Category Archives: Art, Graphics, Woodworking

JCS wrap up

Sunday, March 31st, 2013

Today we closed Jesus Christ Superstar at the Historic Cocoa Village Playhouse.  It was a great run and it was pulled it off amazingly by a wonderful cast and crew.  It was a lot of work, but I’m glad I did it.

Here are some statistics on the run.

  •  Opened March 15th, closed March 31st (17 calendar days)
  • 15 total performances
  • 594 seats in theatre (8910 seats for the entire run)
  • 8763 seats sold during entire run
  • 149 seats unsold during entire run (an average of 9.93 unsold seats per performance)


Poll: What is your opinion of Jesus Christ Superstar (soundtrack, musical, movie)?

I grew up thinking that everyone loved Jesus Christ Superstar, just like my parents did. I never knew there was such a big controversy surrounding the musical. It seems like there is still quite a difference of opinion about the show, even 40 years later. People either love it or hate it, it seems.

To help satisfy my curiosity, and to help me understand how divided people really are about it, please take 5 seconds out of your busy day and answer this simple anonymous poll question:

https://polldaddy.com/poll/6913188/


image courtesy https://rodgersandhammersteincom.s3.amazonaws.com/modules/image/5859/338997/file_url.jpg

Now, whatever your answer to the poll question, you may want to come see the “best community theater in Florida” put on this musical during the final three weekends in March 2013. You can buy your tickets online at http://www.cocoavillageplayhouse.com/ or you can phone the box office at 321-636-5050.

Thank you for your time!
Kurt

Custom built wood washer and dryer shelves

Ever since we got our front loading washer and dryer a few years ago, we’ve been wanting to get some of those laundry pedestals to lift them up higher.  But the pedestal units are pretty pricey.  Those things are like $250 bucks … each.  Ridiculous. So I decided I would make my own laundry pedestals out of wood that I had laying around in my shop.  And I decided that I would design a pedestal that would include both a step stool and a storage drawer in one single unit. The step stool will help us reach the wall mounted cabinets that are mounted above our washer and dryer.

Click on any photo to view larger versions of it in my photo gallery.

Here is a photo of the basic frame for my pedestal design.  You can see that the front (facing down and to the left) is basically open to receive a drawer.  The sides and back are solid enough to support a few hundred pounds (as long as the weight is directed down into the floor and focused at the four corners).  All the cross beams are just there for stability.  The four feet of the washer or dryer sit on the top-most two 2x4s.

Here is the same basic frame after the decorative plywood and trim was applied.  The back of the unit was left open and so was the top.  That should allow for access to the bottom of the washer or dryer and access behind the unit if that access is ever needed.

I forgot to take photos of the drawer unit during construction, but this photo gives you a pretty good idea of it’s design.  It’s fairly straightforward.  The front of the drawer is on the upper left in this photo and contains the step stool portion which is made from 2x4s for strength.  The horizontal 2×4 in the middle is both for stability and for mounting the pull handle.  The rest of the drawer is made from plywood that I joined together with biscuit joints.  The 4th sidewall is missing from this photo, but it fits right over the exposed 2x4s shown in this photo and creates a completely closed drawer bin used for storage.

Here is the same drawer from another angle.  The front of the drawer has the decorative plywood.

And here is what the unit looks like with the drawer installed.  I chose not to install a drawer slide.  I just installed some felt pads underneath the drawer unit and it slides in and out just fine.  The next step is to prime and paint to match the washer and dryer.

And here is what the finished laundry pedestal looks like in use in our laundry room.  The drawer holds quite a bit of stuff and pulls out much farther than is shown in the photo below.

And the step-stool feature allows us to reach the wall mounted cabinets above our washer and dryer.

That’s about all the detail that I can think of.  Add a comment below if you like this design or if you have any questions about details that I have left out.  If you end up using my design for a laundry pedestal or if you have an ideas for improvements, please feel free to post in the comments below.

Kurt

Gifts for your geek

Oh boy.  You’ve put it off and now only one week of shopping remains.  Here is my best advise for those of you who have a geek to shop for.  Just click on one of these ad banners below and shop away.  Trust me … geeks love this sort of stuff in their stockings.

Get some awesome geek clothes from Super Hero Stuff! If you buy something from Super Hero Stuff, type in the coupon code HOLIDAY12BONUS for 12% off everything you buy! Holy Super Hero Savings, Batman!

Holiday Sale-Headstart

New DC Shirts

New Star Wars Stuff

You can get some truly awesome and amazing geek gifts and accessories from Think Geek!  Think Geek thinks of absolutely everything that your resident geek might be longing for this year … including Death Star ice cubes, Star Trek pizza cutter, Bazinga t-shirt, retro super hero drinking glasses (no longer offered), the Zombie Survival Guide book, soft headphones that you can sleep in, the Etch A Sketch iPad case (no longer offered), and even bacon lip balm (no longer offered)!

May the force be with you.

Kurt

Laundry folding countertop hinges open to reveal utility sink

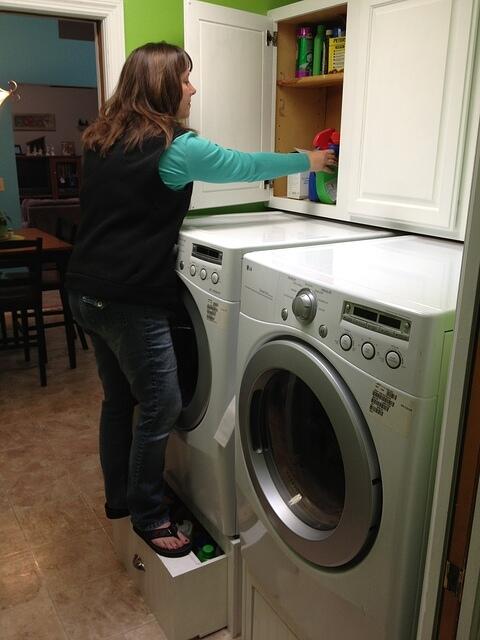
Little by little we are making small home improvements to our new house.  Recently my lovely and talented wife came up with this amazing idea.  It’s a countertop for our laundry room that is primarily used to fold clothes fresh out of the dryer.  The most awesome and amazing part of her idea is that the countertop portion over the utility sink is hinged and folds up out of the way so we can use the sink.  I liked the idea so much that I immediately started designing and creating it.

Here is a photo of the final product.  The decorating ideas also came from my lovely and talented wife, by the way.  Click on any photo to view larger versions of it in my photo gallery.

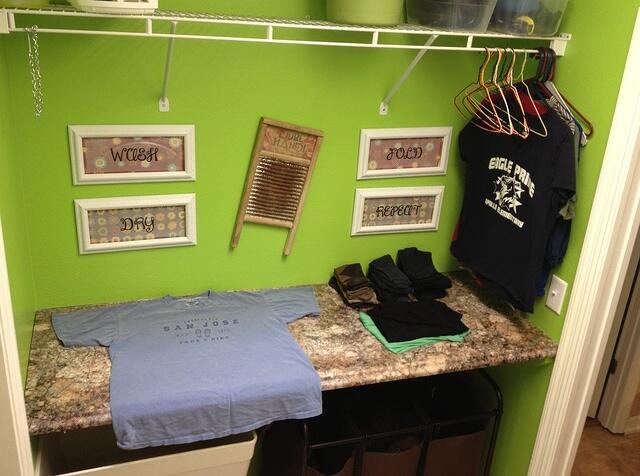
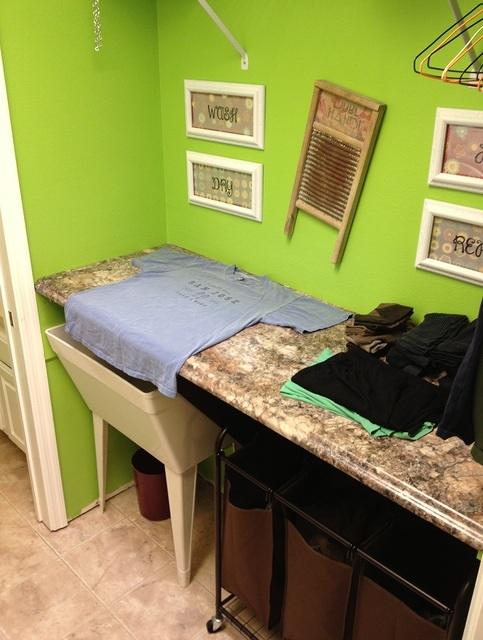
I bought the countertop from my local home improvement store and cut it down to the correct size using my table saw.  This countertop looks like granite, but it is actually a pressboard or an MDF with a hard laminate on top.  Here is the final product from another angle.

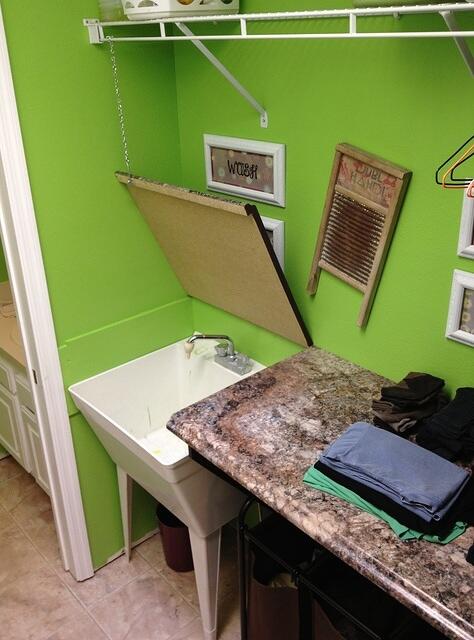
And here is what it looks like with the sink countertop opened up.  I installed a chain and hook to hold the countertop up.

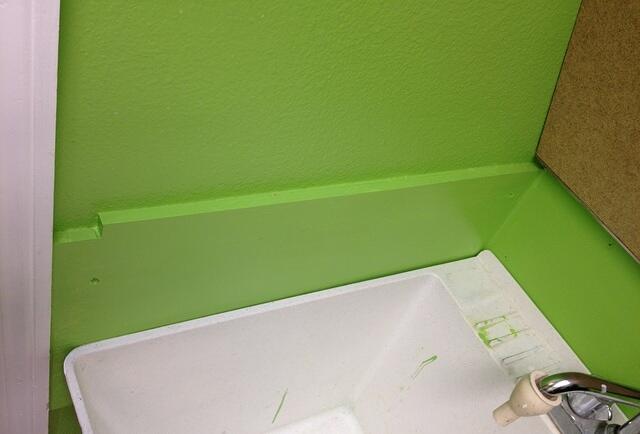
And below is some design detail of the hinged countertop.  It’s pretty hard to see since the green paint pretty much blends together and hides detail, but the hinge is actually mounted to a piece of plywood that was mounted directly to the studs in the back wall.  I cut out the drywall on the back wall and replaced the drywall with plywood that was about one eighth inch thinner than the drywall.  That way the hinge would be set into the wall a bit in order to hide the hinge when looking from above with the countertop down.

Aside from being held up in the back by the hinge, the hinged countertop is held up on the left by another piece of plywood that is mounted on top of the drywall and provides a ledge for the countertop to rest on when closed.  And on the right side, I created a bracket out of plywood and 2x4s that sticks out enough for the hinged countertop to rest on when closed.

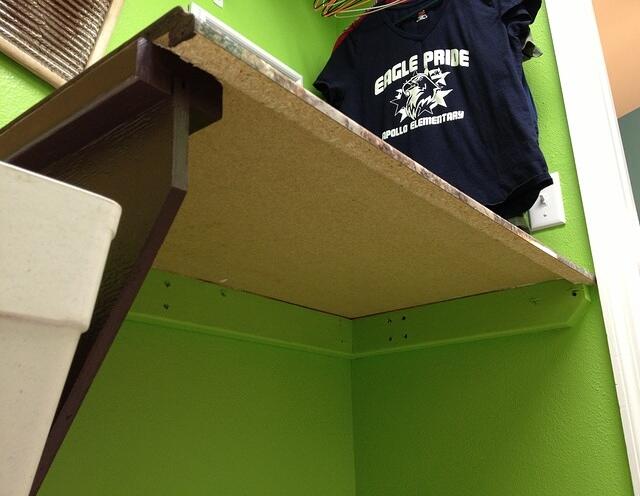
Here is a better look at the plywood along the left side of the hinged countertop that it rests on when closed.  It’s just plywood mounted on top of the drywall.

And here is a better look at the bracket that I created to hold up the countertop next to the sink.  I notched the 2x4s so that the plywood would slide into them and hold firmly.  I glued and screwed the plywood into the notches from the back side and then mounted the whole thing to the wall.

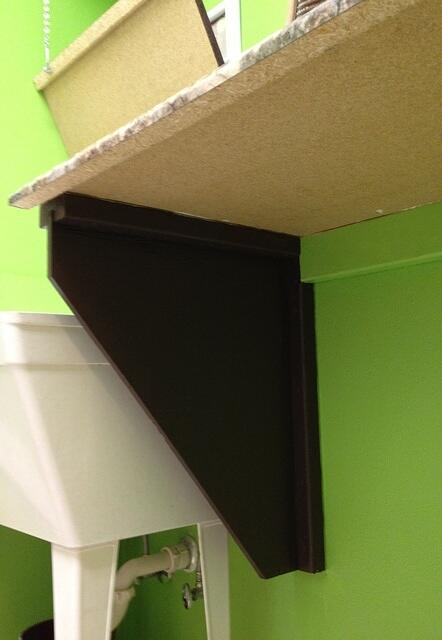
And here is a reverse angle showing a close up of the bracket plus you can see how I used 2x4s under the other portions of the countertop to hold it up.  When installing something like this which is fairly heavy, it’s important to screw into wall studs.  Otherwise, the weight could pull the whole thing right off the wall.

That’s about all the detail that I can think of.  Add a comment below if you like this design or if you have any questions about details that I have left out.

Kurt