How to make your own custom car window decals

This custom, hand-made, vinyl, Star Wars family window decal is now sporting the back of my car!  And I actually made it myself!  I will now show you how I did it, step by step!

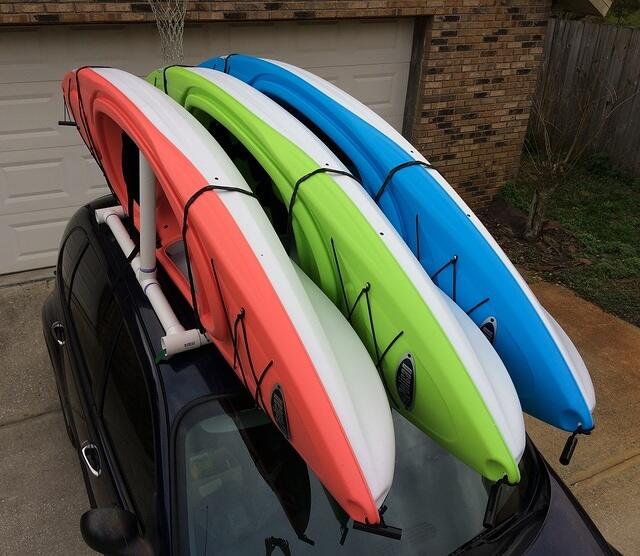
To be fair, this decal set not really my own design.  You can buy Star Wars family decals from ThinkGeek and other online stores.  Although that particular set does not come with the AT-AT Walker.  I had to make that myself using white vinyl electrical tape and a X-ACTO knife.  Below is a photo of what my car window decals looked like just a few days ago.

The AT-AT Walker and blaster look like new because they were just remade last year.  The original ThinkGeek decal set lasted way longer than the electrical tape did.

So when it came time to replace the set this summer, I wanted to come up with a better solution than electrical tape for the AT-AT Walker.  I found self-stick vinyl sheets at my local craft store and decided to give it a try.  Then I decided to try to make the entire set myself since I had these large vinyl sheets.

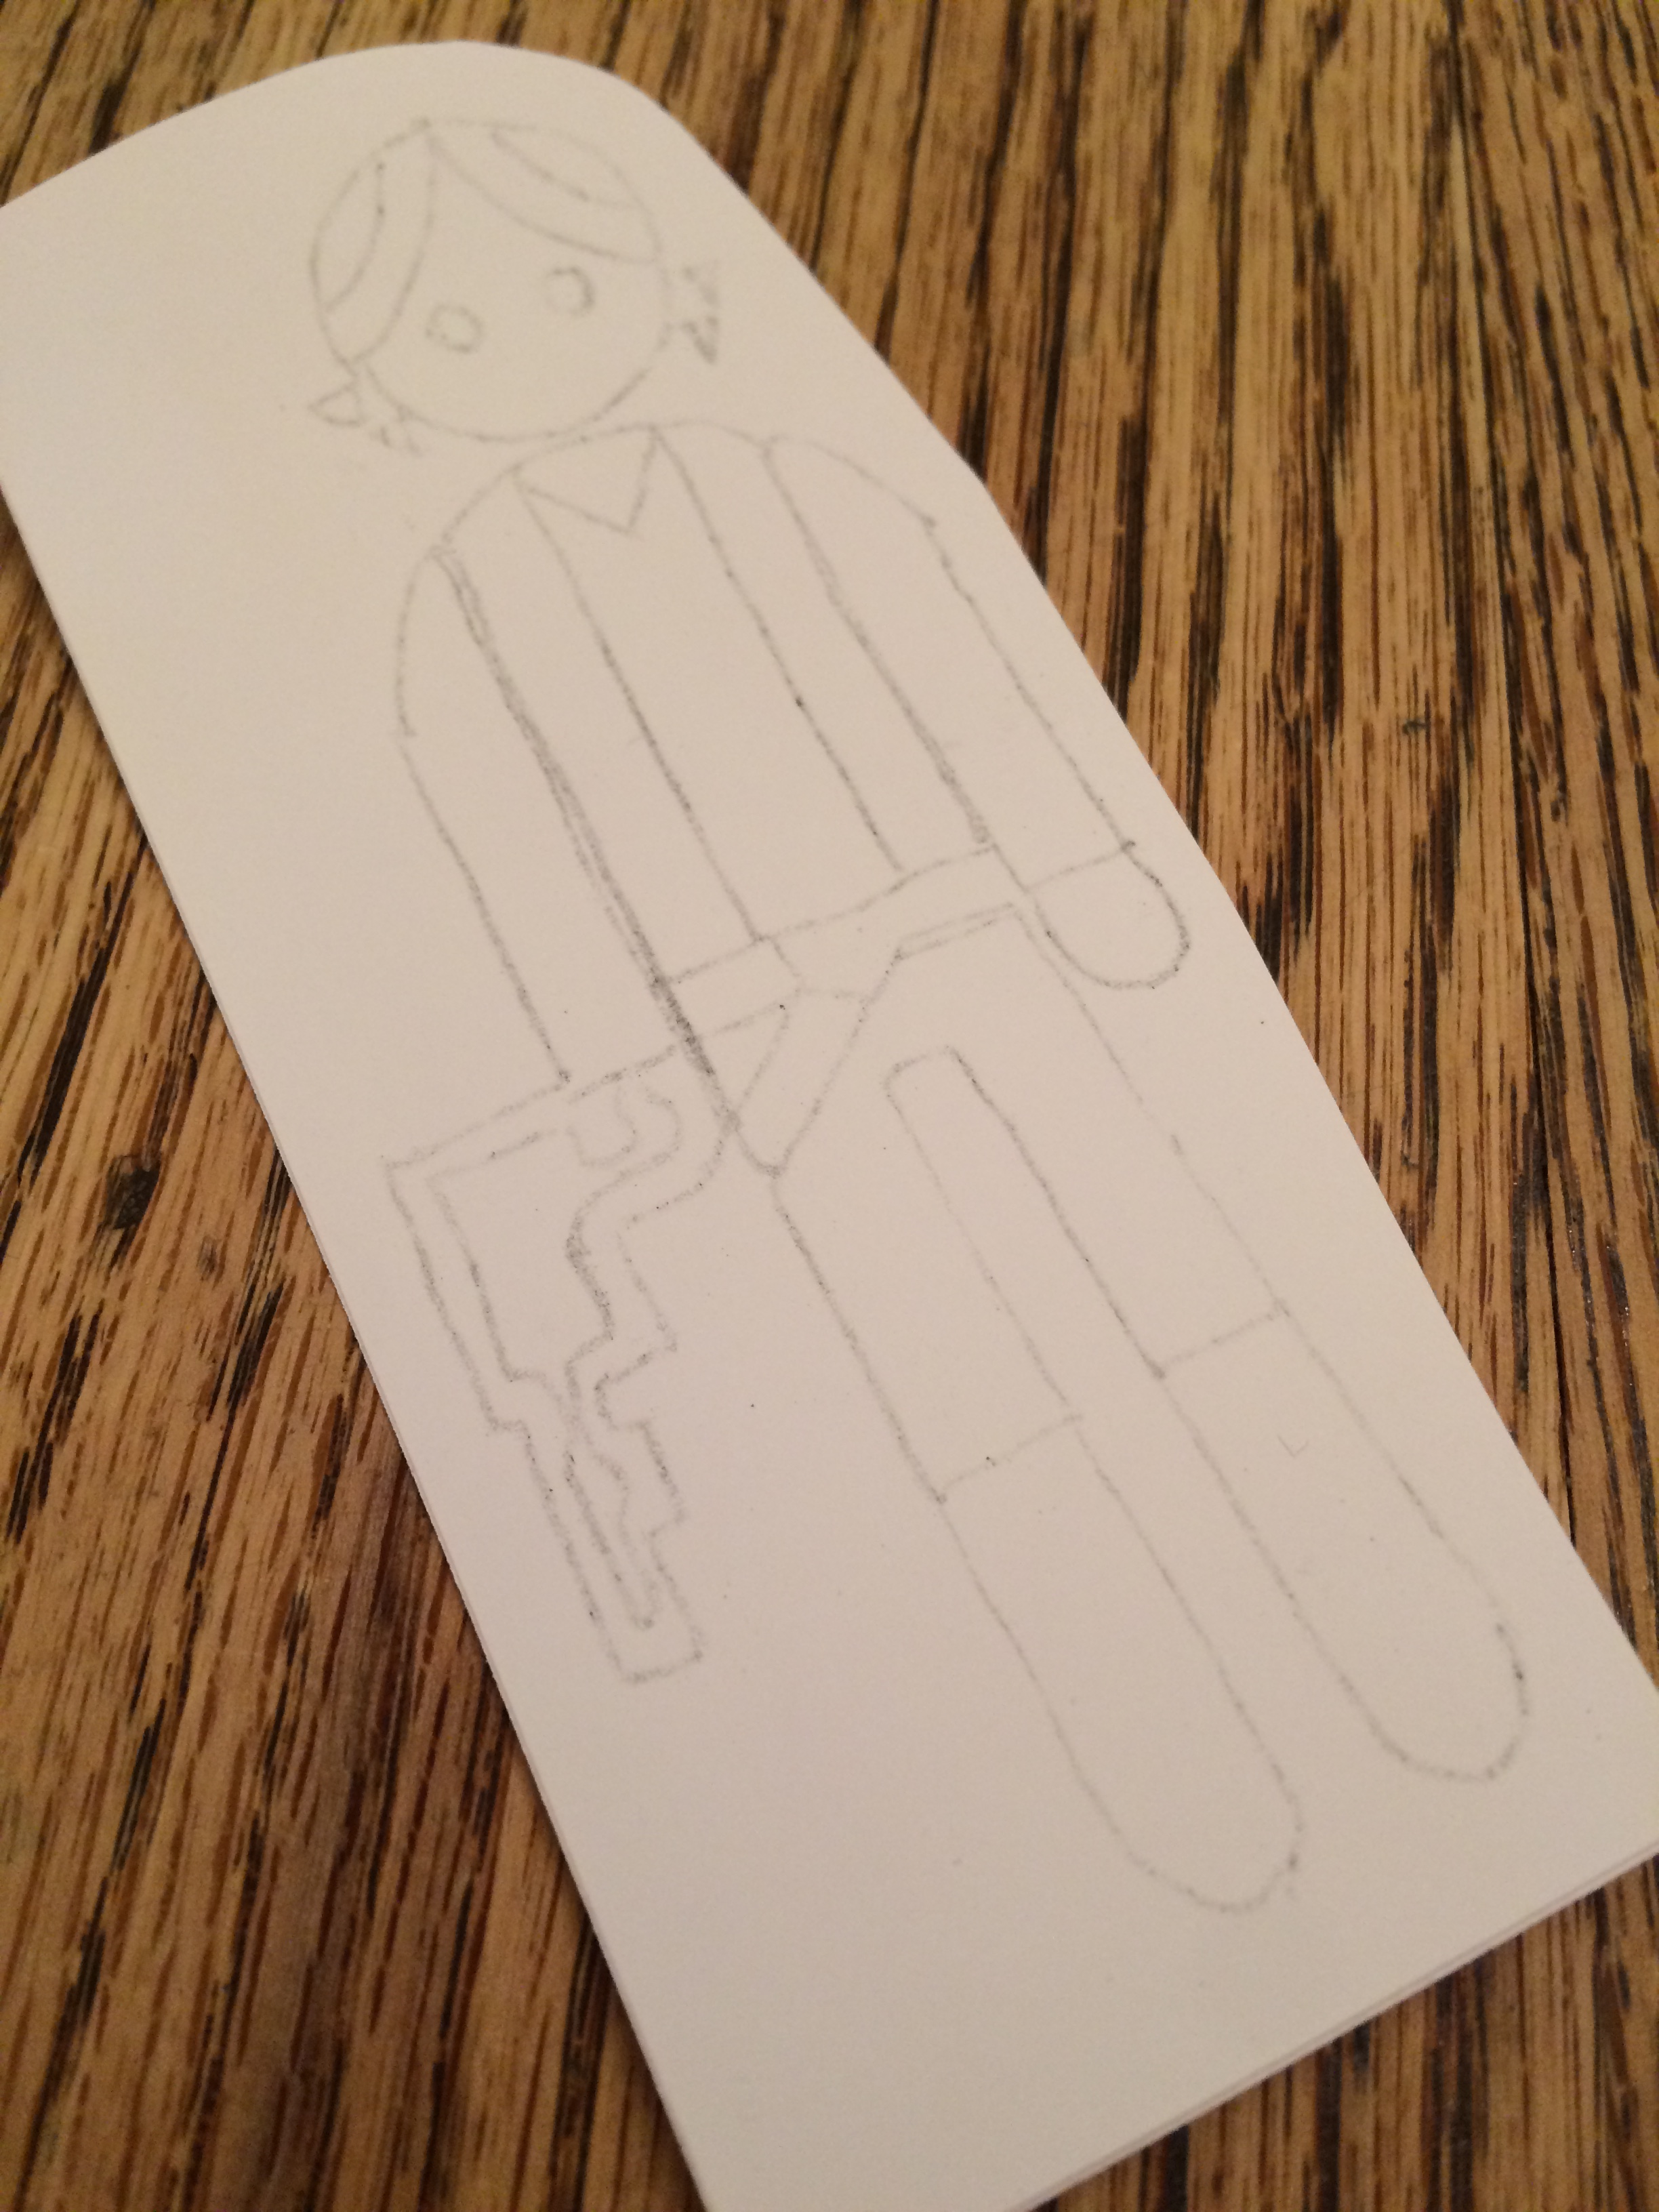
It’s possible to print directly onto these vinyl sheets, but I didn’t have a thin crisp outline image to start out with, so I printed on regular paper what I had at my disposal.  But an outline showing exactly what needs to be cut out is what you need at this point.

I decided to do one character at a time, so I cut out the first character.  Again, this was printed on regular printer paper at the exact size you want on your window.

To transfer your cutout lines to the vinyl, carbon paper would be very useful.  In the absence of carbon paper, a technique that works pretty well is to rub pencil on the back of the pattern.

And then trace the cutout lines on the front of the pattern held firmly on top of the vinyl sheet.

And now you have a light pencil drawing of the cutout lines there on your vinyl sheet.

Then you just cut out that part of the vinyl sheet.

And you prepare the window surface by scraping with a razor blade and washing with glass cleaner.

Then peel off the backing from the vinyl sheet and carefully align the character where you want it.  Let it make contact in the middle and then roll the contact surface towards the outside edges to keep air bubbles from getting trapped inside.

Then start cutting with a X-ACTO knife and peeling away the waste material.

Getting perfectly straight lines and perfectly symmetrical curves takes some concentration and/or some artistic talent.  But when it’s all said and done, these cuts don’t have to be perfect.  Most people will be viewing them from about a car-length away.

The hardest cut-outs, I think, are the thin lines.  Making them straight and symmetrical isn’t trivial.

Getting closer.  This takes patience and a steady hand.

And the first character is all done!

Then repeat the steps for the second character.

And the third character.

And so on.

Until your entire family is complete.  Plus any pets that you want to include.

Now I’m not sure exactly how long this craft vinyl material is going to last out in the elements.  But I live in Florida and I don’t have any shade at work to park my car under.  And we also have quite a bit of rain here in the summer months.  So I will update this blog article as soon as I have an idea about how long this stuff lasts under these conditions.

That’s all!  I hope this blog article ends up being useful to someone out there in Internet-land!

Thanks for your interest!

Kurt

Update: July 2017

I recently added a NASA Swarmie robot to the side windows of my car.  What do you think?

Normalizing Google Analytics Data

Google Analytics is really awesome!  It tracks all the visitors to my website and gives me nice reports about the audience, the pages they are viewing, and the means they used to get to my site.  It’s completely invaluable for website owners and administrators!

BUT … the pageview data is not normalized.  Google lets me choose the date range and then it shows me all pageviews for that entire date range.  Even for pages and blog posts that didn’t exist during part of the date range.  This un-normalized pageview data is totally unfair to the newer content!  It’s not fair to compare 1,000 pageviews for a page that’s been around for 5 years to 1,000 pageviews for a second page that’s only been around for 5 months!  But this is how Google Analytics displays the data.

While looking at the all-time top content on my personal leucht.com website recently, these were the all-time top pages or posts:

But when I took into account the birth date of each page, I got different results.  These are actually my most popular pages.  Not the list above.

I’m not surprised by the VOB blog post being in the number one spot.  I get a lot of feedback and people thanking me for posting that one.  But I’m really stoked about the Batmobile Pinewood Derby post being my 2nd most popular post!  That one was not on the radar in the initial Google Analytics report!

So please, Google … please figure out a way to decide when each page got created (by looking at the first hit, maybe?) and then show me the pageviews per day over the life of each page.  That way, I can see the all-time velocity or all-time popularity of each and every page on my site as a fair comparison regardless of the age of the content.

Thanks for listening,

Kurt

How to make your own car-top kayak rack

I designed and built what I think turned out to be a pretty decent car-top carrier rack for my kayaks.  Here is a photo of the final product mounted on the roof of my PT Cruiser.

I built the rack out of PVC pipe bought from my local home improvement store.  I designed the rack so that it can be attached to the roof of my car using standard ratcheting straps that loop around the car roof with the doors open.  The ratchets are inside the cab of the car.

Before I built this rack, my best solution for hauling my kayak to the river was just to strap the kayak itself to the roof of my car.

One problem with that scenario was that I could only haul a single kayak that way.  Another problem was that the ratcheting straps outside the cab would vibrate and buzz loudly when I was driving down the road at highway speeds.  But the rack I designed and built solved both of these problems.

Below is a photo of the rack after I glued all the PVC pieces together.  I designed the left side of the rack with a single upright that sits up into the seat hole in the first kayak which will hold it at the angle I want.  Then the other two kayaks lean up against the first one.  The right side of the rack has 2 uprights to cradle the bottom side of the third kayak.

I used T’s rather than 90’s for the 4 corners so that I could feed the ratcheting straps through the pipe and keep the straps out of the winds, thus keeping them from vibrating and buzzing.

I’m not going to give specific parts lists and specific measurements because this rack needs to be custom sized for your kayaks and also custom sized for your car.  But cutting these PVC pipes and gluing them together is very very easy.  So this is a project that just about anyone should be able to take on.

The below photo shows how 3 kayaks fit perfectly into this rack.

But I actually own 4 kayaks, and occasionally I will want to haul all 4 of them to the river.  It turns out that my SUV has a roof wide enough to hold all 4 kayaks, so I designed my kayak rack to be expandable from 3 kayaks to 4 kayaks.  So now I can use the rack on my car or on my SUV.

You can see in the below photo that the rack is now wider.  The PVC pipes on the left are all 2 inch pipes and the PVC pipes on the right are all 1 and 1/2 inch pipes.  The 1.5 inch pipes fit nicely inside the 2 inch pipes with not very much wiggle room, so that worked out nicely for this application.

If I was making a single size rack that didn’t expand, I would probably just use the 1 and 1/2 inch PVC pipe for the entire rack.  It feels to me like it is strong enough to do the job of holding up these 10 foot kayaks, but also flexible enough to bend a bit around the contour of the car’s roof.  In my case, the 2 inch PVC pipe I used for most of the rack doesn’t give very much and it ended up denting part of the roof of my car a bit when I torqued the rack down using the ratcheting straps.

Here is a photo of the rack holding 4 kayaks.

The detail photo below shows you the single upright on the rack that fits up into the seat hole of the first kayak and basically holds the first kayak upright at a slight tilt from vertical which is good for leaning the other kayaks up against the first kayak.

The photo below details the other side of the rack where the two uprights are there supporting the bottom of the third kayak.  This photo also shows my solution for holding the kayaks down.  I used black rubber bungee cords.

The photo below details the attachment points of the bungee cords.  I bought a bungee cord that was the right length to go all the way around each kayak.  And I drilled holes into my PVC pipes to attach the bungee cords.  These bungee cords hold the kayaks down tight to the rack and they also keep the kayaks from moving very much left and right.  And also, thankfully, these bungee cords don’t vibrate and buzz at highway speeds.

IMPORTANT:  This photo shows the PVC sitting down directly onto my roof.  Do not do this!  The PVC is plastic, but it’s a very hard plastic and it WILL damage your paint job!  Make sure you put something soft or rubbery between the PVC and your vehicle!  My suggestion is to buy 2 inch wide self-stick Velcro in bulk rolls and apply the soft side to the bottom surface of your PVC rack!  Also don’t ratchet it down so tight that it dents your roof!  The idea is to use PVC that is flexible and conforms to the contour of your roof!

This photo shows you the inside of one of the PVC pipes.  You can see the ratcheting strap and also the bungee cord attachments.

And here is the final rack.  I tested it at highway speeds and it worked quite well.

Another photo of the final rack.

And one last photo of the final rack.

And just for fun.  Here are a couple drawings I drew up during the process to help me decide on the design and to help me come up with a parts list to go buy.

Thanks for your interest!  Please leave questions or comments below!  Or use the “Email Us” link at the bottom of the website!

Kurt

NASA Tethered Satellite: Broken Tether Analysis

Here are a couple photos of me from 1996 wearing a NASA “bunny suit” while working the failure analysis of the broken tether on the Tethered Satellite System re-flight (TSS-1R) that had recently returned from orbit on Space Shuttle mission STS-75.  I was taking magnified photographs with a fancy high-tech digital SLR camera through an old-school benchtop microscope.

These photos were taken in the Operations & Checkout (O&C) Building hi-bay which is a clean-room environment up on the work platforms, because the workers are adjacent to flight hardware.  The blue bunny suits look kind of funny, but they help keep the flight hardware pristine and help keep our hair and our skin flakes from falling onto the flight hardware.

The Tethered Satellite System was a pretty interesting experiment.  The theory was that we could extend a long electrical wire while orbiting the earth and that long wire would cut through the earth’s magnetic field lines and generate electricity.  The tether on this experiment was nearly 13 miles long!  Wow!

This tether experiment first flew in 1992 on Space Shuttle mission STS-46, but had trouble deploying.  It deployed less than a thousand feet out from the orbiter before it jammed.  But it got a second chance and flew again in 1996.  The deployment during the re-flight mission went well and was nearly complete … about 95 percent complete … when the tether broke and the experiment was over.

The broken tether was reeled back in and was brought back to earth for analysis.  The task was to find out if the tether was mechanically broken, like from too much tension, or maybe from a micro-meteor impact.  Or whether the tether was broken due to an electrical arcing event, such as an over-current.

The final analysis showed that it was an electrical overload.  But the reason for the excess current was pretty interesting and took some detective work.  Around the outside of conductor was a clear Teflon insulation layer which is basically a plastic.  It’s similar to the white plastic insulation layer around the center wire in a coax cable.

It was determined that this plastic Teflon layer was “breached” and electrical arcing occured between the tether’s conductor and the gantry system that was deploying the tether.

One possible cause of the break in the insulation was “foreign object debris”, which is NASA-speak for something that does not belong there.  We take great efforts to keep flight hardware pristine and clean.  But if a loose wire or something stiff or sharp got into the cogs of the deployment mechanism and punctured the insulation, that could have caused the electrical short.

Another possible cause was a simple manufacturing defect and subsequent quality control miss.  Investigators showed that trapped air in the Nomex core could have leaked out through tiny pinholes in the plastic Teflon insulator and caused an electrical plasma arc due to the high voltages involved.  The experiment was generating about 3,500 volts and about half an amp of current when the failure occurred.

Even though the tether broke and the experiment could not be completed, it was a partial success and lots of data was collected during the deployment before the failure.  So it wasn’t a total loss.

Thanks for your interest!

Kurt

My Apple IIe: Introduction to AppleSoft Basic

This simple introduction to AppleSoft Basic is demonstrated on my working Apple IIe from 1983. It’s meant for beginners, so it doesn’t dive deeply into any one topic.

This 30 minute video lightly covers the following topics:

  • numeric and string variables
  • moving around the text screen
  • common error codes
  • procedural programming in RAM
  • editing and debugging
  • low resolution graphics
  • high resolution graphics
  • beeps and audio

If you want to try AppleSort Basic for yourself on a Windows PC, the best Apple IIe emulator I’ve found is called AppleWin and it is located here:
https://github.com/AppleWin/AppleWin
Scroll down to the bottom of the GitHub page to click on the release link to download the zip file. Admin rights are not necessary. Just unzip the file and run the executable. Then click the Disk 1 button and choose the default (master) file. Then click the Apple button to boot up!

Thanks for your interest!

Kurt


Thanks for visiting,
Kurt & Sam Leucht
Titusville, FL
http://www.leucht.com/
Email Us or Give Feedback!
(Report a Problem, Request a Feature)