Tag Archives: do it yourself

Custom Size & Shape Standing Desk

Like many of you, I’ve been working mostly from home for over 9 months now. And, like many of you, I’ve tried performing my daily work routine from a few different locations in my home. Seeking out the perfect spot for efficiency and for productivity. But also needing to be able to step away from work at the end of the day.

Right now I’m set up in our guest room which may not be the best work location in the house but it definitely lets me step away and forget about work at the end of the workday.

One thing that made our guest room not ideal for working was the desk situation. But I think I’ve fixed the problem.
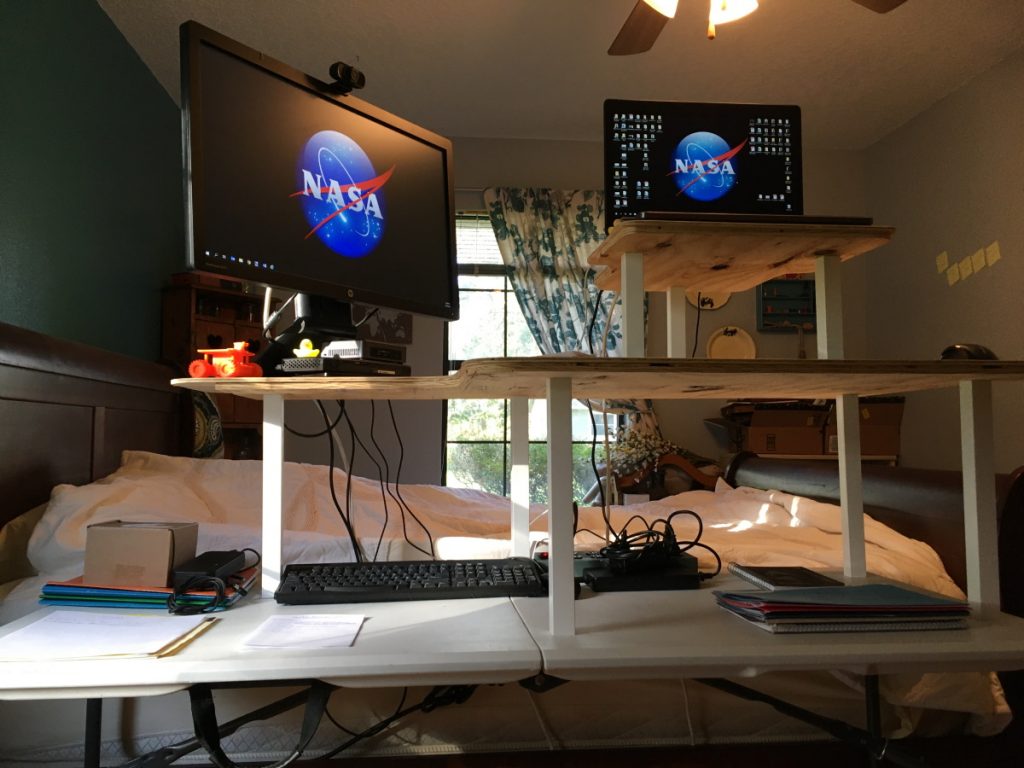
I started with a base desk which is just a 6 foot plastic folding table. But I really wanted a standing desk for good posture and for back strength. One option would be to raise the table itself to the correct height for standing rather than sitting.

Putting the table legs up on blocks of some sort would accomplish that goal fairly easily and inexpensively. But it would also keep me from sitting which I would probably want to do occasionally. So what other options are there other than buying one of those really expensive motorized adjustable standing desks?

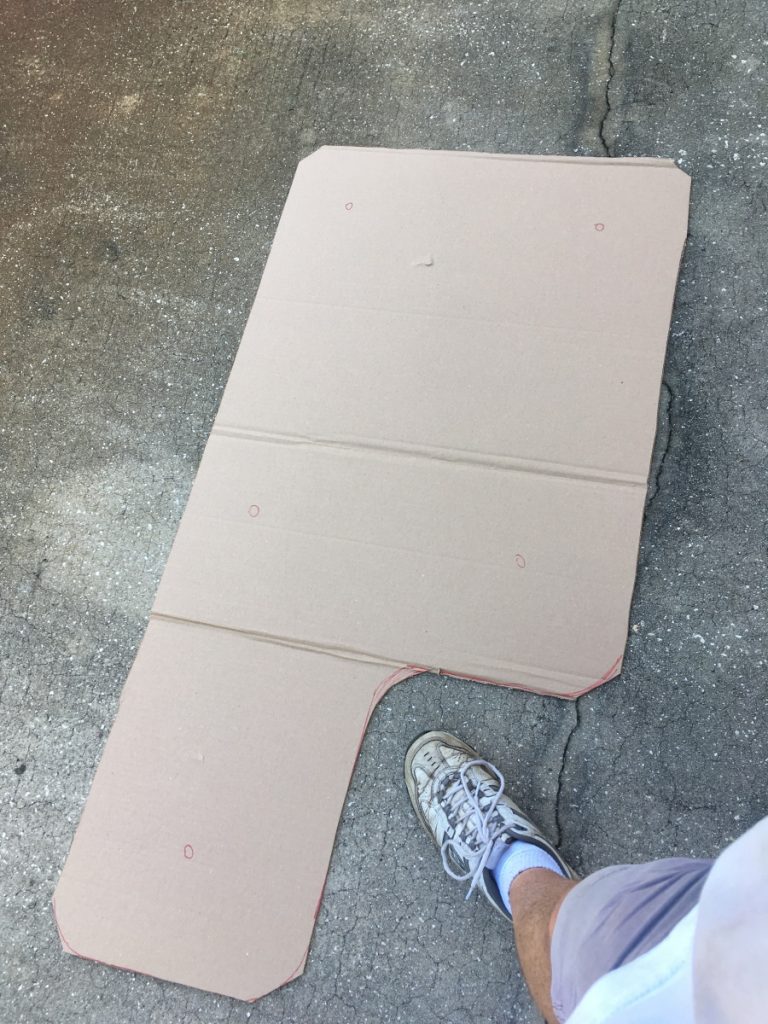
It occurred to me that the entire surface didn’t need to be at standing height. Just the part of the tabletop that holds the laptop, keyboard, mouse, and 2nd monitor. So I grabbed some cardboard and I started measuring and cutting out a template.

Here’s what I came up with:
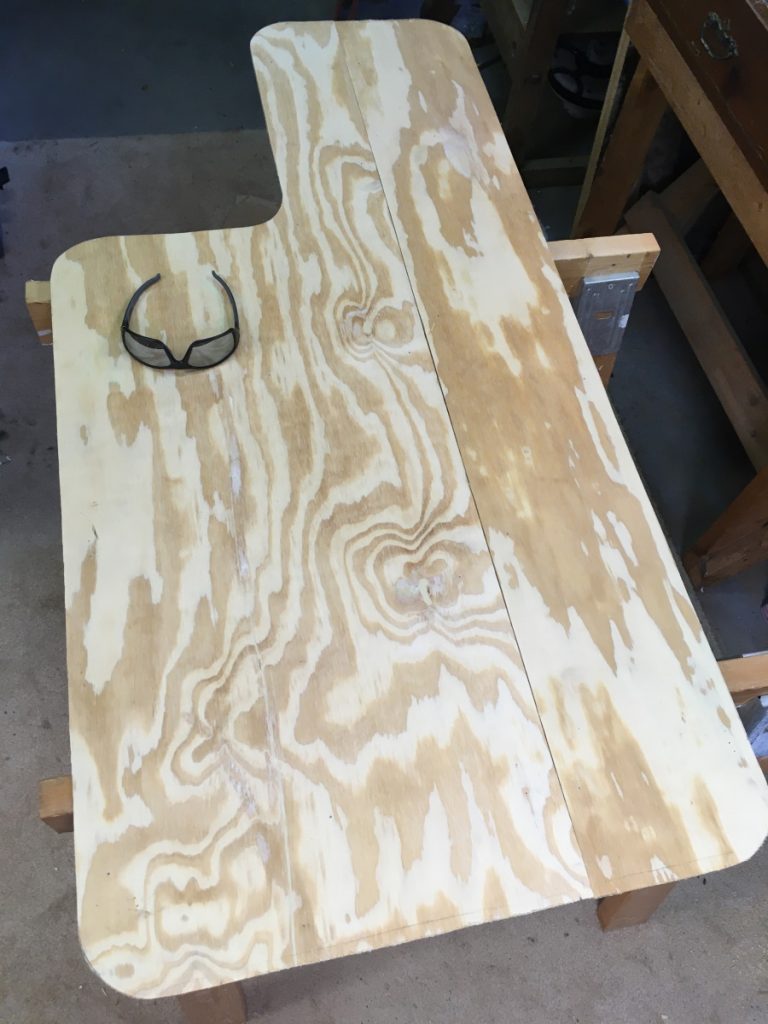
Then I went out to my shop and made this new tabletop out of some scrap wood that’s been out there collecting dust for years.
At first I wasn’t sure how to hold up this new tabletop above the base plastic table. So I just temporarily used some old milk crates and some scrap 2x4s to get it to the exact height that would fit my elbows and eyeballs. This temporary configuration allowed me to try it out and make sure the height was correct before committing.
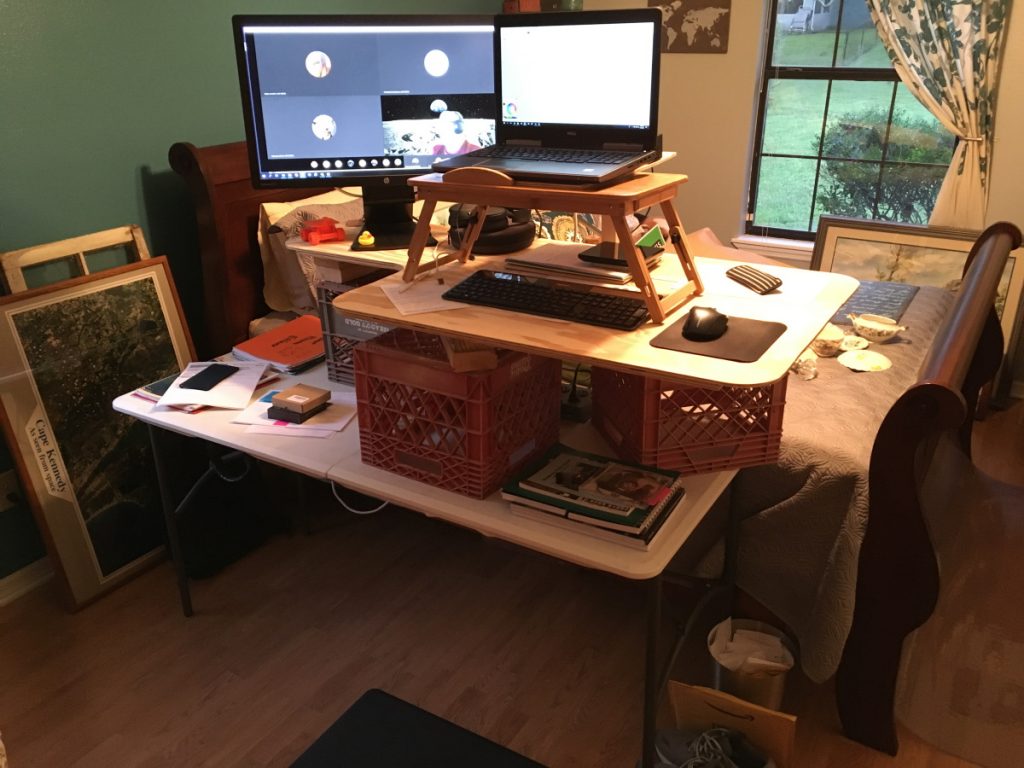
Essentially I had created a desk with different levels for different uses. On the right side is where I stand and do most of my daily work. But the notched area on the left side is where I can sit down at the table and read or write or think or whatever.

After a few months of working in this temporary configuration, I bought some solid inch square stair rail balusters which are the vertical pieces of the stair rail sometimes called spindles. I cut them to the exact length I needed and just screwed them to my custom tabletop.

I also made a smaller tabletop for my laptop and docking station and I used the same balusters as legs, which takes up less room than the little wooden lap desk that I was using before. Just need to paint the plywood surfaces and it will be complete!

An unplanned by-product of this multi-level desk design is that I ended up with some decent storage space between the levels. There’s actually enough space down there to organize and store folders and papers and books and stuff like that.

I’m really happy with this design and I’m even more happy about how inexpensive it was to build!

If you have any more ideas or suggestions, please leave a comment below!

Thanks for your interest!

Kurt

Restoration of a vintage 8mm film projector

A few months ago, my wife and I found this beautiful old 8mm film projector at an antique flea market on Florida’s Gulf Coast. And it was very reasonably priced too. We thought it would look great displayed in our living room, and we were right!

This vintage projector reminds me of my grandfather, Kurt William Leucht, who came to America when he was 18 years old from Germany. Grandpa Leucht was very artistic and creative. As an adult, he got really into making home movies with his family and with his friends. So my family has quite a bit of old 8mm film from my grandpa.

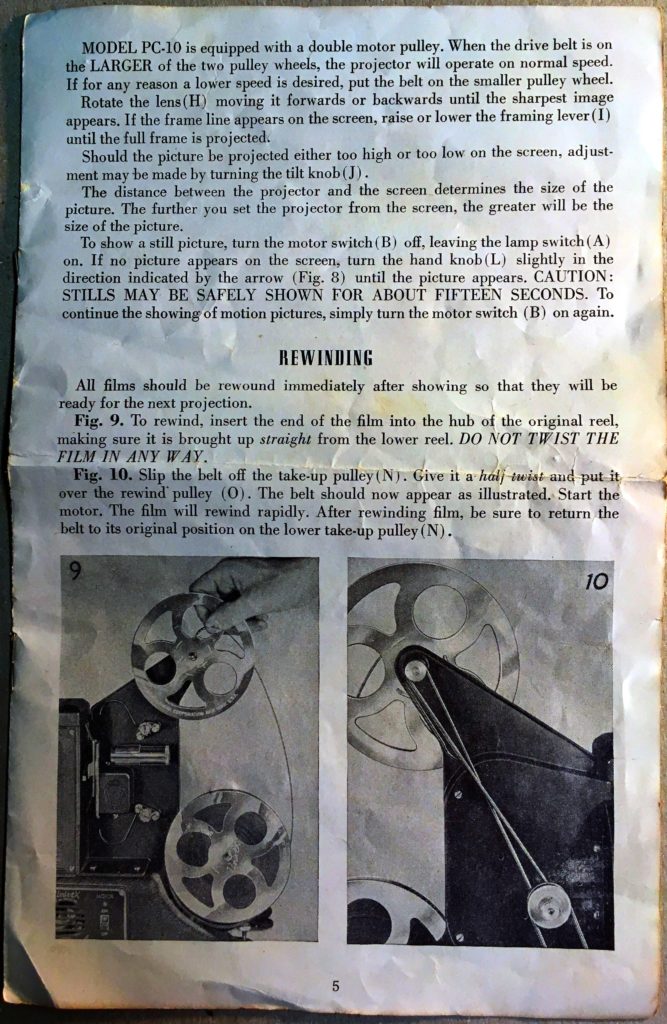
This projector is a a Univex model PC-10. There is no manufacture date on the unit. Most online references say that these were manufactured in the 1930s, but I found one site that claims manufacture in 1947. My grandpa was 51 years old in 1947, so he could have actually owned a projector like this one.

The power cord was rubber and in very good shape, so I assume it had been replaced since the original cords were fabric covered. The motor worked fine and the lamp could not be tested since the bulb was burned out. I ordered a replacement bulb (BWY) online and it worked perfectly!

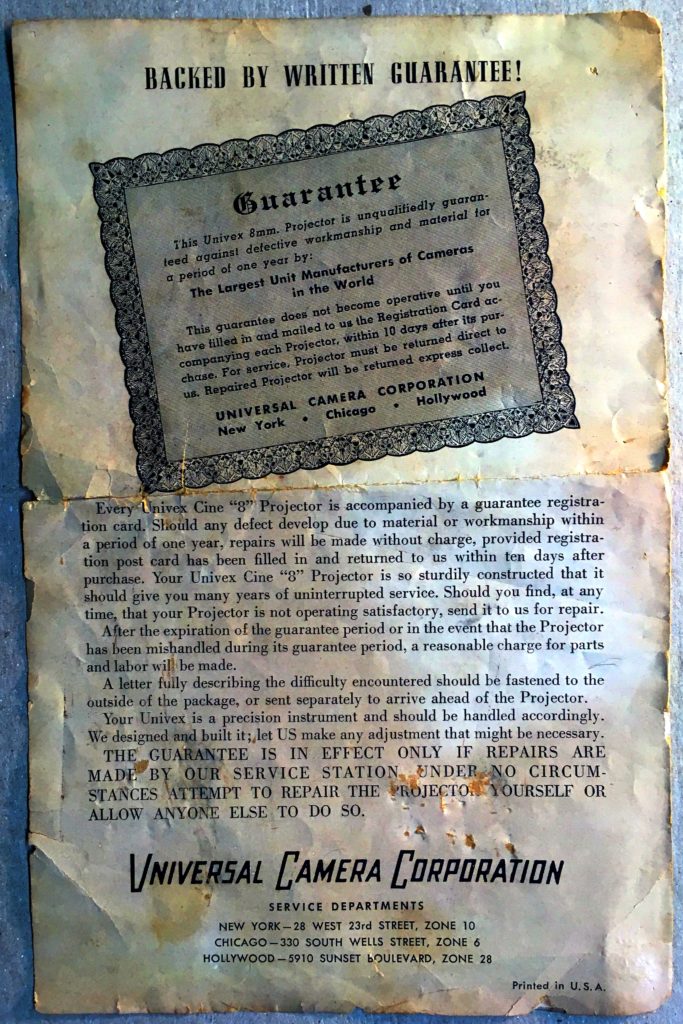
Surprisingly, this projector came with the original price tag from the manufacturer, Universal Camera Corporation! Universal Camera Corporation was founded in 1932 in New York. It manufactured still cameras, film, movie cameras, and binoculars until 1952, when the company declared bankruptcy. If we assume 37 bucks was the 1947 price, that would make the 2019 price close to $420.

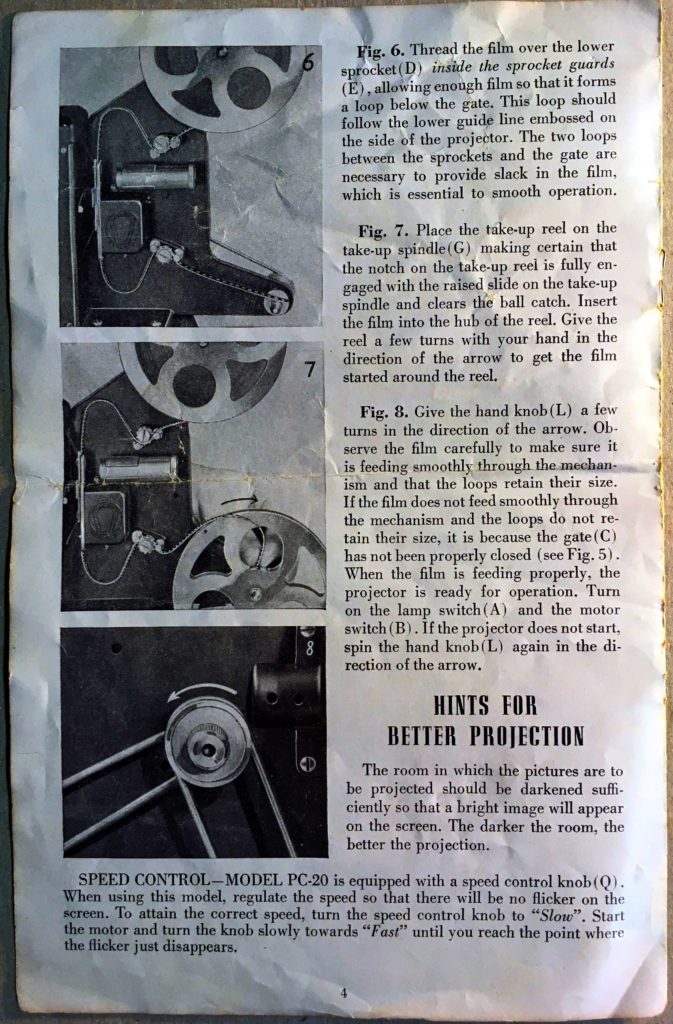
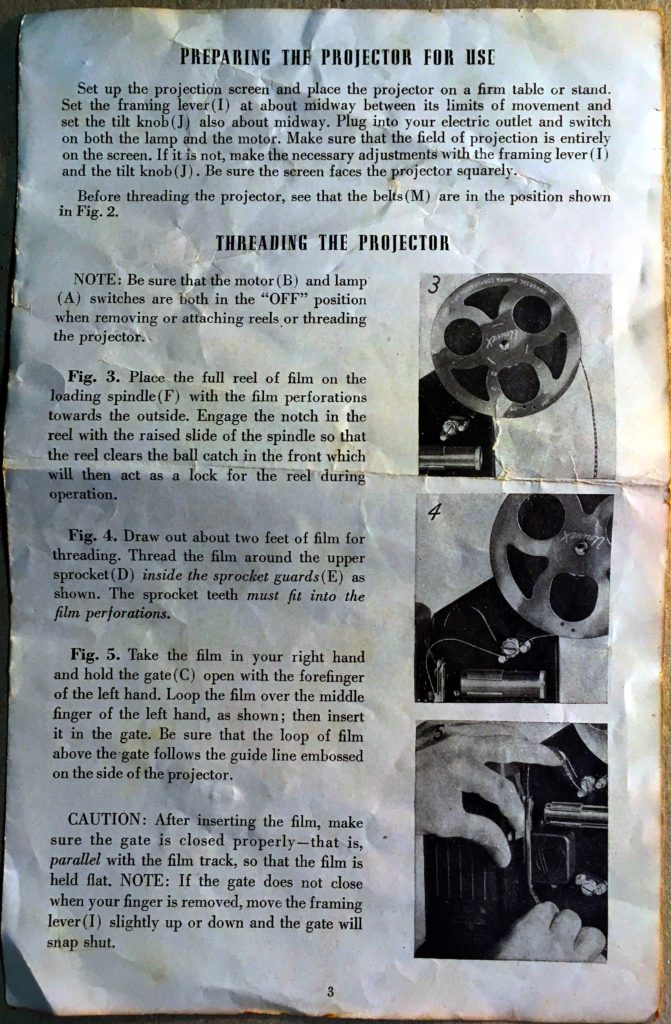
This projector is actually pretty simple to understand. The sprocket at the top pulls the film off the reel and the sprocket at the bottom feeds the film into the temporary take-up reel. In between those 2 sprockets, the film is fed into a spring loaded gate which guides the film past the lens and the projector light. The film gets fed past the lens using a finger like gear that flips the film quickly to the next frame and then pauses while a rotating window opens up to let the projector light through.

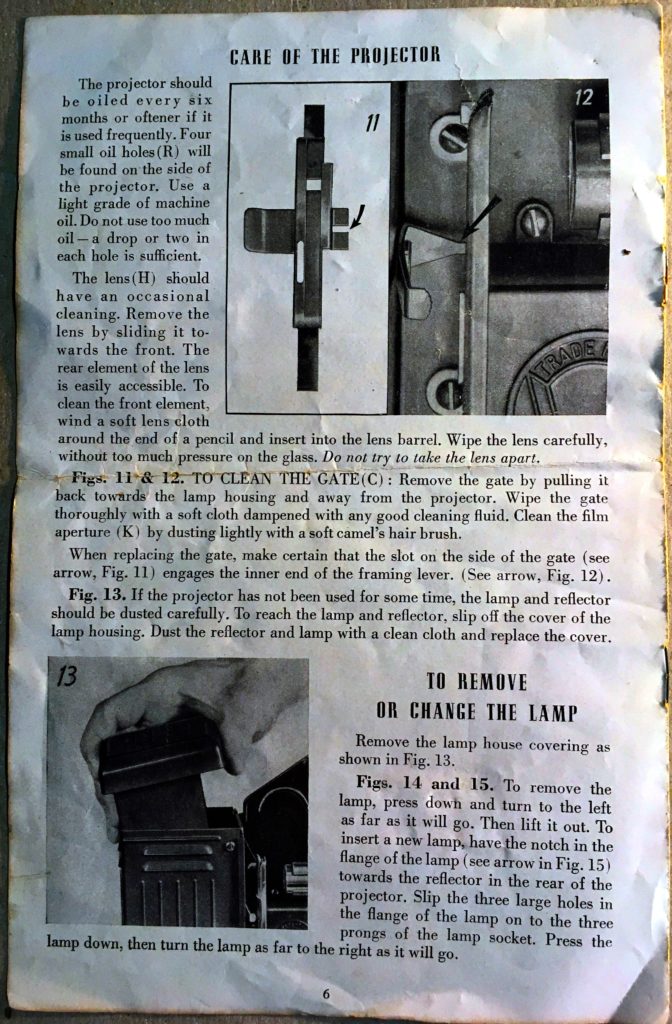
It’s really cool that the lens is only held in place by spring friction. This allows you to twist the lens ever so slightly while pulling it away from the film or towards the film to change focus. This design also allows the lens to be removed easily for cleaning.

The internal gears were basically locked up due to aging and thickening of the original grease. But a single cover revealed the gear box and so I took apart each gear and cleaned and oiled them thoroughly.

Once the gears were all cleaned and oiled with a light machine oil, the projector worked perfectly! The two belts that run between the motor and the gearbox and take-up reel were made from flexible steel springs, so they were still in perfect shape. Had they been rubber or some other material, they wouldn’t have lasted 70+ years.

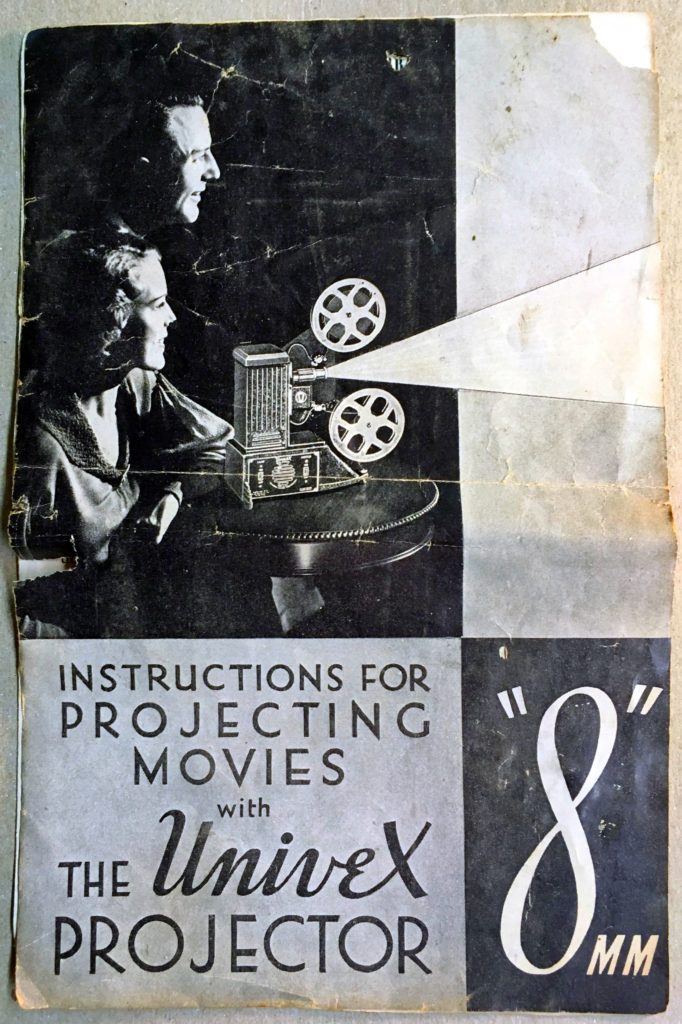
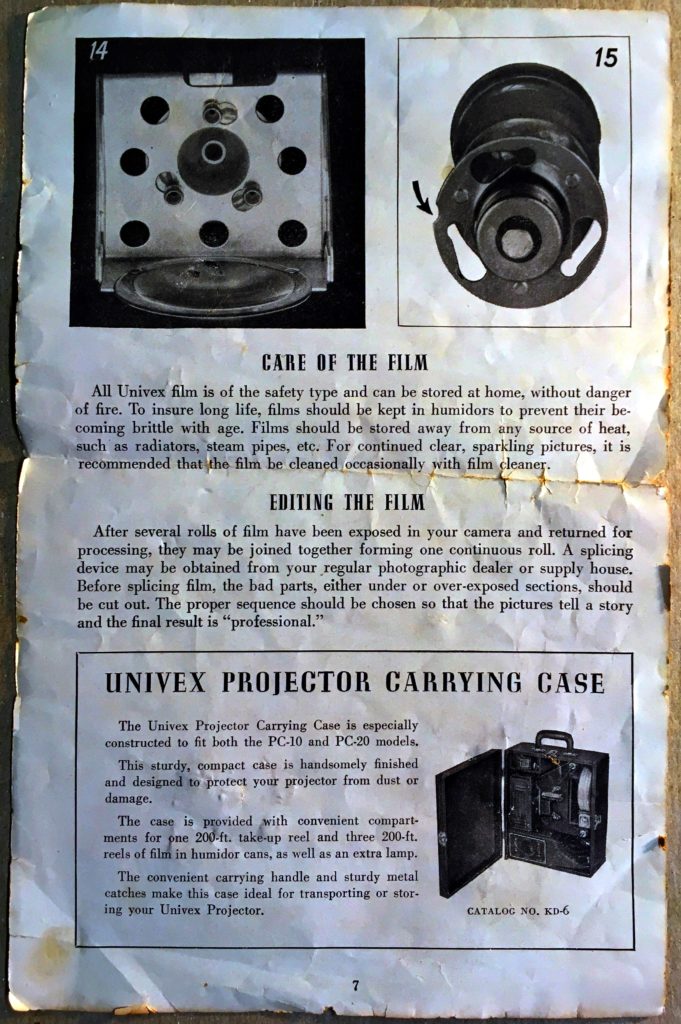
A complete instruction booklet came with this projector, although the pages were all separated from each other. My favorite old-timey phrase from this instruction booklet is “Read carefully the simple instructions which follow and you will add immeasurably to your pleasure.” Love it!

Another cool item that came with this projector was an old order form from 1946 that was used to order 8mm and 16mm films. That probably dates this projector to 1946. The film distributor was Castle Films, and the form just says to fill it out and mail the form to your local dealer. I’m assuming that local camera dealers probably kept the most popular reels in stock and ordered the rest as needed. Apparently Castle Films was pretty popular back in the day. My favorite old-timey phrase on this order form is “Remittance Enclosed Herewith”. Awesome!

These film reels were all black and white except for a small selection of color cartoons.

These Castle Films reels cost $1.75 for a 50 foot headline reel and $5.50 for a 180 foot complete reel. That’s more than 22 bucks and 71 bucks in 2019 money! Castle Films are still popular today and you can buy them on eBay for reasonable prices. Although depending on storage, the condition may be far from ideal. Film that was stored in a hot attic for 50 years will be brittle and will completely fall apart on you.

Thanks for your interest!

Kurt

Turn an old antique hand saw into wall decor!

A few years ago I bought an old rusty vintage hand saw at a local garage sale for 50 cents. I figured I would do something cool with it someday. What I decided to do was to make a welcome sign for our house. Using craft paint, I painted “the Leucht’s (est. 1998)” across the rusty blade. Right now it’s hanging in the garage, but we’re thinking about a couple other possible locations for it.

Before painting, I needed to sketch it out and figure out the size of the letters that would look good. So I started with chalk, which is easy to erase and try again until the proportions were just right.

The next step was to create a pattern or template, because painting letters freehand is not for the faint of heart. So I got on my computer and tried a few different fonts to find ones that I thought looked pretty good. It took a few cycles of trial and error before I got printouts that were close to the correct dimensions.

Once the templates were ready, I used chalk again to transfer the outlines of the letters onto the blade. I just chalked up the back side of the template pretty good and then used a pencil to outline each letter which transferred a thin chalk outline onto the saw blade. Then I just painted between the lines. Easier said than done, I know. It takes a pretty steady hand and a lot of patience.

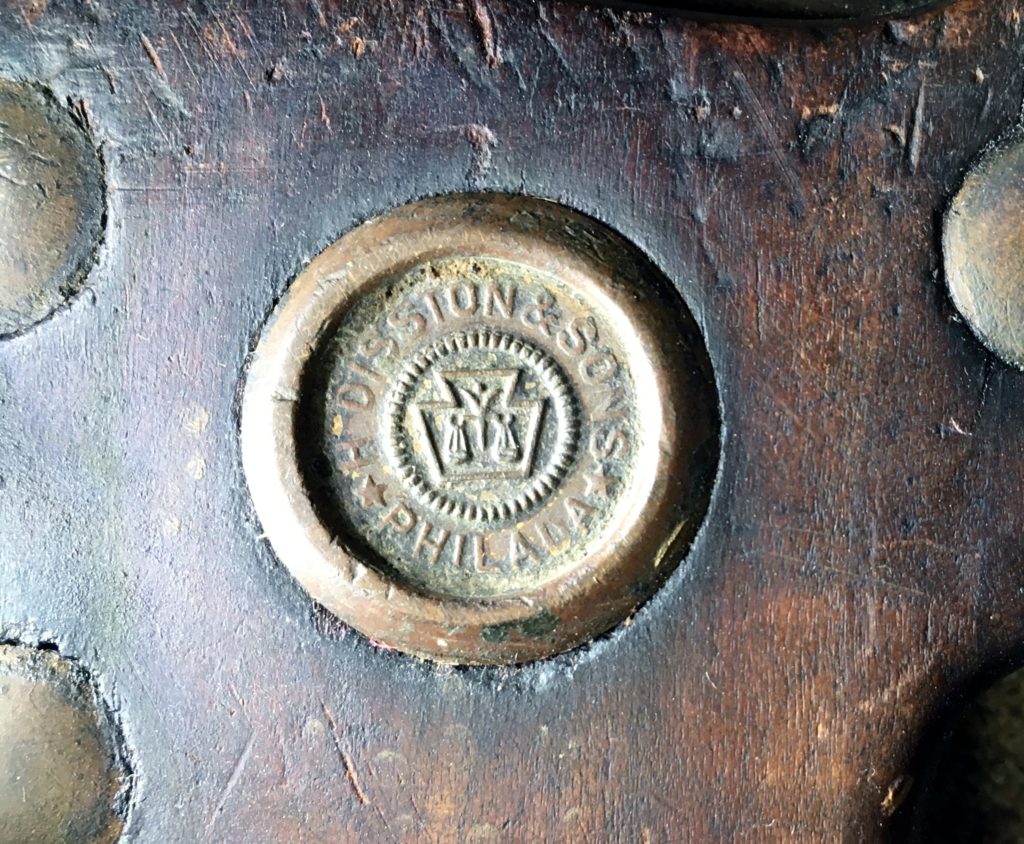
These old antique saws almost always contain stamped metal medallions or label screws that identify the manufacturer. These medallions can also sometimes be used to determine the age of the saw. Here is a close up photo of the medallion on my saw.

It says “H Disston & Sons, Philada” which is Henry Disston and Sons, a highly regarded handsaw manufacturer in Philadelphia. A quick Internet search revealed that this particular medallion design was used between 1896 and 1917! This saw is over a hundred years old! That’s pretty cool!

Here are a few links that I found helpful or interesting:

Thanks for your interest!

Kurt
How to make a custom license plate bracket for your car

If you’ve followed me for any length of time, you probably noticed that I like to make things myself if I can, rather than buy them.  Most of my projects are in wood, but occasionally I do some light metal-work out of necessity.

In today’s installment, I will show you how I was able to make a custom fitted metal bracket which allowed me to mount an old vanity plate to the front of my new-to-me car.  Hopefully, this information ends up being useful to someone out there in the Interwebs.

My new-to-me car is a 2010 Honda Civic SI.  She’s a beaut, isn’t she?  But when I tried to mount my vanity tag, which has my name on it, to the front of the car, the mounting holes were nowhere near where they needed to be.  Apparently, a mounting bracket is required here.  In my prior car, a 2004 Chrysler PT Cruiser, I just drilled holes right into the plastic bumper and screwed the plate right in.  But this car is quite a bit too new and much too nice for that technique.

I looked at my local auto parts stores for a bracket, assuming that it was some sort of common standard, but I came up empty.  So I looked around my woodworking shop to see what I had laying around.  Luckily, I had just the thing.  I had a couple unused pieces of thin steel perforated  angle iron from my new garage door opener.  If you don’t have any laying around, your local home improvement store sells this sort of material.  Just search for Metal Angles.

Notice in the photo above, the cardboard prototype on the bench.  Making a cardboard prototype of the final product was step one in this process.  It will save you a lot of time and frustration if you always start out by making a cardboard version first!  You can see in the cardboard design, that the bracket needs to swoop up, go straight across, and then swoop back down.  Easy peasy!

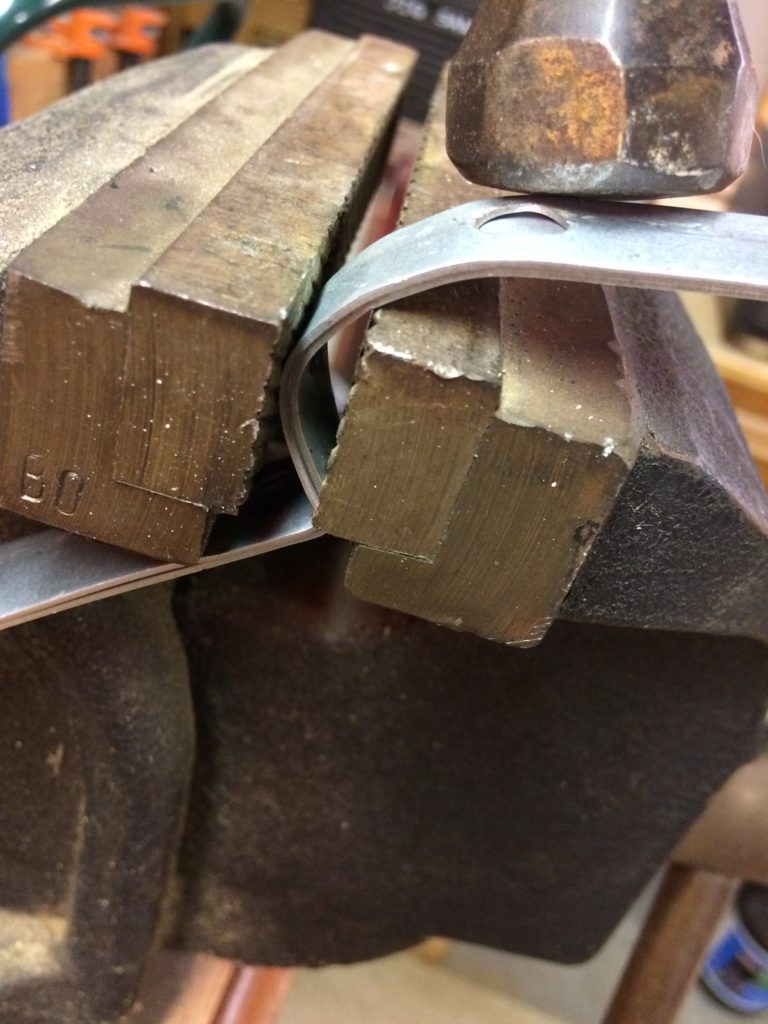
The second step was to fold over the angle iron to make it into a flat plate.  Mashing it between my hammer and my bench vise worked nicely.

Then I hammered it into a 90 degree angle by squeezing it in my bench vise and hammering it over and nicely flat.  The bench vise makes it easy to create sharp angles like this out of thin steel.

The curved section was a bit more work.  And it took some trial and error.  A round tip anvil might have been the right tool for this part, but sometimes you have to deal with the tools that are in your toolbox.

So here is the bracket compared to the cardboard prototype.  Not too shabby.

And a bit more sweat got it looking like so!  Yep, my cardboard prototype was from a Fruit Loops cereal box.  Don’t judge me!

After passing the side by side comparison test with the cardboard prototype, I hacked off the extra material with a … you guessed it … hacksaw.

Now a fit check to the actual license tag was in order.  Looking good!

Then the holes were marked and drilled.  By the way, if you work mostly with wood, like I do, don’t use your wood drill bits for steel!  If you don’t ruin the bits completely, you will at least dull them terribly.  Do yourself a favor and buy a set of hardened bits just for metal.

Here is a photo of the finished product!  It worked like a charm!  And it looks great!

I mean the bracket itself doesn’t look all that great.  But it’s completely hidden behind the vanity plate!  So why spend 20 bucks on a fancy tag bracket when nobody ever sees it!

Thanks for your interest!

If you have any comments or questions, feel free to leave a comment or click on the Email Us link at the bottom of the page!

Kurt

How to make an awesome eclipse viewing rig!

Do you own binoculars?

Do you own a tripod?

If your answer to both of these questions is YES, then you have what it takes to create a pretty awesome, and completely safe, eclipse viewing rig!

Here are the step by step instructions!

Step 1

DO NOT look through the binoculars!  That is very very dangerous!

Step 2

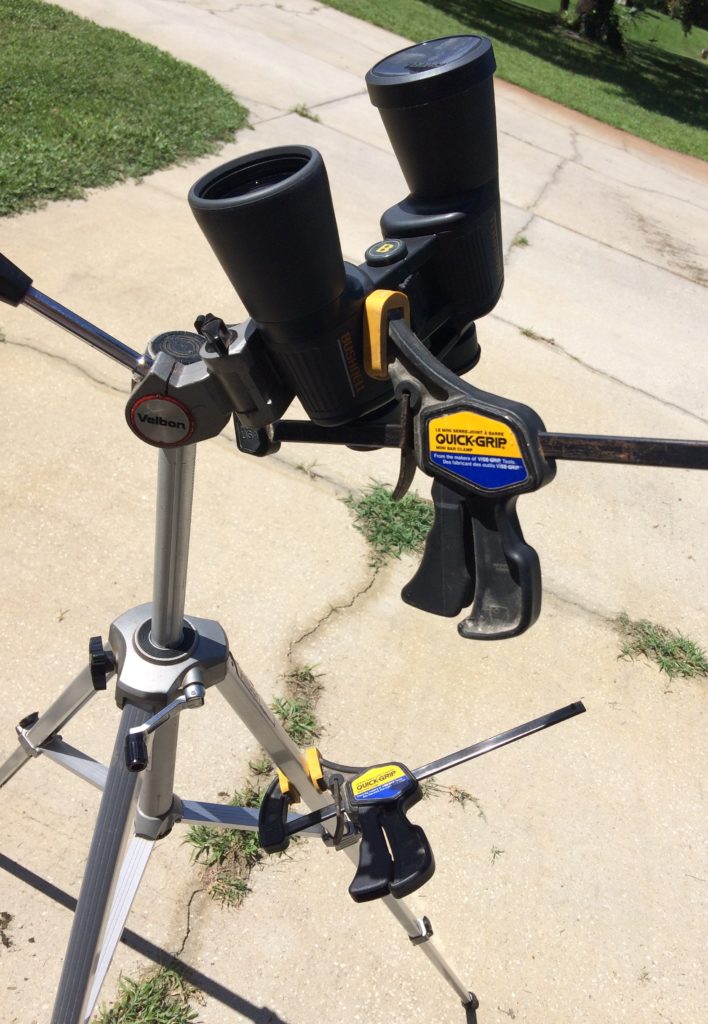
Attach your binoculars to your tripod using any means necessary.  I used wood clamps but duct tape also works pretty good.  (Although it leaves a sticky residue.)

Step 3

NEVER EVER EVER look through the binoculars! You will destroy your retinas!

Step 4

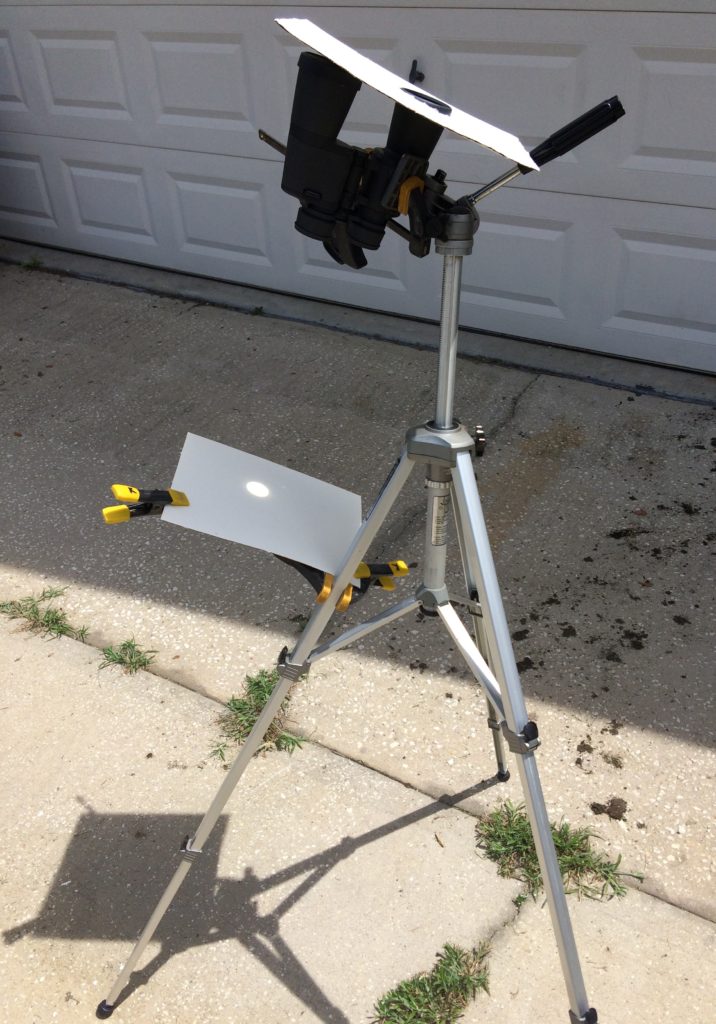
Attach white paper or white cardboard a foot or so directly below the binoculars, with the binoculars pointing in the direction of the sun.  Again, I used wood clamps, but duct tape can also do this job.

Step 5

DON’T EVEN THINK about looking through the binoculars!  That’s a completely stupid idea!

Step 6

Cut a hole in some cardboard and place it over the binoculars to create a shade panel.  Now only the sun will be projected onto the white paper below the binoculars.  You can use the binocular’s focus capability to get the sun into perfect focus on the paper.

Step 7

That’s all.  There are no further steps.  Other than to NEVER look at the sun.  ESPECIALLY through binoculars.

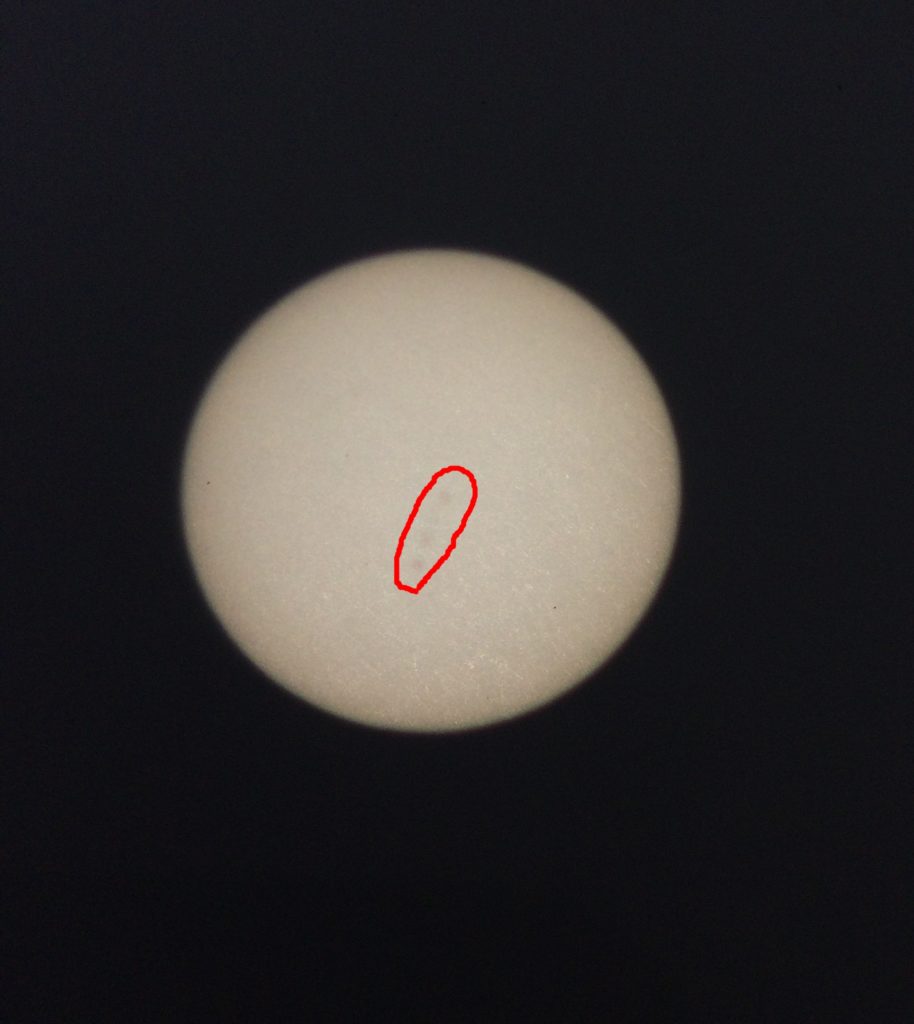
Here is what the sun looked like today while I was setting up and testing my rig.  It looked really cool when thin wispy clouds flew by!

To get this photo, I just held up my iPhone very close to the white paper, white balanced on the center of the white sun image by clicking on it with my finger and snapped this photo.

It looks even better with the naked eye!

If you look closely, you can see three sunspots!  Amazing!

Thanks for your interest!  And remember to never look at the sun!  Especially through binoculars!

Feel free to share this post on your favorite social media accounts!

Kurt

Sunday August 20th update:

This blog post appears to be going a bit viral this morning!  Thank you to everyone who has shared it!  I’m happy that so many people find it useful!

I will gladly share your eclipse photos here!  If you make your own eclipse viewing rig using binoculars, put your eclipse photos and videos online (Flickr, Facebook, YouTube, Dropbox, etc.).  Then contact me using the “Email Us” link at the bottom of this website!  Give me the link to your media and tell me what city and state you were in and I will post thumbnails and links right here in this blog post!

Photos and Videos from all over the country!

From [name goes here] in [city, state]:

[image thumbnail with link to original hosted on another site]

From [name goes here] in [city, state]:

[image thumbnail with link to original hosted on another site]