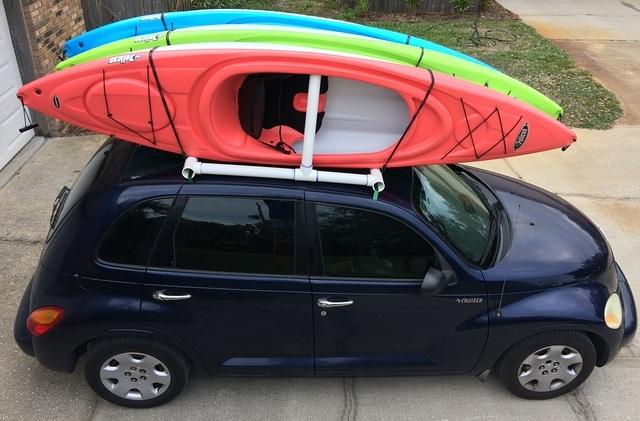
I designed and created what I feel like is a pretty awesome looking Batmobile car. I will attempt to give you step by step instructions below.
Disclaimer 1: This was my car that I created for the open class adult races at my son’s local cub scout Pinewood Derby event recently. This design will very likely NOT meet all the rules and regulations for size and weight that apply to cub scout Pinewood Derby cars. This is too difficult a build for a child that age anyways.
Disclaimer 2: The construction steps below are in the order that I went through them, but I realized several times that I had done some steps out of turn. So please read and understand the entire process and try to not make the same mistakes that I made.
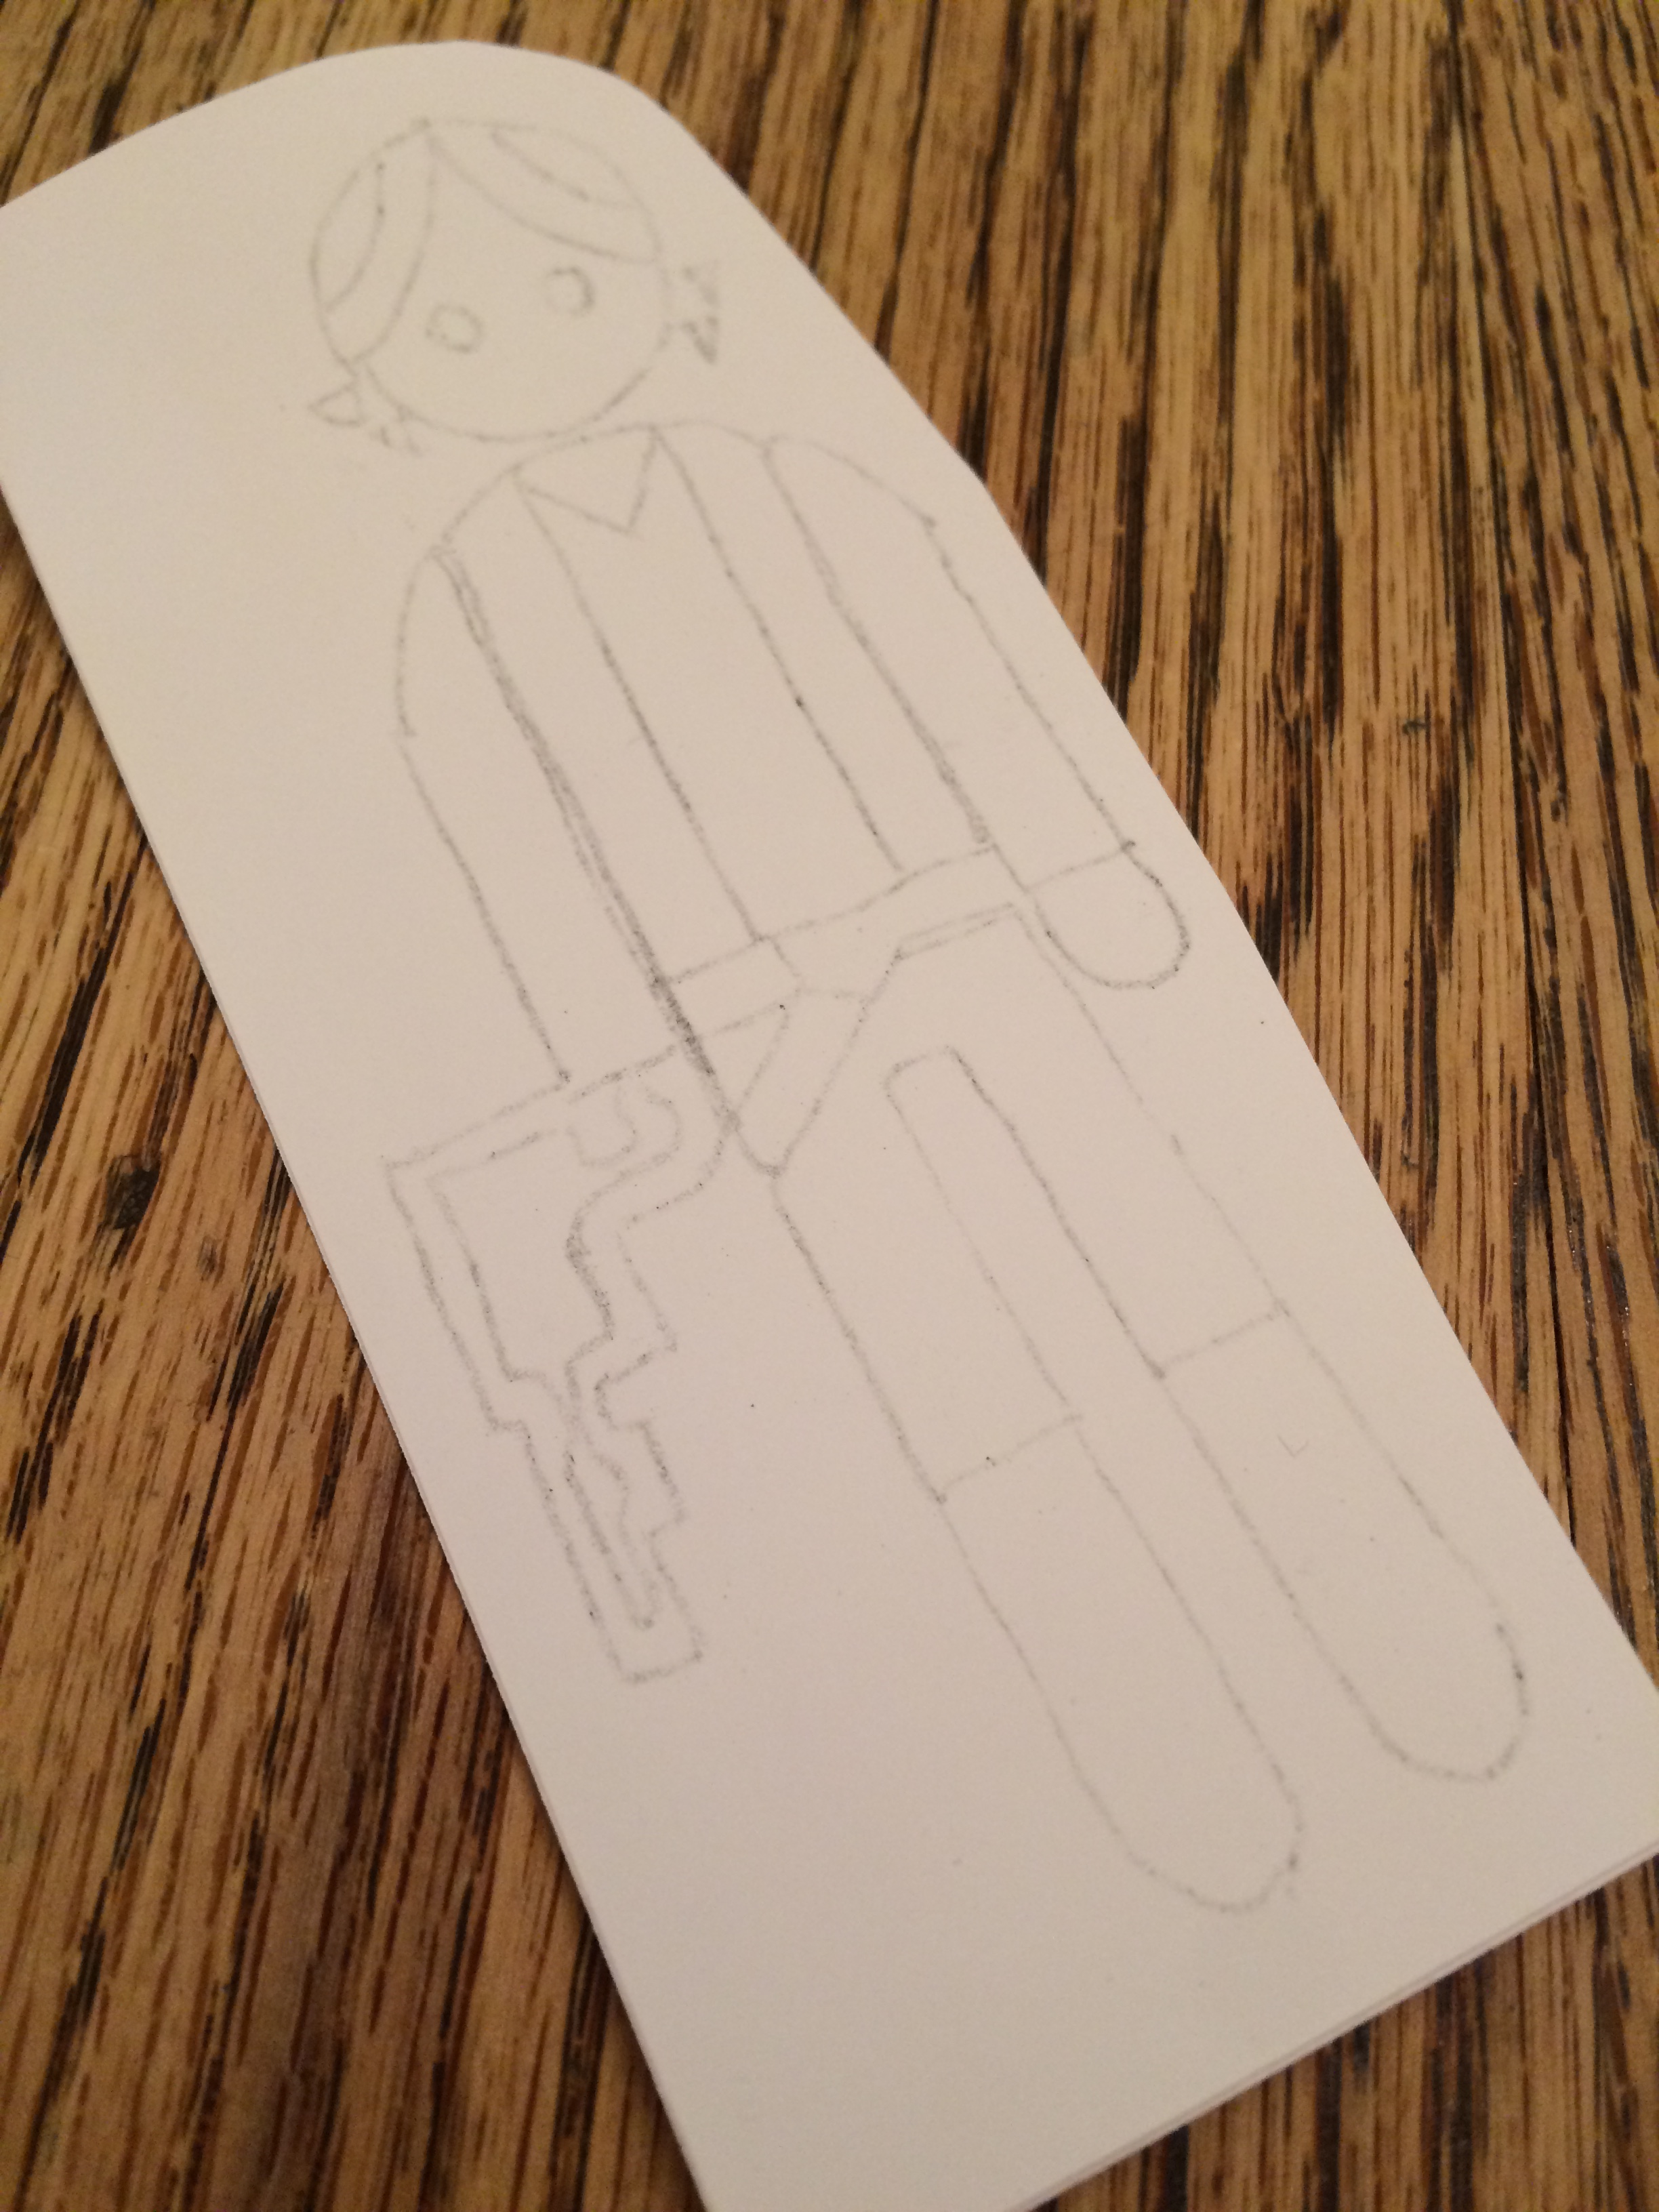
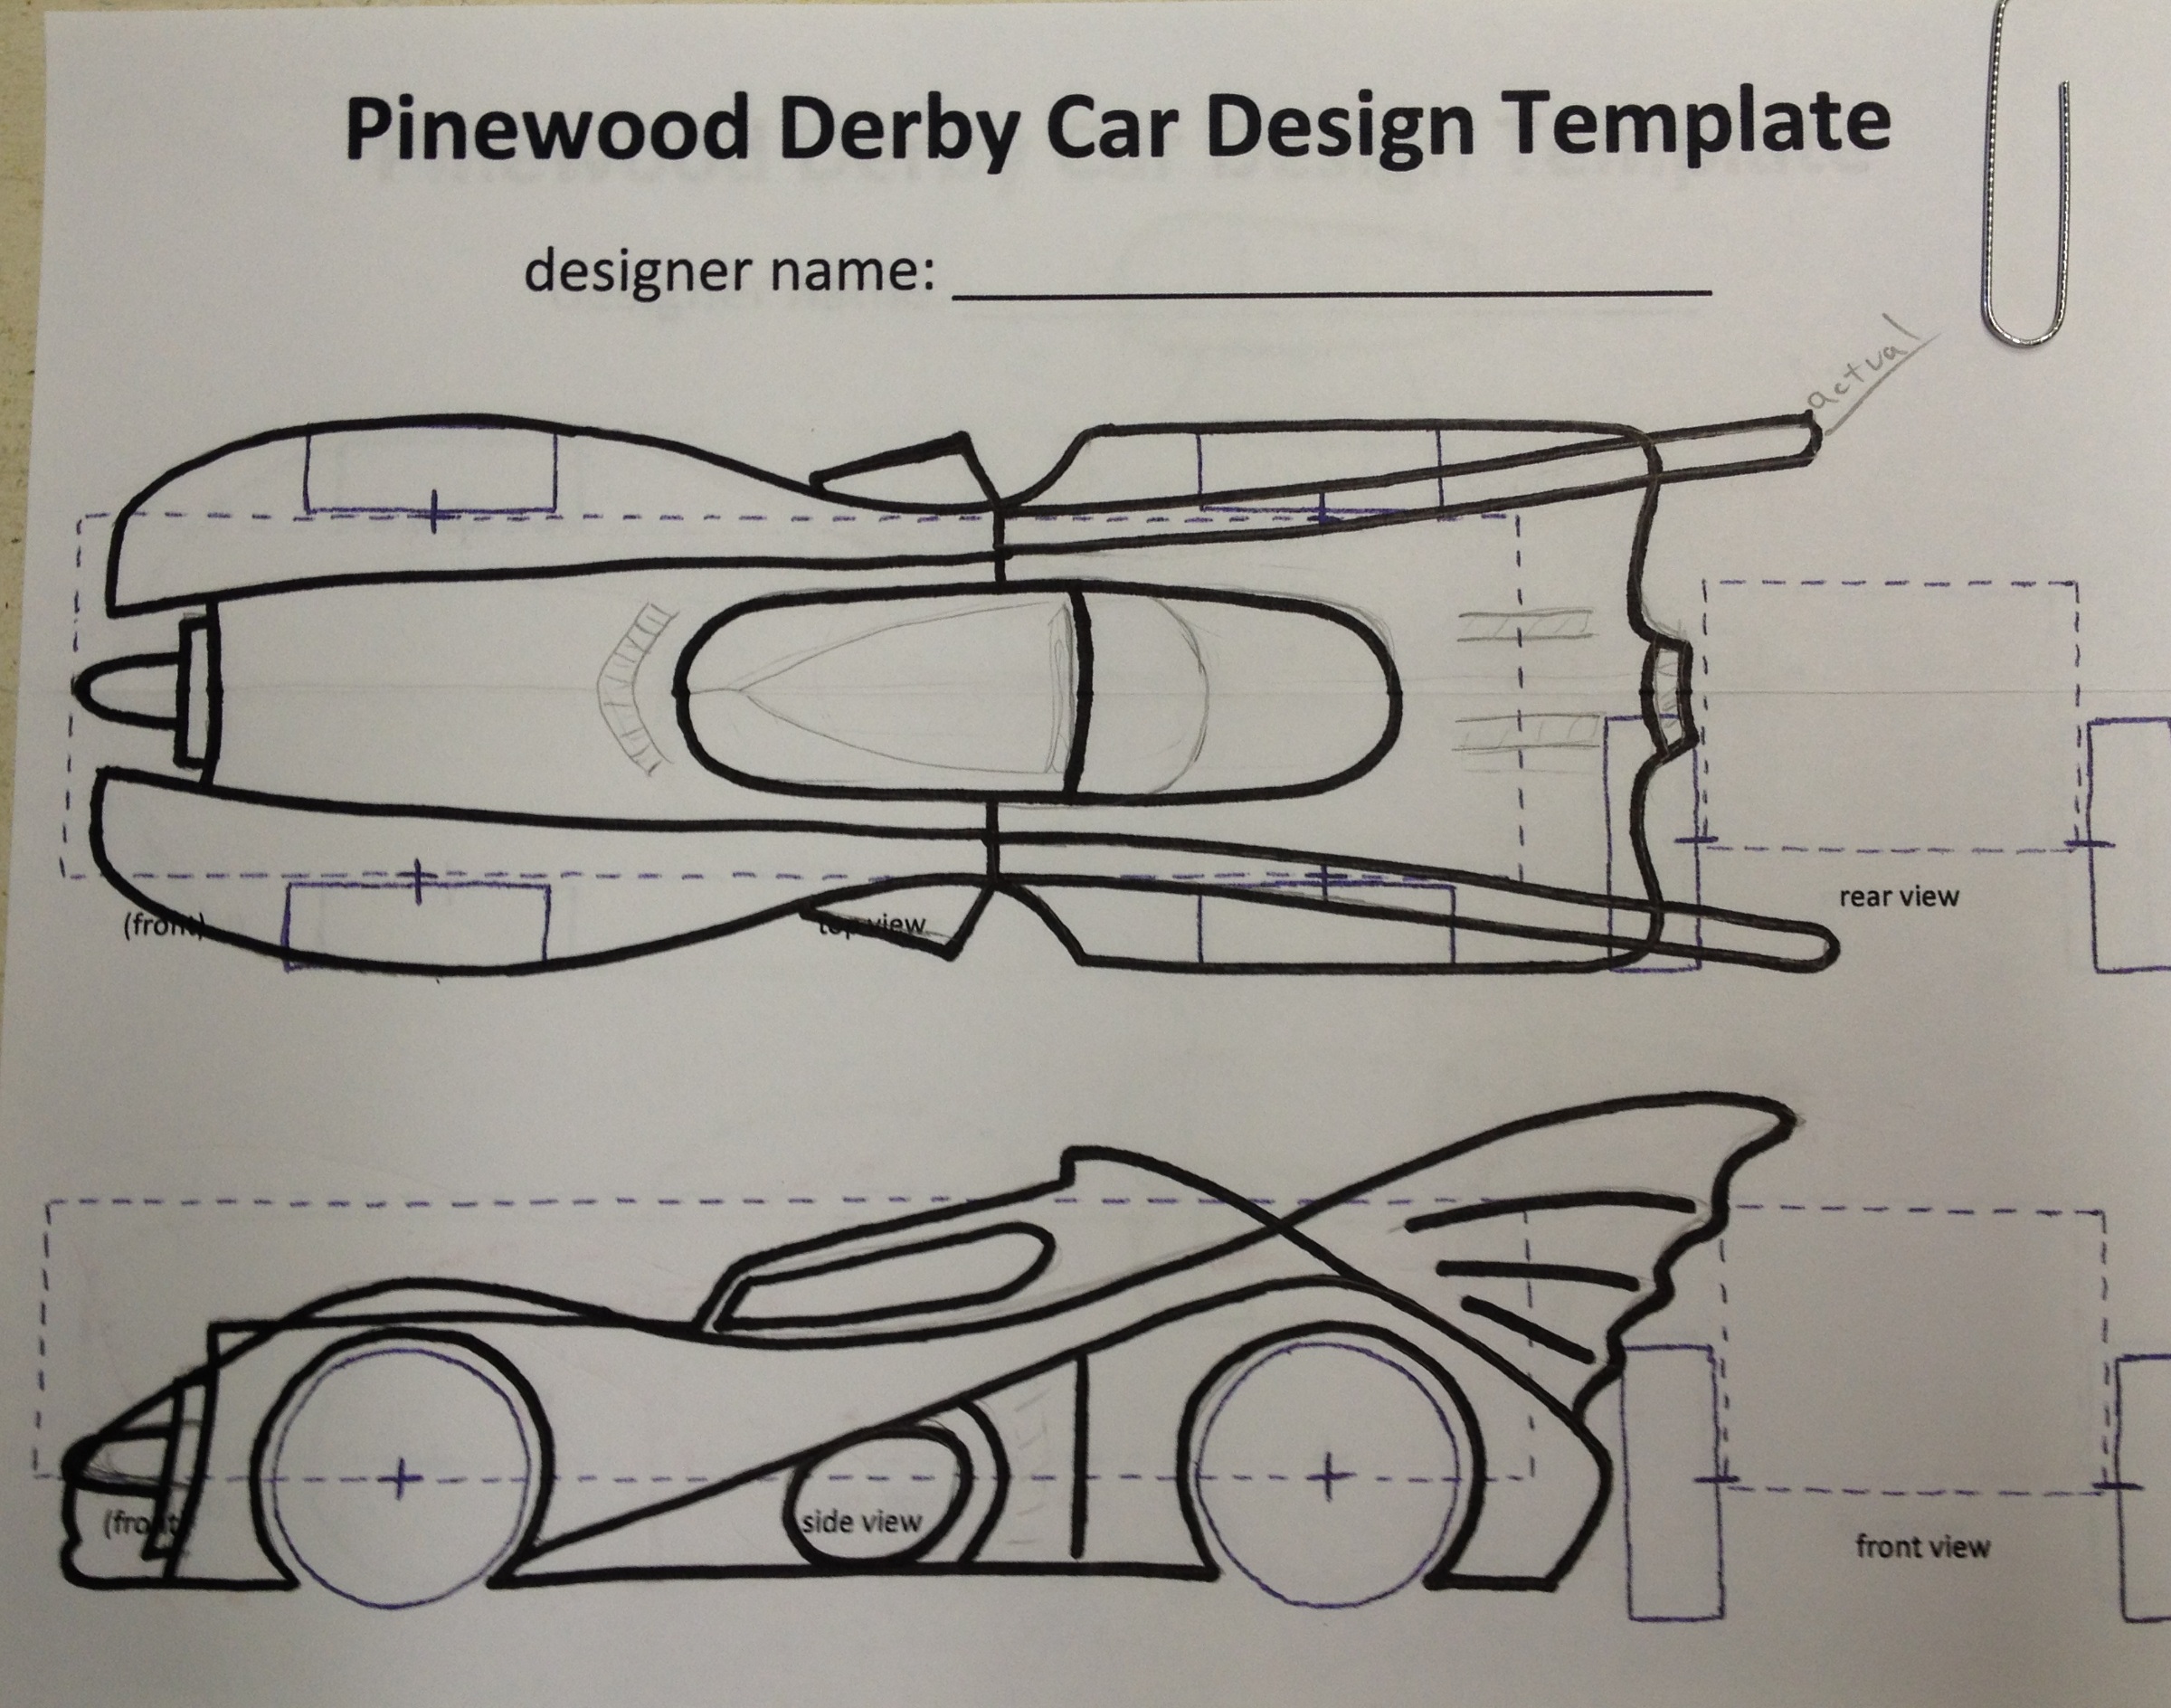
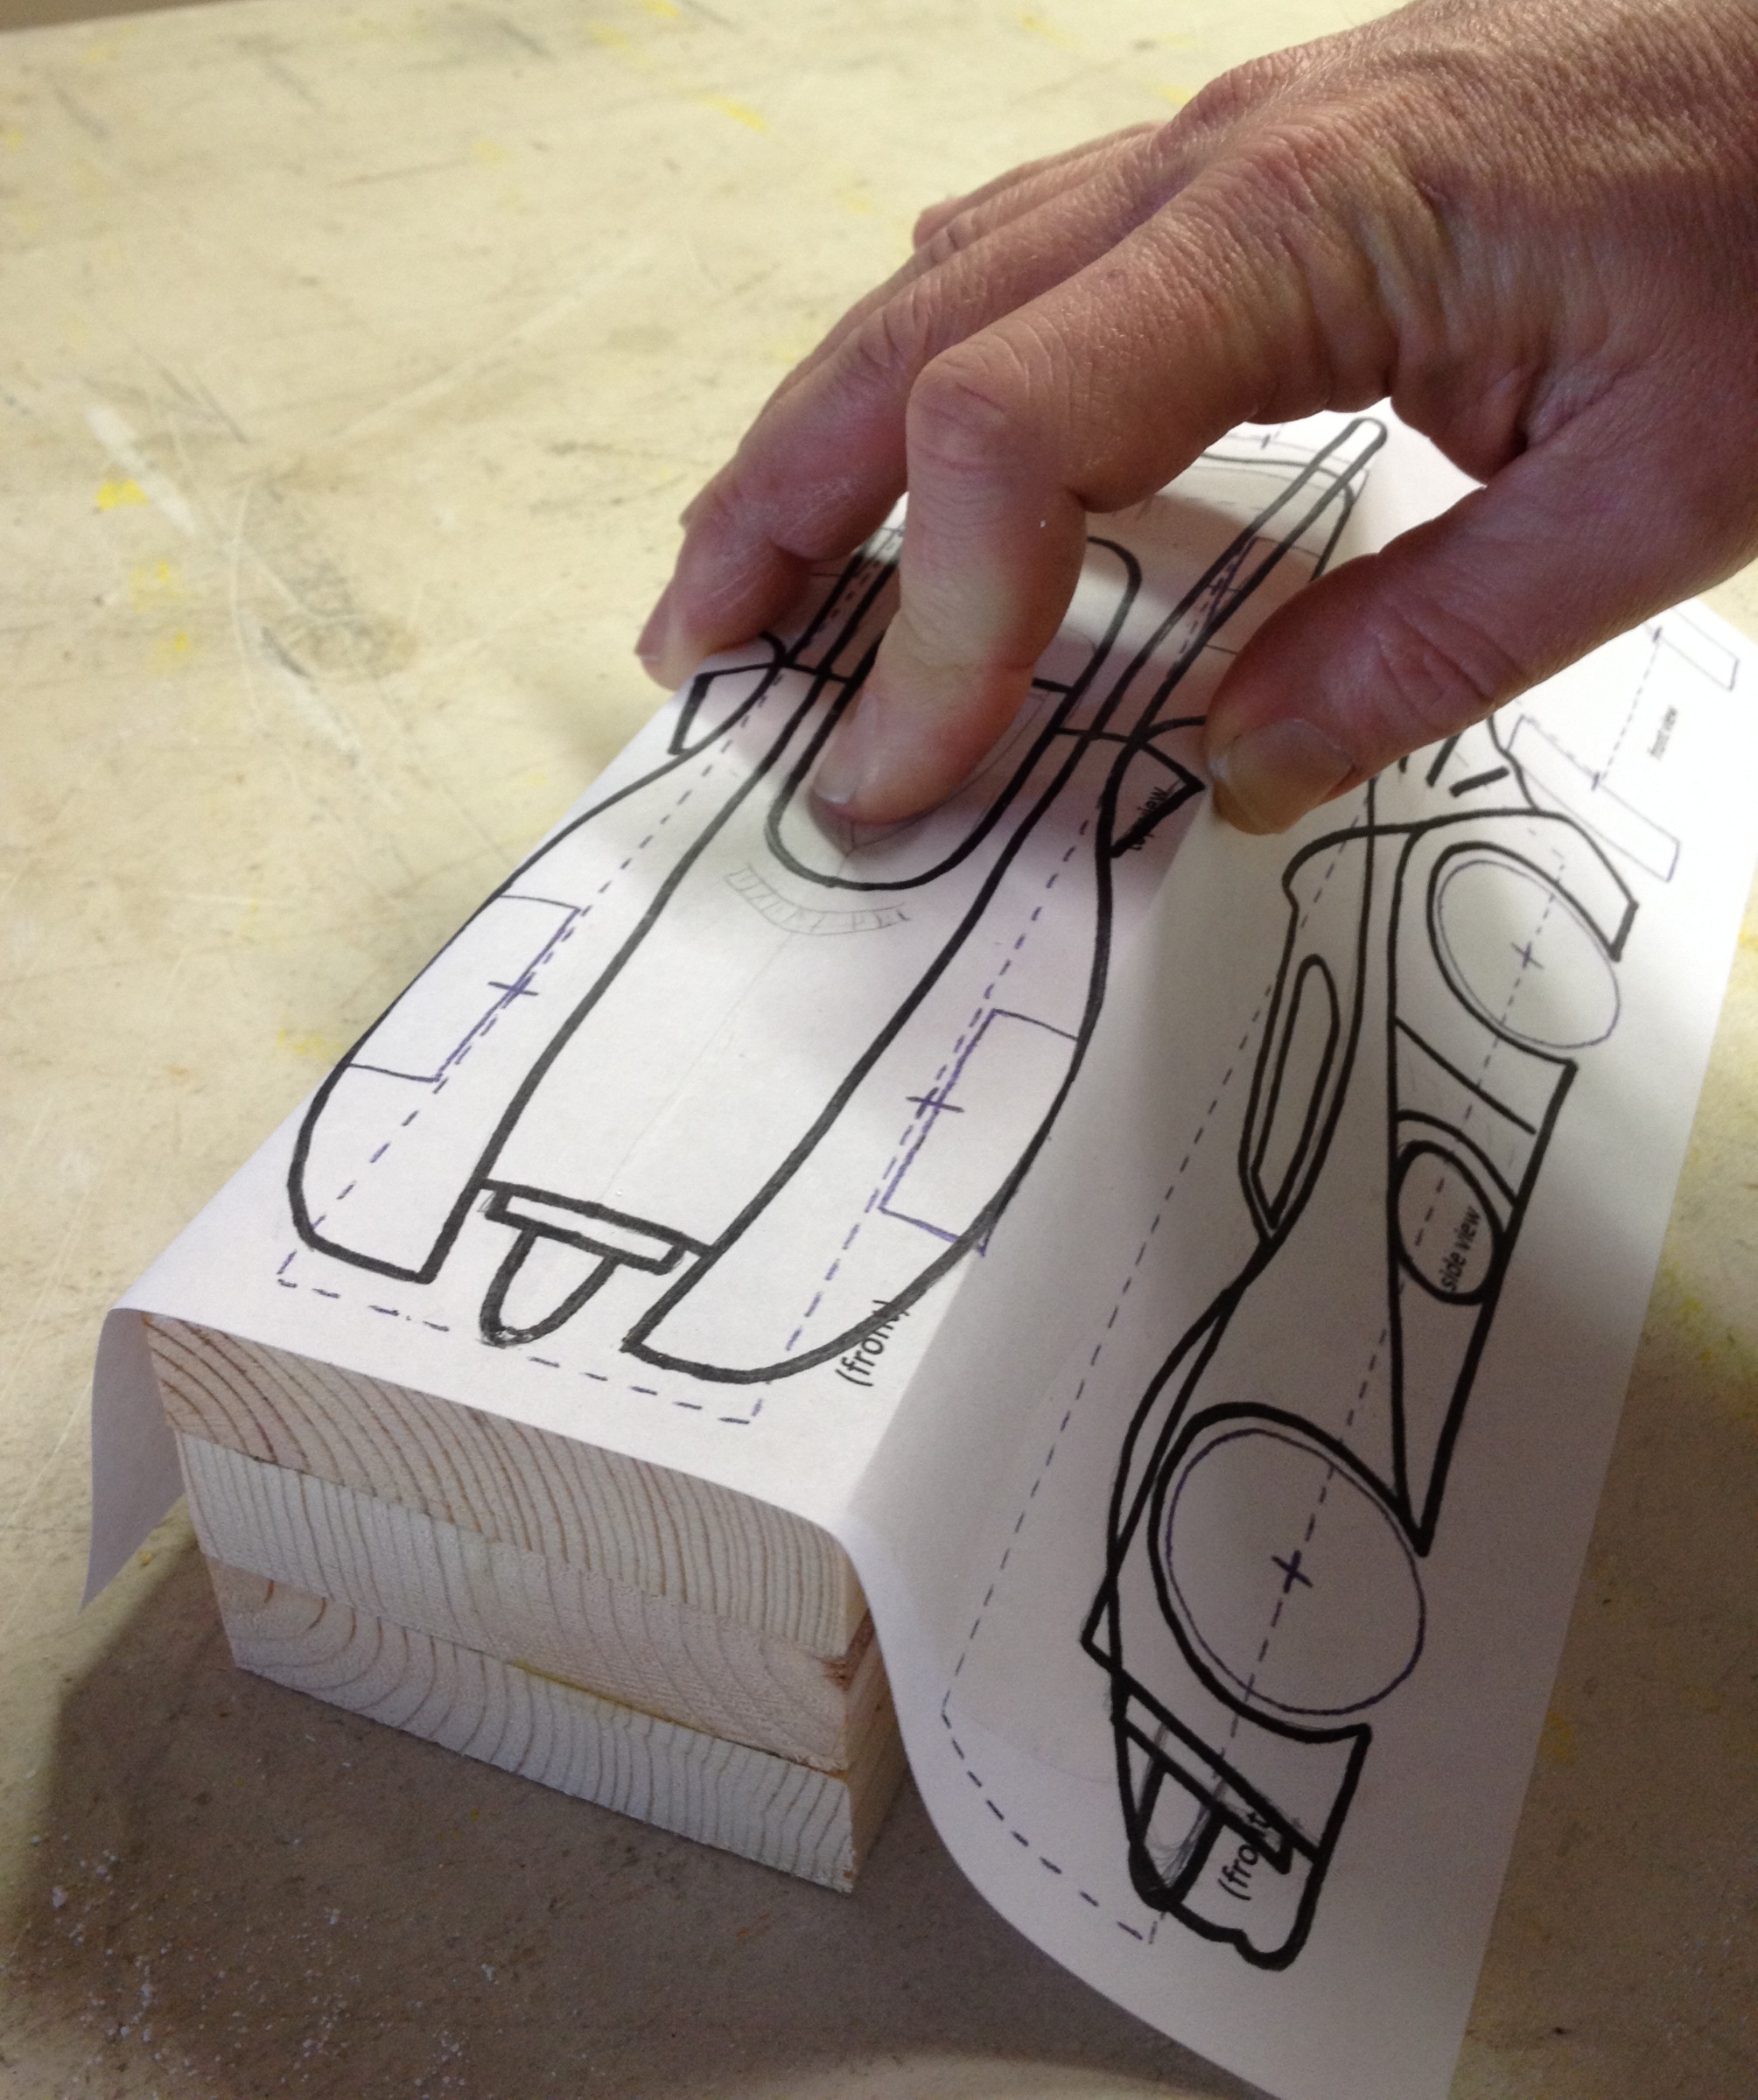
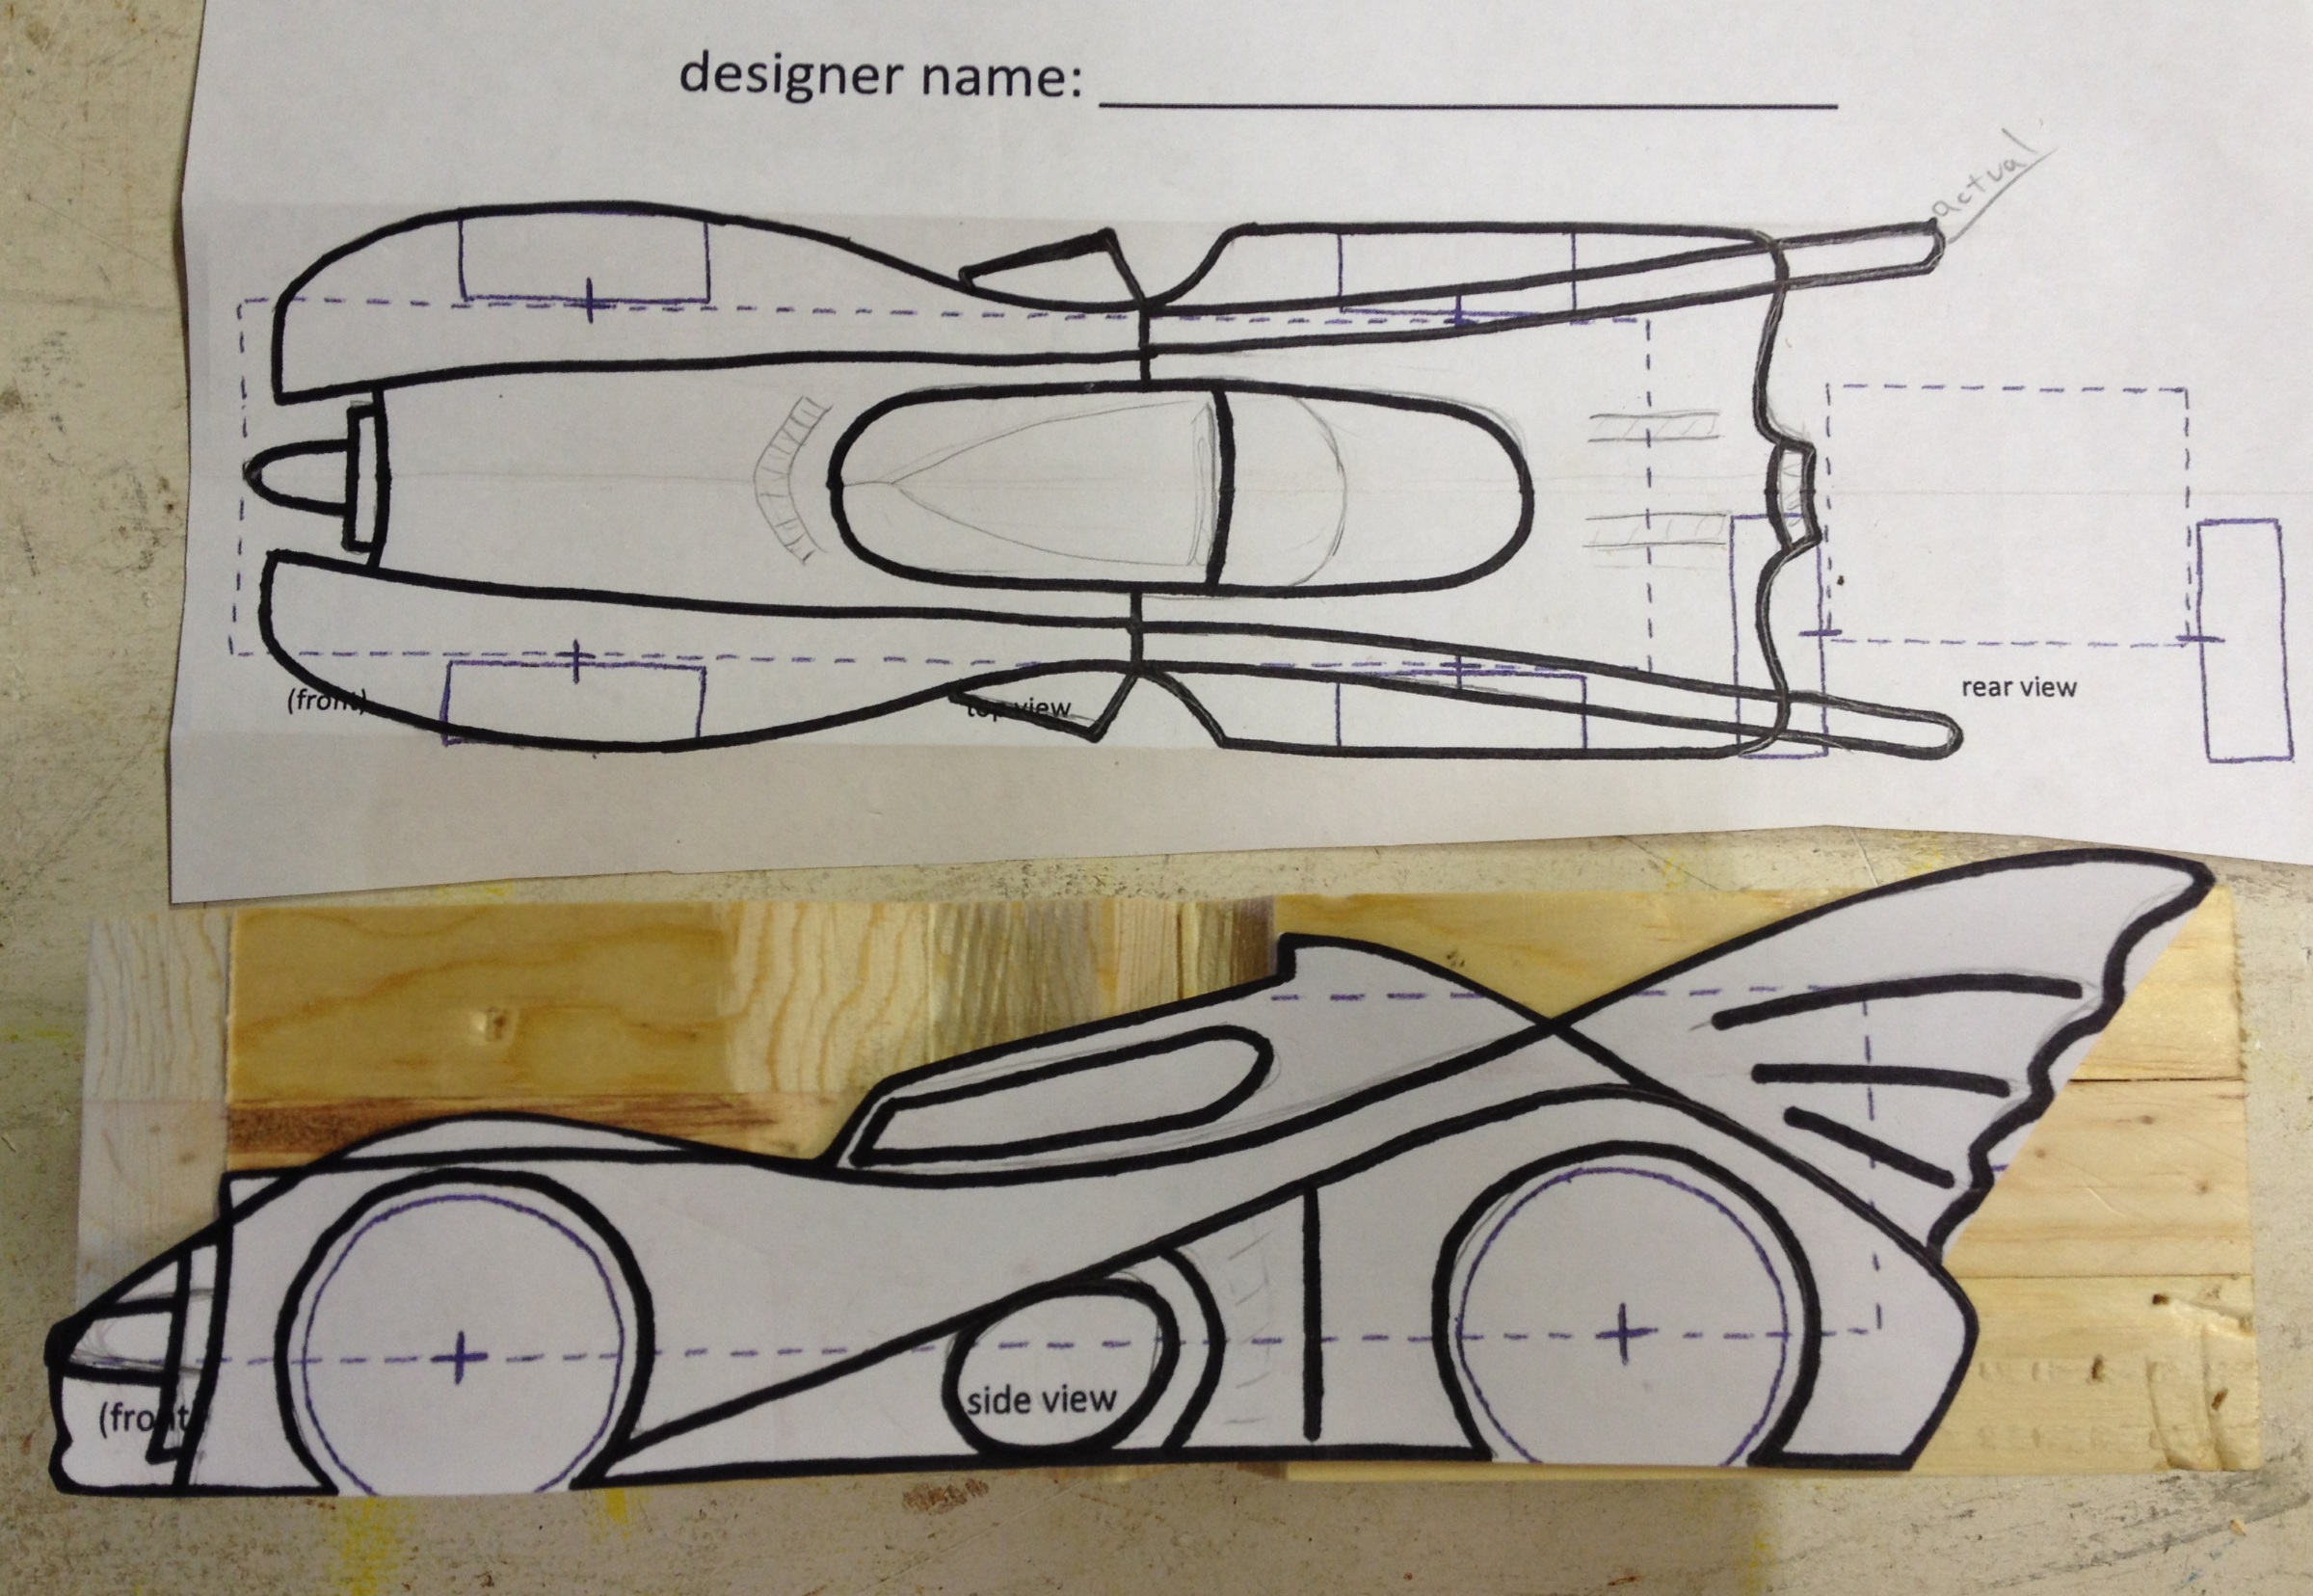
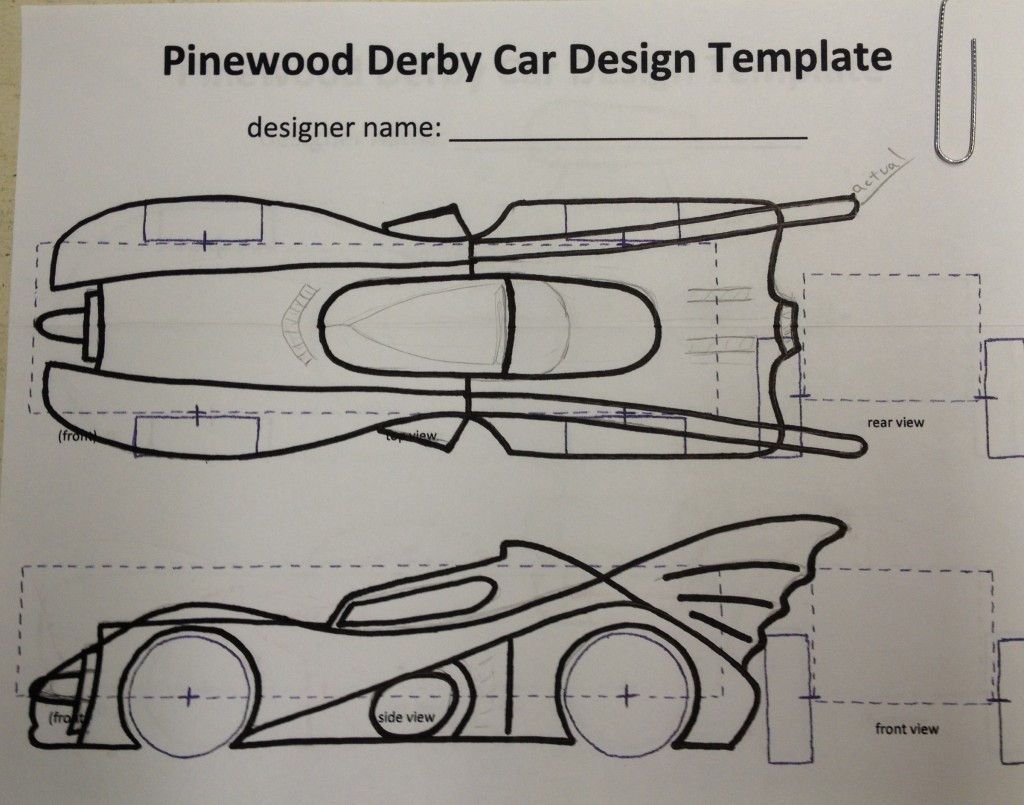
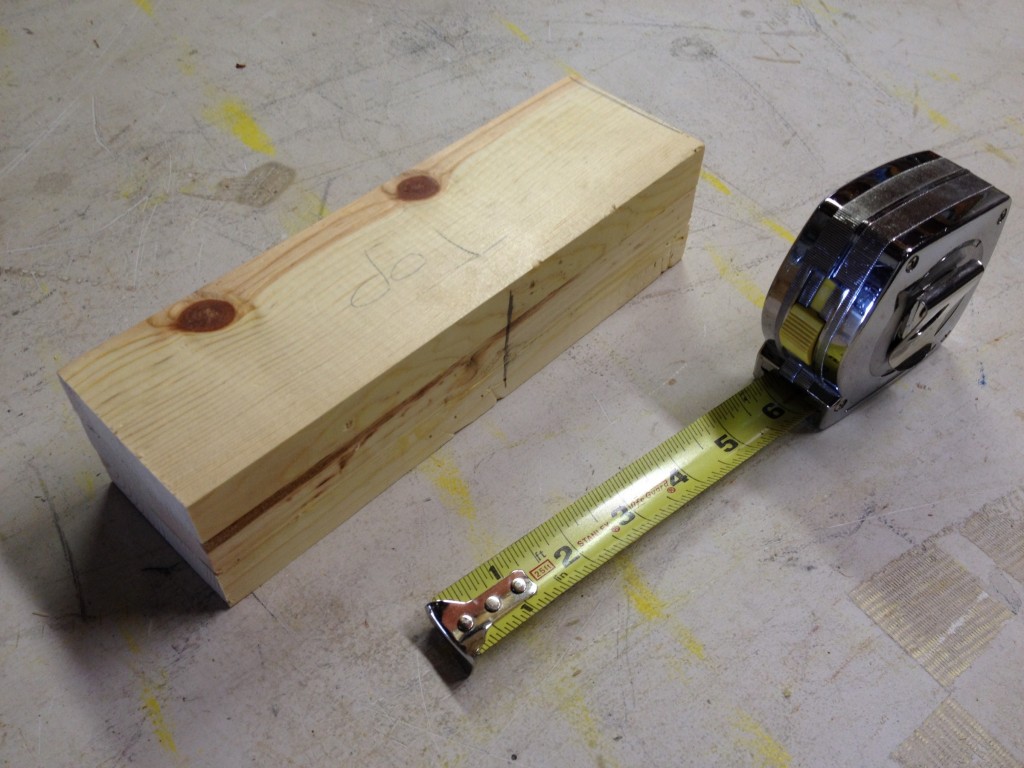
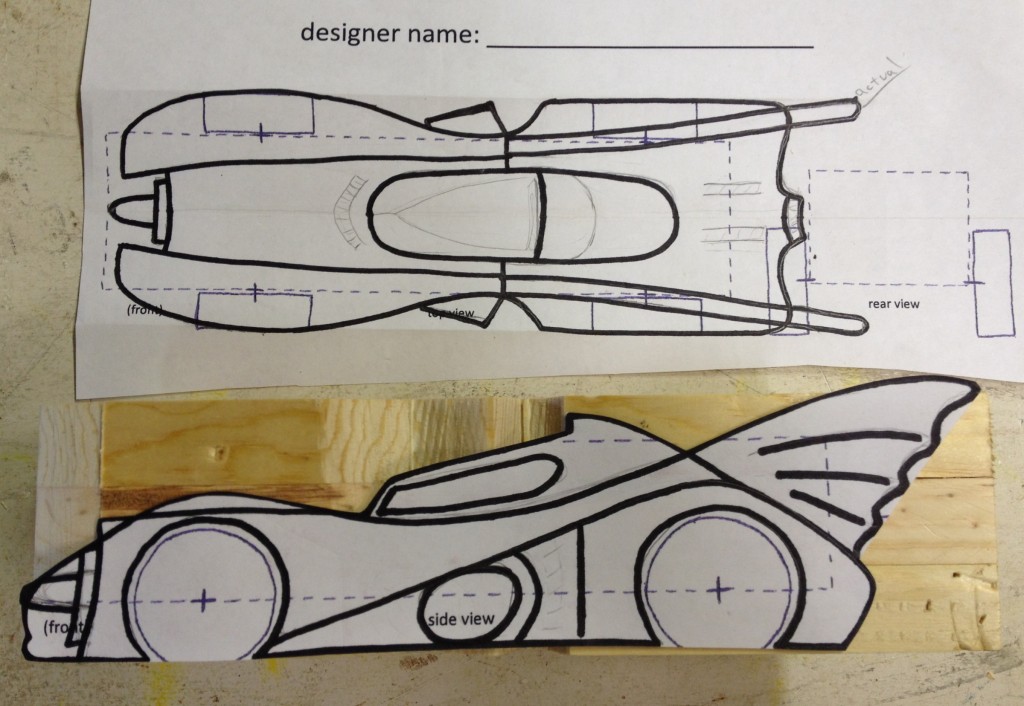
I always first start out with a hand drawn template. You can download a template here and try to draw the Batmobile design yourself, or you can download the image below and print it on an 8.5 x 11 sheet of paper and it should be pretty close to the correct size. The Batmobile design that I came up with is wider and taller and even longer than the standard block of wood that comes with the Pinewood Derby car kits. So I had to make my own block of wood for this build.
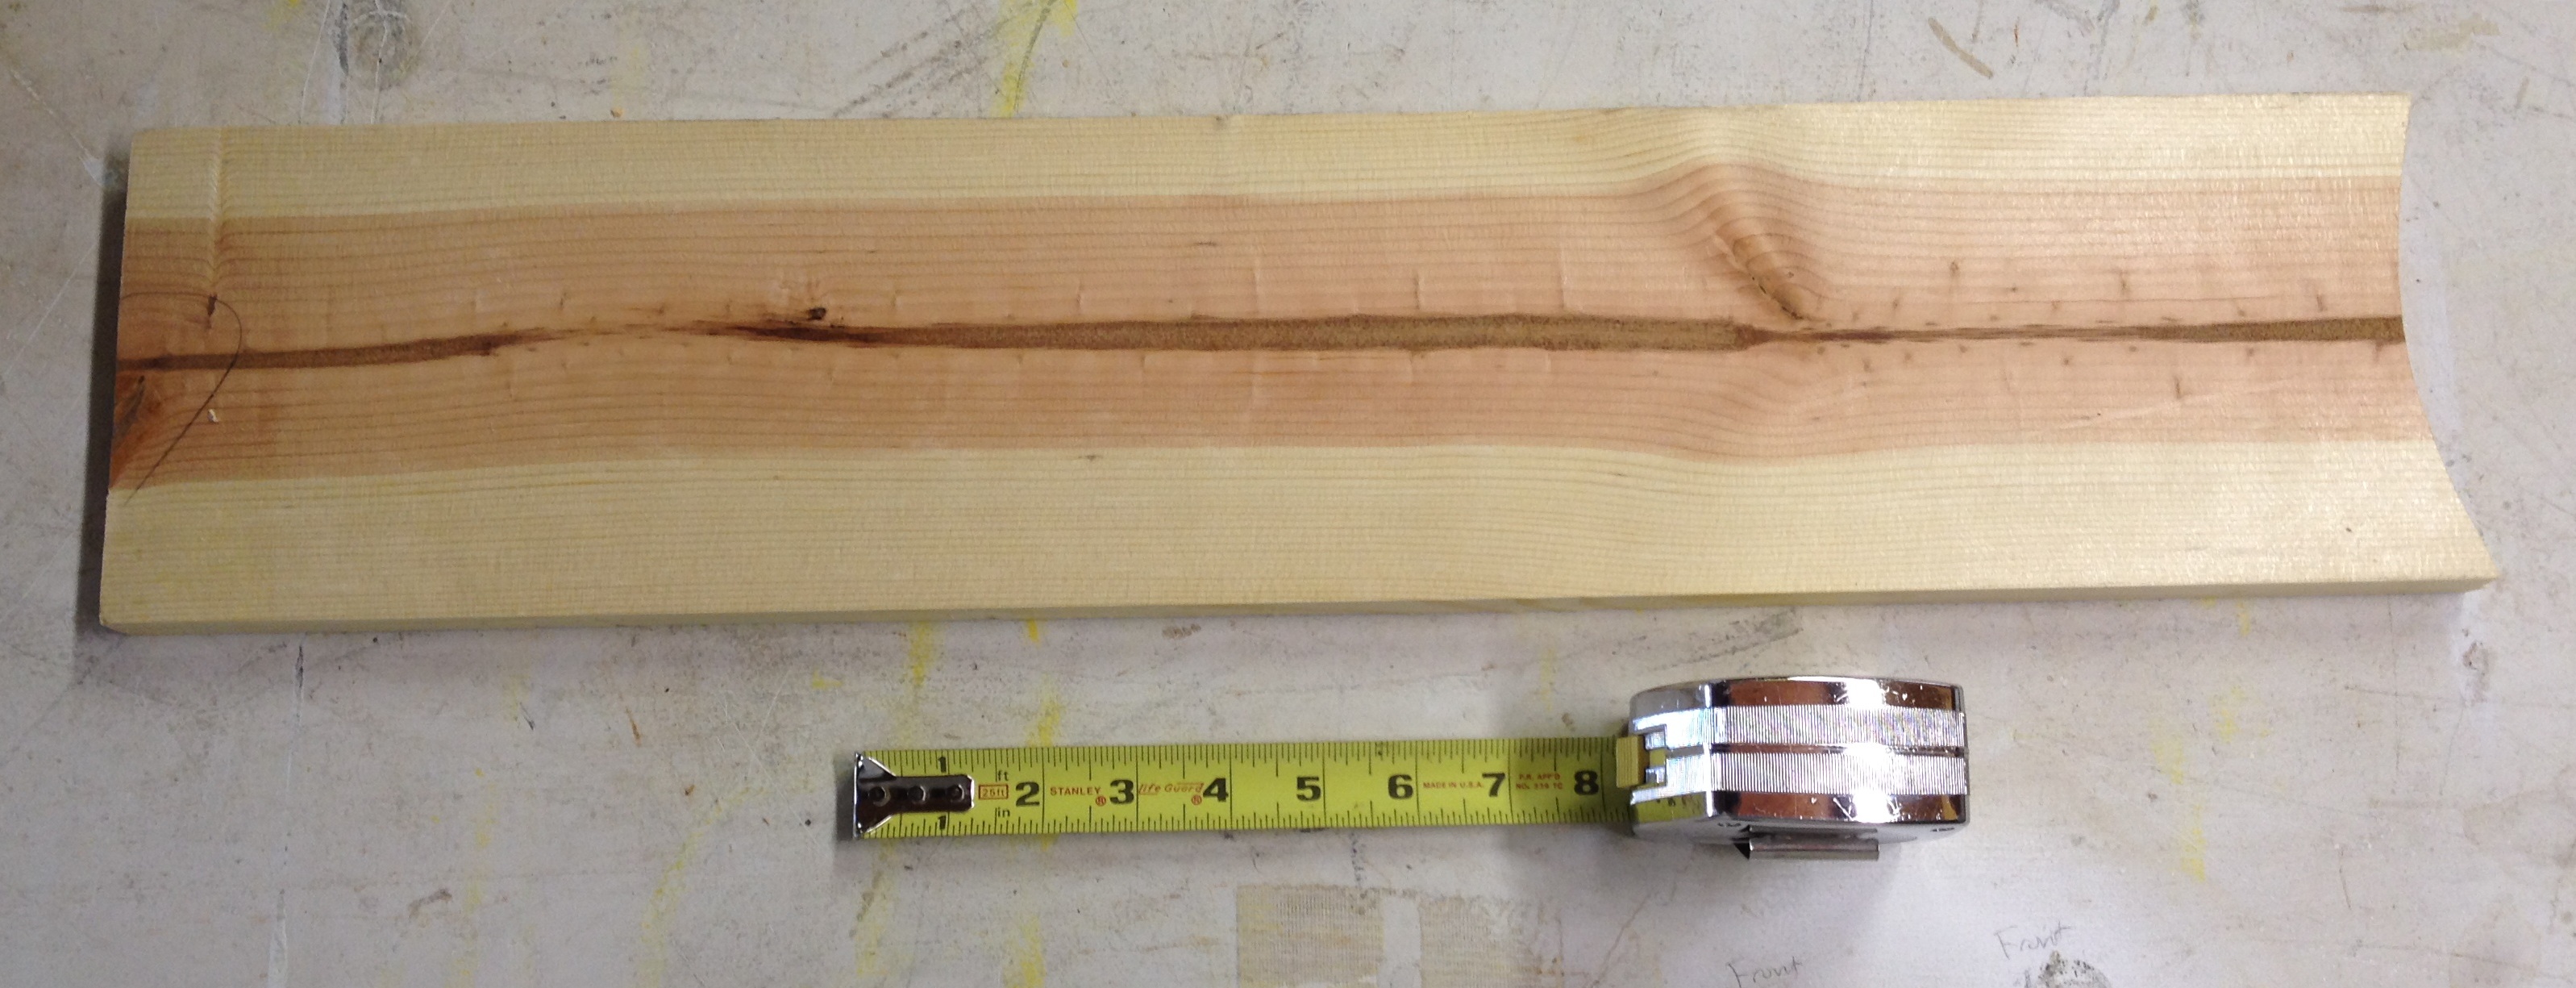
I started with some scrap pine 1×6 wood that I had laying around my shop. It’s possible to use harder woods, but it will make the shape carving process much more difficult.
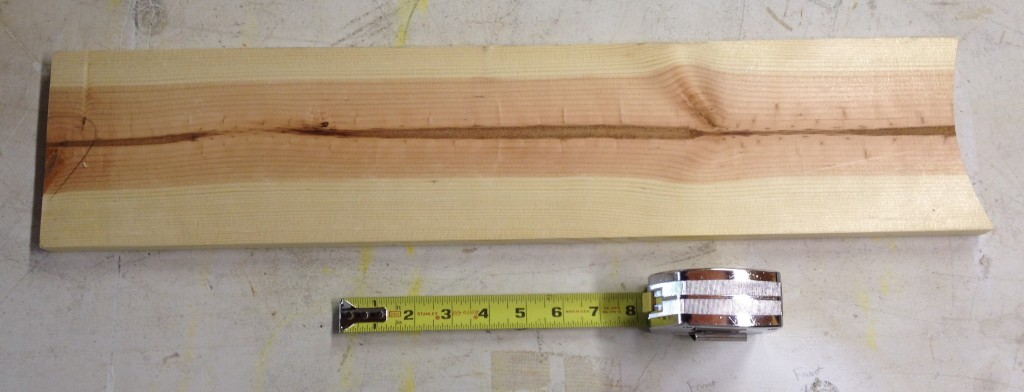
I ripped this board down on my table saw to 2 strips that were 2.75 inches wide. You really don’t want to make a Pinewood Derby car more than about 2.75 inches wide or it could overlap into the adjacent car’s lane on the track and the event organizers may not even let you race it.

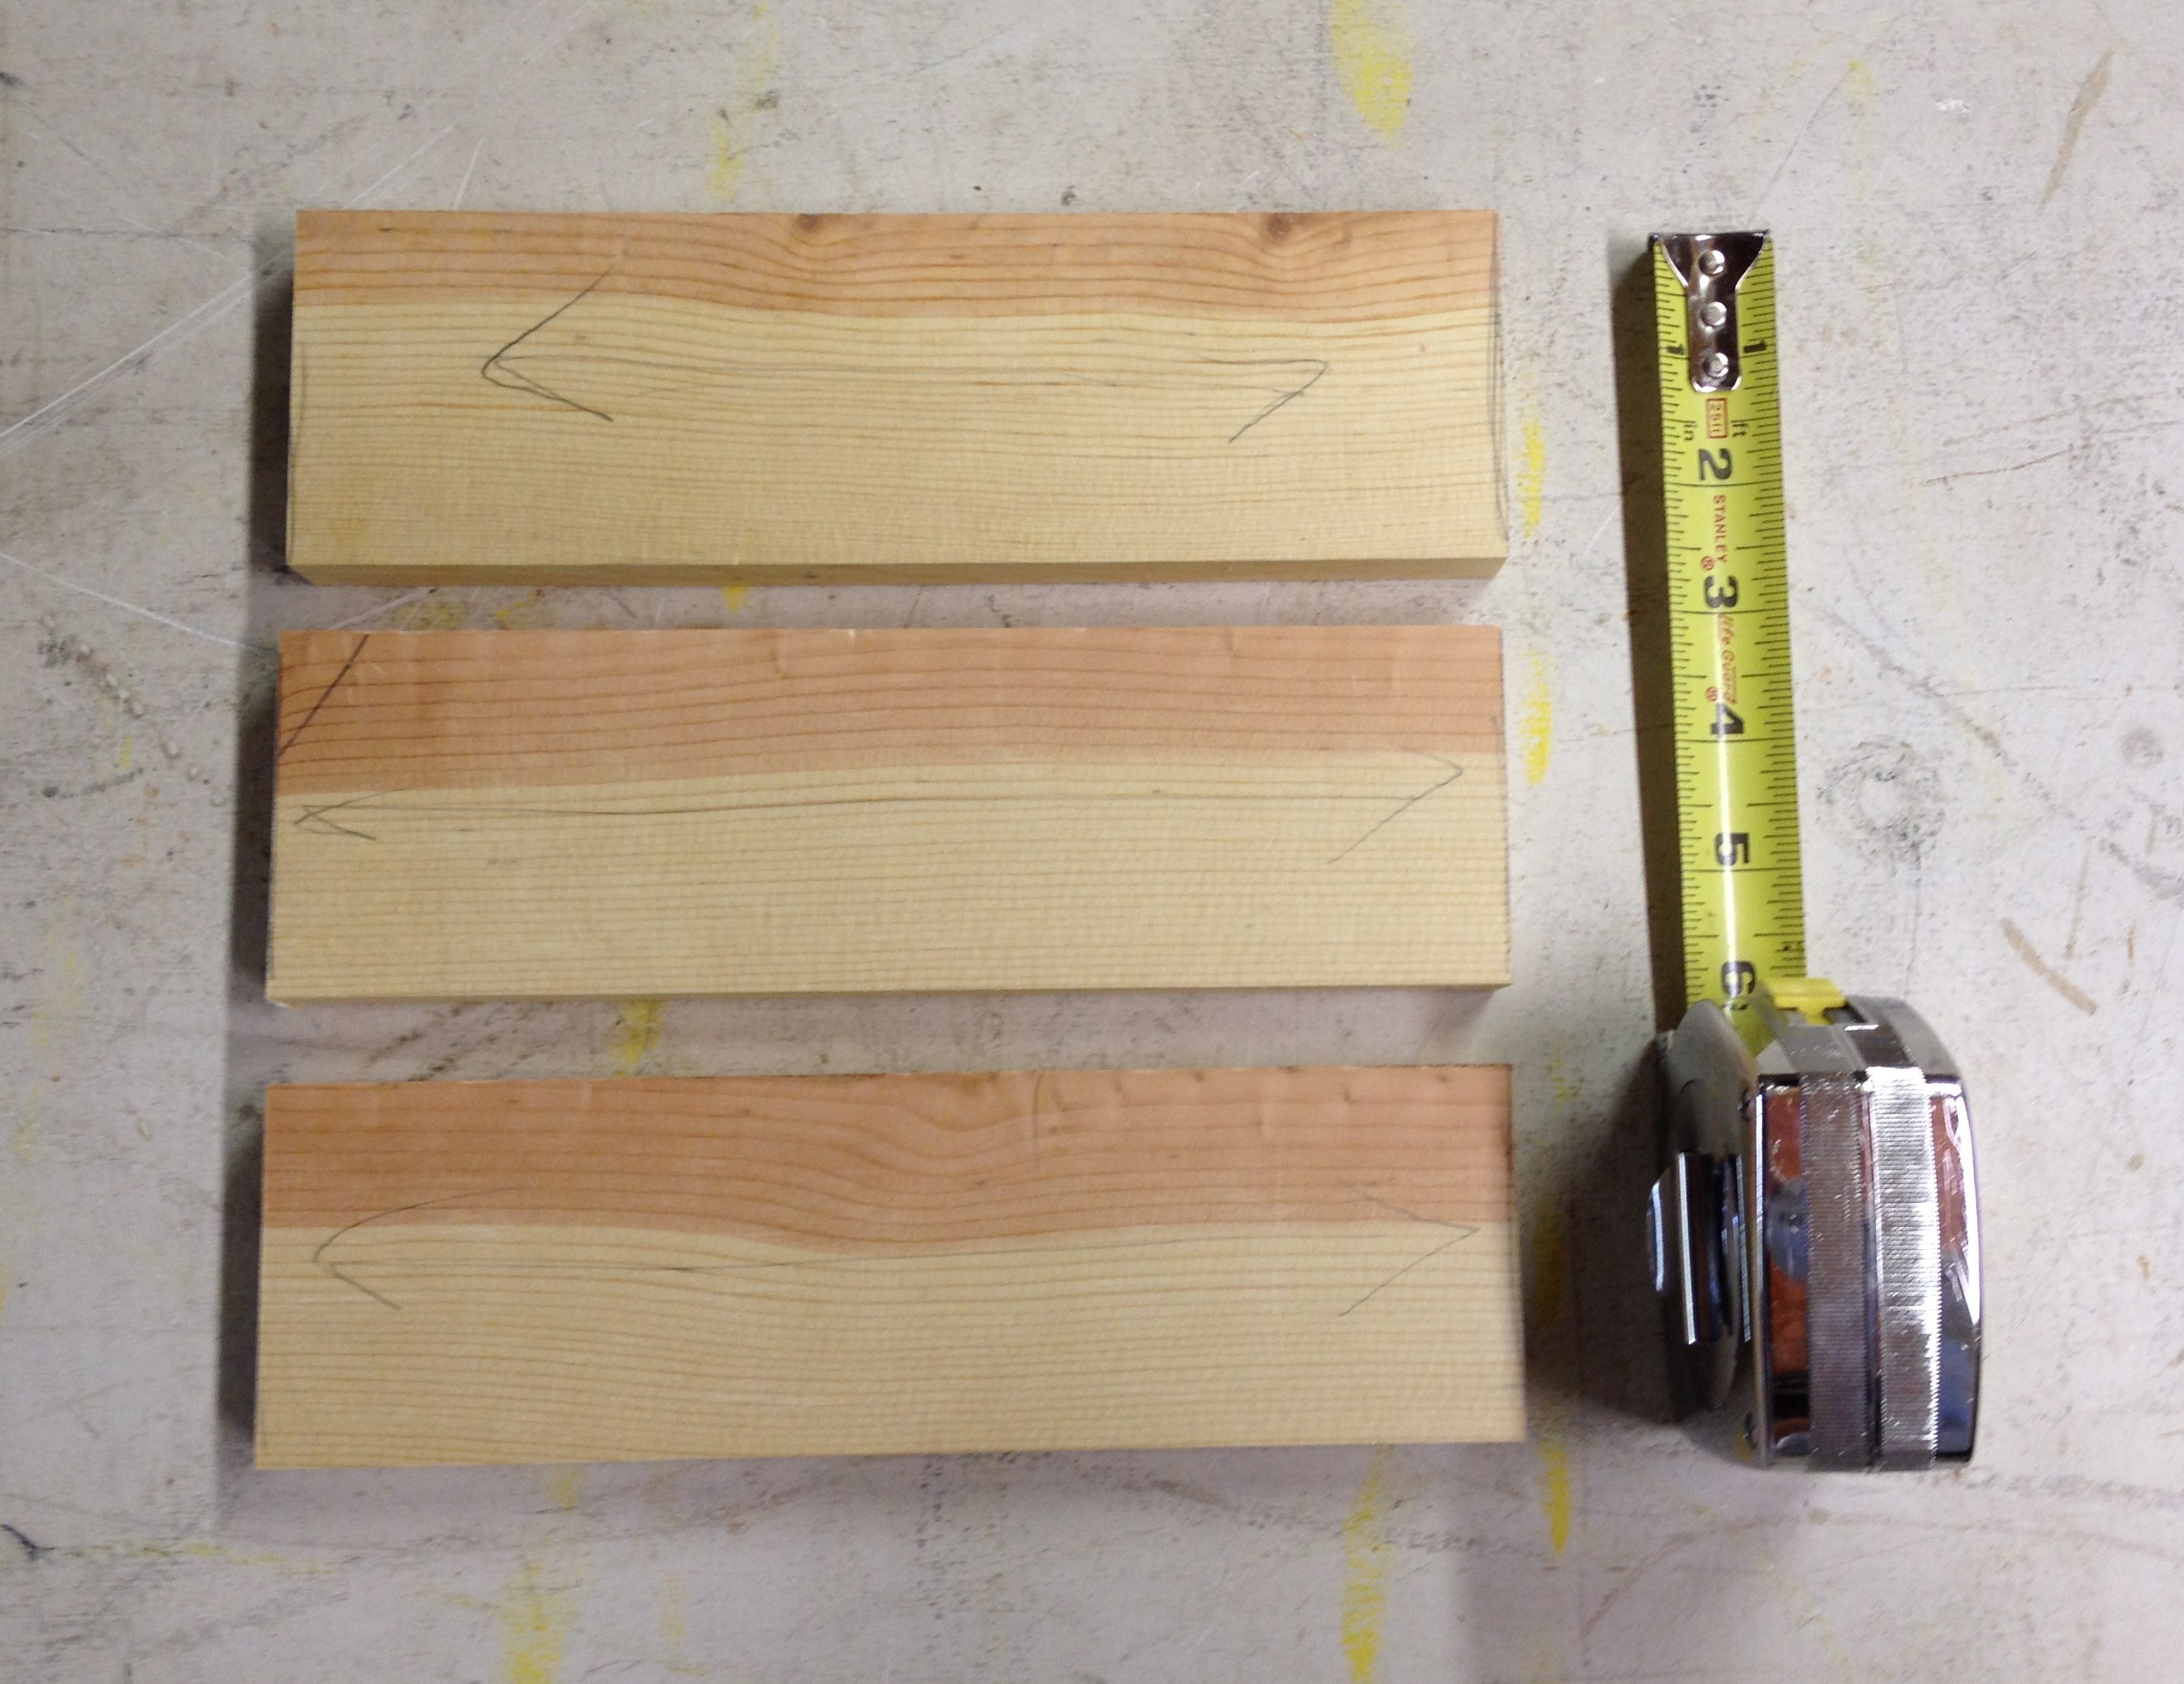
Then I found the best three sections from the strips that were about 9 inches long and cut them out using my miter saw.

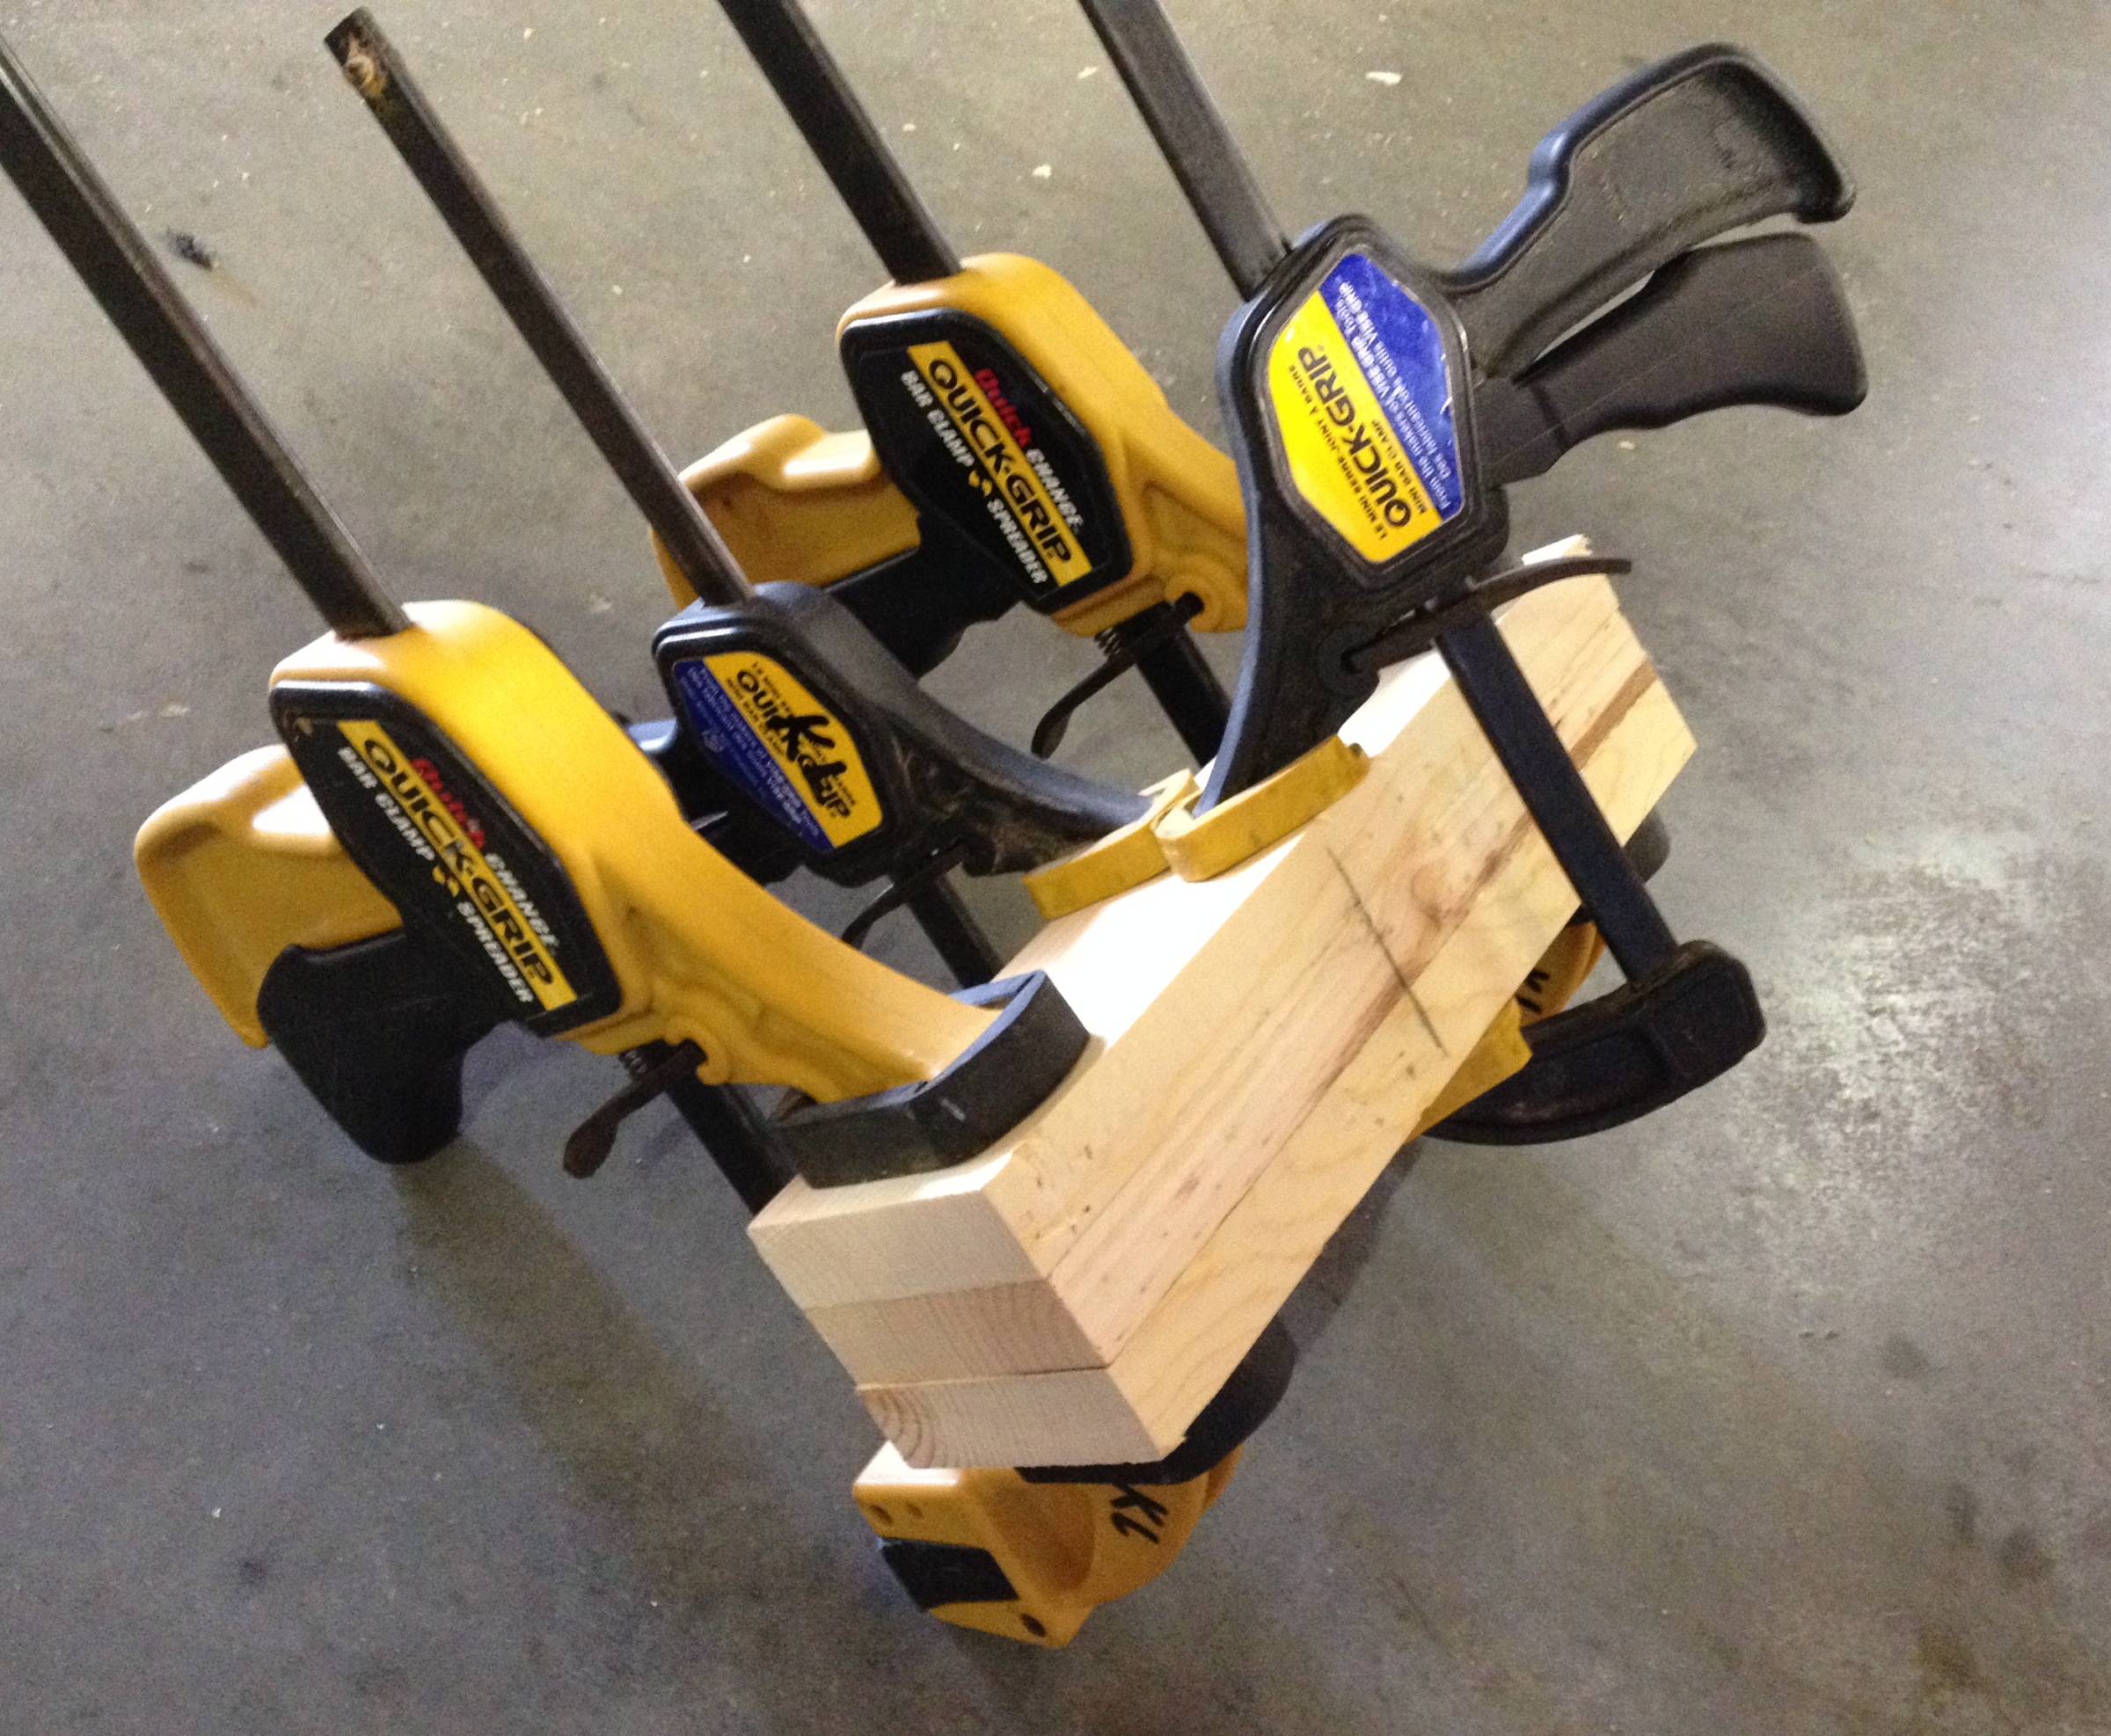
Then I carefully put a thin and even layer of wood glue between them and clamped the three pieces together. If the glue is not done carefully, you could end up with gaps which could come apart later during the shape carving. If that happens, you will just have to get the glue out again and glue the thing back together.

And now here is the block of wood we will use to start our Batmobile carving. I should have taken a photo of this block of wood next to the standard one that comes with the Pinewood Derby car kits to show you how much bigger this block is.
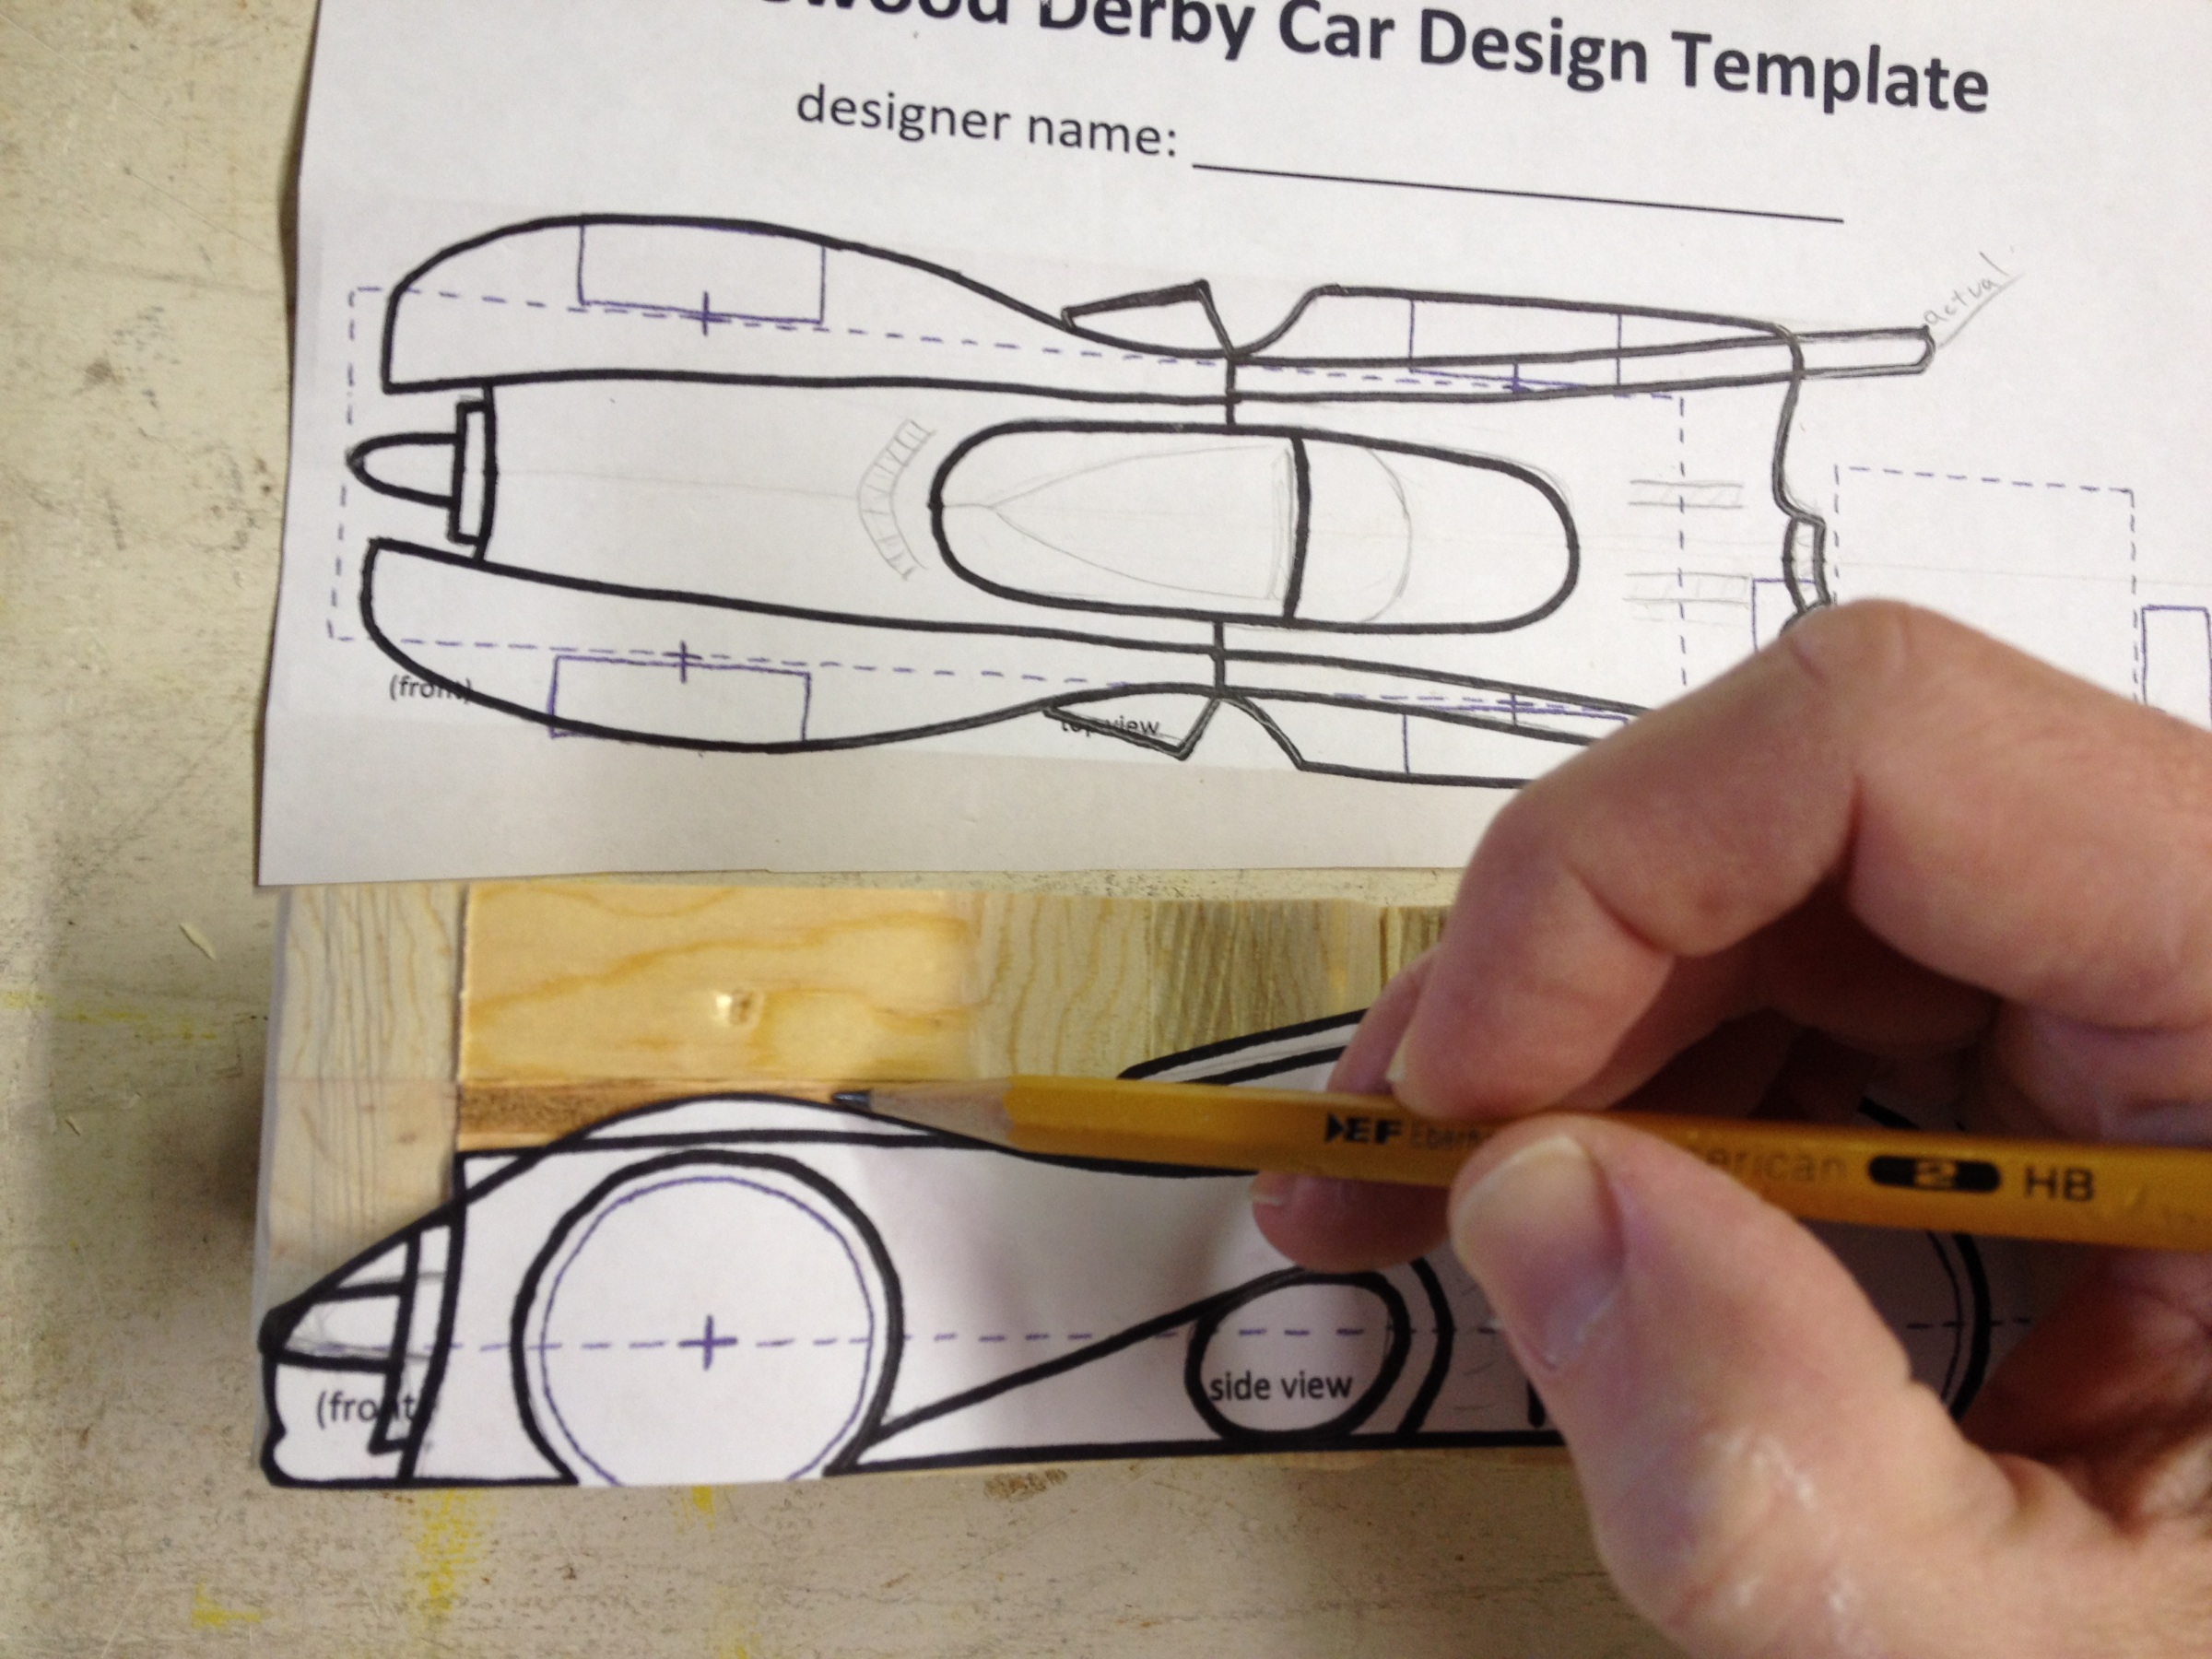
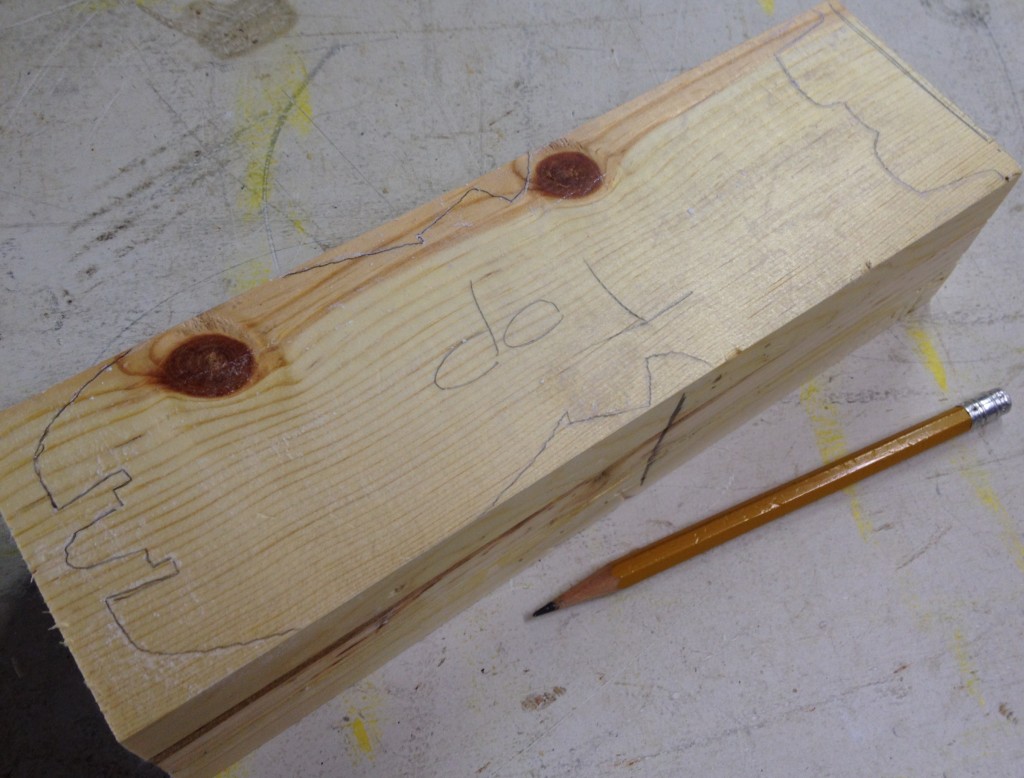
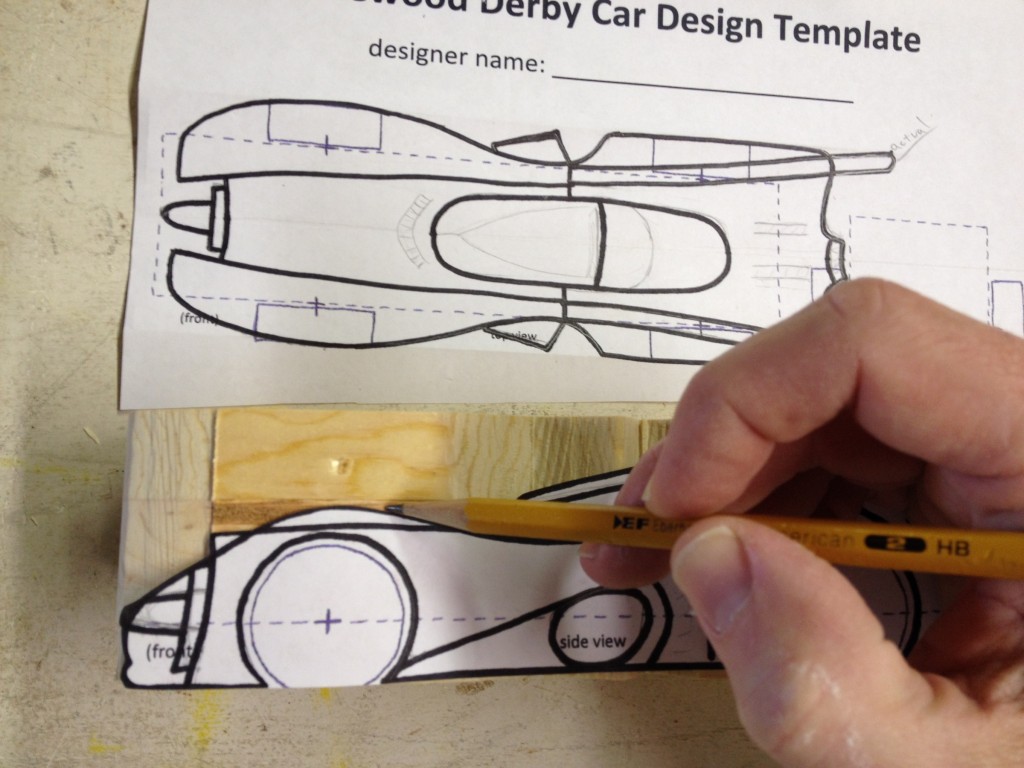
Now we need to transfer the Batmobile silhouette to the block of wood. I scribbled with chalk on the back side of the paper template, but you can also scribble with pencil, which shows up better on this light colored wood. Another option is to cut out the silhouette completely, then trace around it.

After scribbling on the back, just lay it on the block of wood and hold it there …

… while you trace around the entire silhouette with a pencil.

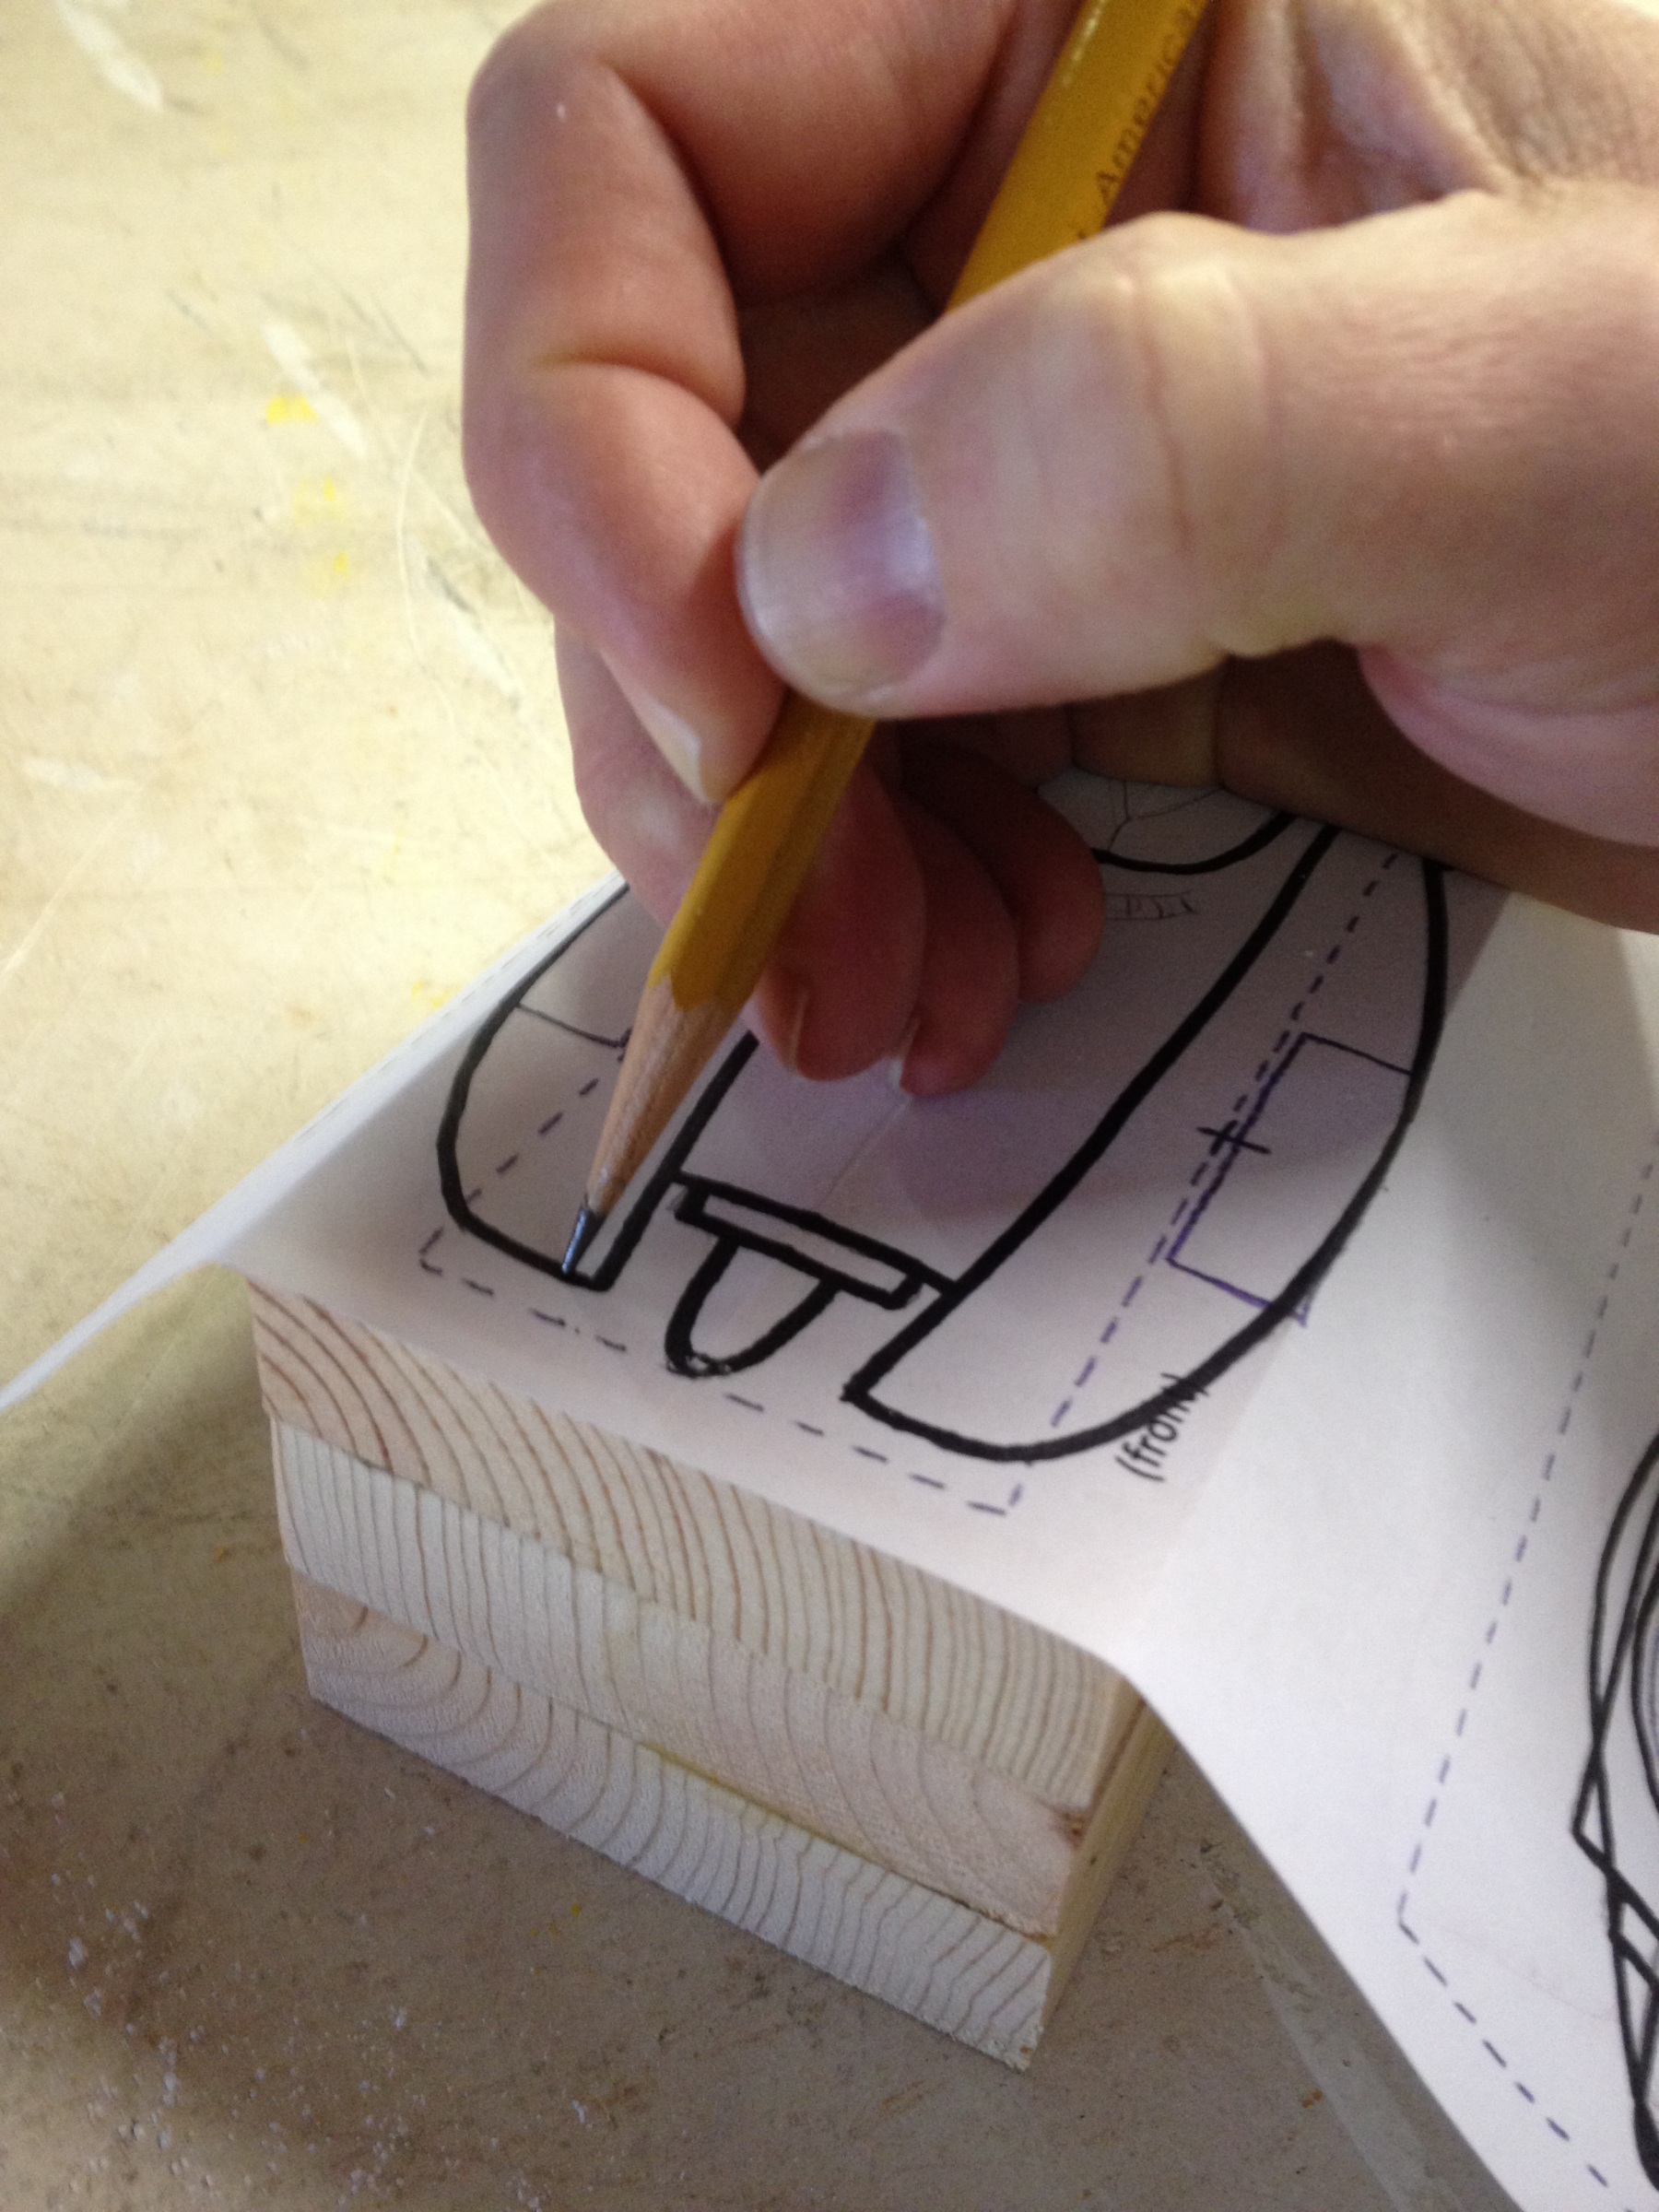
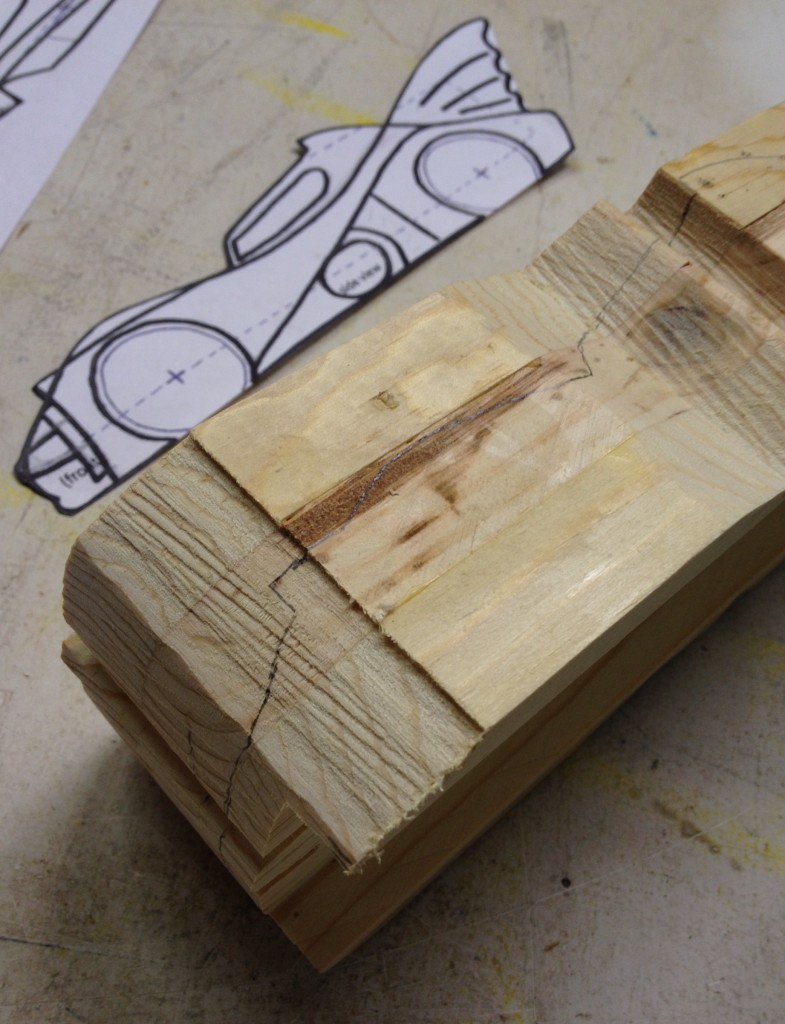
When you are done, you will see the chalk has transferred to the wood. In hindsight, pencil would have been much easier to see on this light colored pine.

Because the chalk was hard to see, I traced around the whole outline with a pencil.
Then I cut out the shape using a band saw. This first band saw cut does not have to be perfect. We will do lots of shaping later, so these band saw cuts can be rough. As a matter of fact, I did not cut all the way to the lines with this initial band saw cut and that left me lots of leeway and flexibility later when I was doing my shaping work.
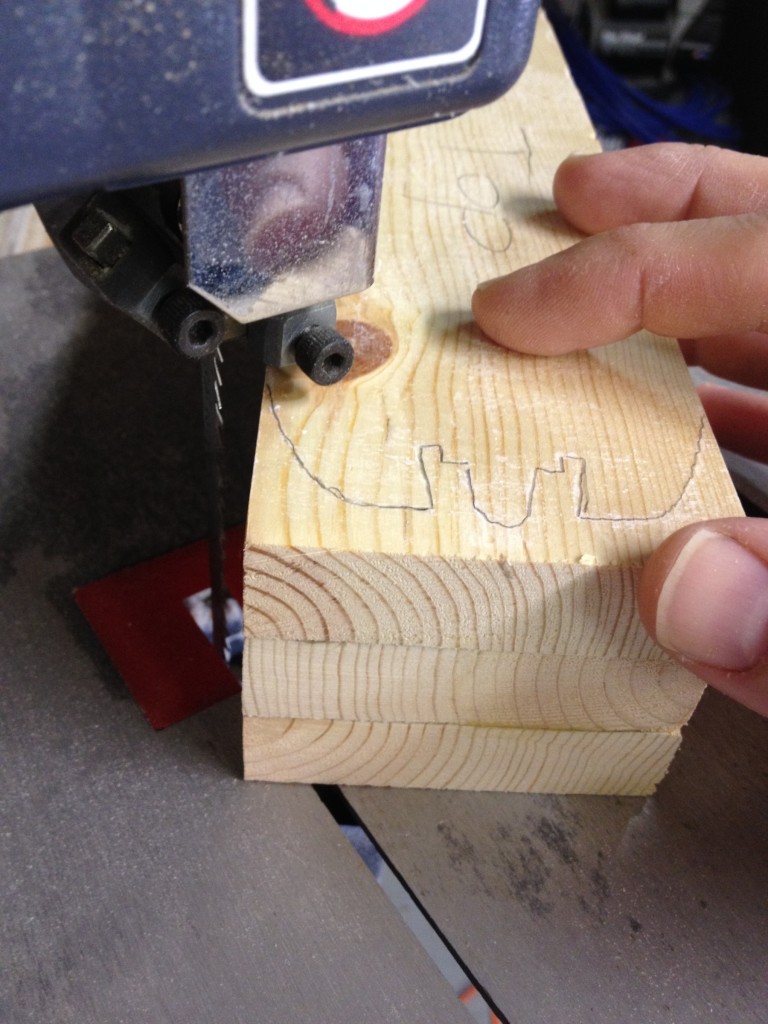
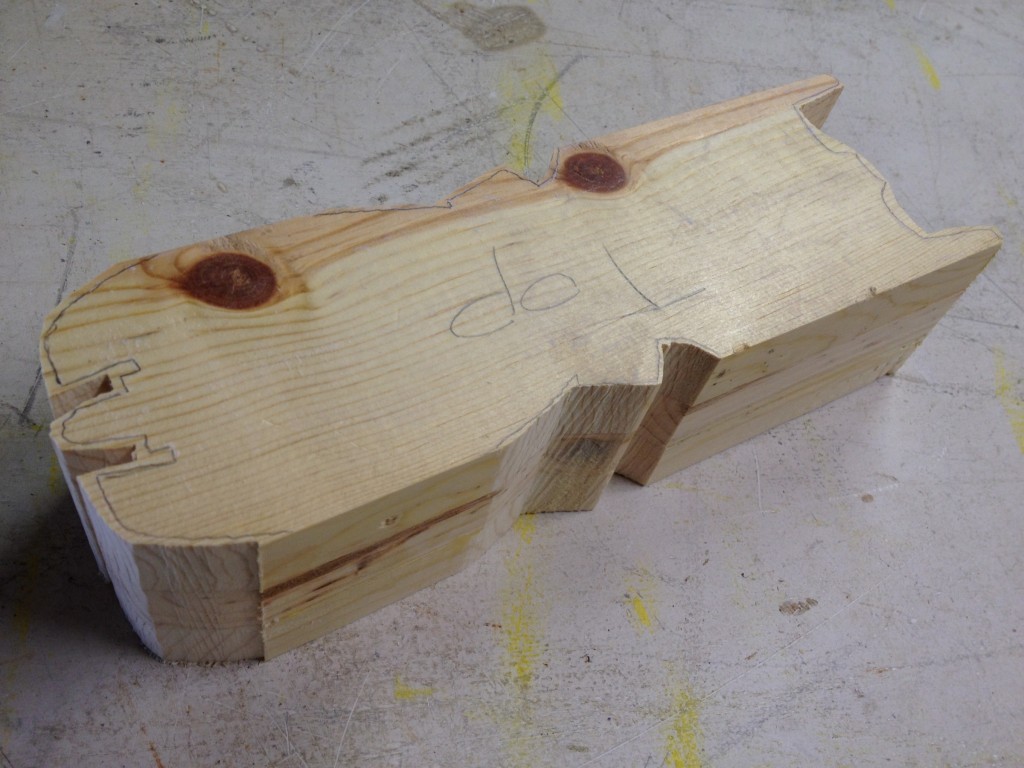
Here is the first rough cut of the silhouette from the top. You can see how I did not cut all the way to the lines.
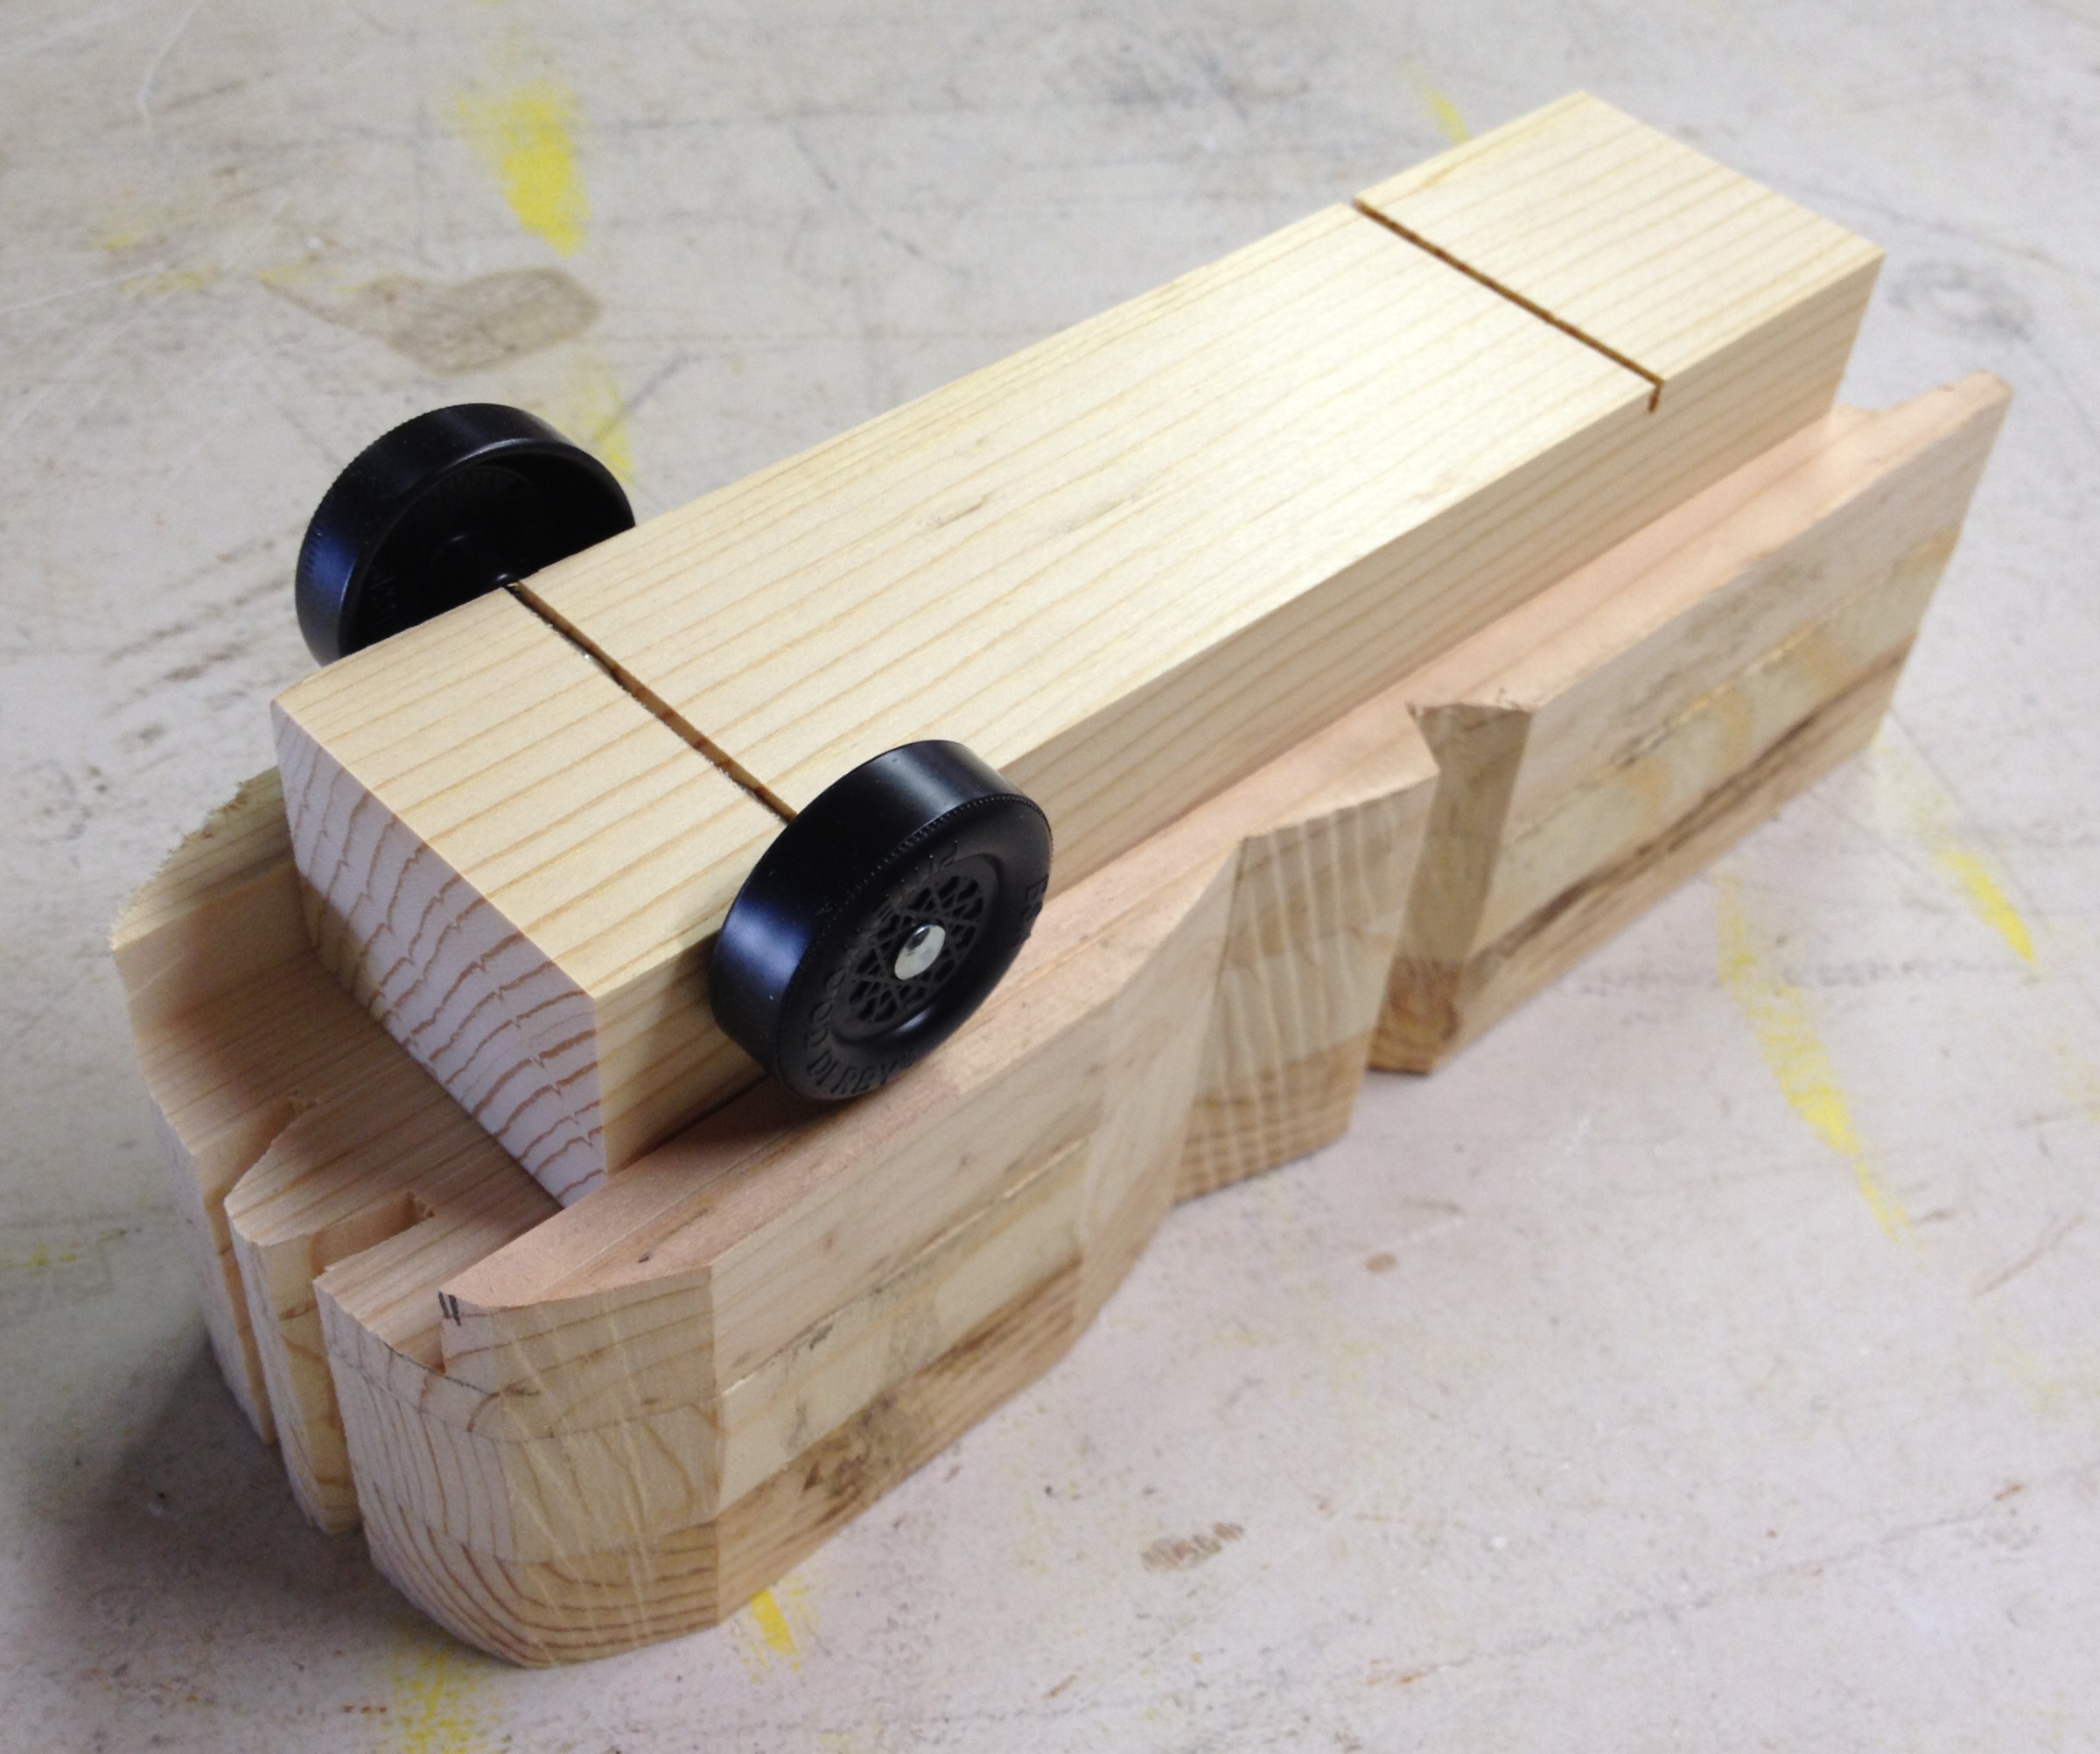
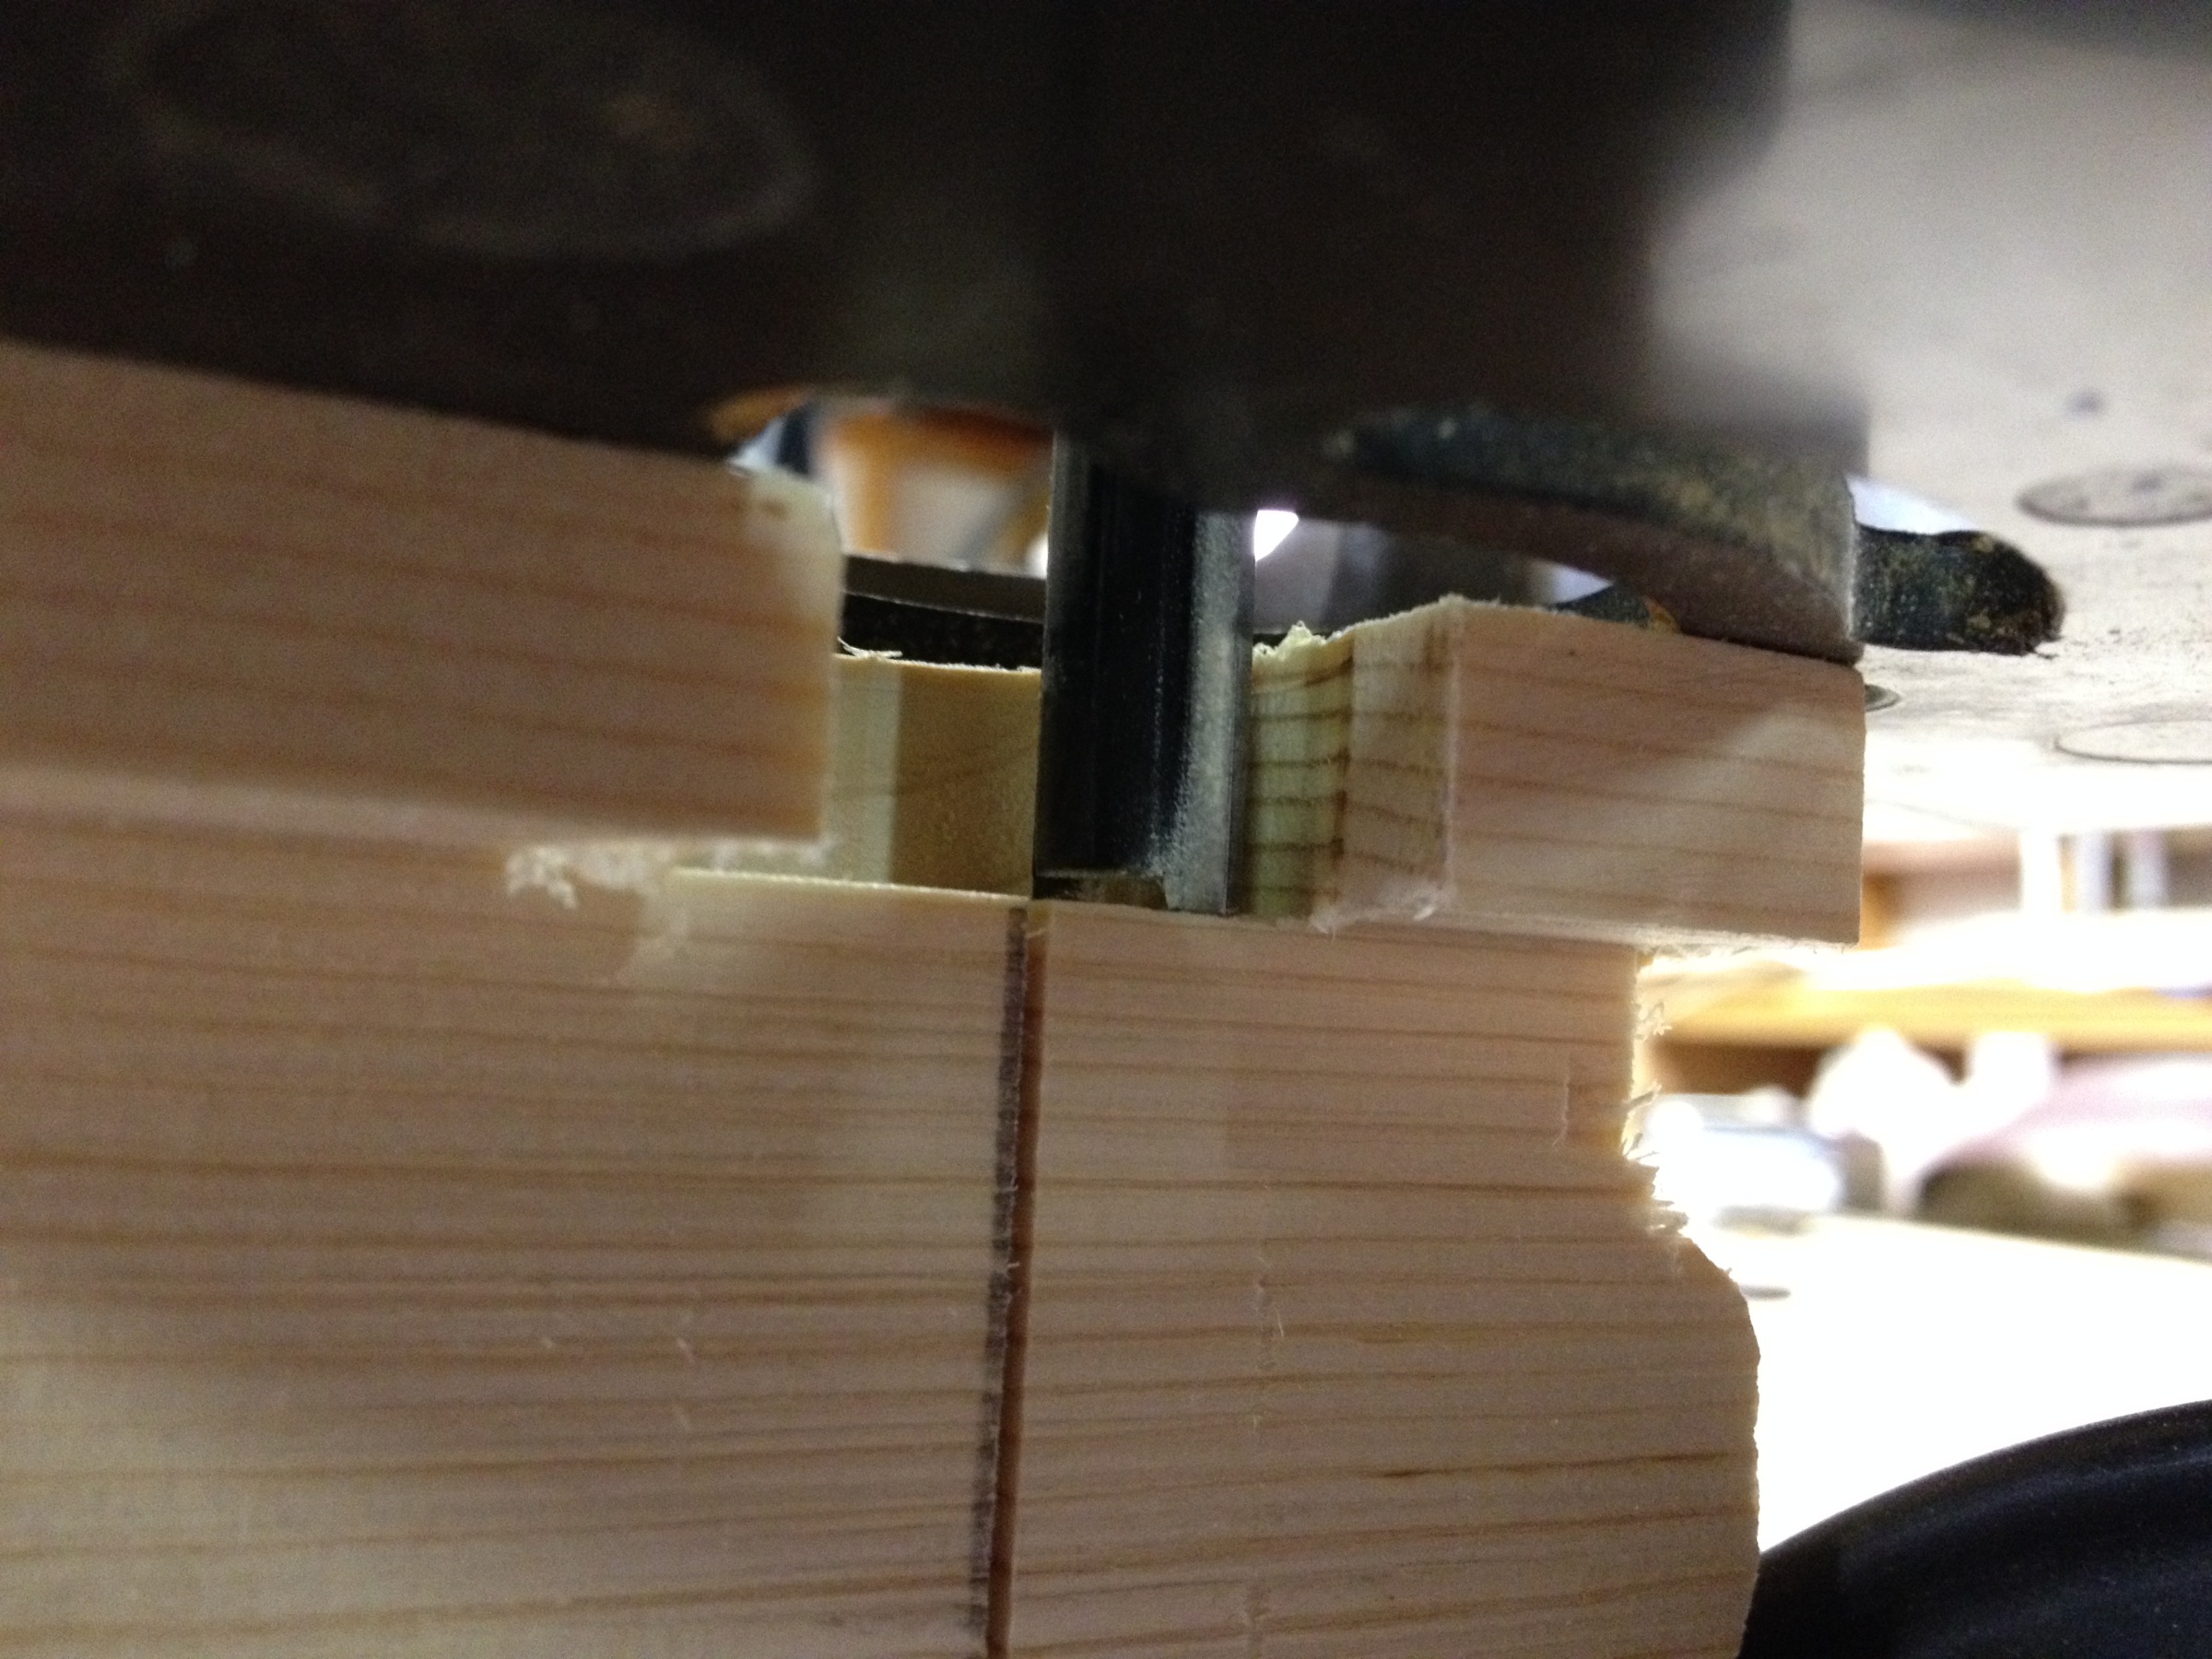
Now here is another thing that I did wrong. I wish I had done this before cutting the rough silhouette. I used many many swipes with my table saw to make a slot underneath the car for the race track. The wheels stick down beneath the bottom of the car about 1/2 inch, so I made this slot about 3/8ths deep. So the wheels will hold the hanging down parts up off the track floor about 1/8th of an inch. This car design hangs down way low which makes it look all that much cooler.
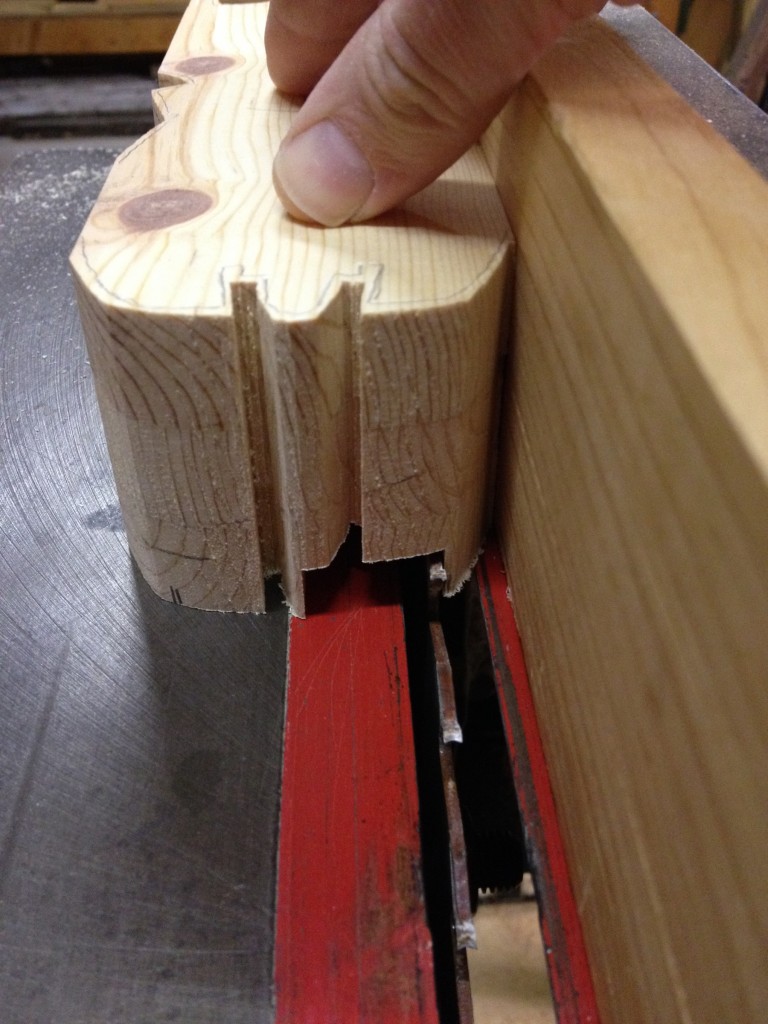
How wide did I make this slot? The exact width of the normal standard Pinewood Derby car which is 1.75 inches.

Just to verify the width was correct, I set the standard Pinewood Derby car block of wood in the slot and it fit perfectly.

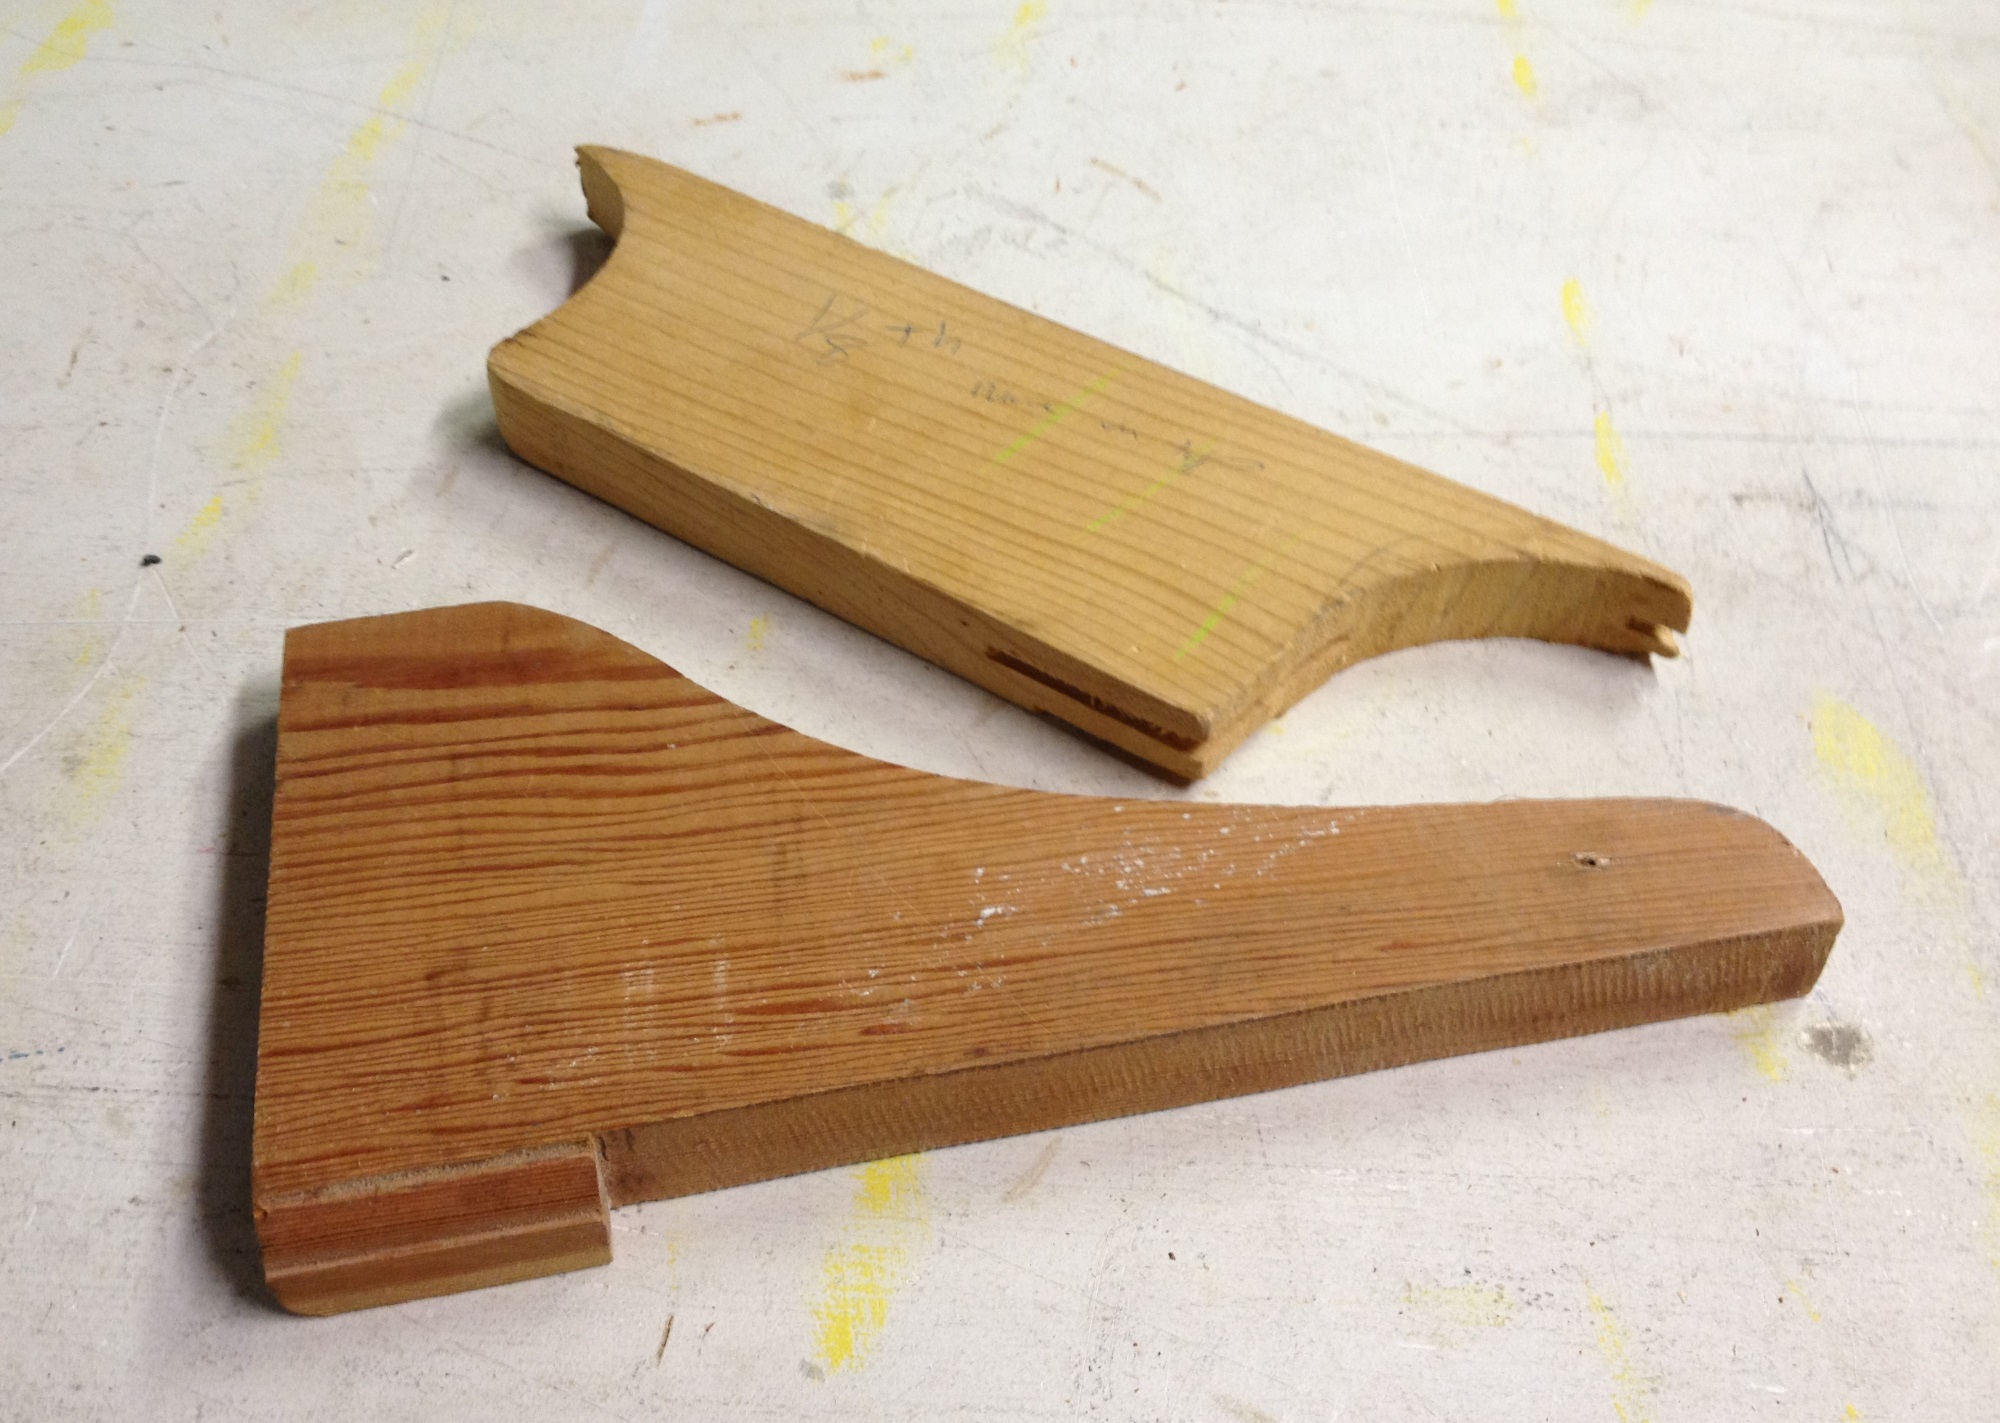
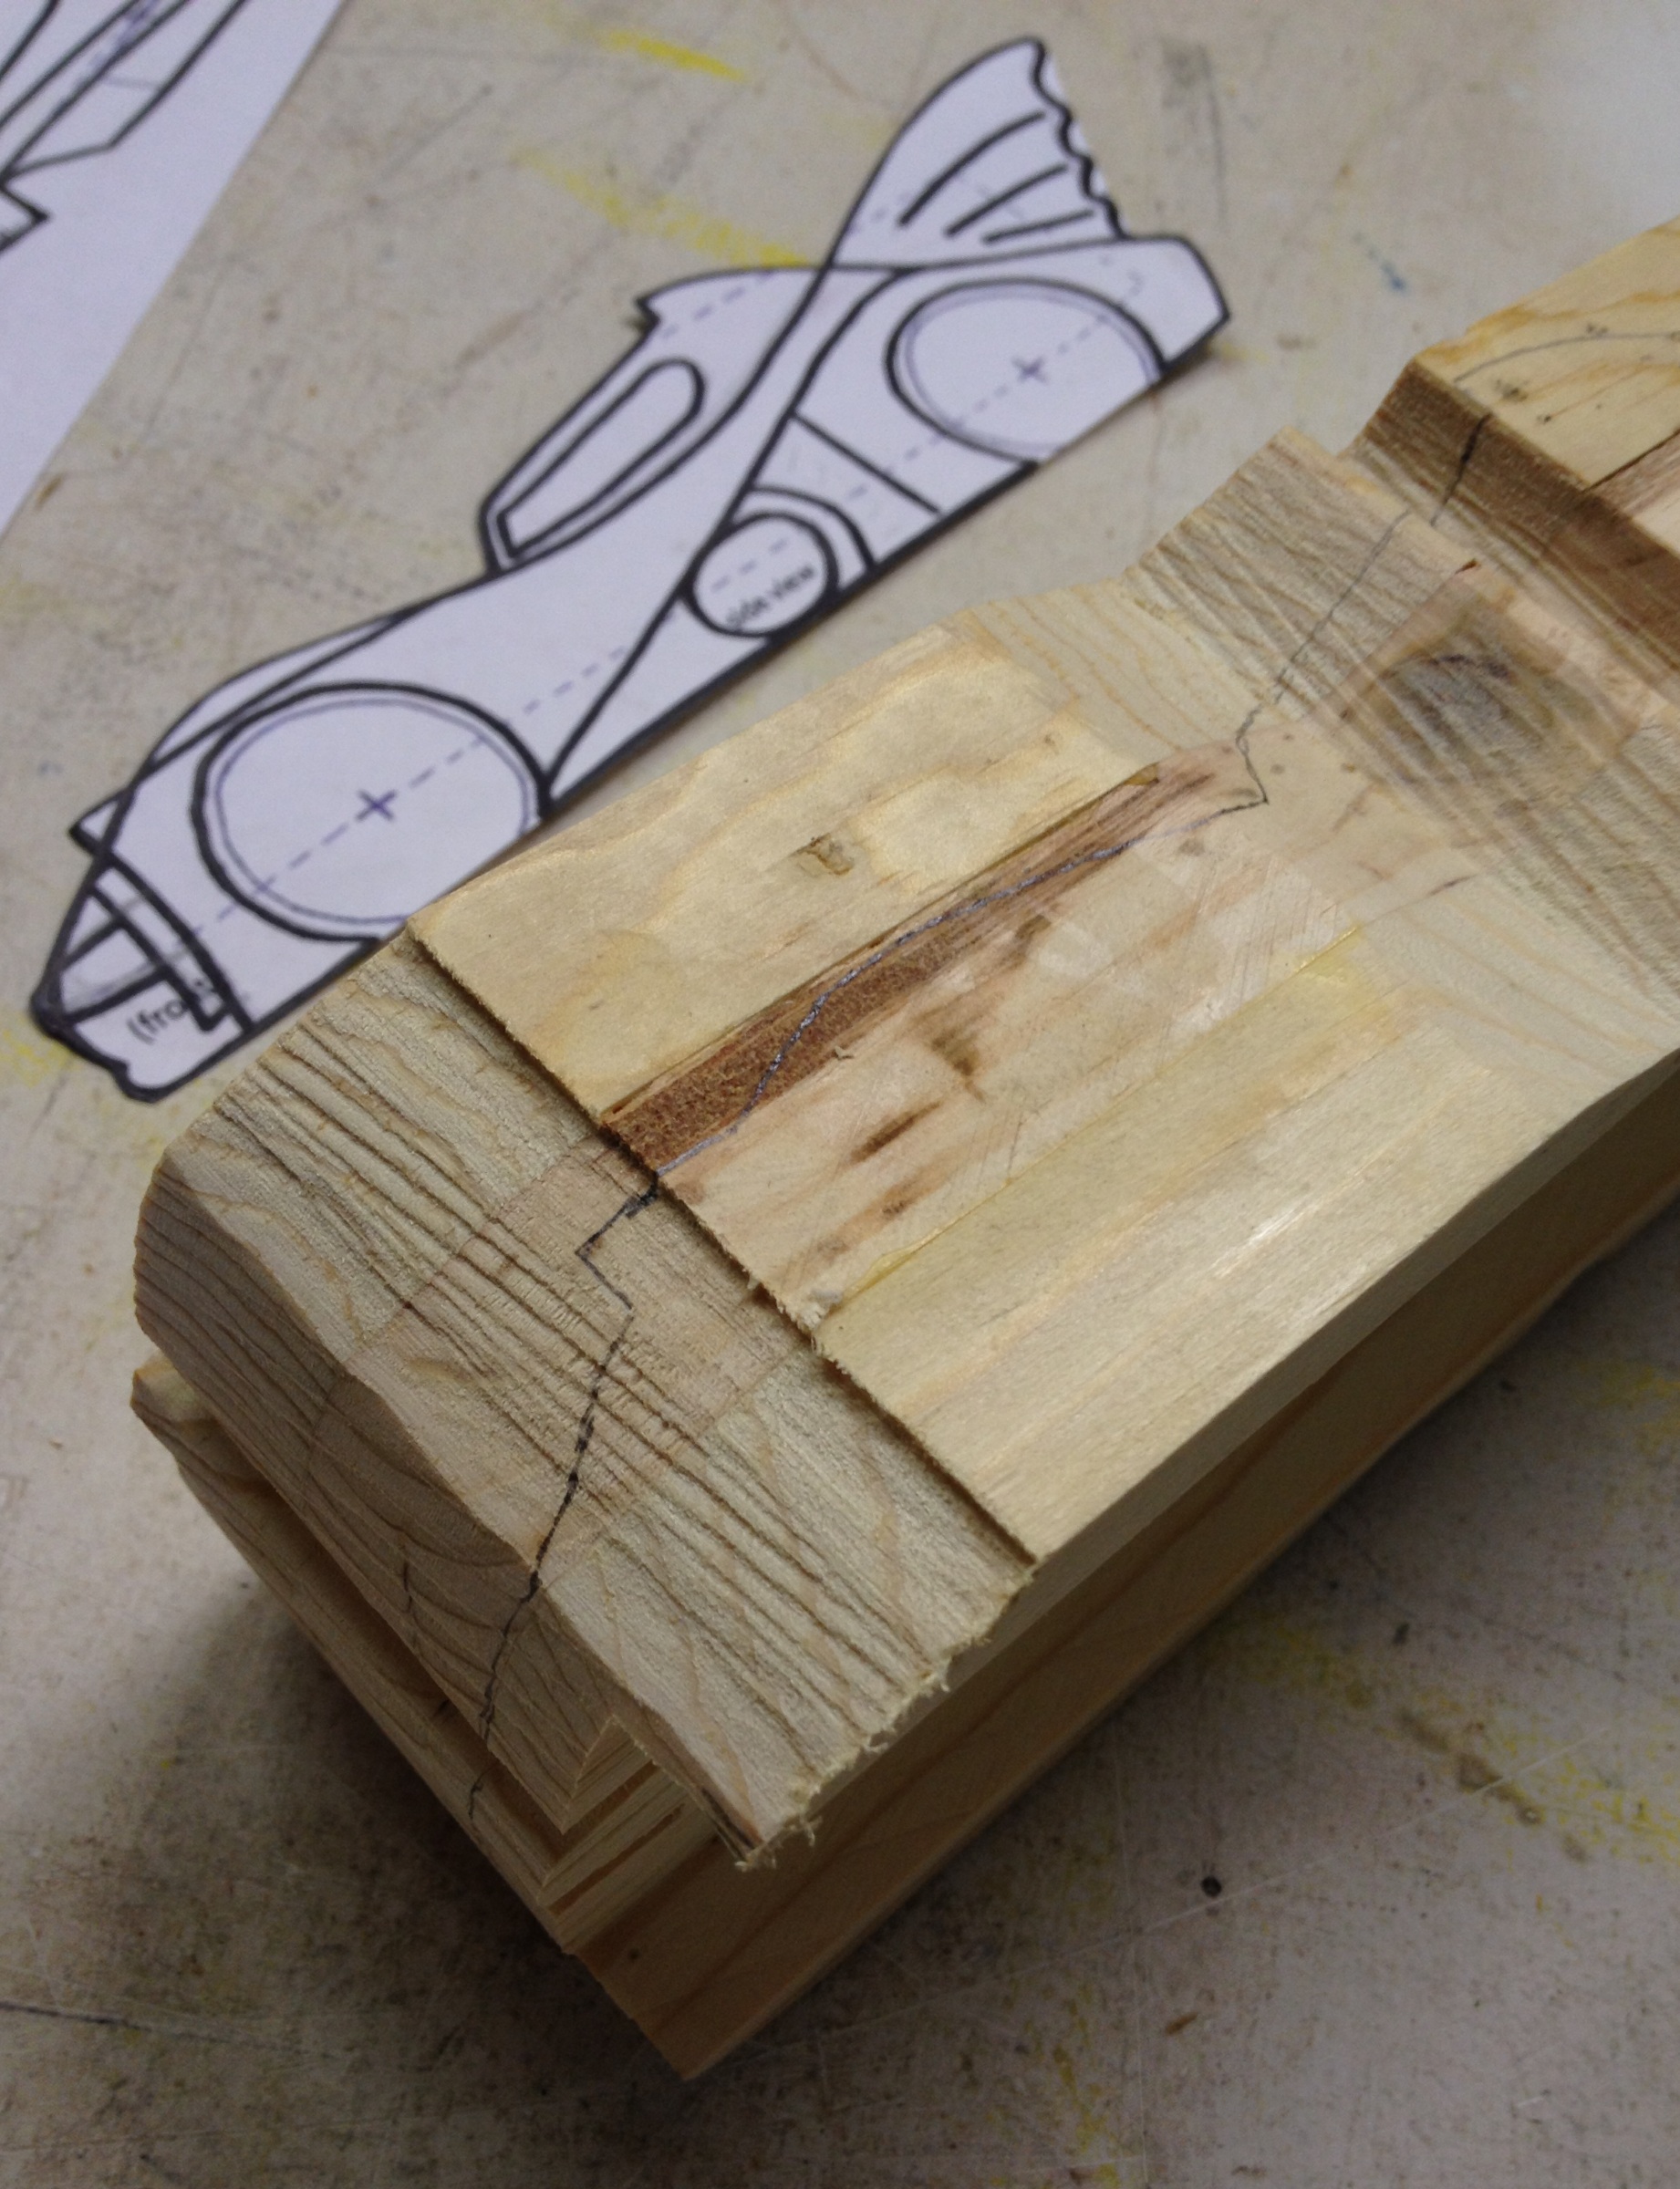
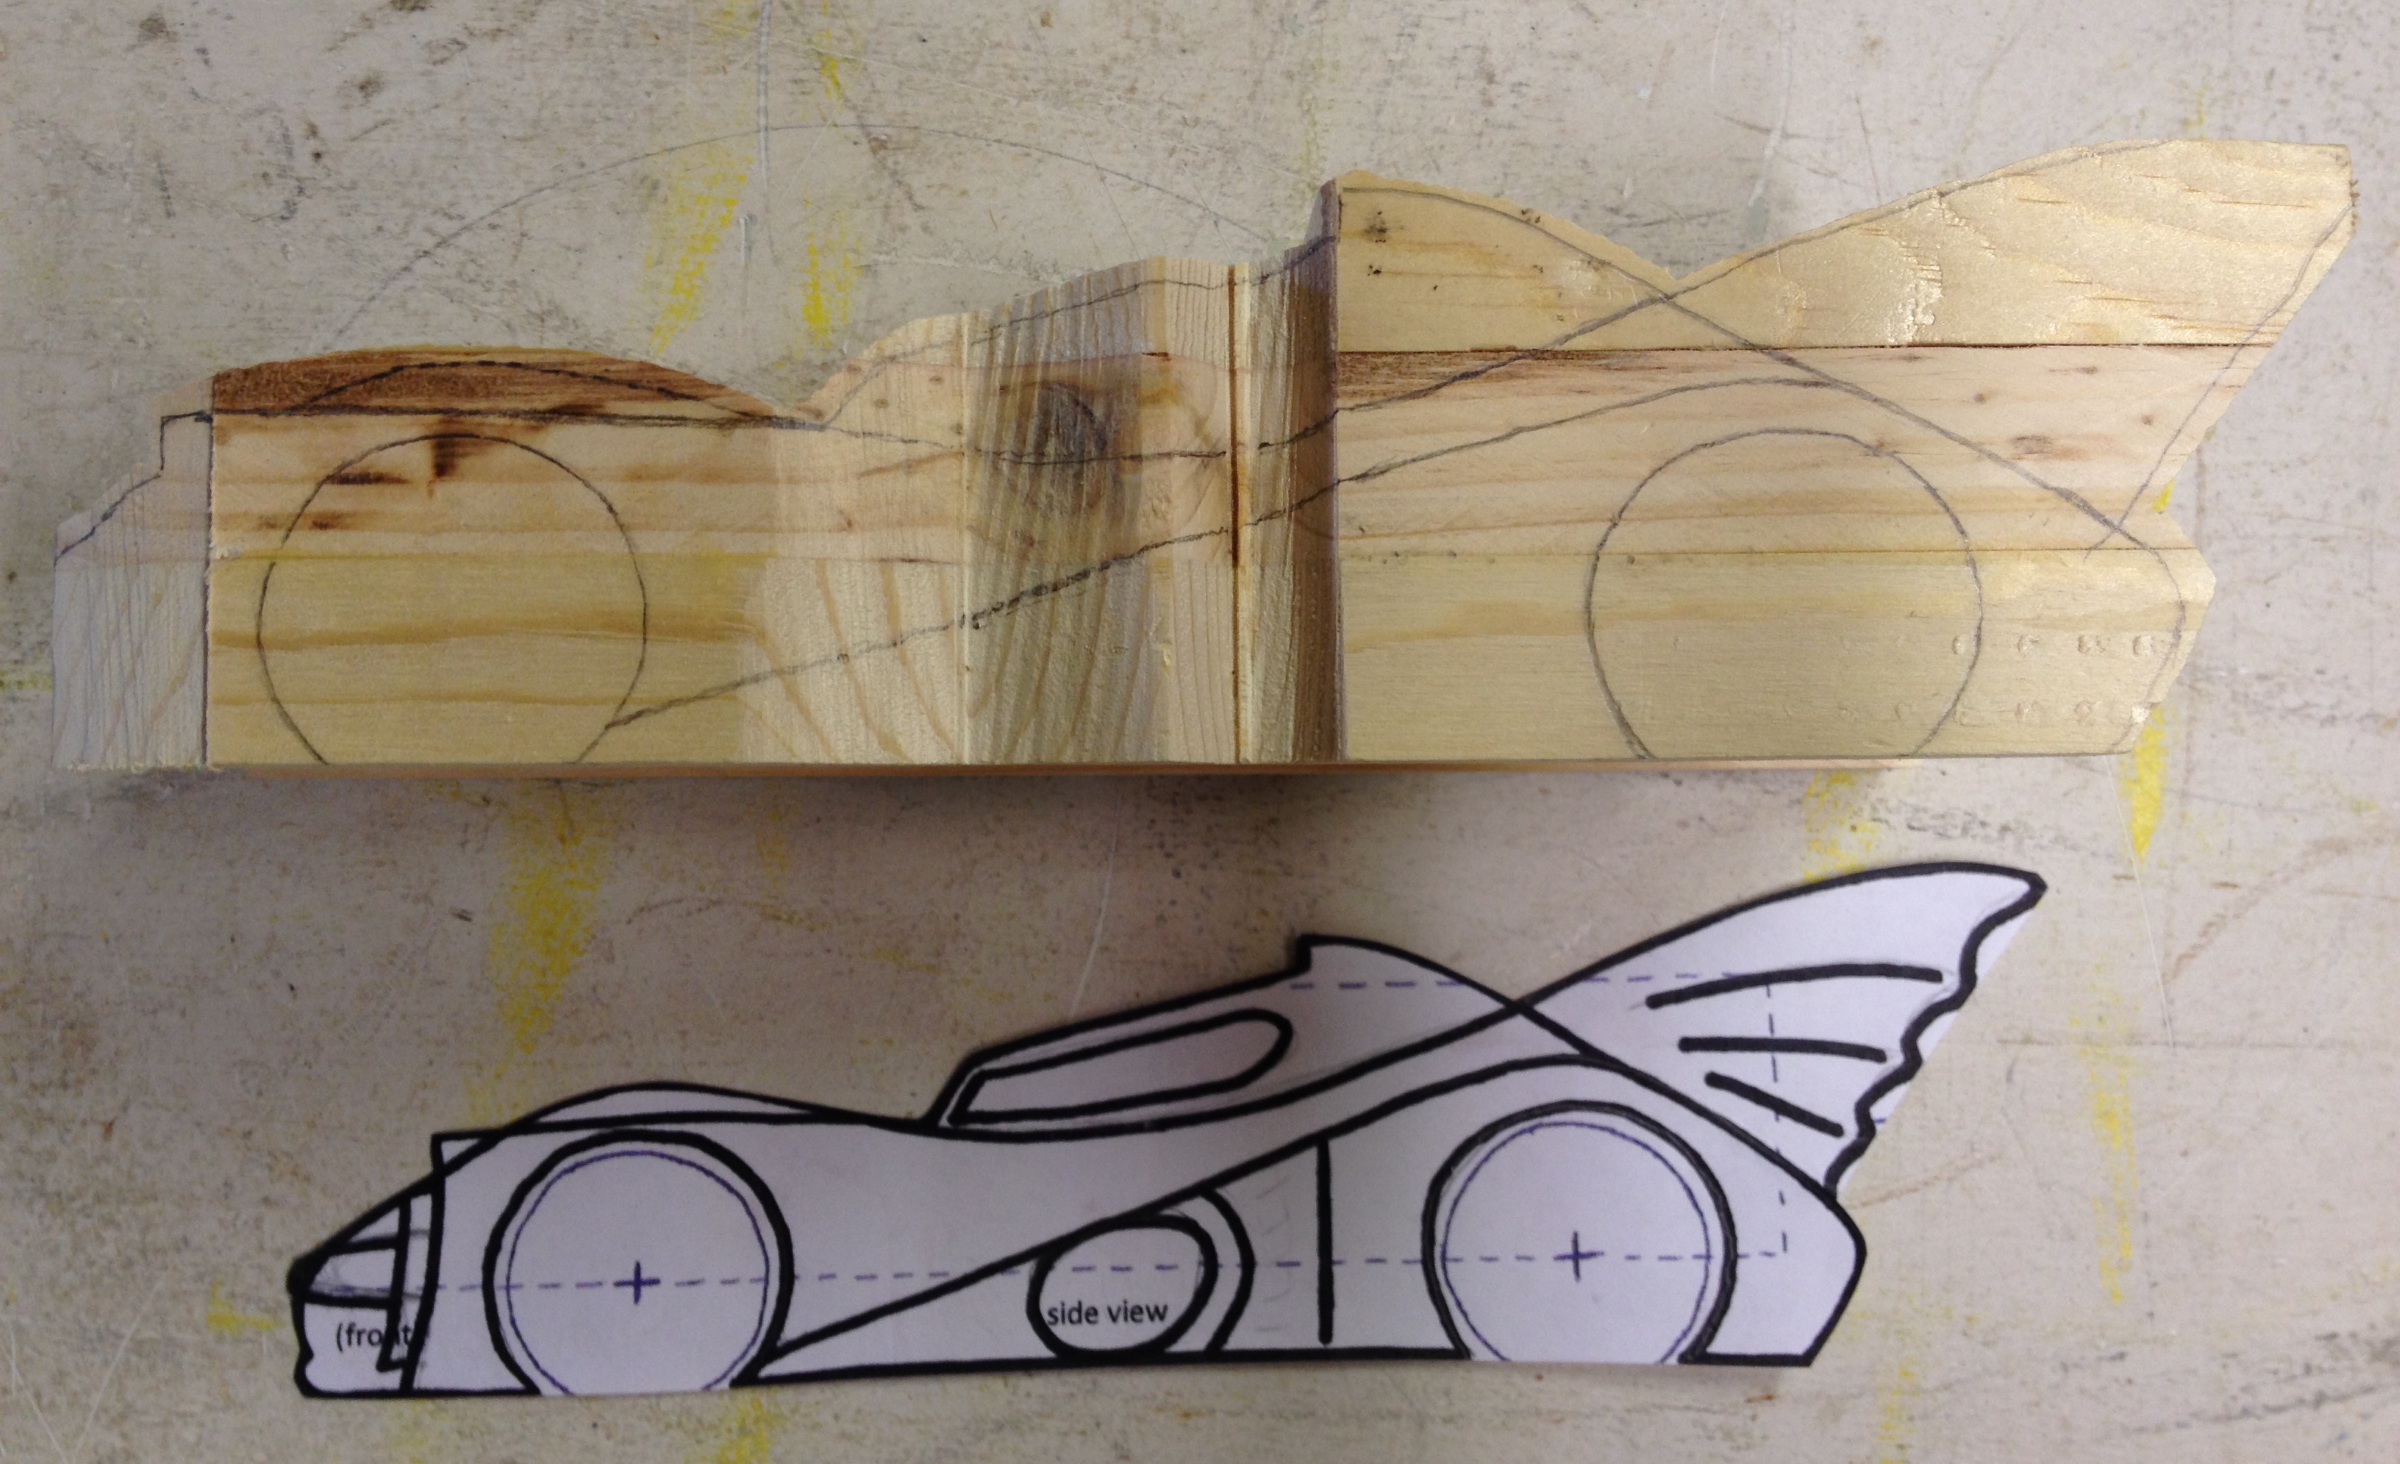
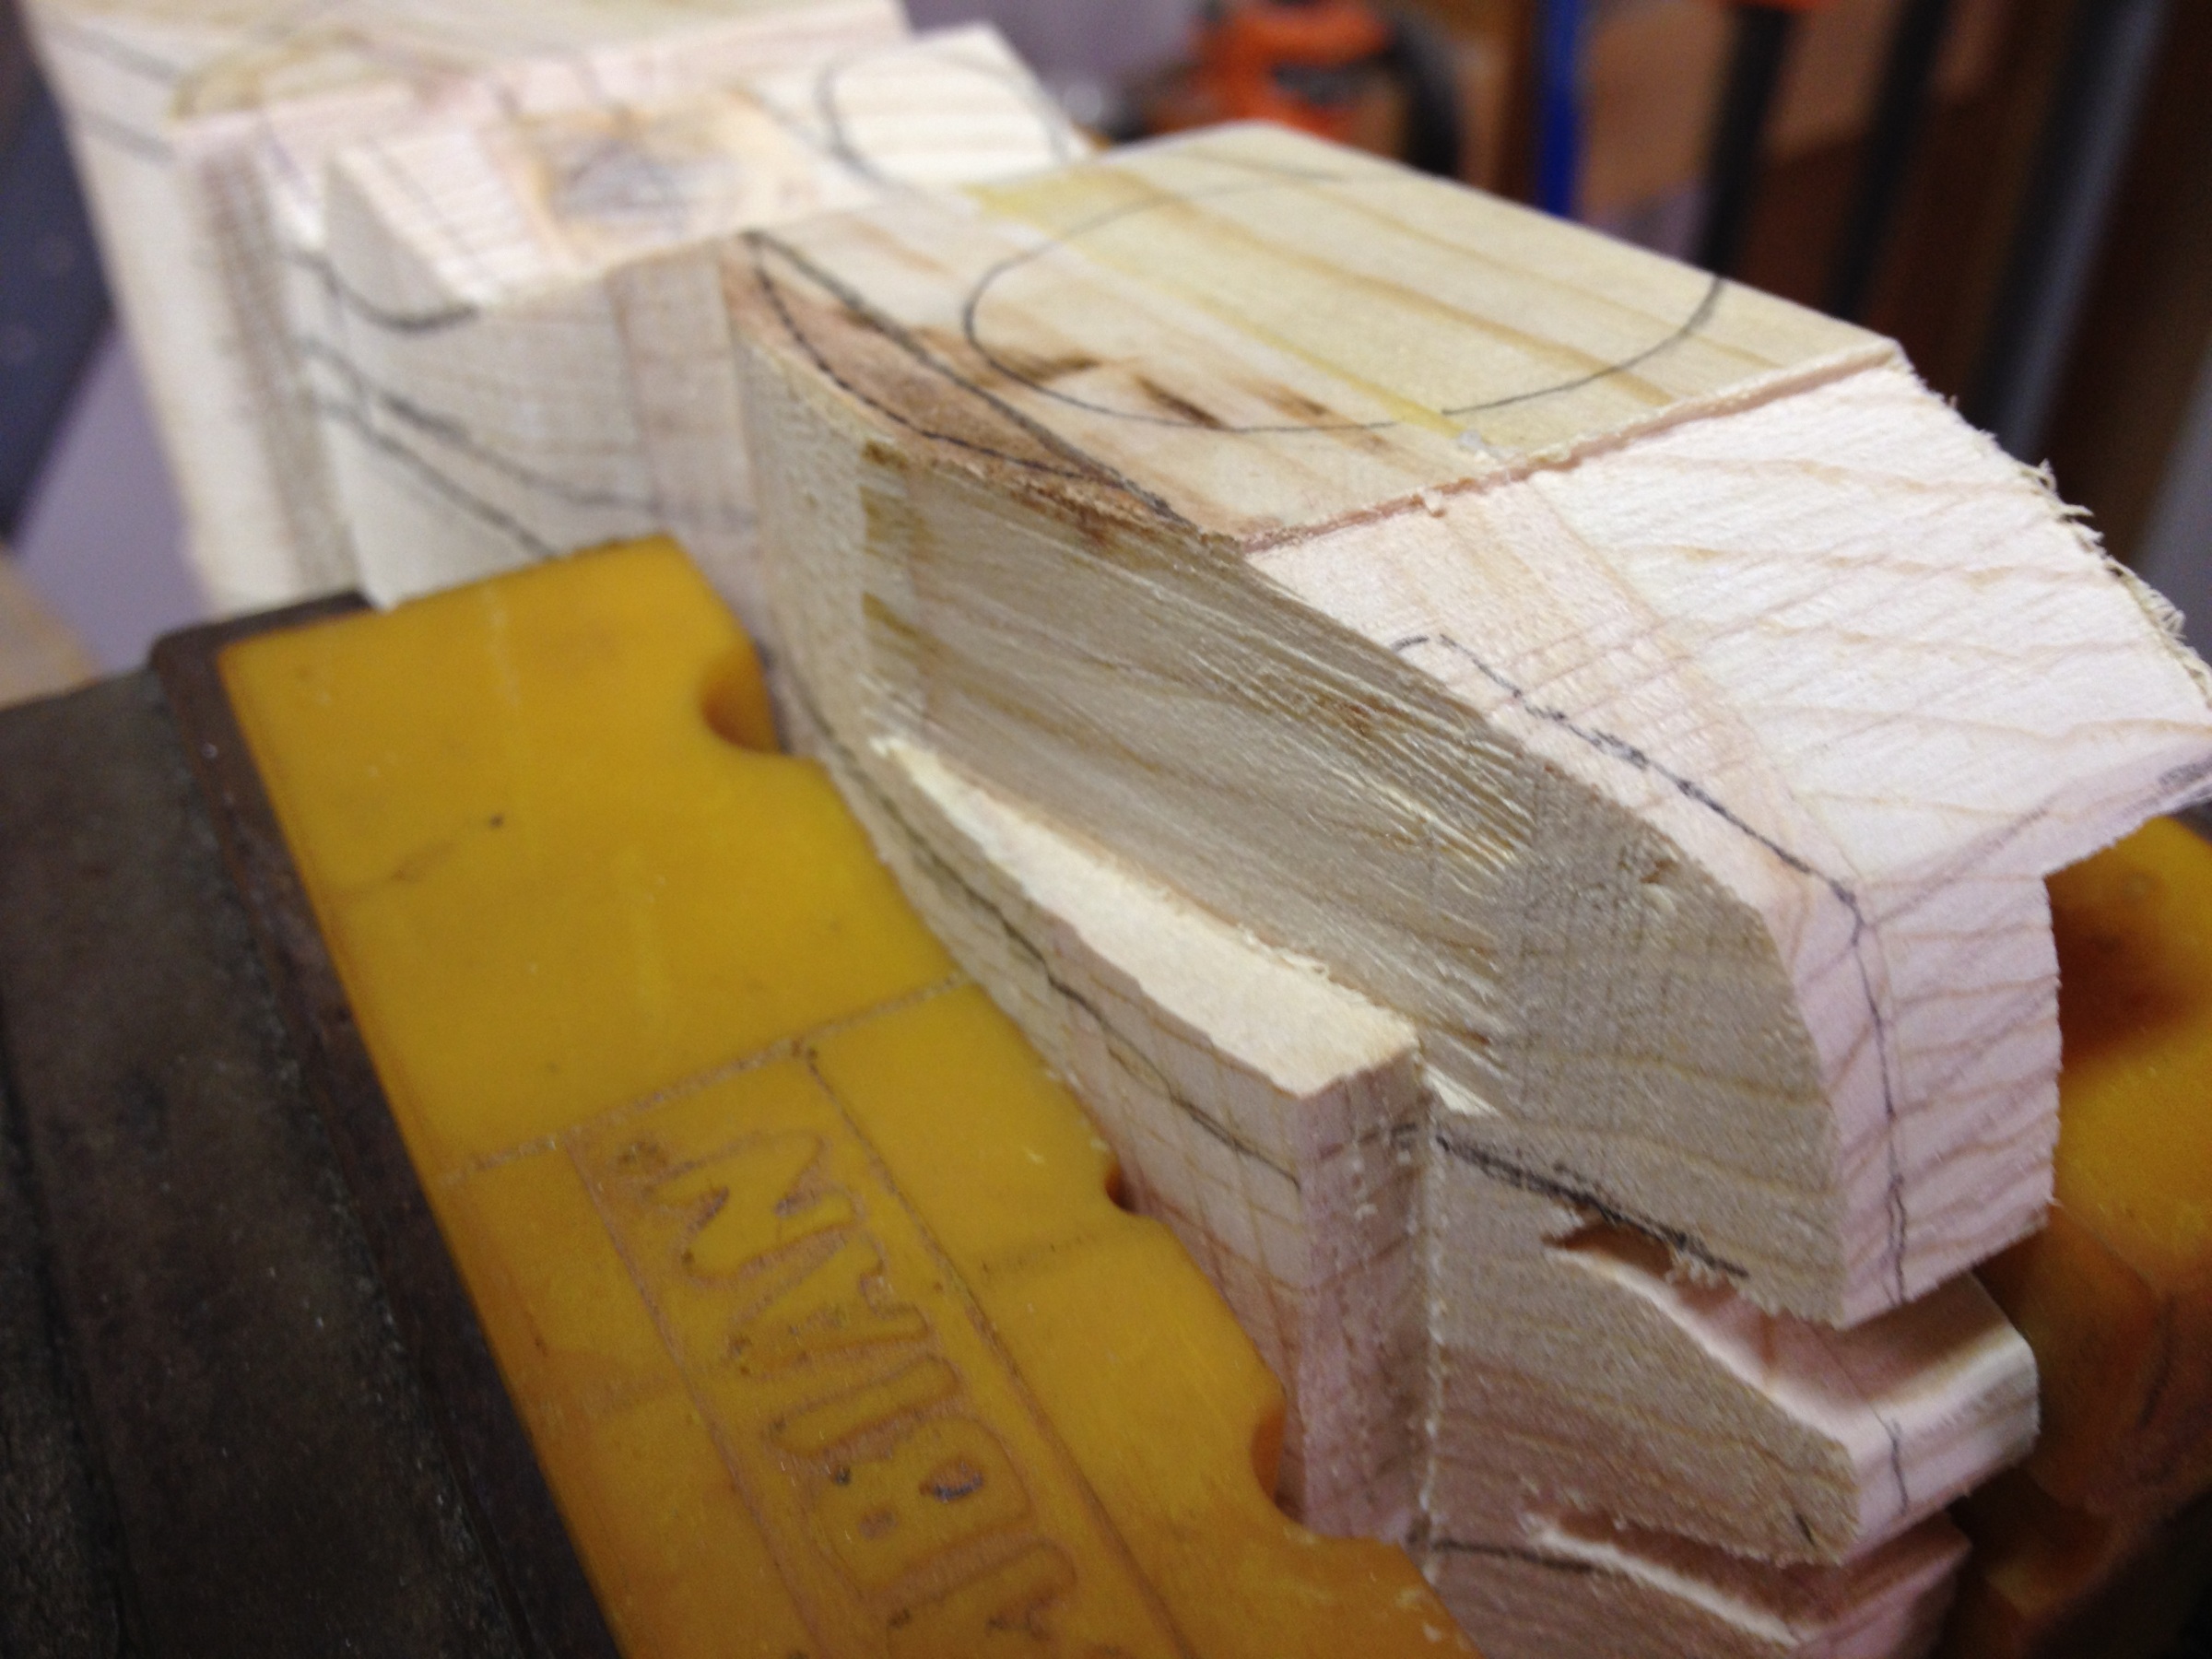
Now that the silhouette is done from above, It’s time to cut out the silhouette from the side view. Since the car’s side panel is no longer just a flat piece of wood, I cut out the side view silhouette and laid it down on the side of the block of wood …
… and I traced the silhouette down into the hills and valleys of the block of wood.
You have to sort of project the lines with your imagination a little bit sometimes.
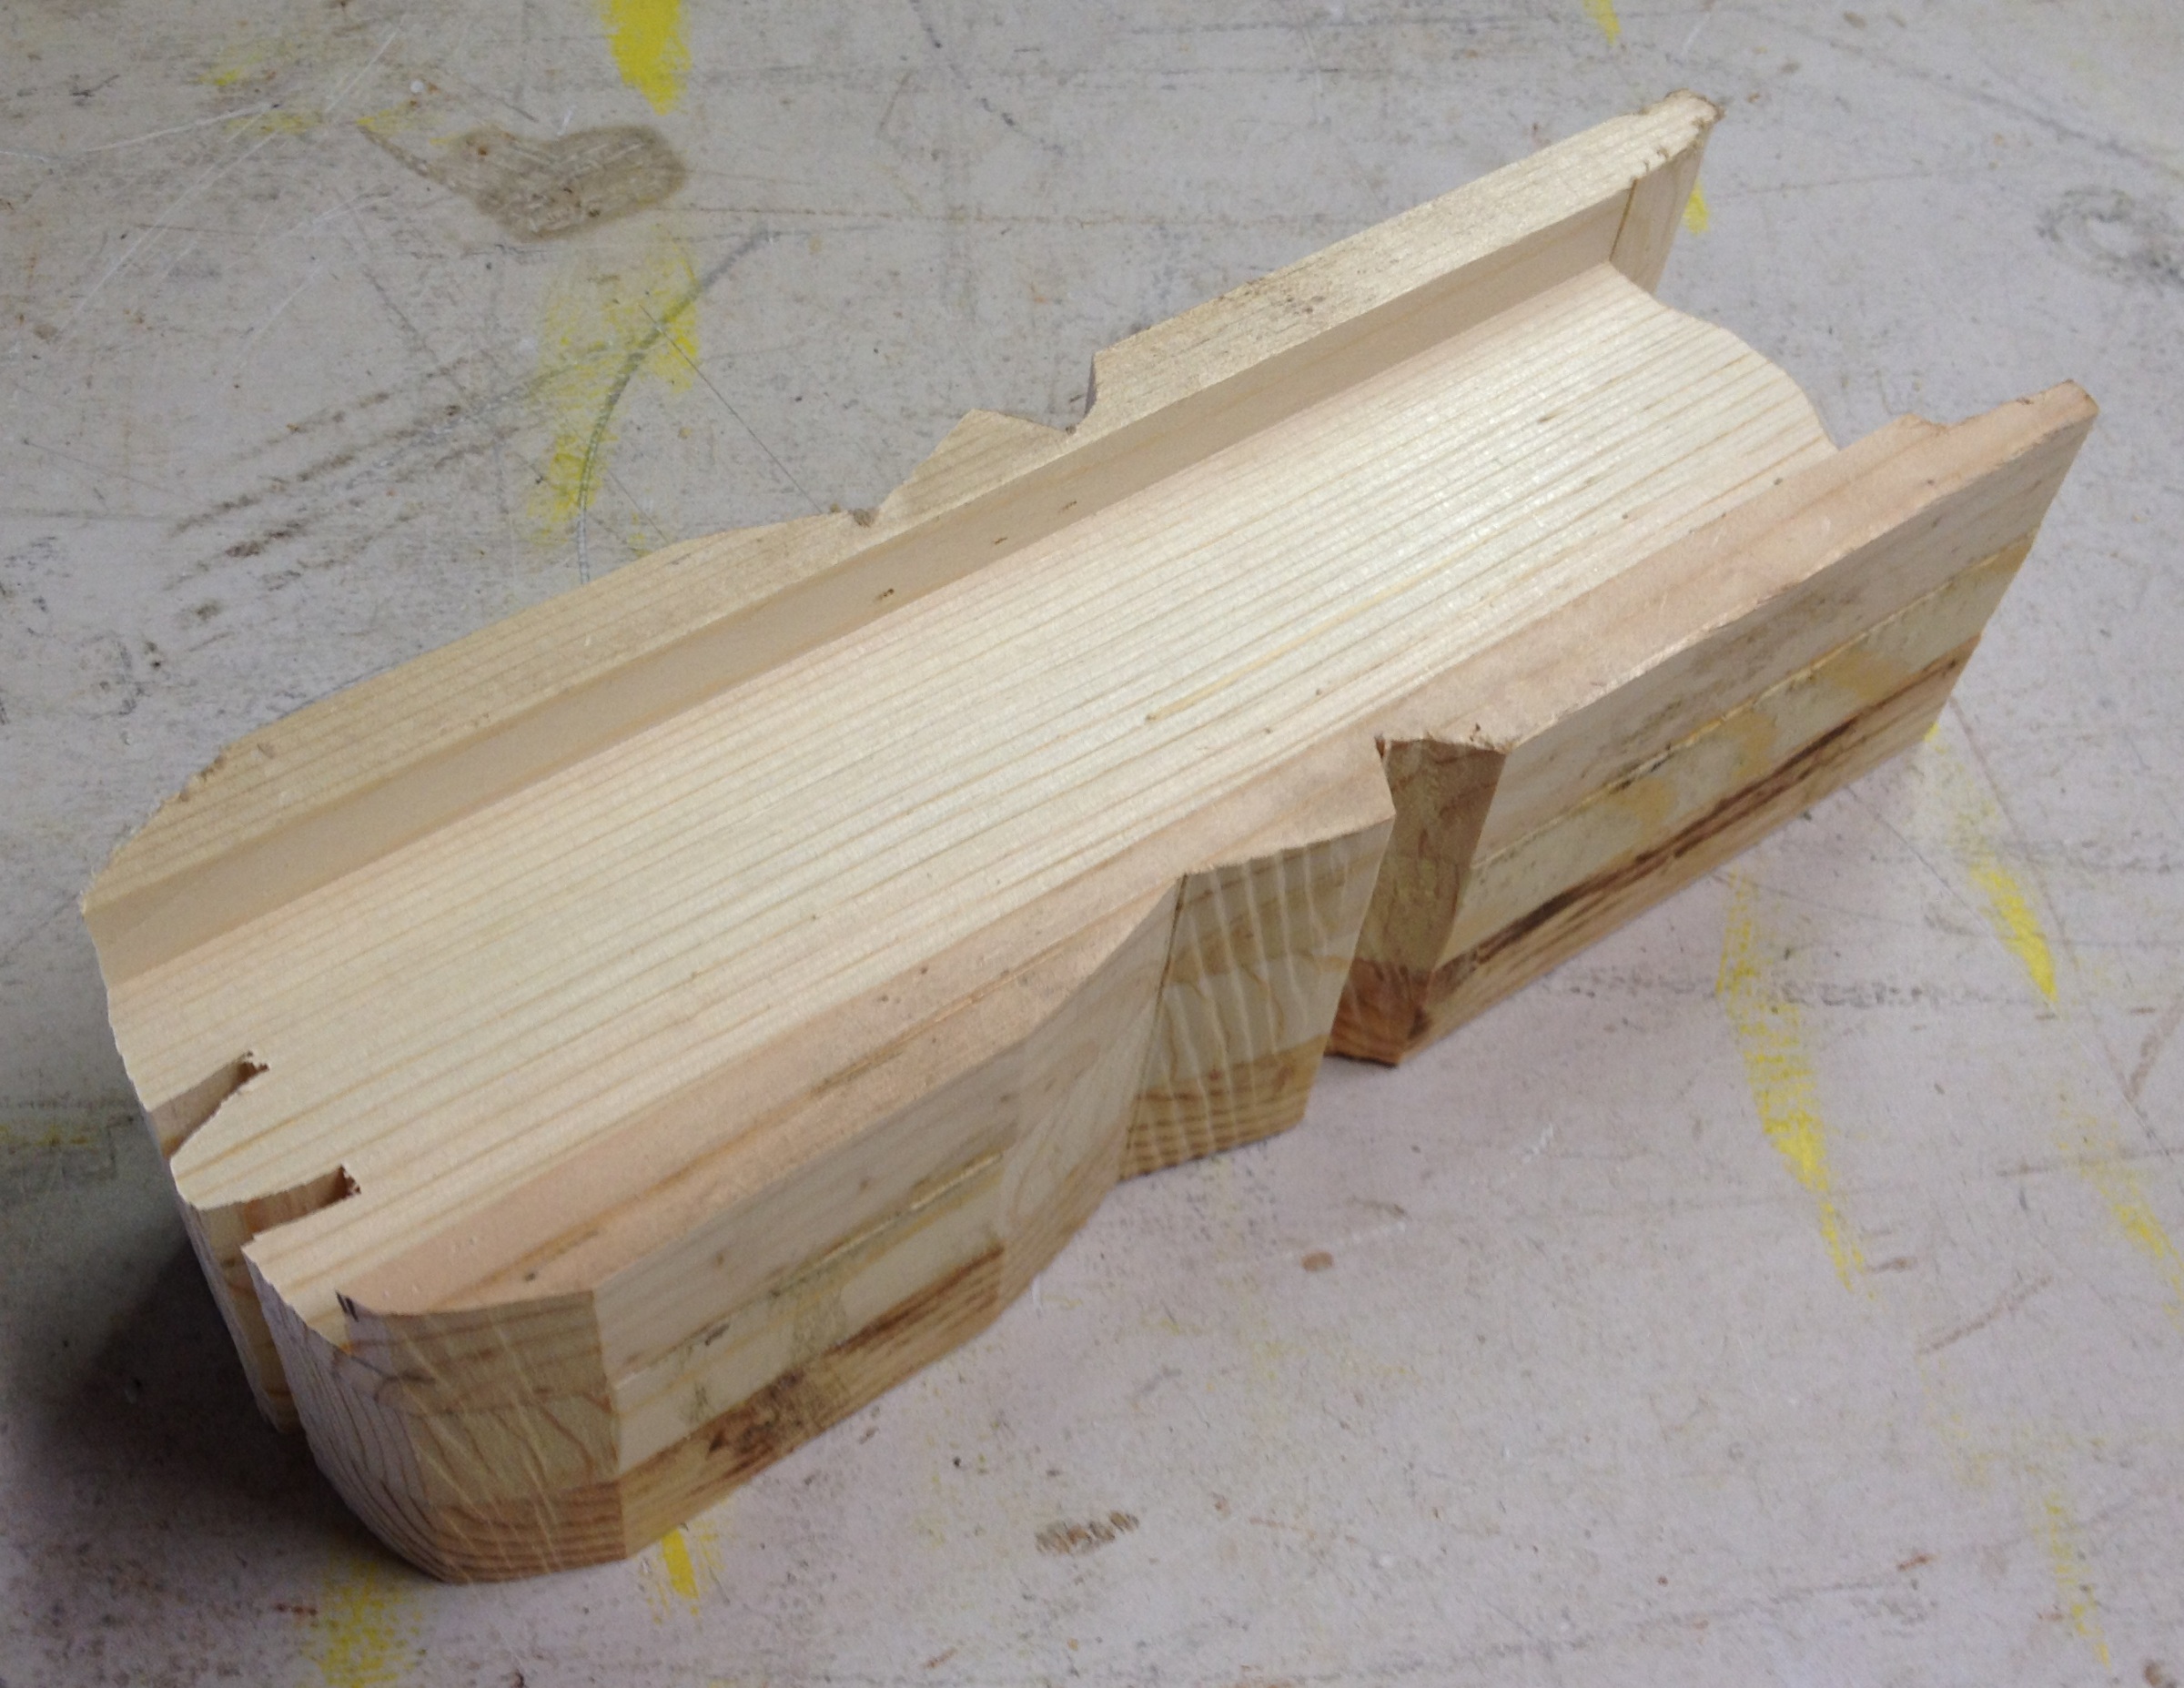
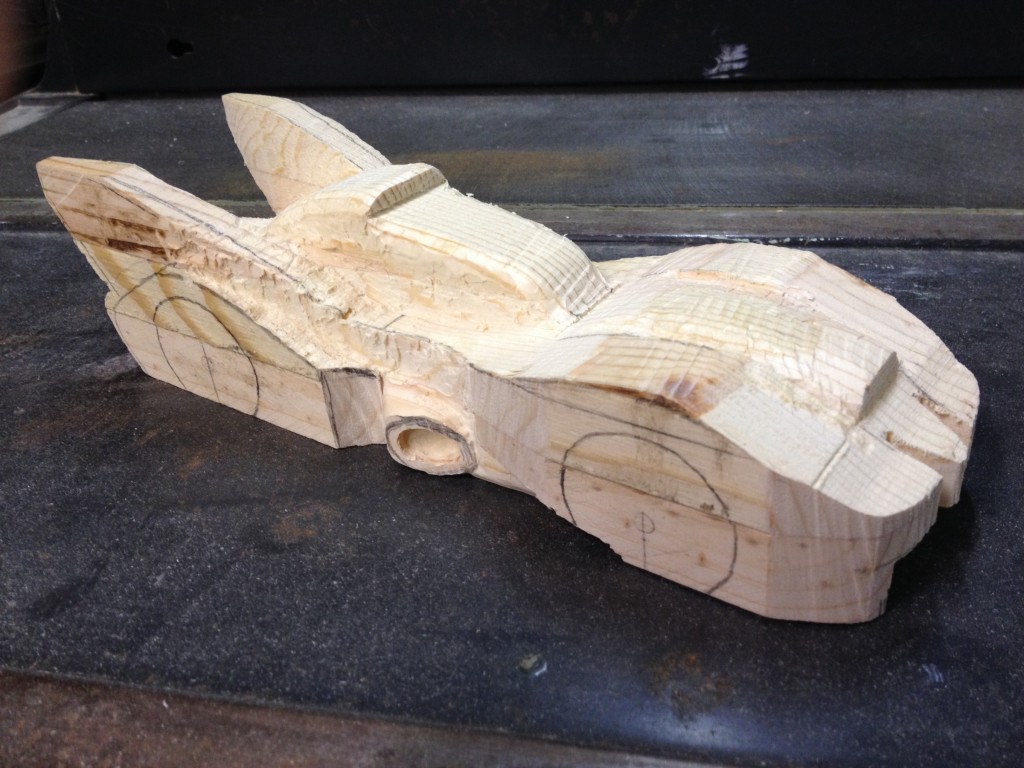
After cutting the side silhouette using the band saw, the block of wood looks something like this. It’s actually starting to take shape a little bit.
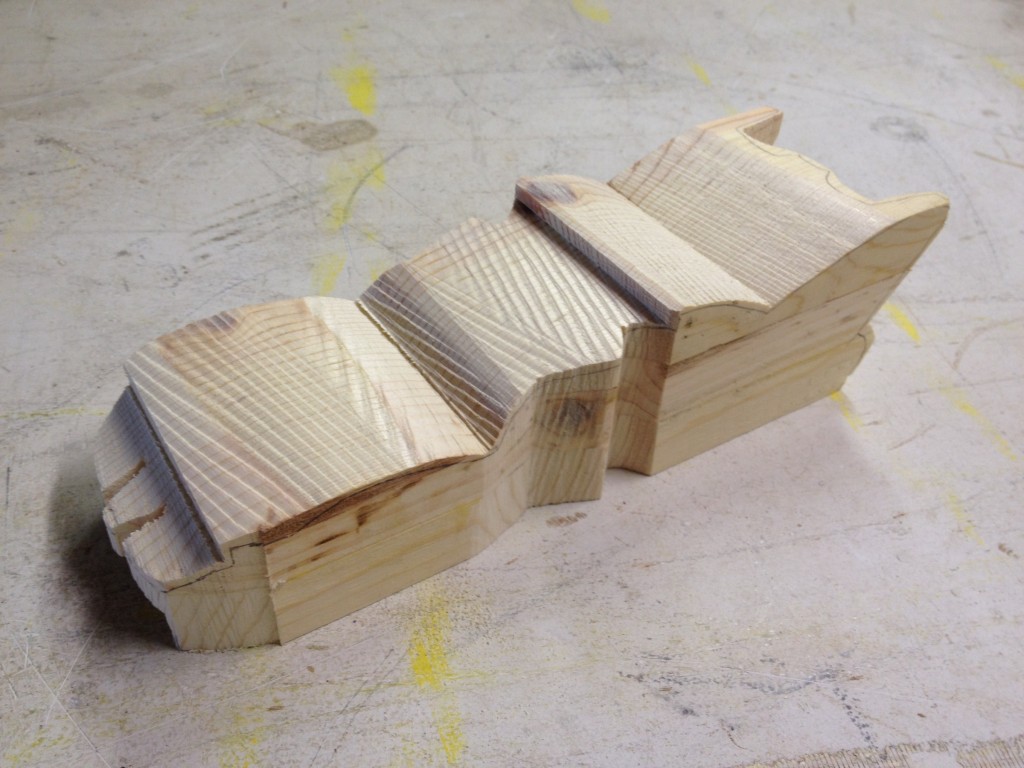
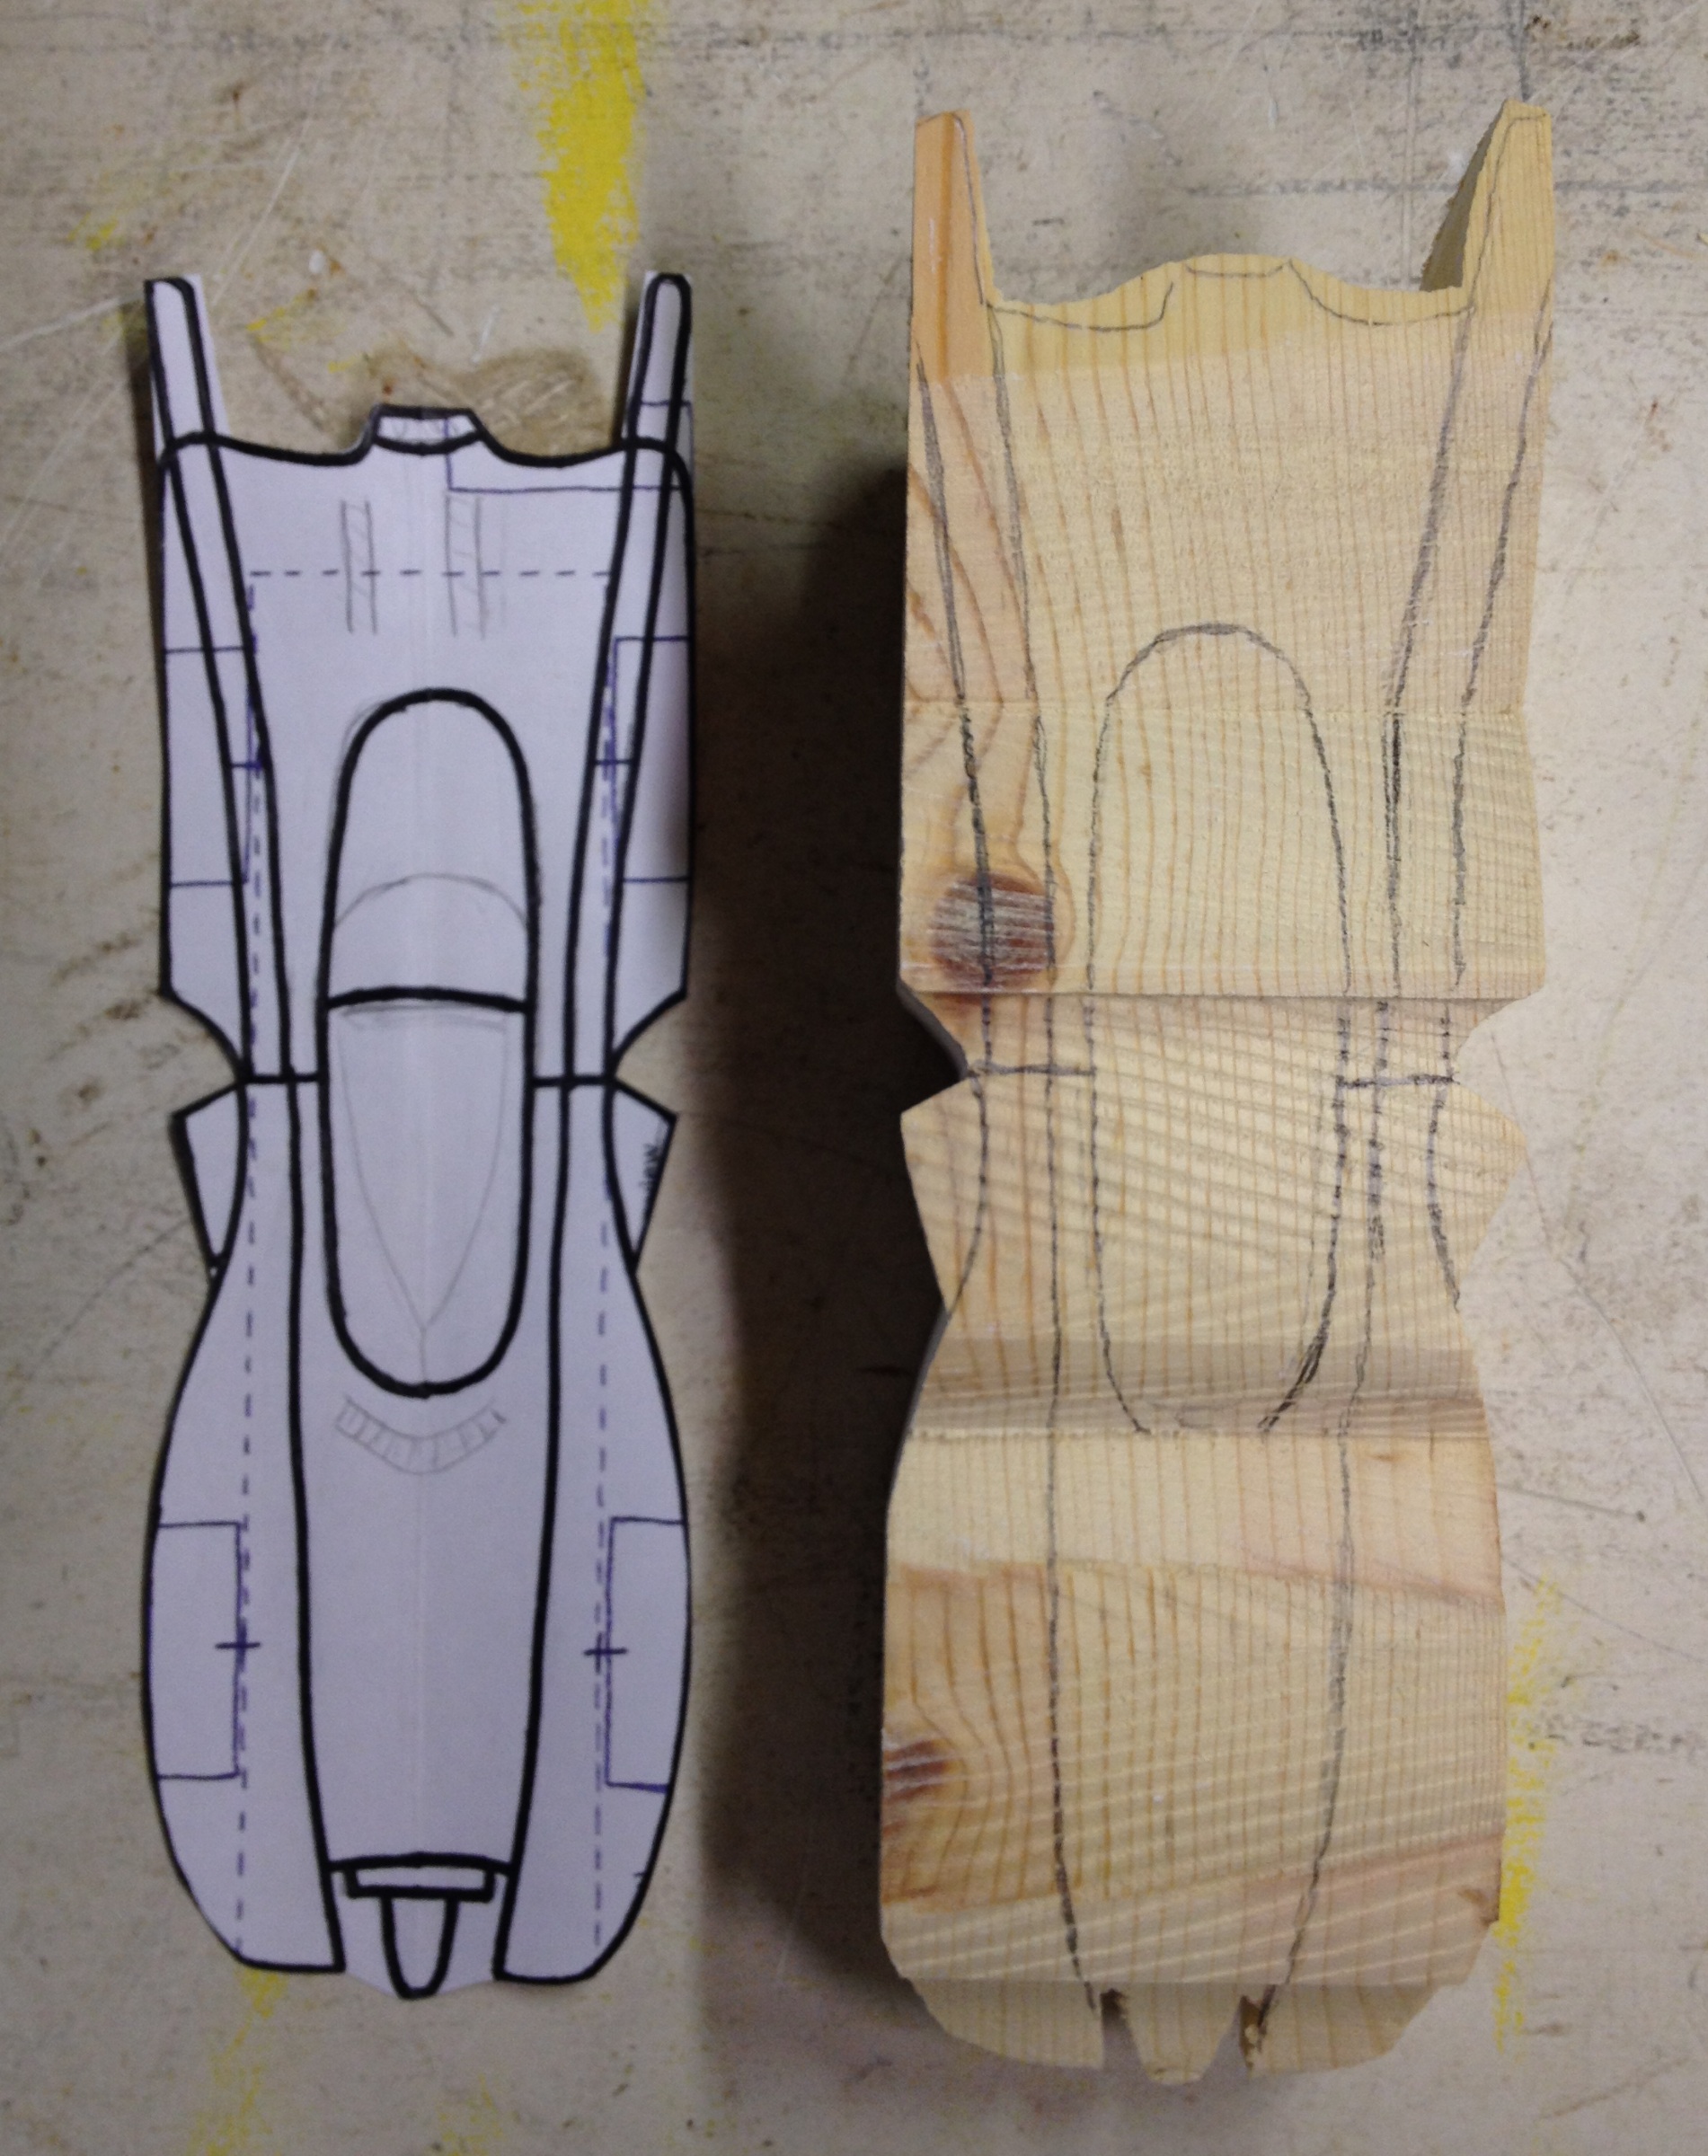
Now before we start carving into areas to remove wood that should not be there, we need some guidelines to go by. So I transferred all the lines from the side view silhouette to the side of the block.

And I did the same thing to the top of the block.

Then I started visualizing where the lines crossed and overlapped and thought about which sections of wood needed to be removed and which needed to stay.
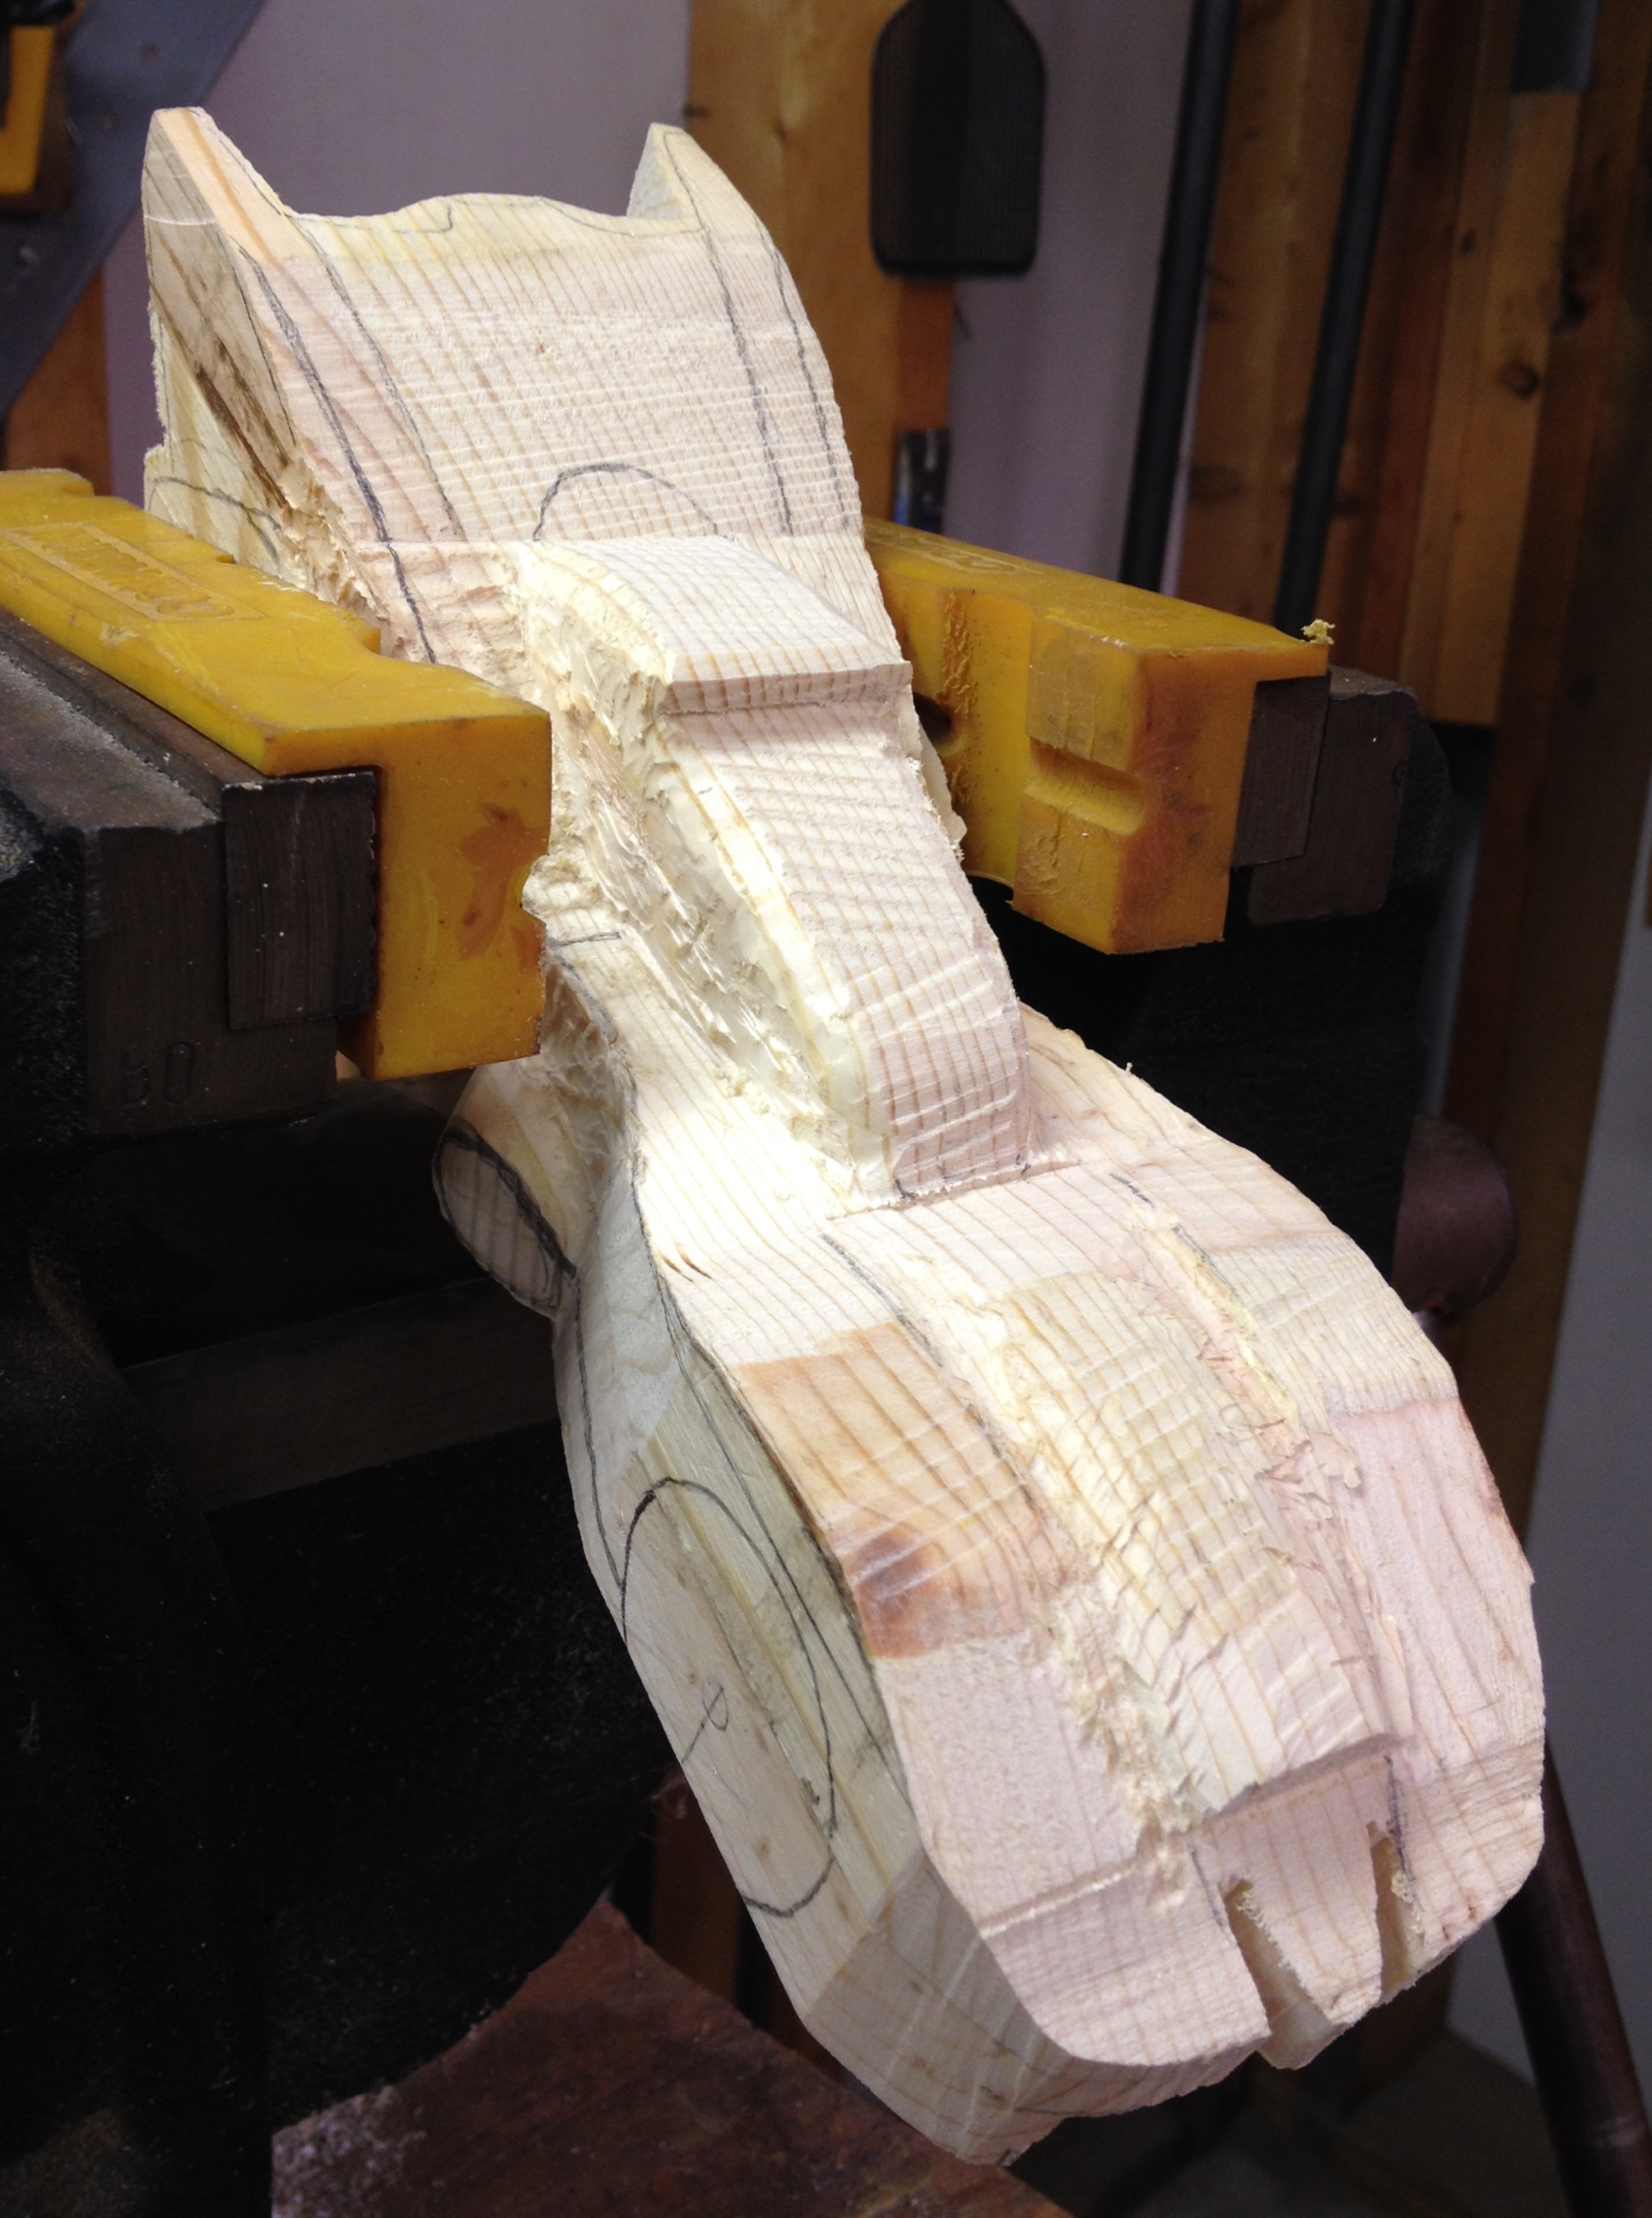
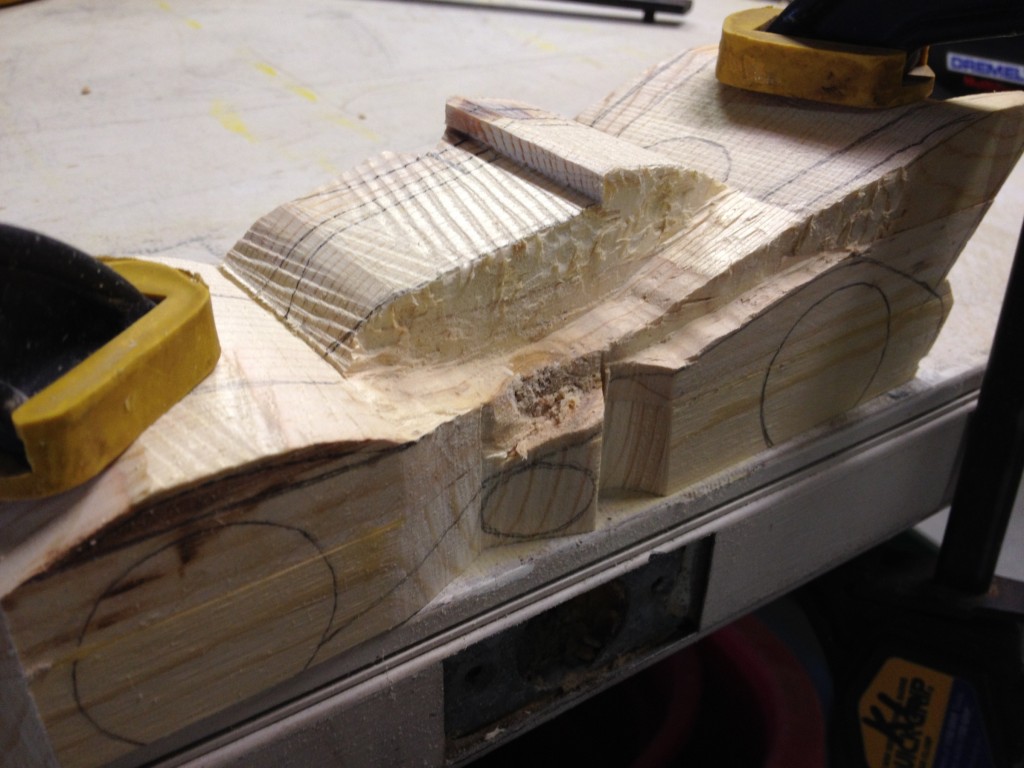
Below is an example of a silhouette shape that was left in place for the middle of the car which is the jet engine intake. But on either side of that central jet engine intake, the car fenders need to curve down in a smooth arc. So using a small coping saw, I cut the rough fender shape towards the center of the hood where the jet engine needs to remain at the original silhouette shape. The car is on its side in this photo, top of the car is to the left, front of the car coming towards the camera.

Then I cut down into the hood to release the piece over the fender that did not need to be there.
This is what it looks like with the unnecessary piece over the fender removed.

Here is a better view with the car in its normal position. Both fenders have been cut out and the center jet engine intake remains the shape of the original silhouette. This is not the final shape of the fenders nor of the jet engine intake. We will take small bites out of the shape and eventually we will get there.
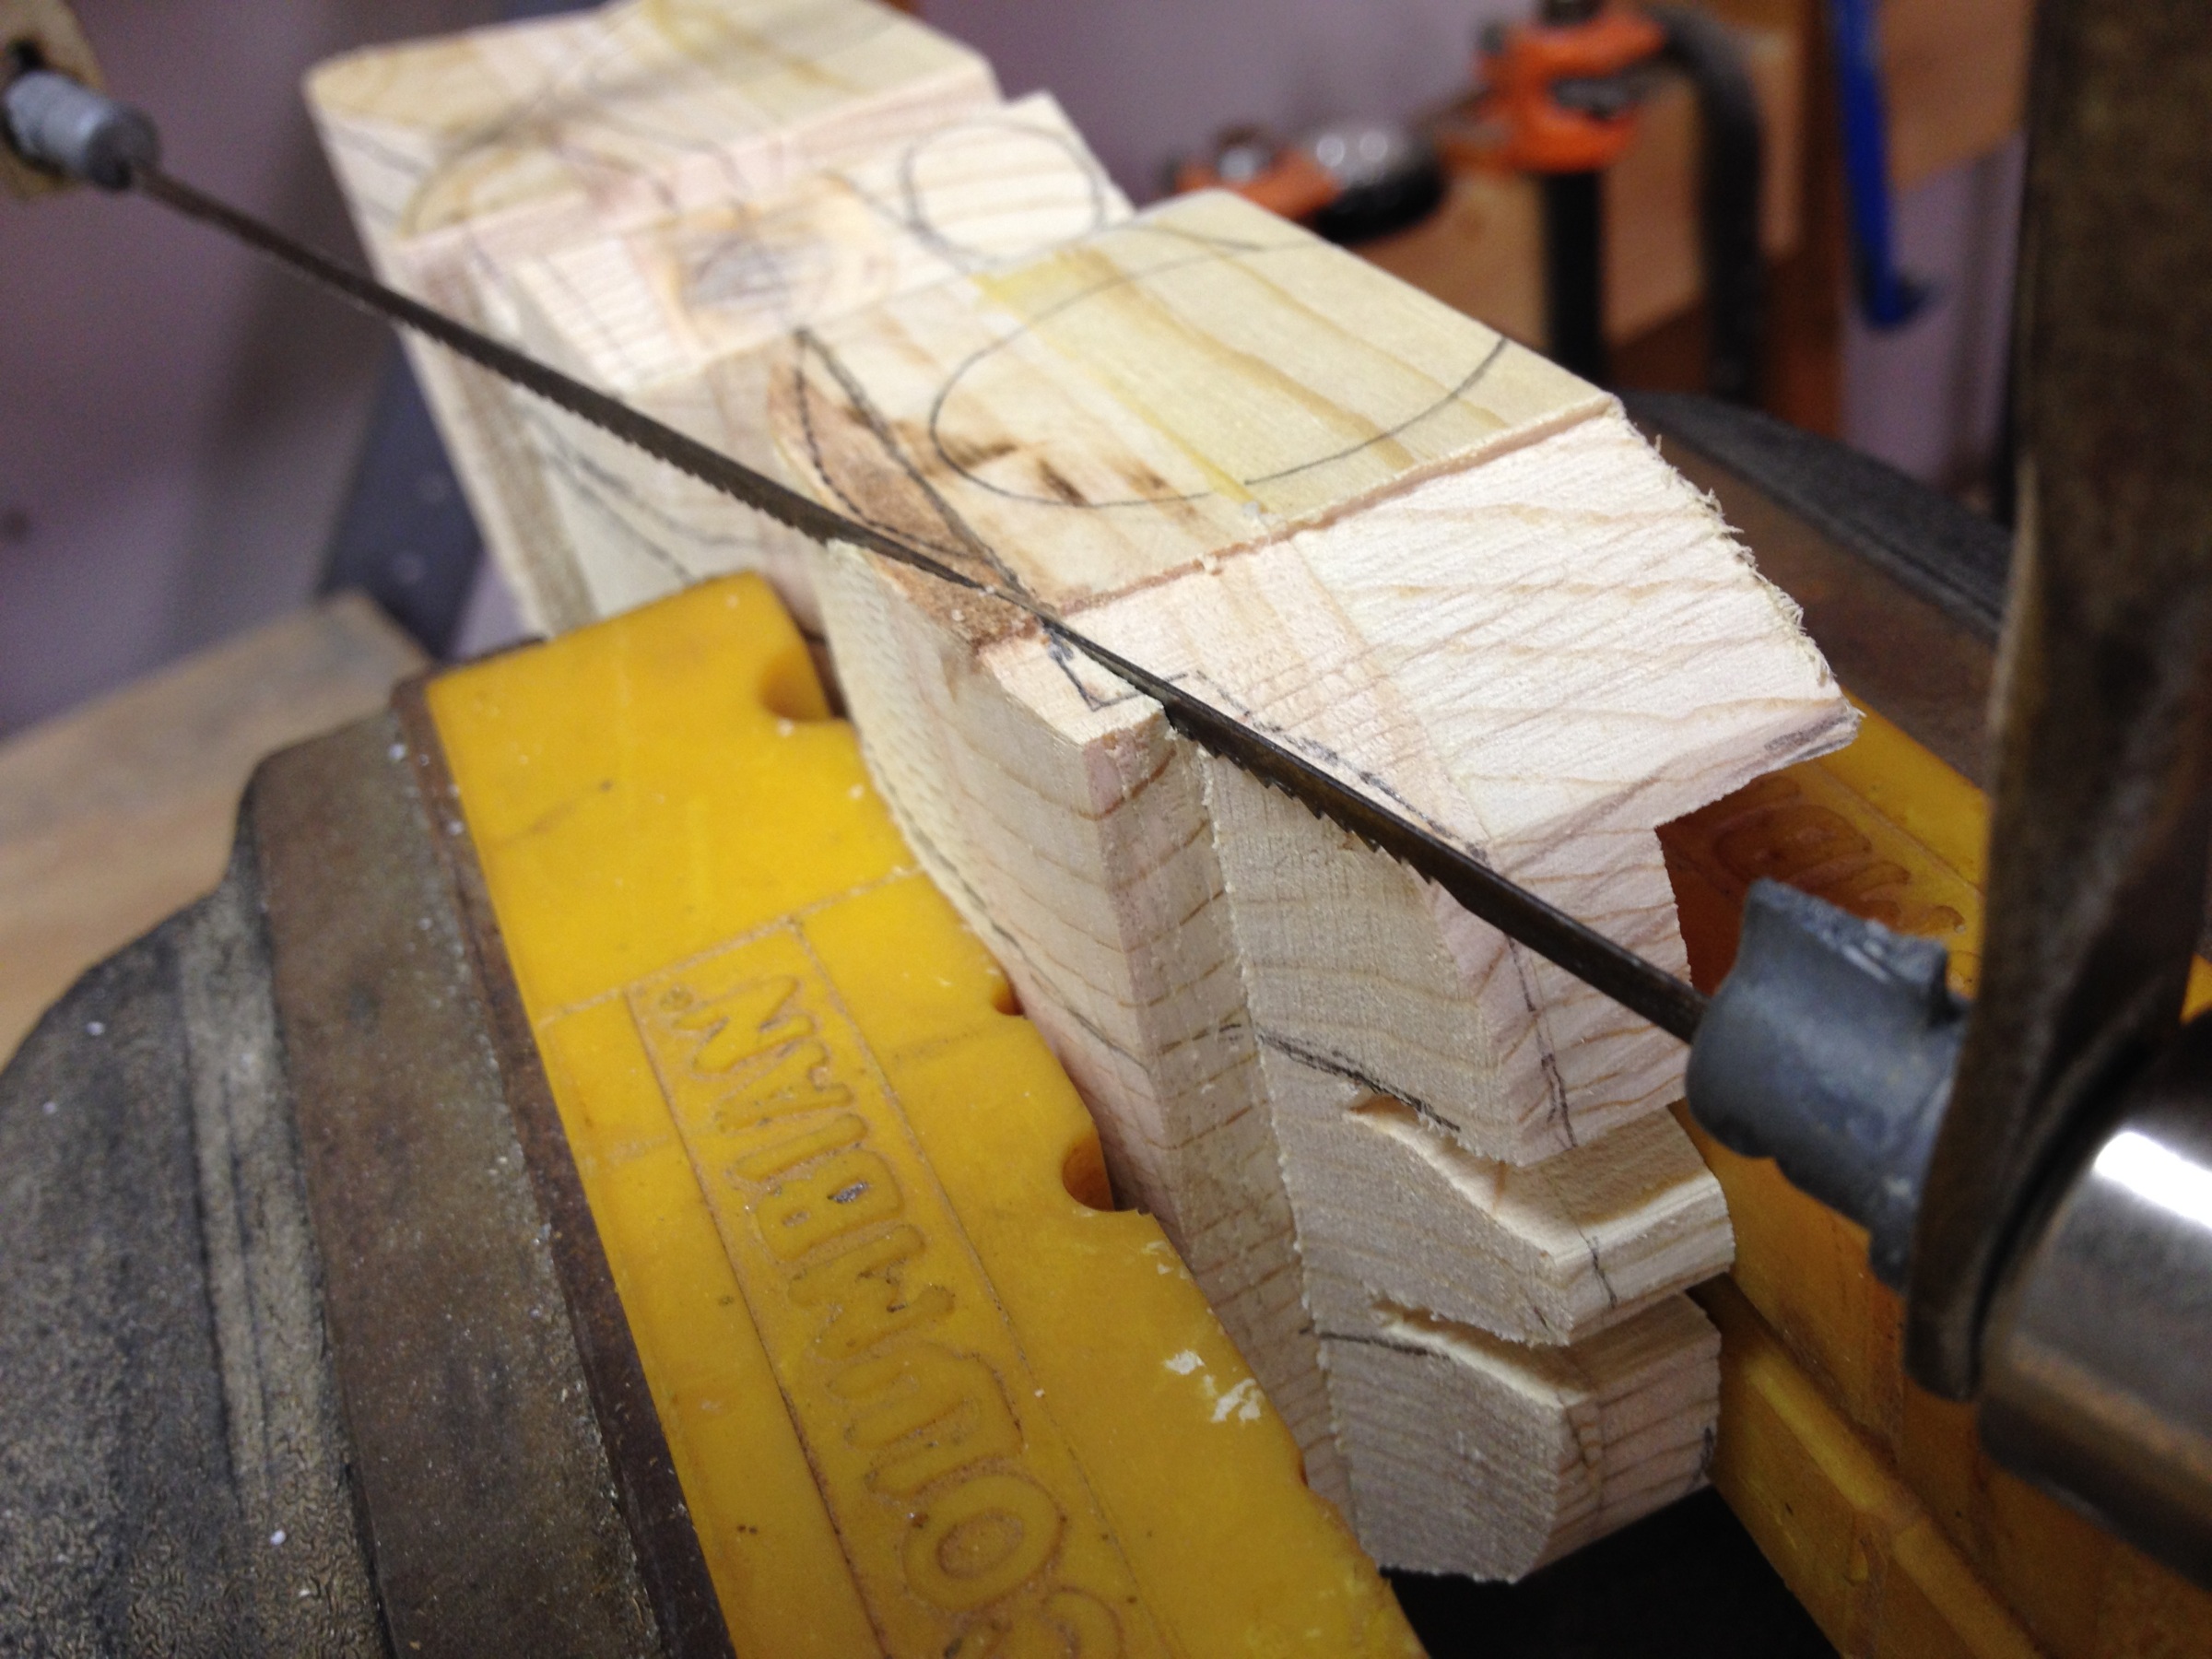
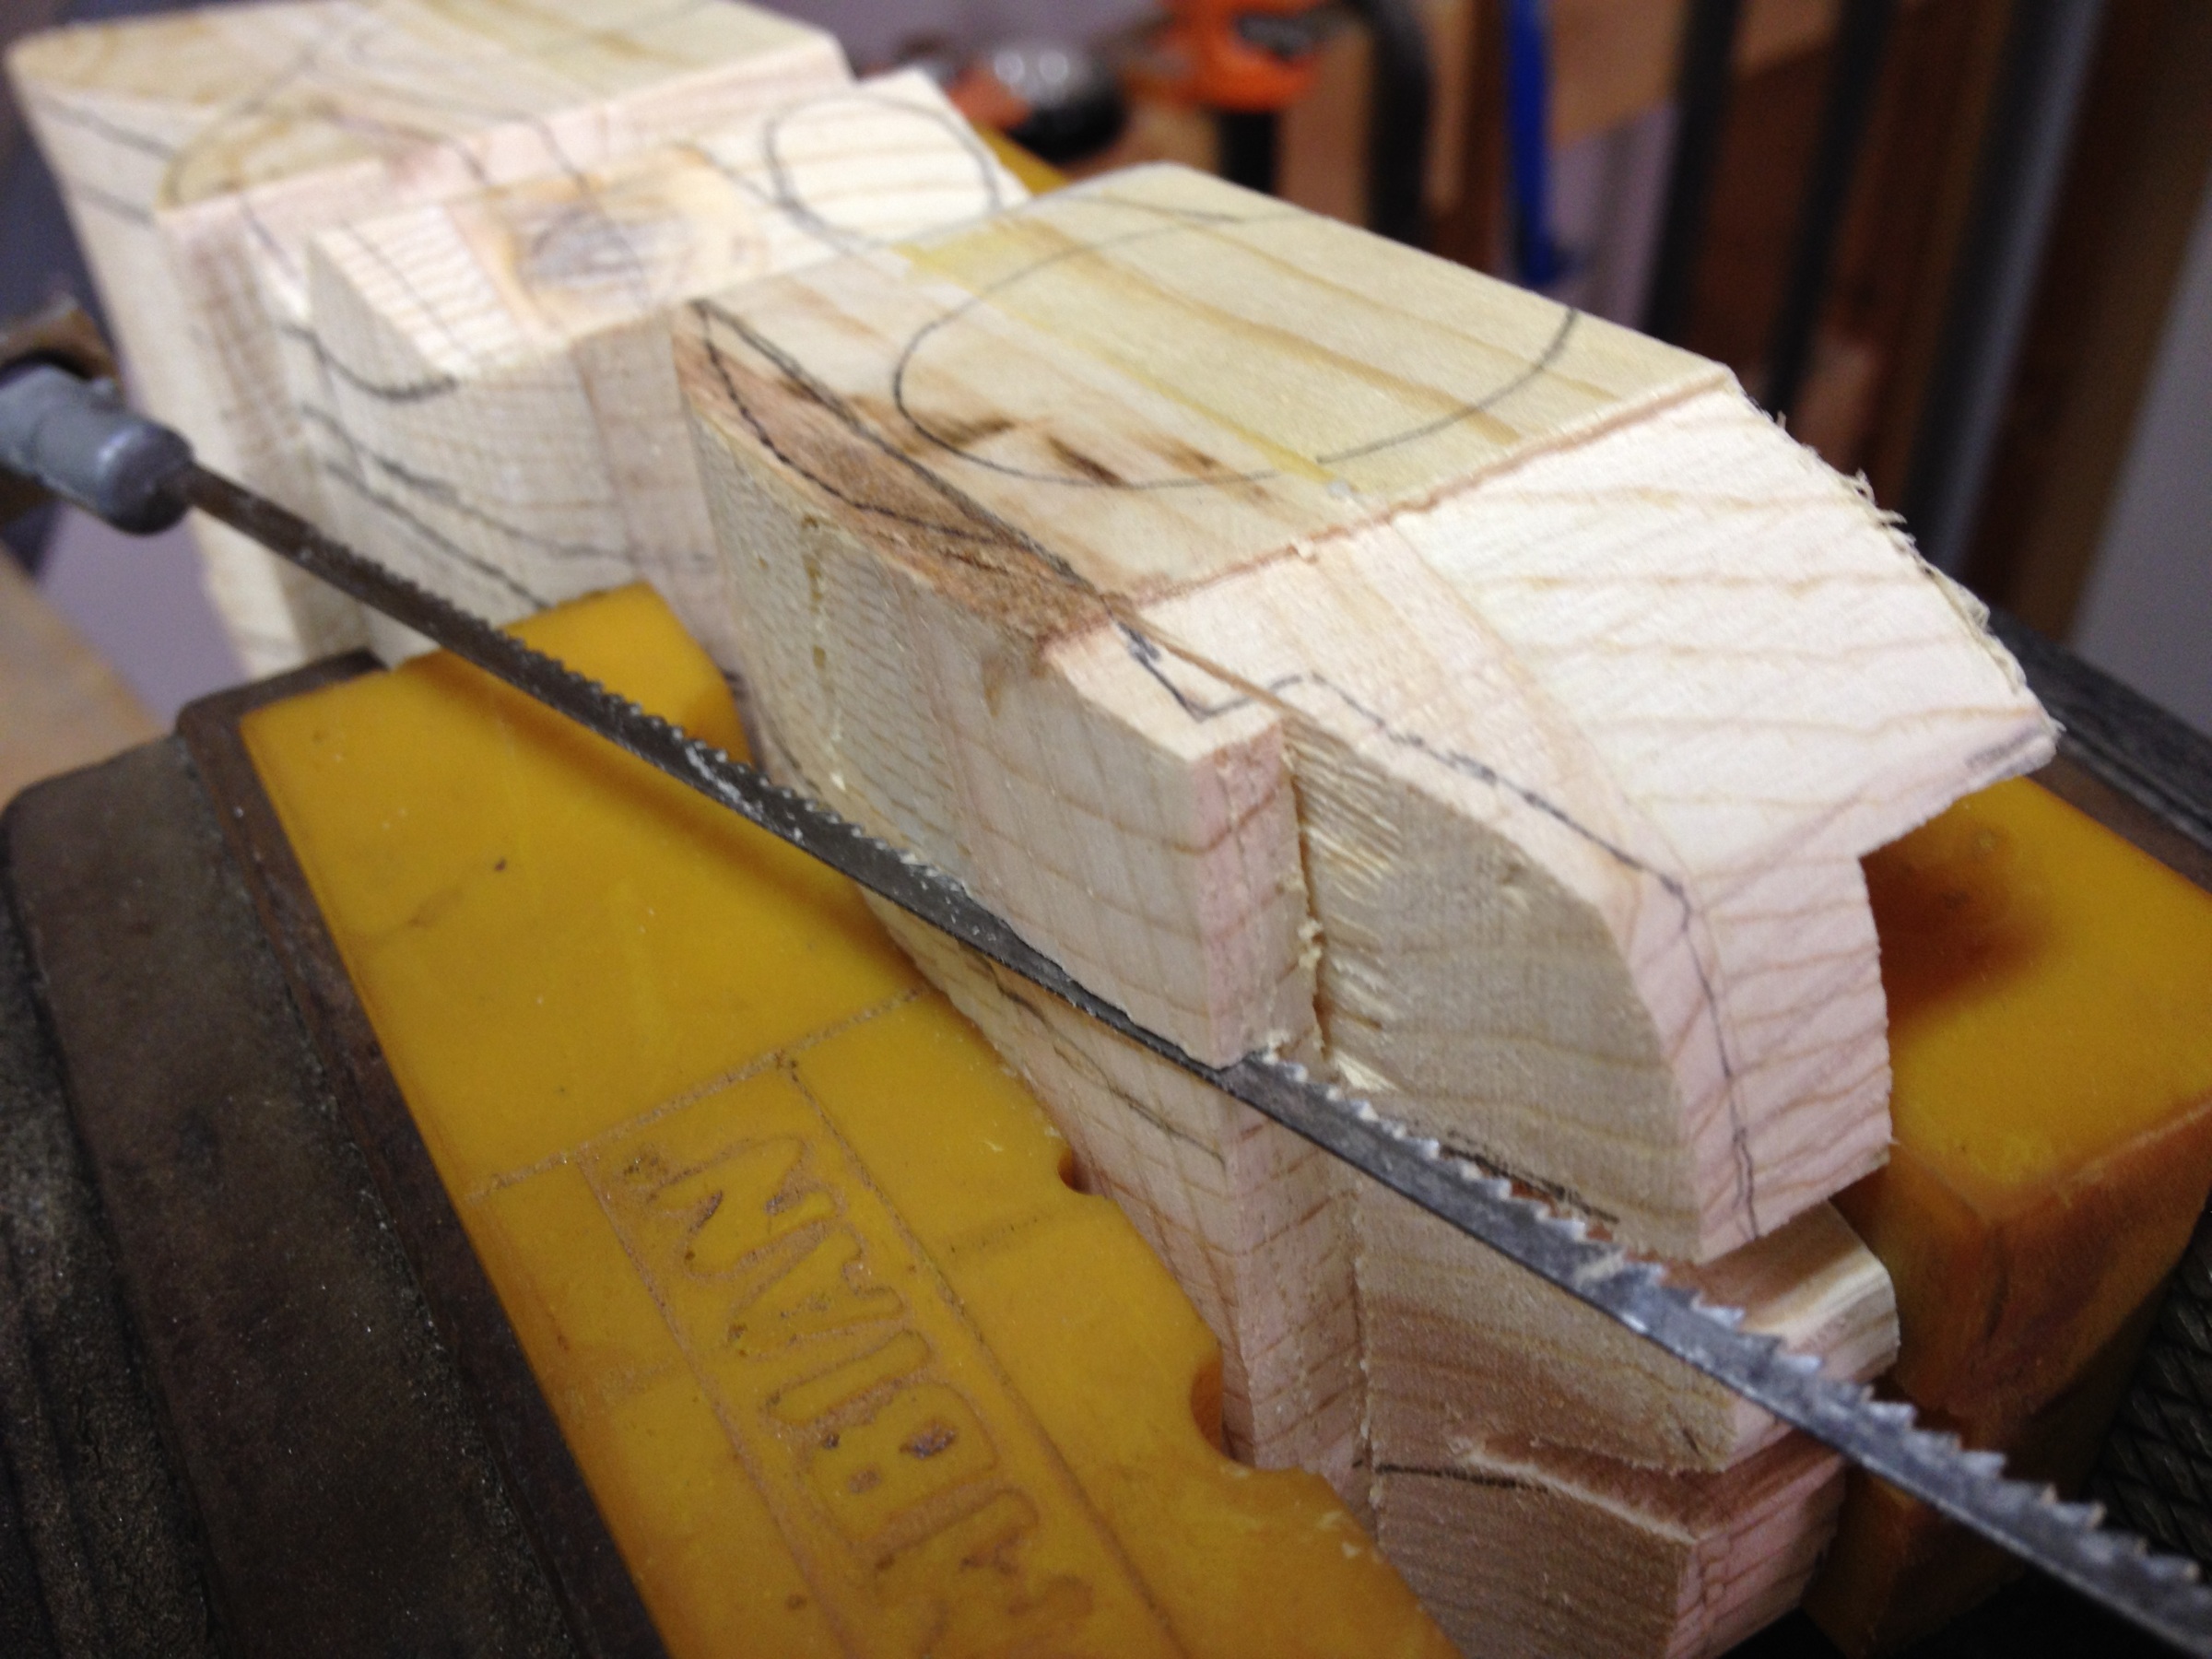
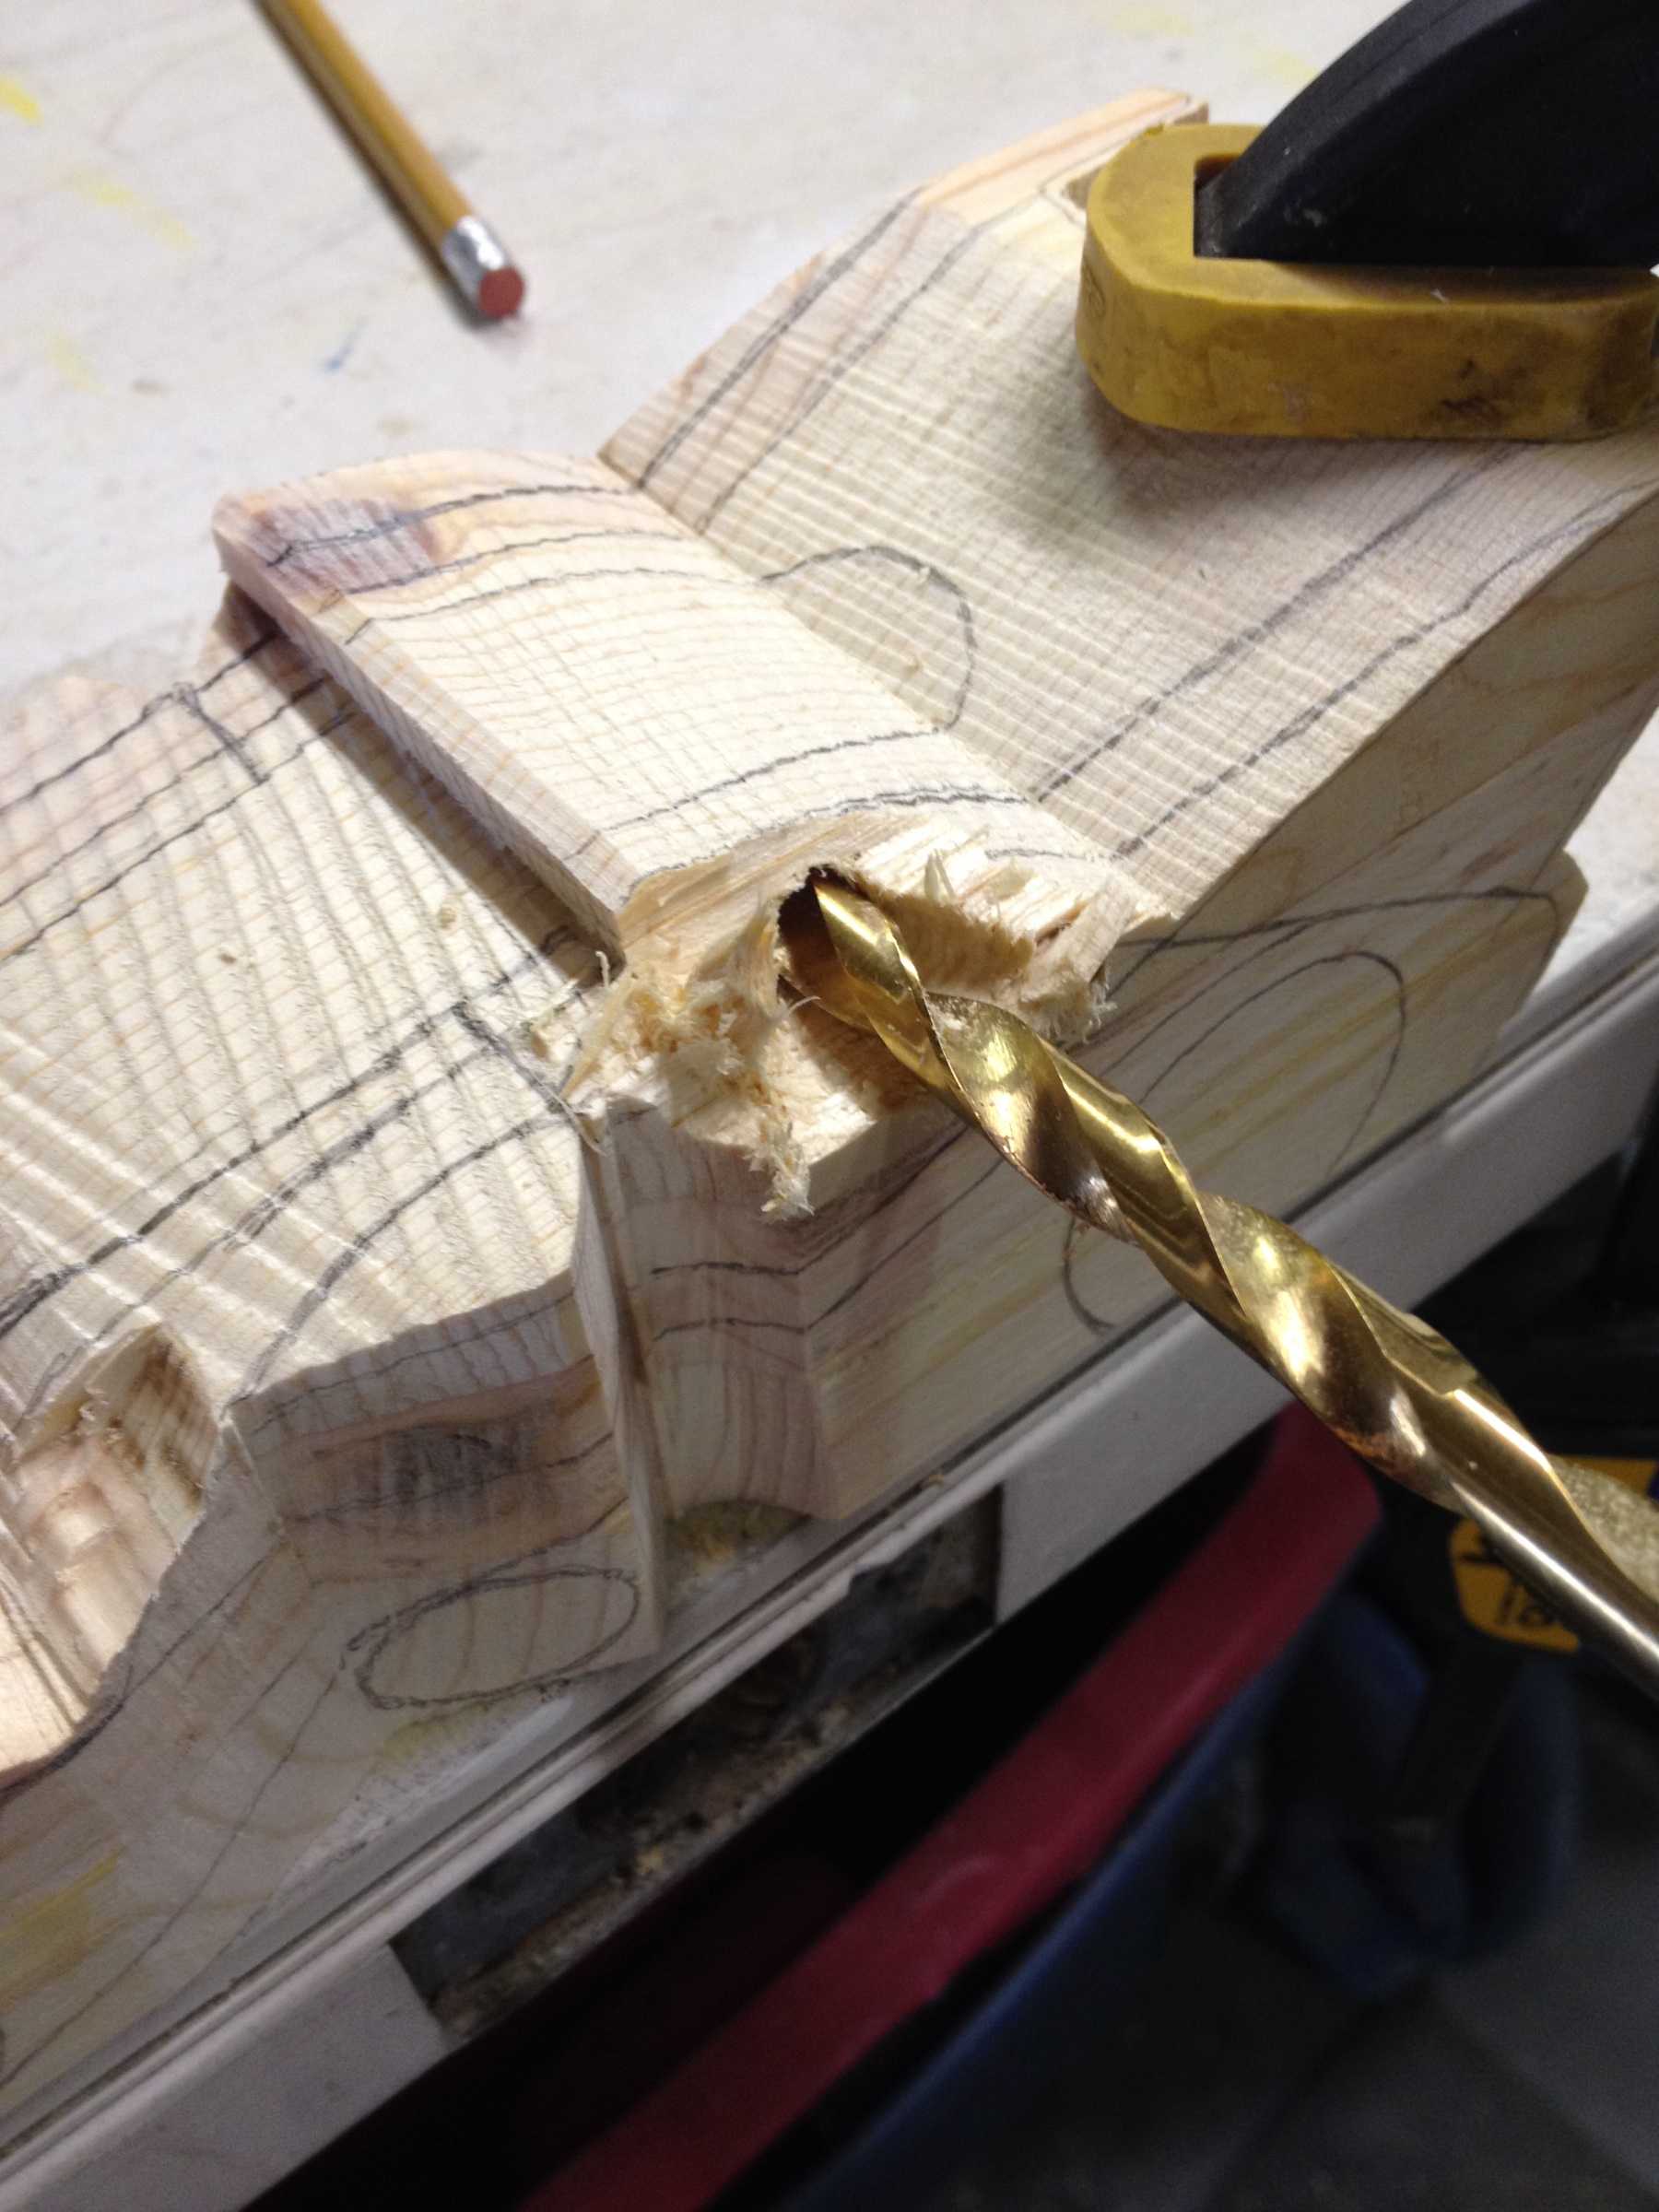
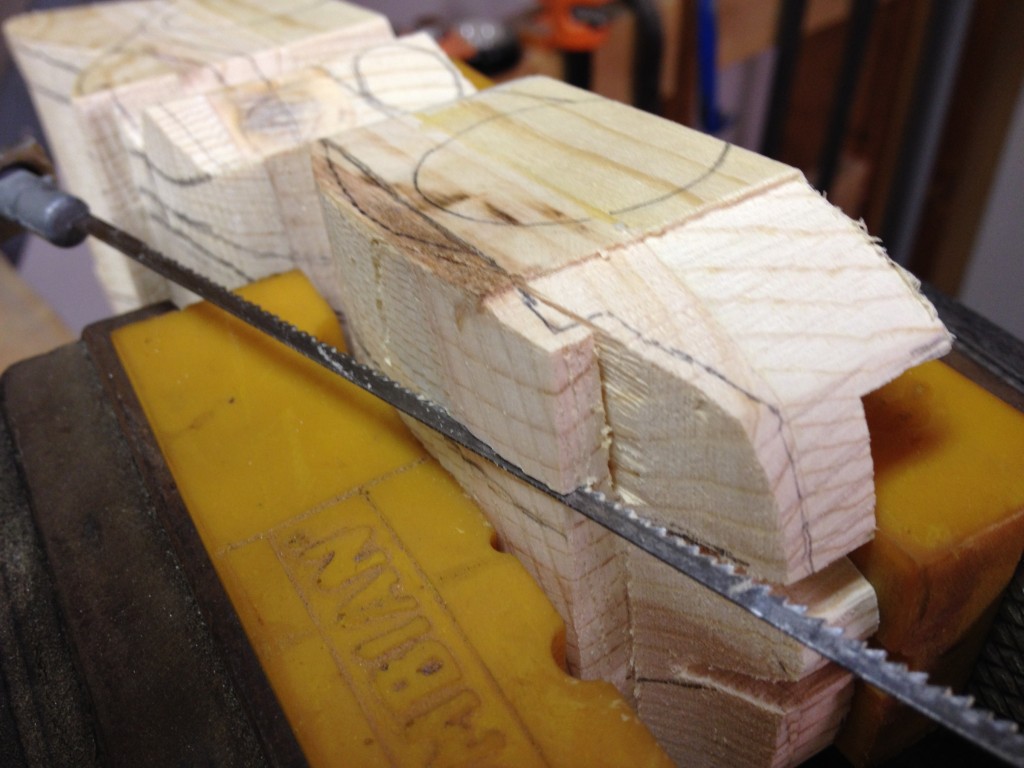
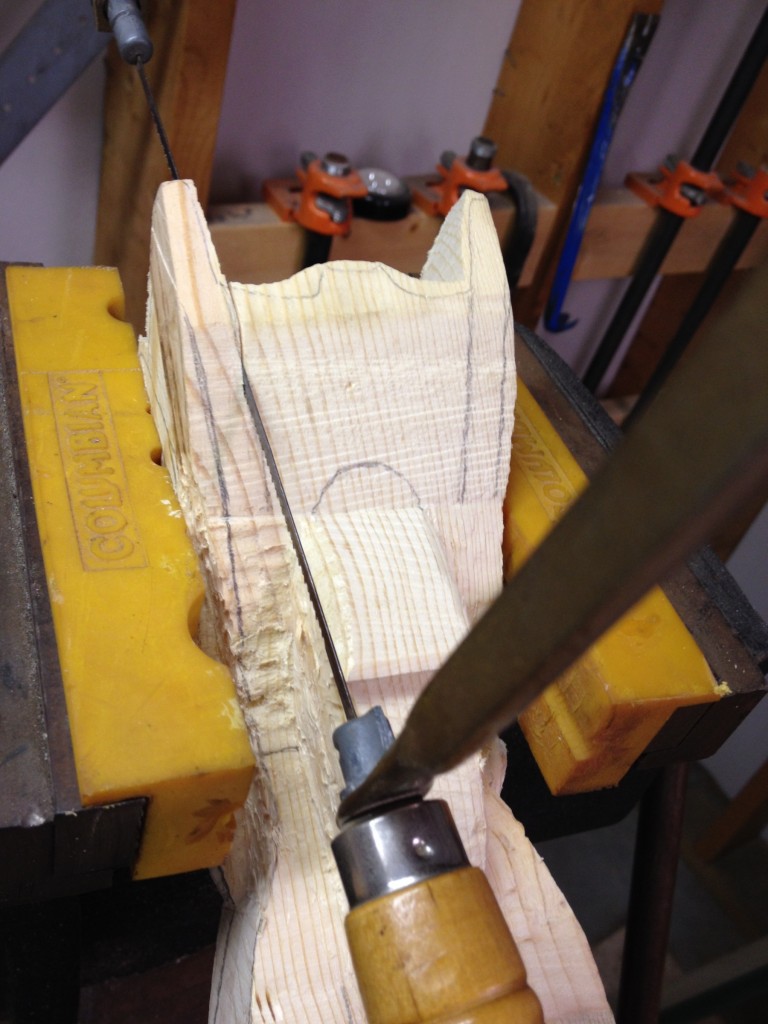
In order to take out larger sections or in order to take out odd shaped sections that a hand saw just can’t do, we will use a good sized drill bit. Below shows me starting to dig out the top of the car on one side of the high dome.

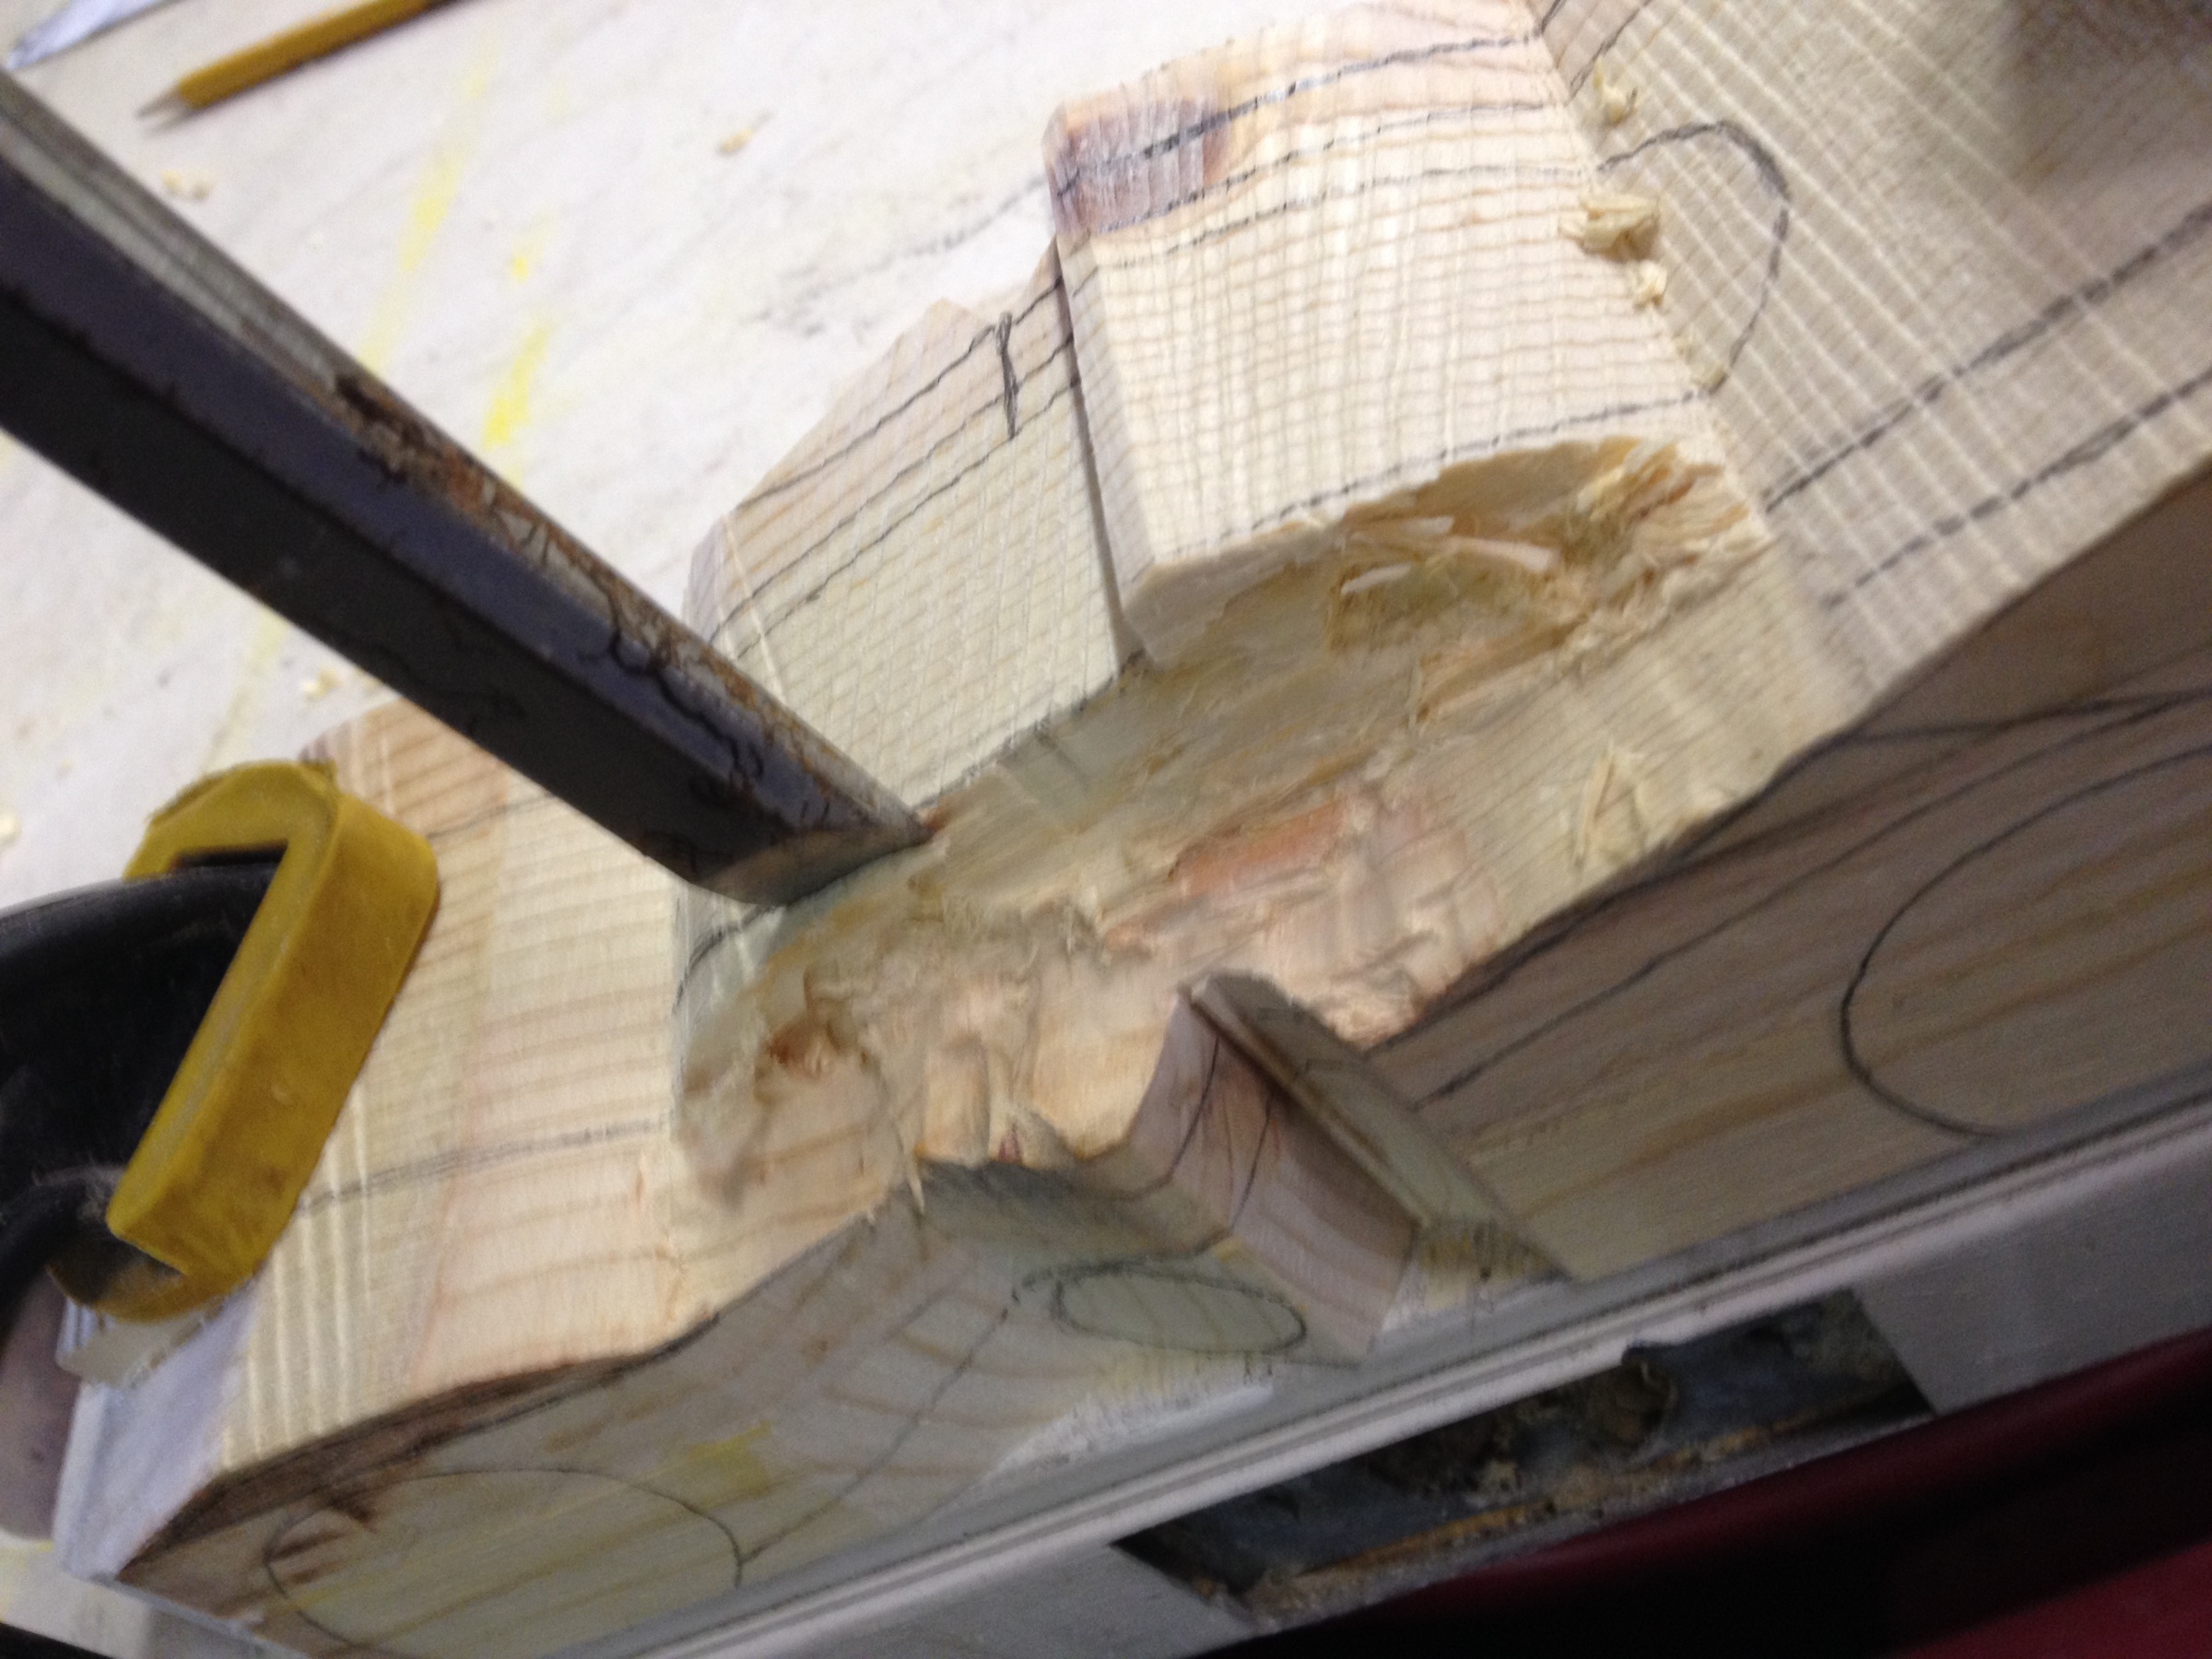
A chisel can then be used to get a little closer to the final shape. But a chisel is still a bit rough for final shaping.
Here are the results after drilling and then chiseling. Still pretty rough. But the general shape is definitely starting to show.

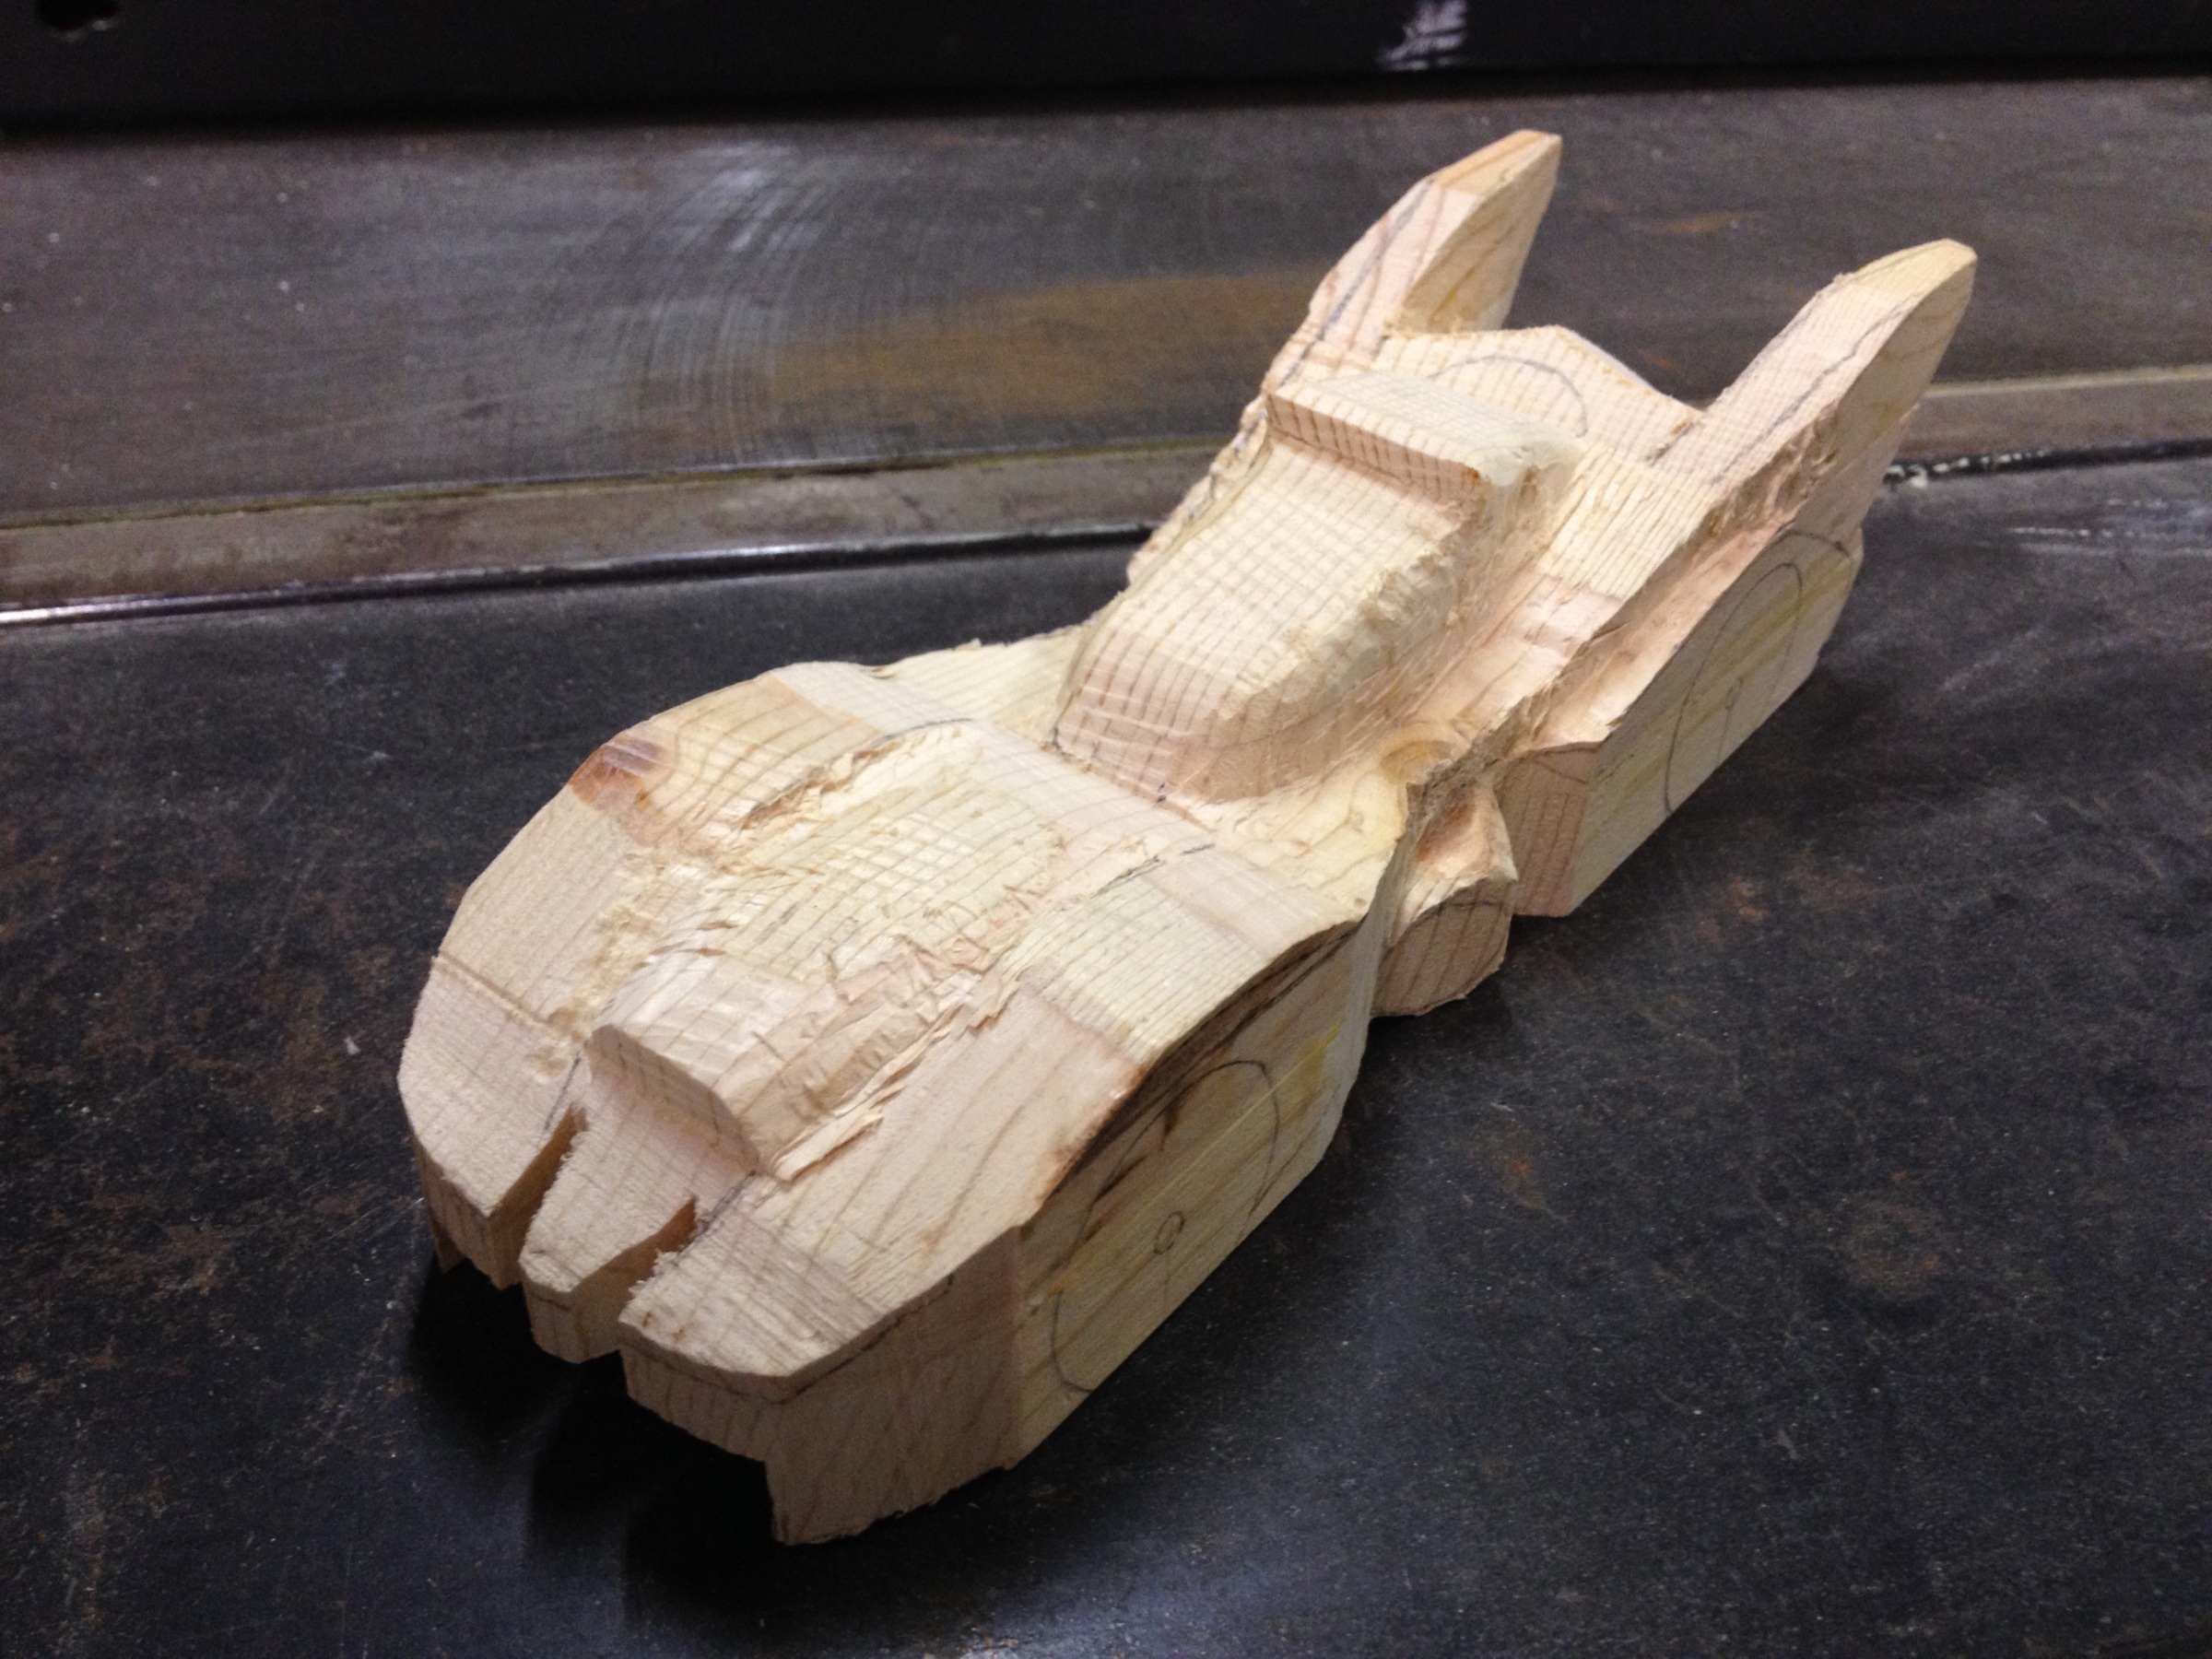
I forgot to take a photo of the tool in use, but after I drilled and then chiseled I did quite a bit of detailed shaping using a high speed cutter bit on my Dremel tool. This picture shows how the shape is getting more detailed now.
The photo below shows what it looks like after doing this level of shaping on both sides of the dome, plus a bit of shaping on the jet engine intake hood area.

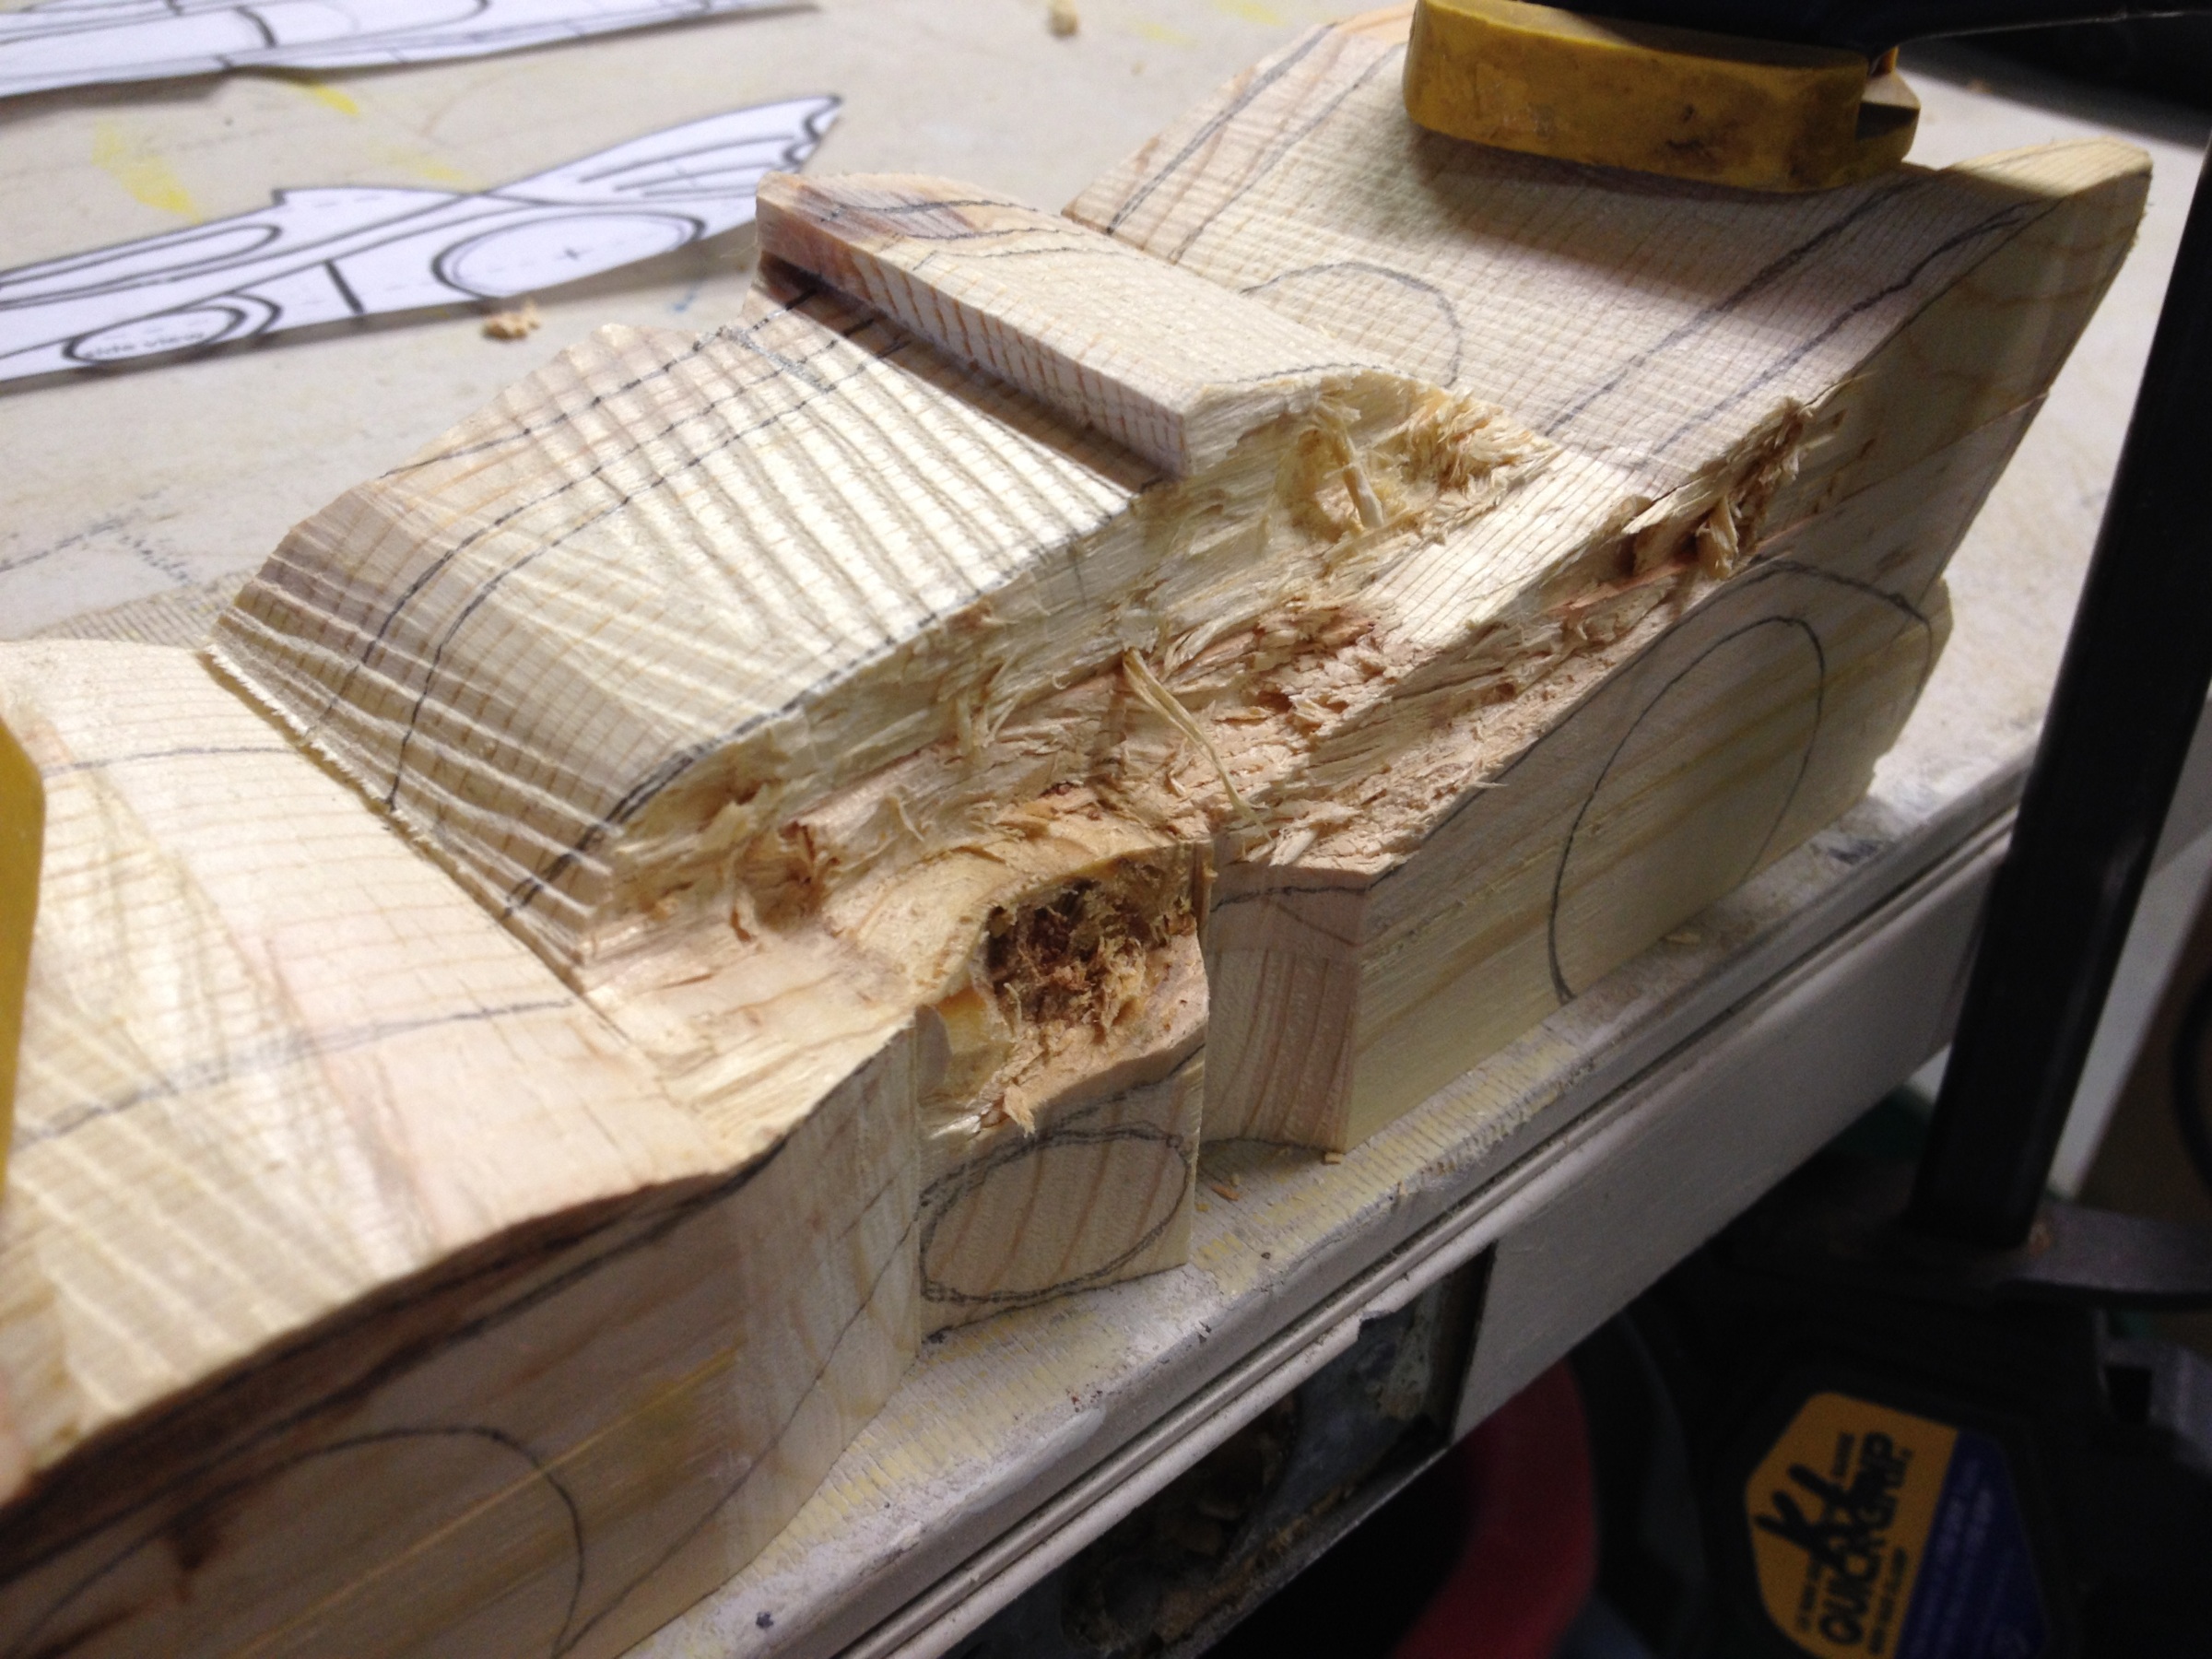
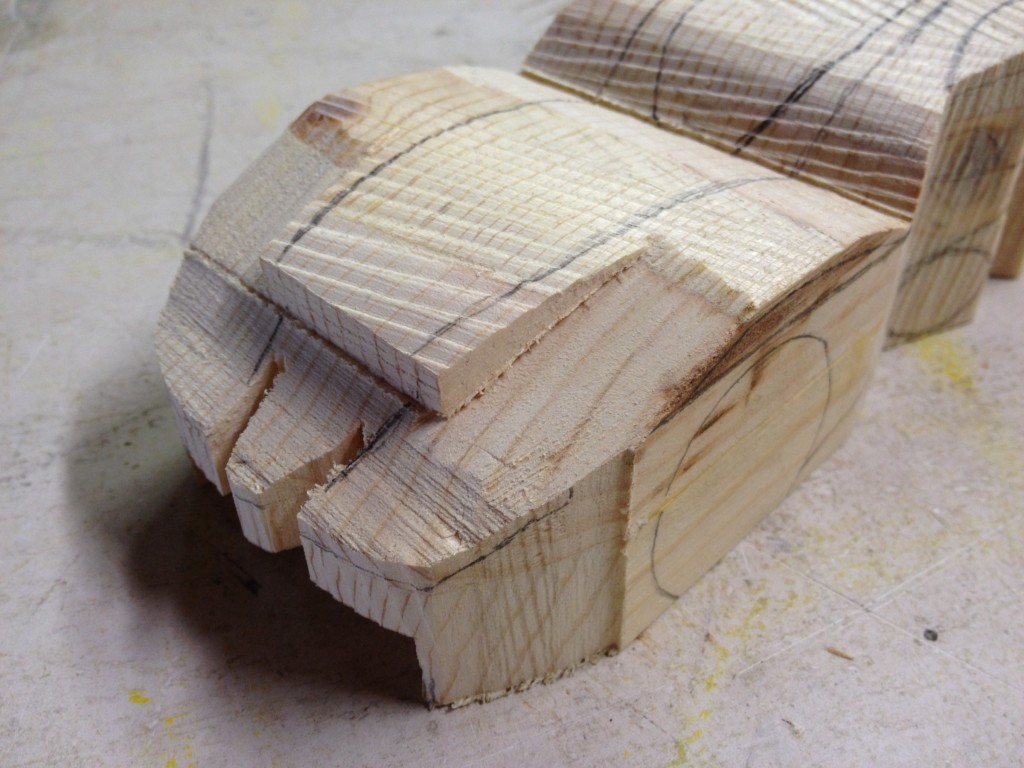
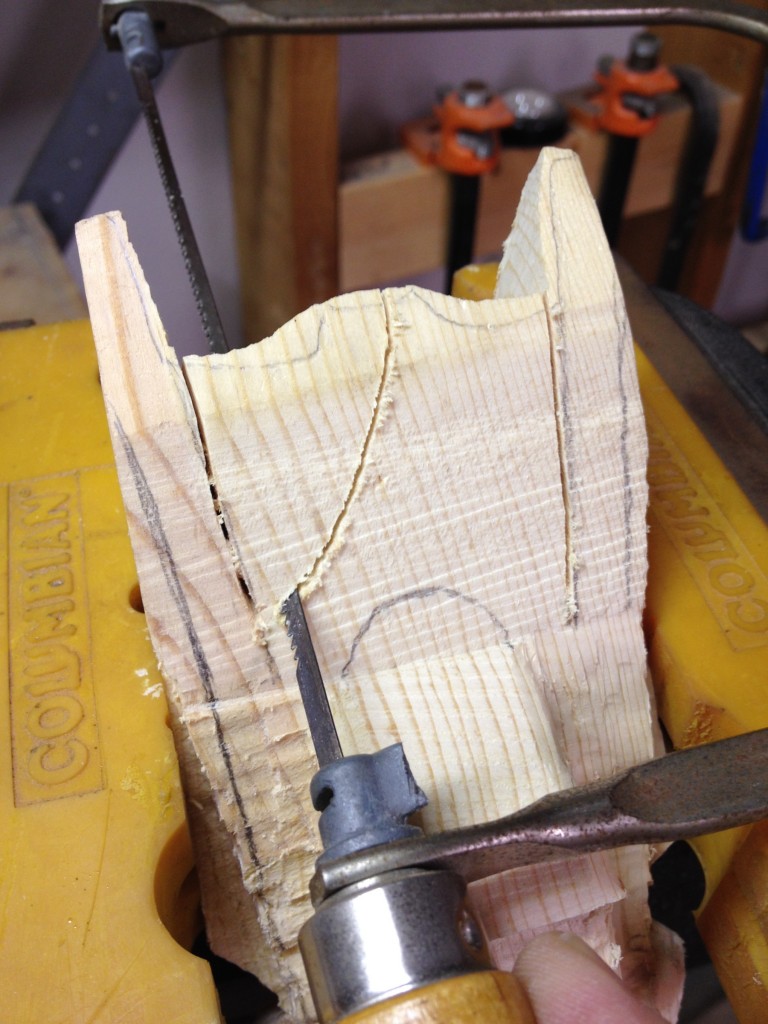
Then I used the coping saw again to get a rough shape cut out of the rear fins.
This is still a pretty rough shape. It will get refined later.
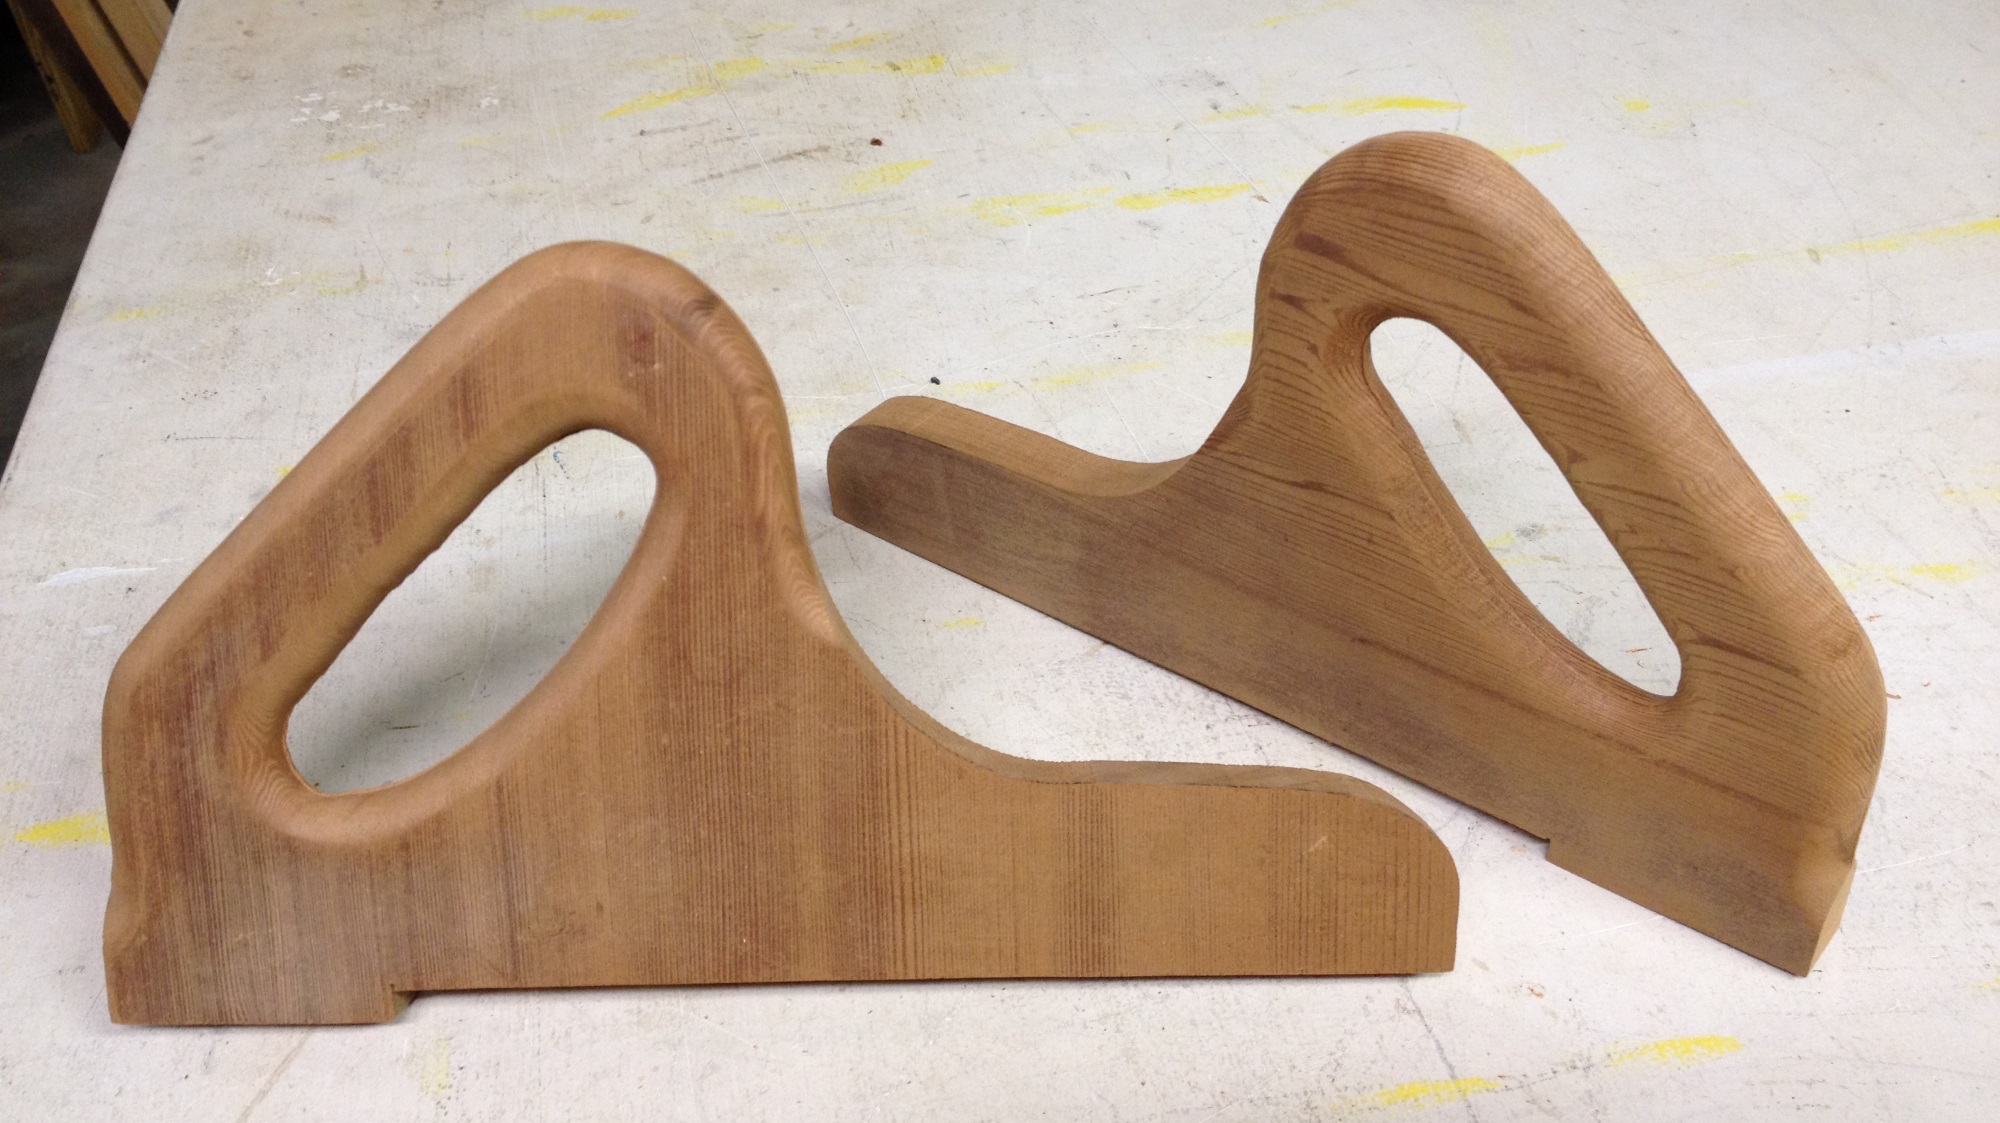
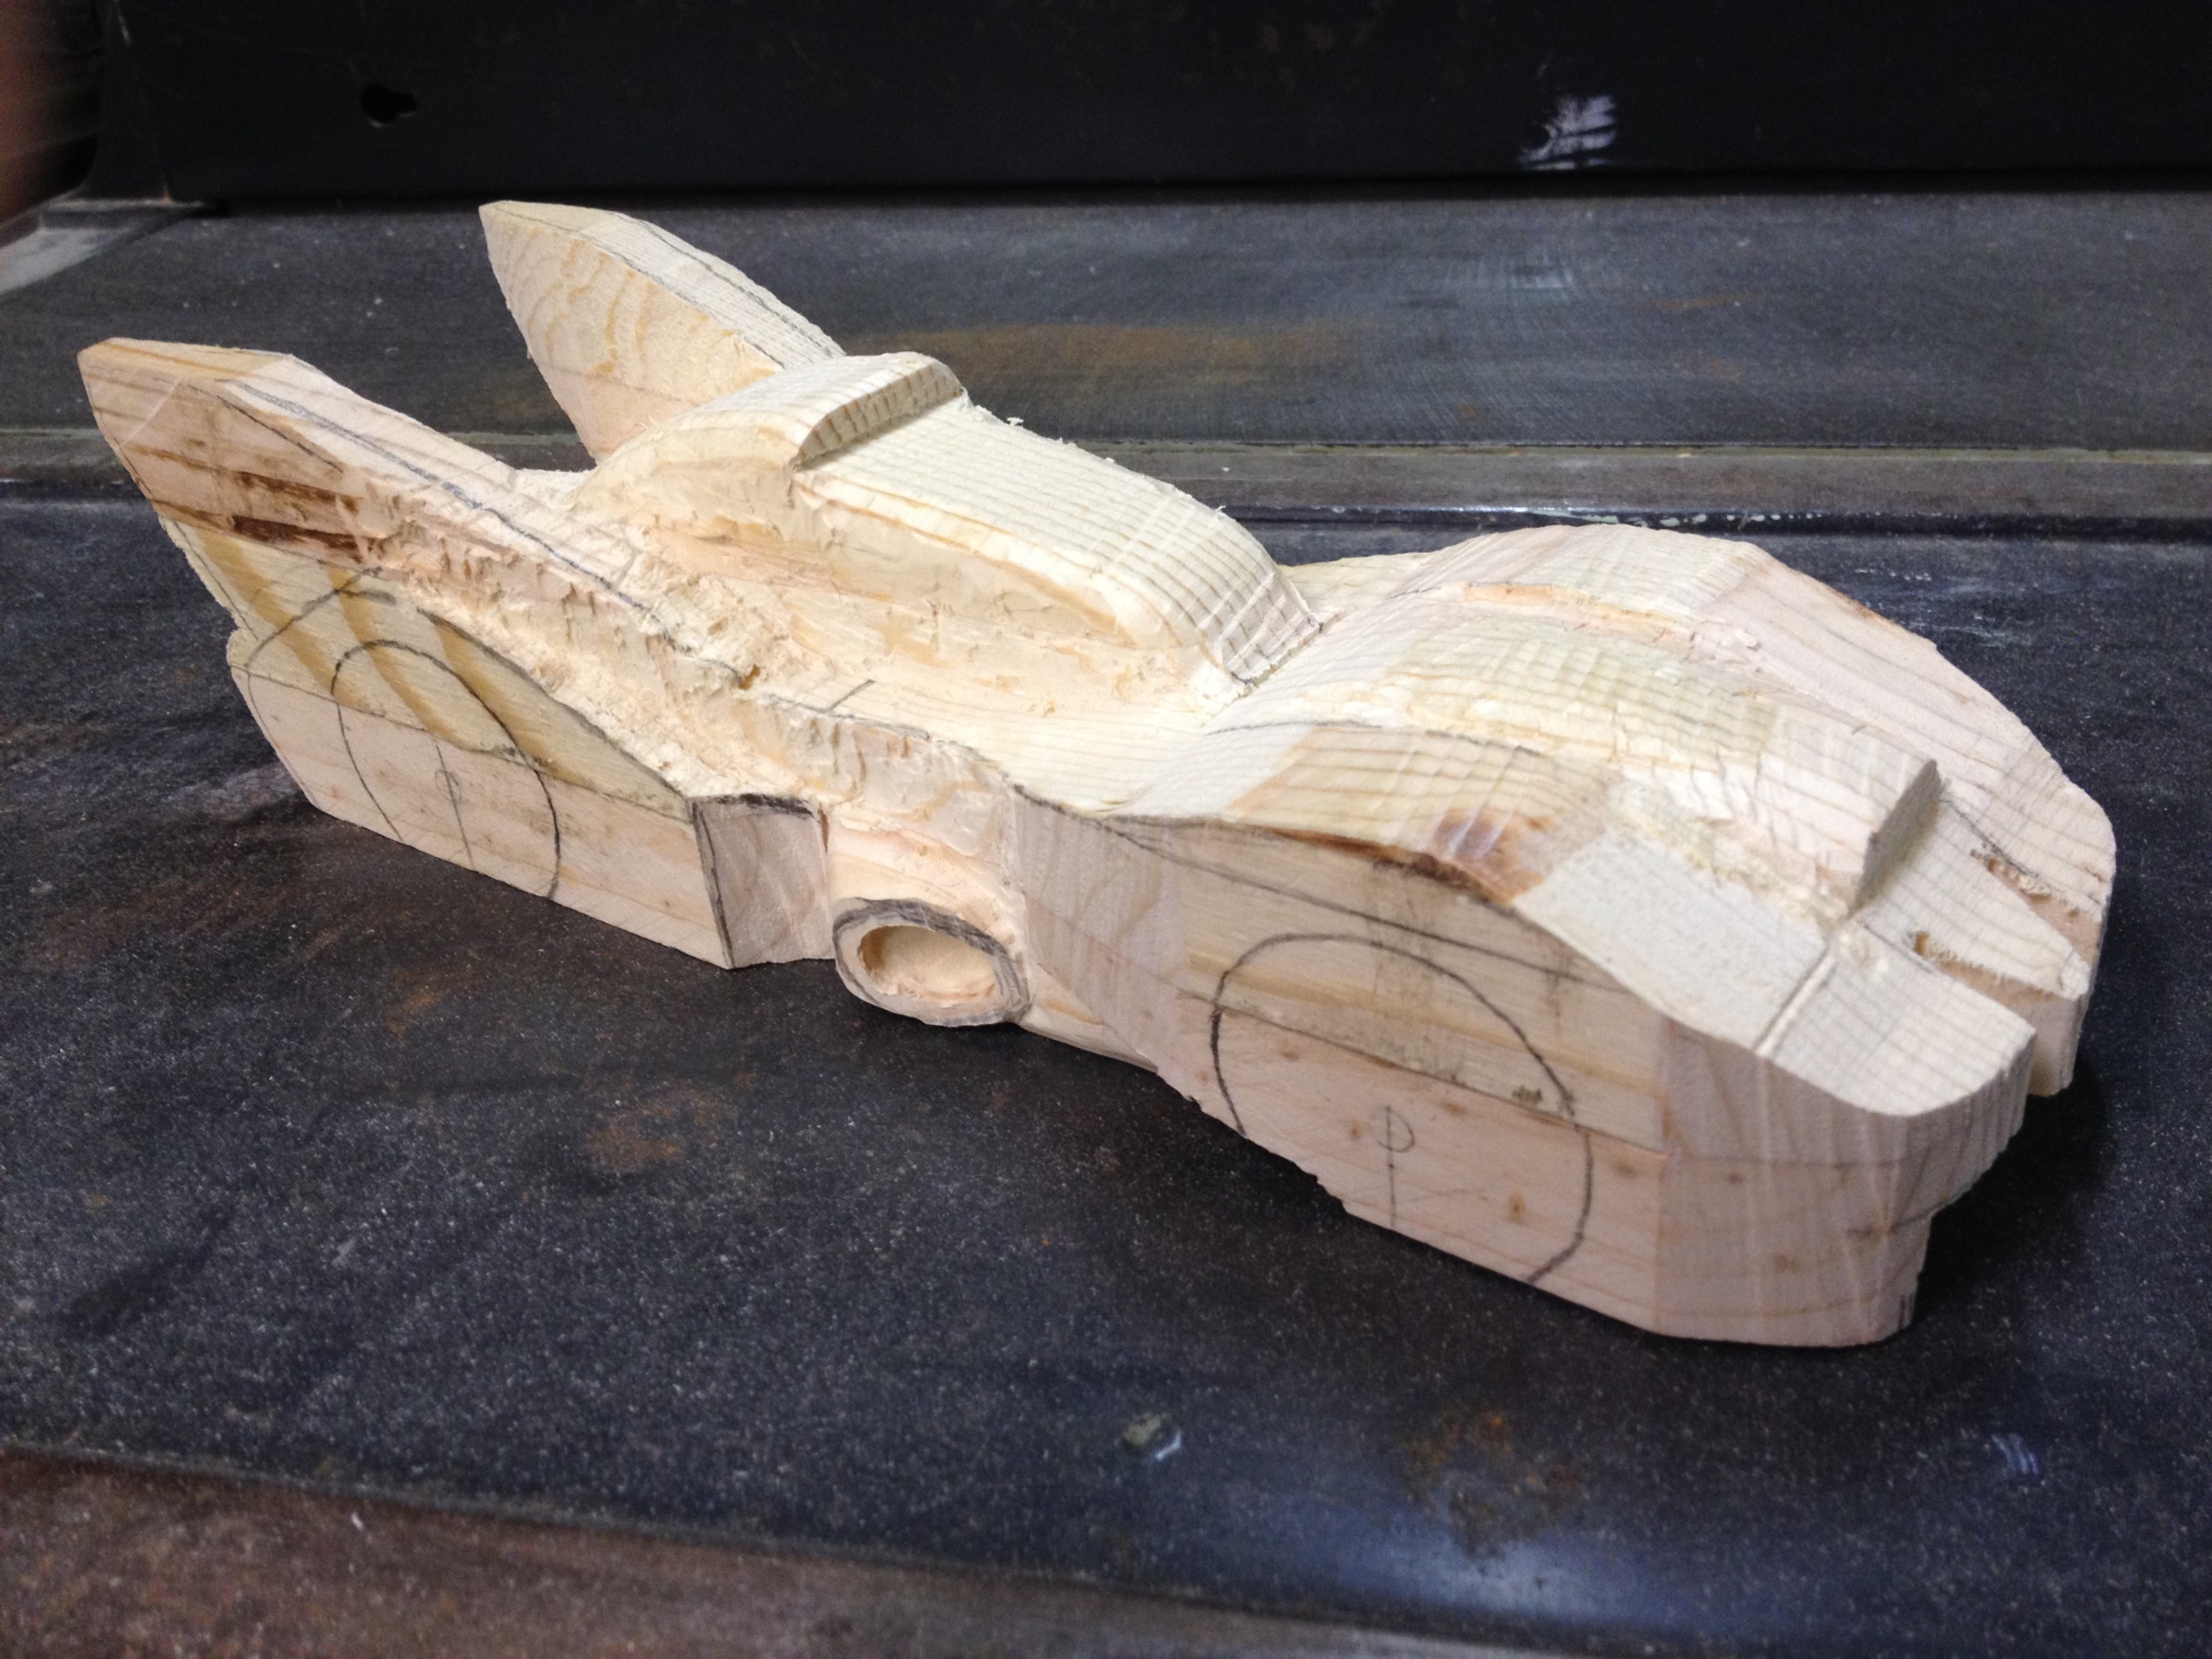
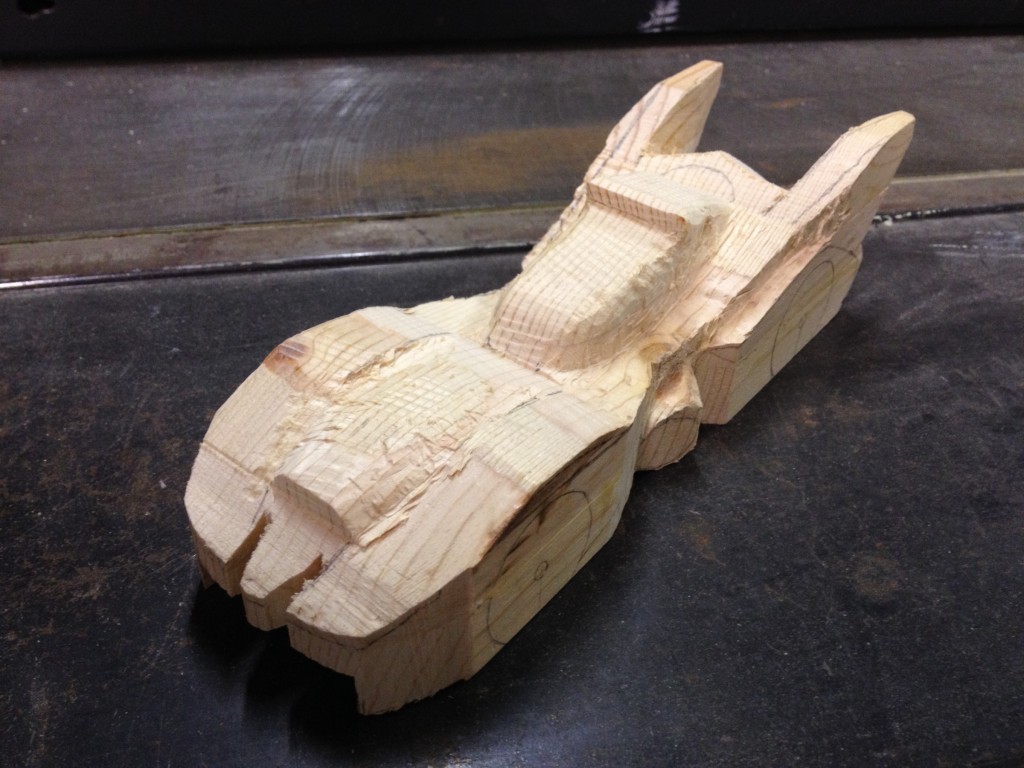
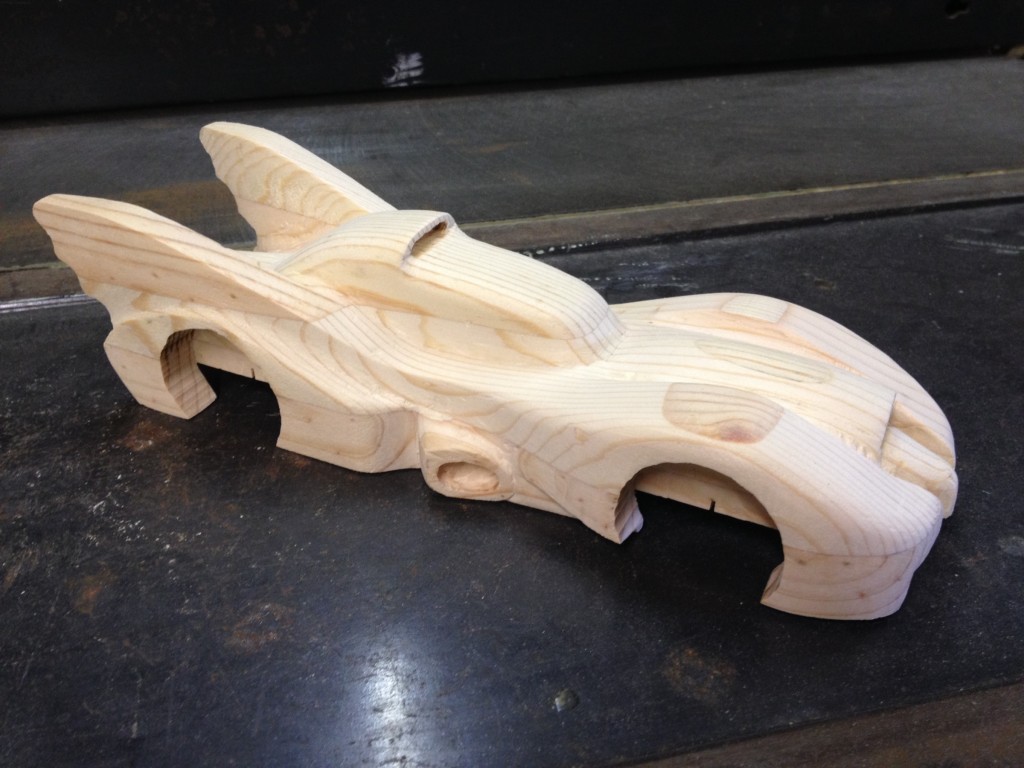
Here is what it looks like so far. It’s starting to look familiar.
Then I just kept jumping around and shaping a little more and a little more. You will want to grab some images from the Internet to use as a reference so you can see what areas need to be removed and shaped as you go.
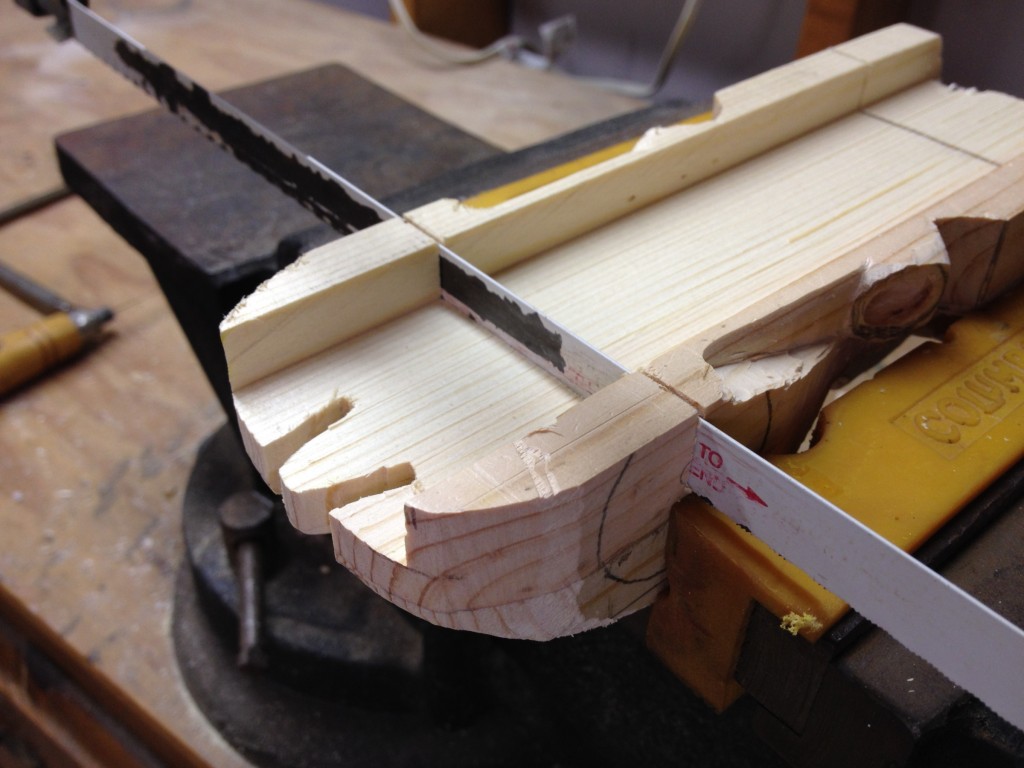
Now, I cut the wheel axle slots at this point, but I definitely should have done this step back when the block of wood was solid and square. Because mine was no longer big and square, I had trouble getting the axles perfectly square, which made my car not want to drive straight, which caused it not to win very many races during the Pinewood Derby competition. Oh well. I did have the coolest looking car there, so that’s a big win in my book!
I used a hack saw to cut the axle slots. I used a square to mark the slots, but mine ended up not being perfect. Also, it’s important that the slots be perfectly level and both front and rear be the same depth. Not easy to accomplish when you’re doing the cut by hand. If you have any suggestions, I’m all ears.
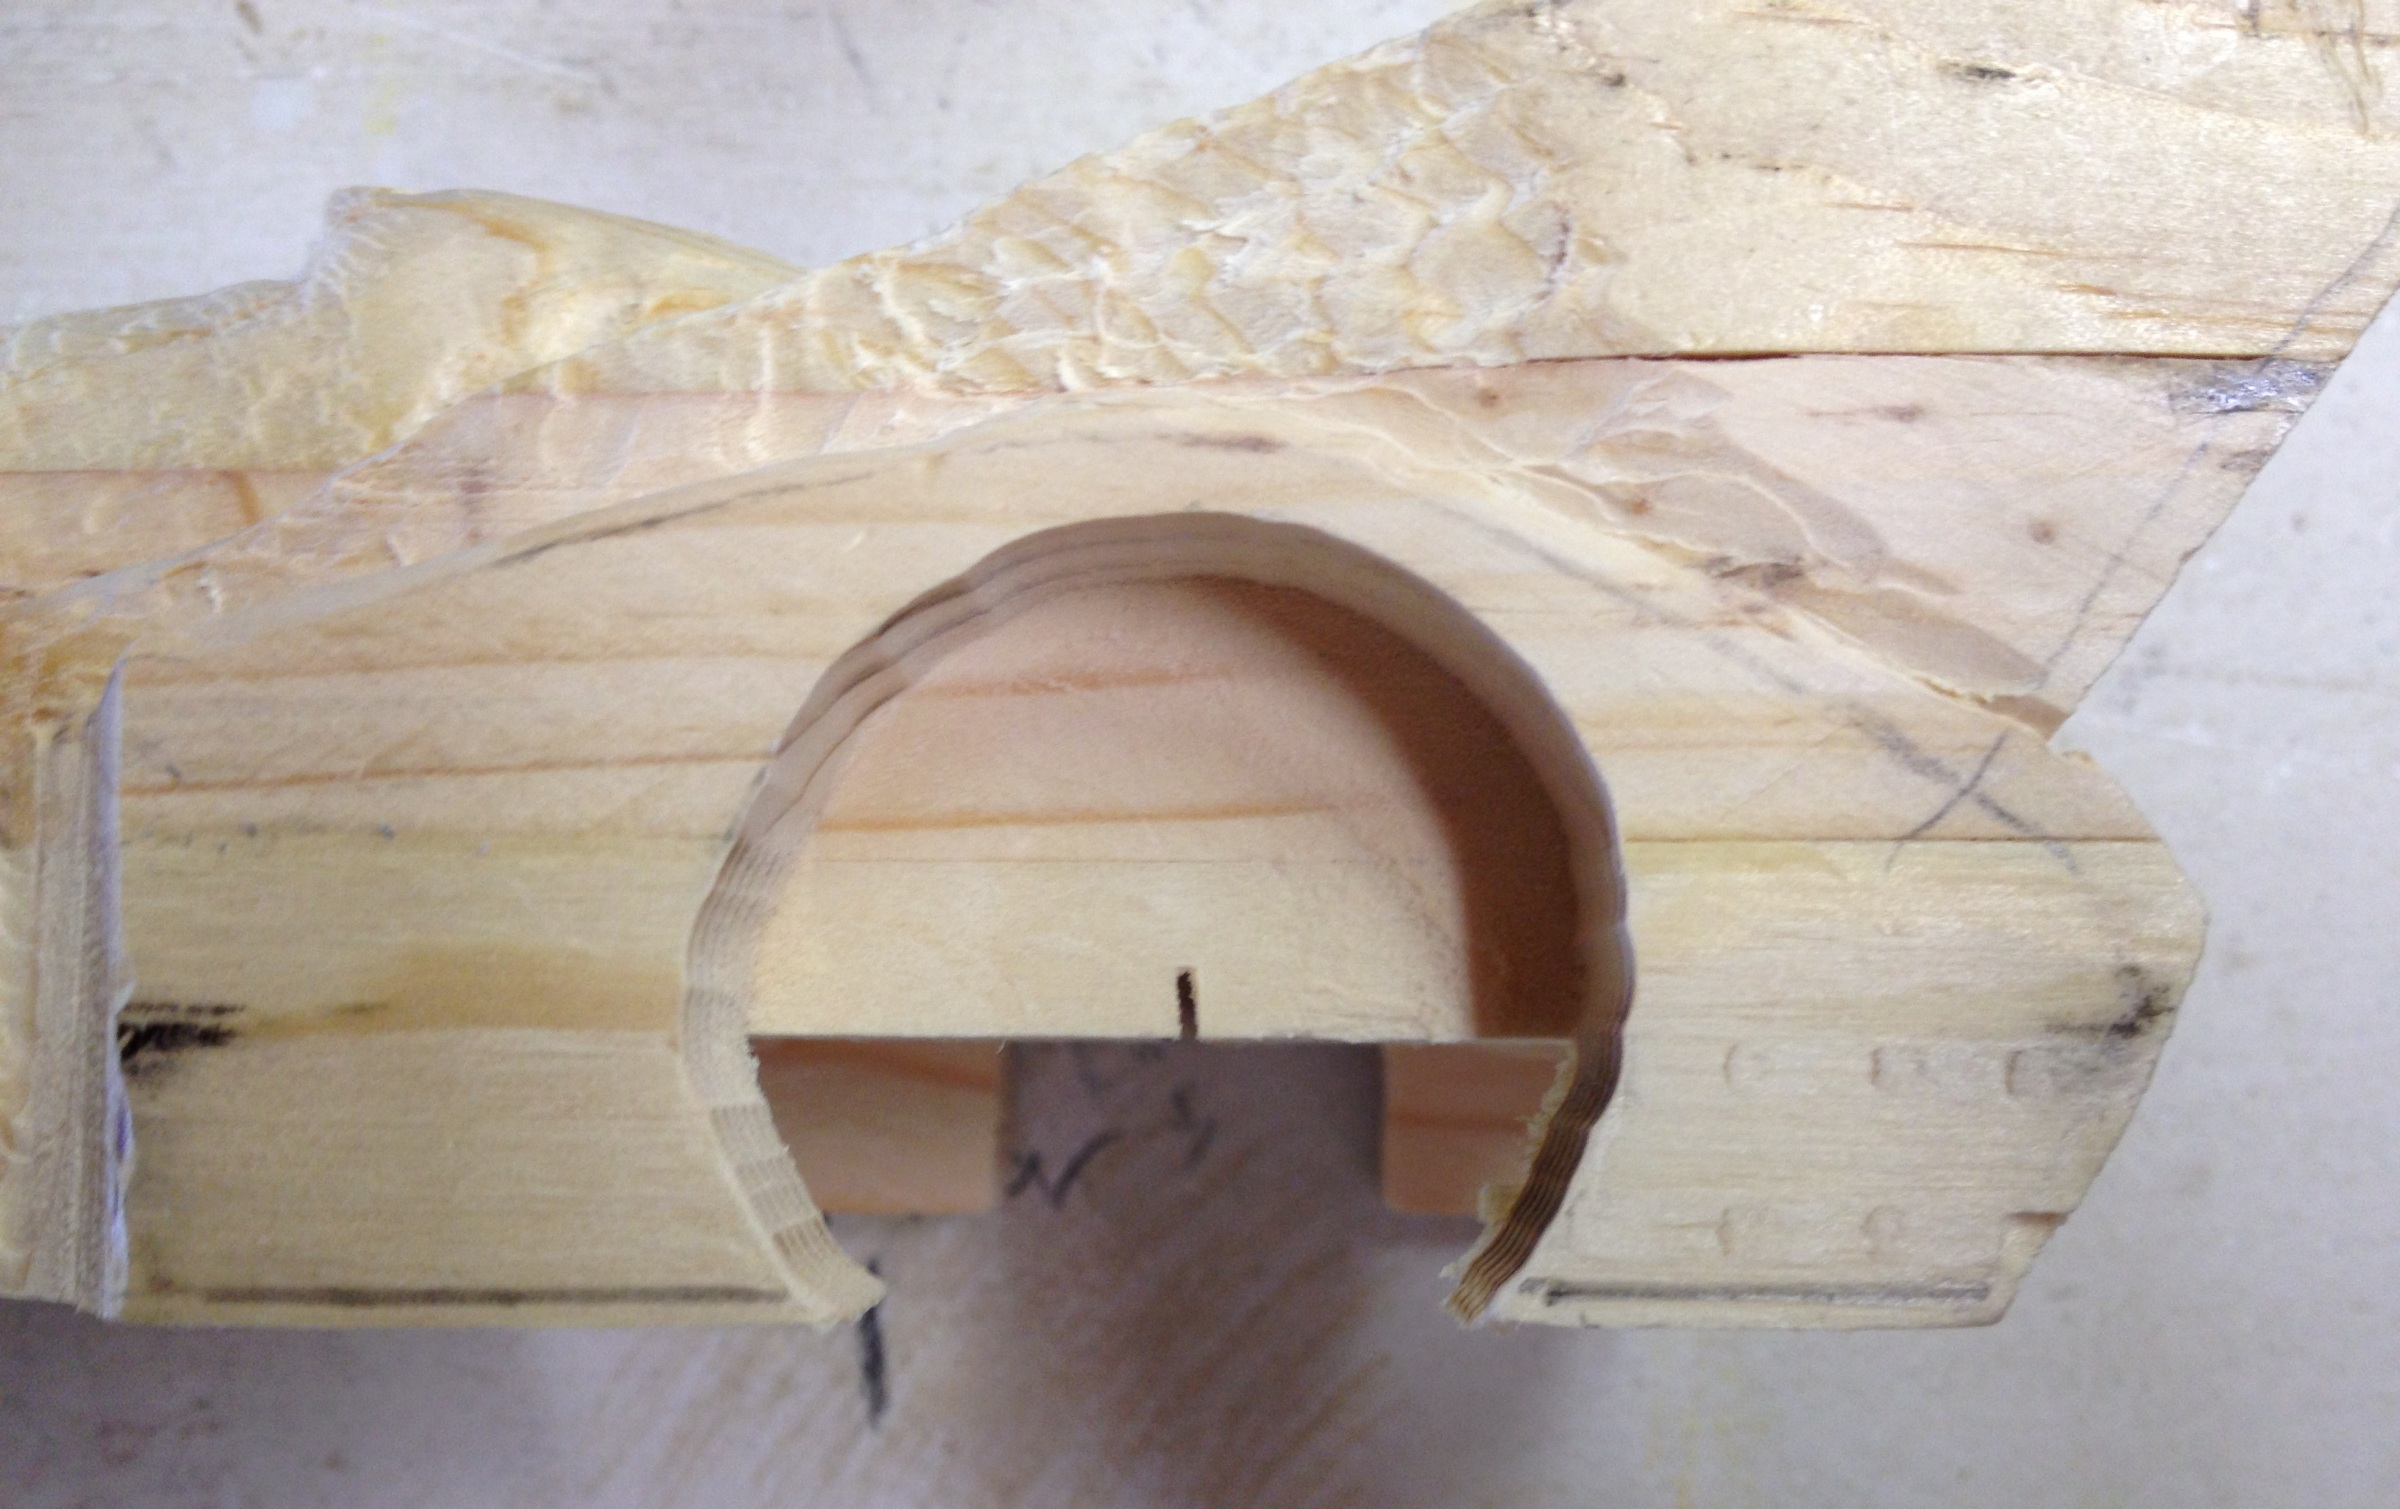
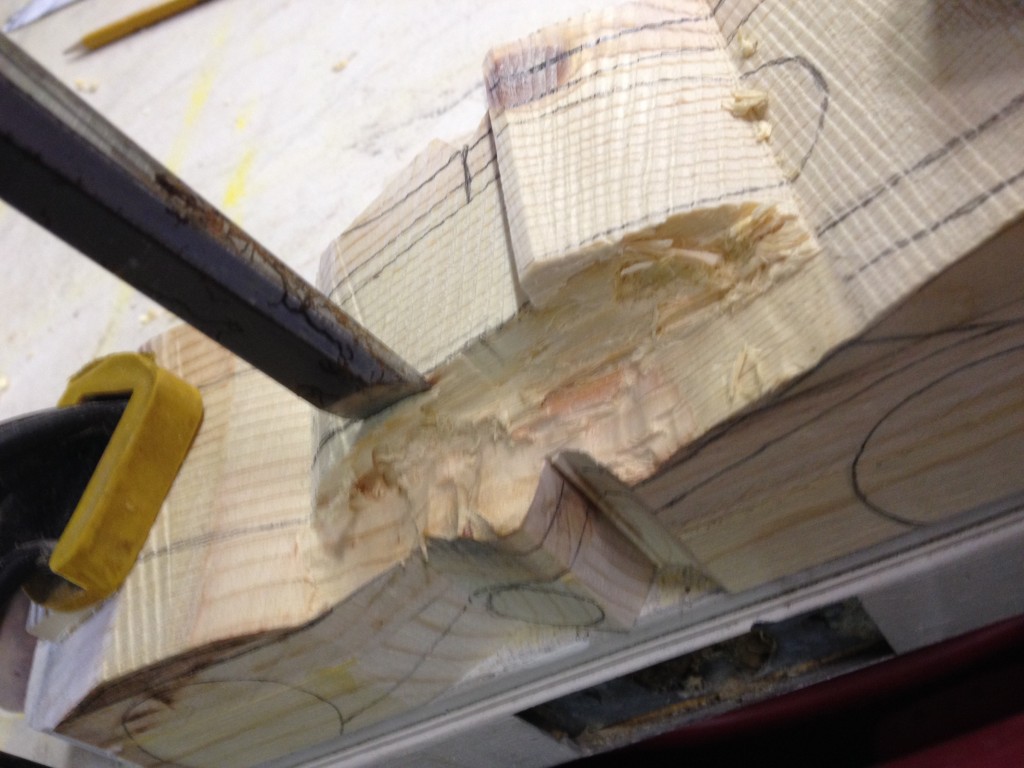
After I cut the slots with the hacksaw, I cut adjacent to the slots and then used a chisel to pop out the pieces which gave me a pretty good start on the wheel well holes.
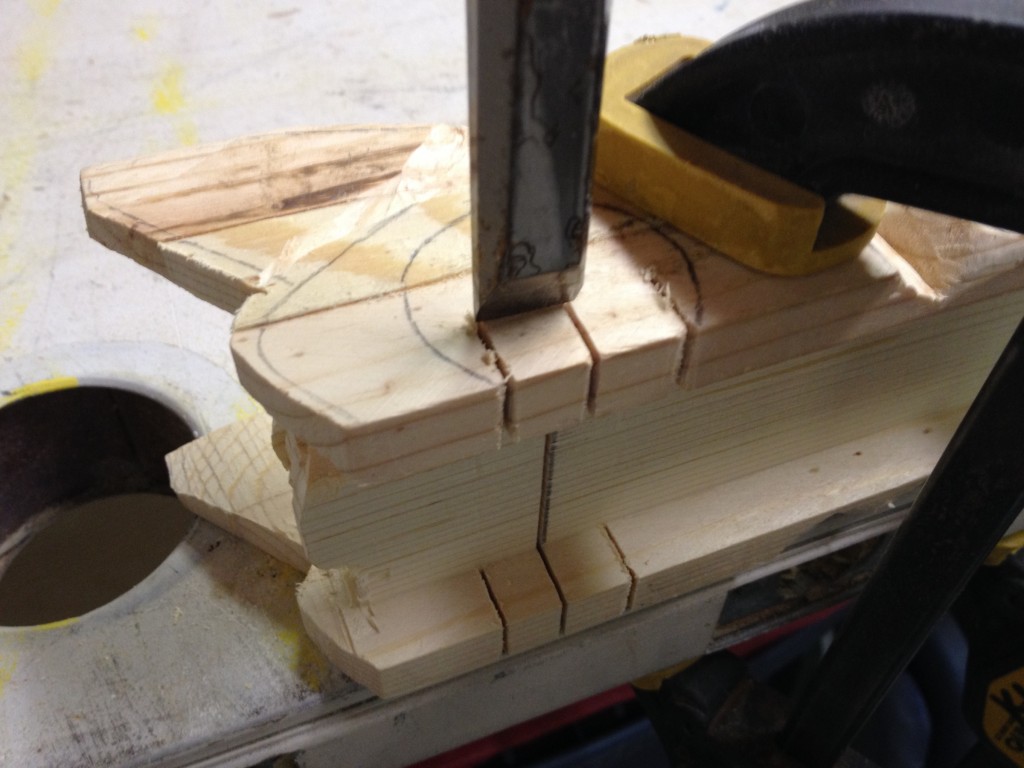
So this is what we have so far.

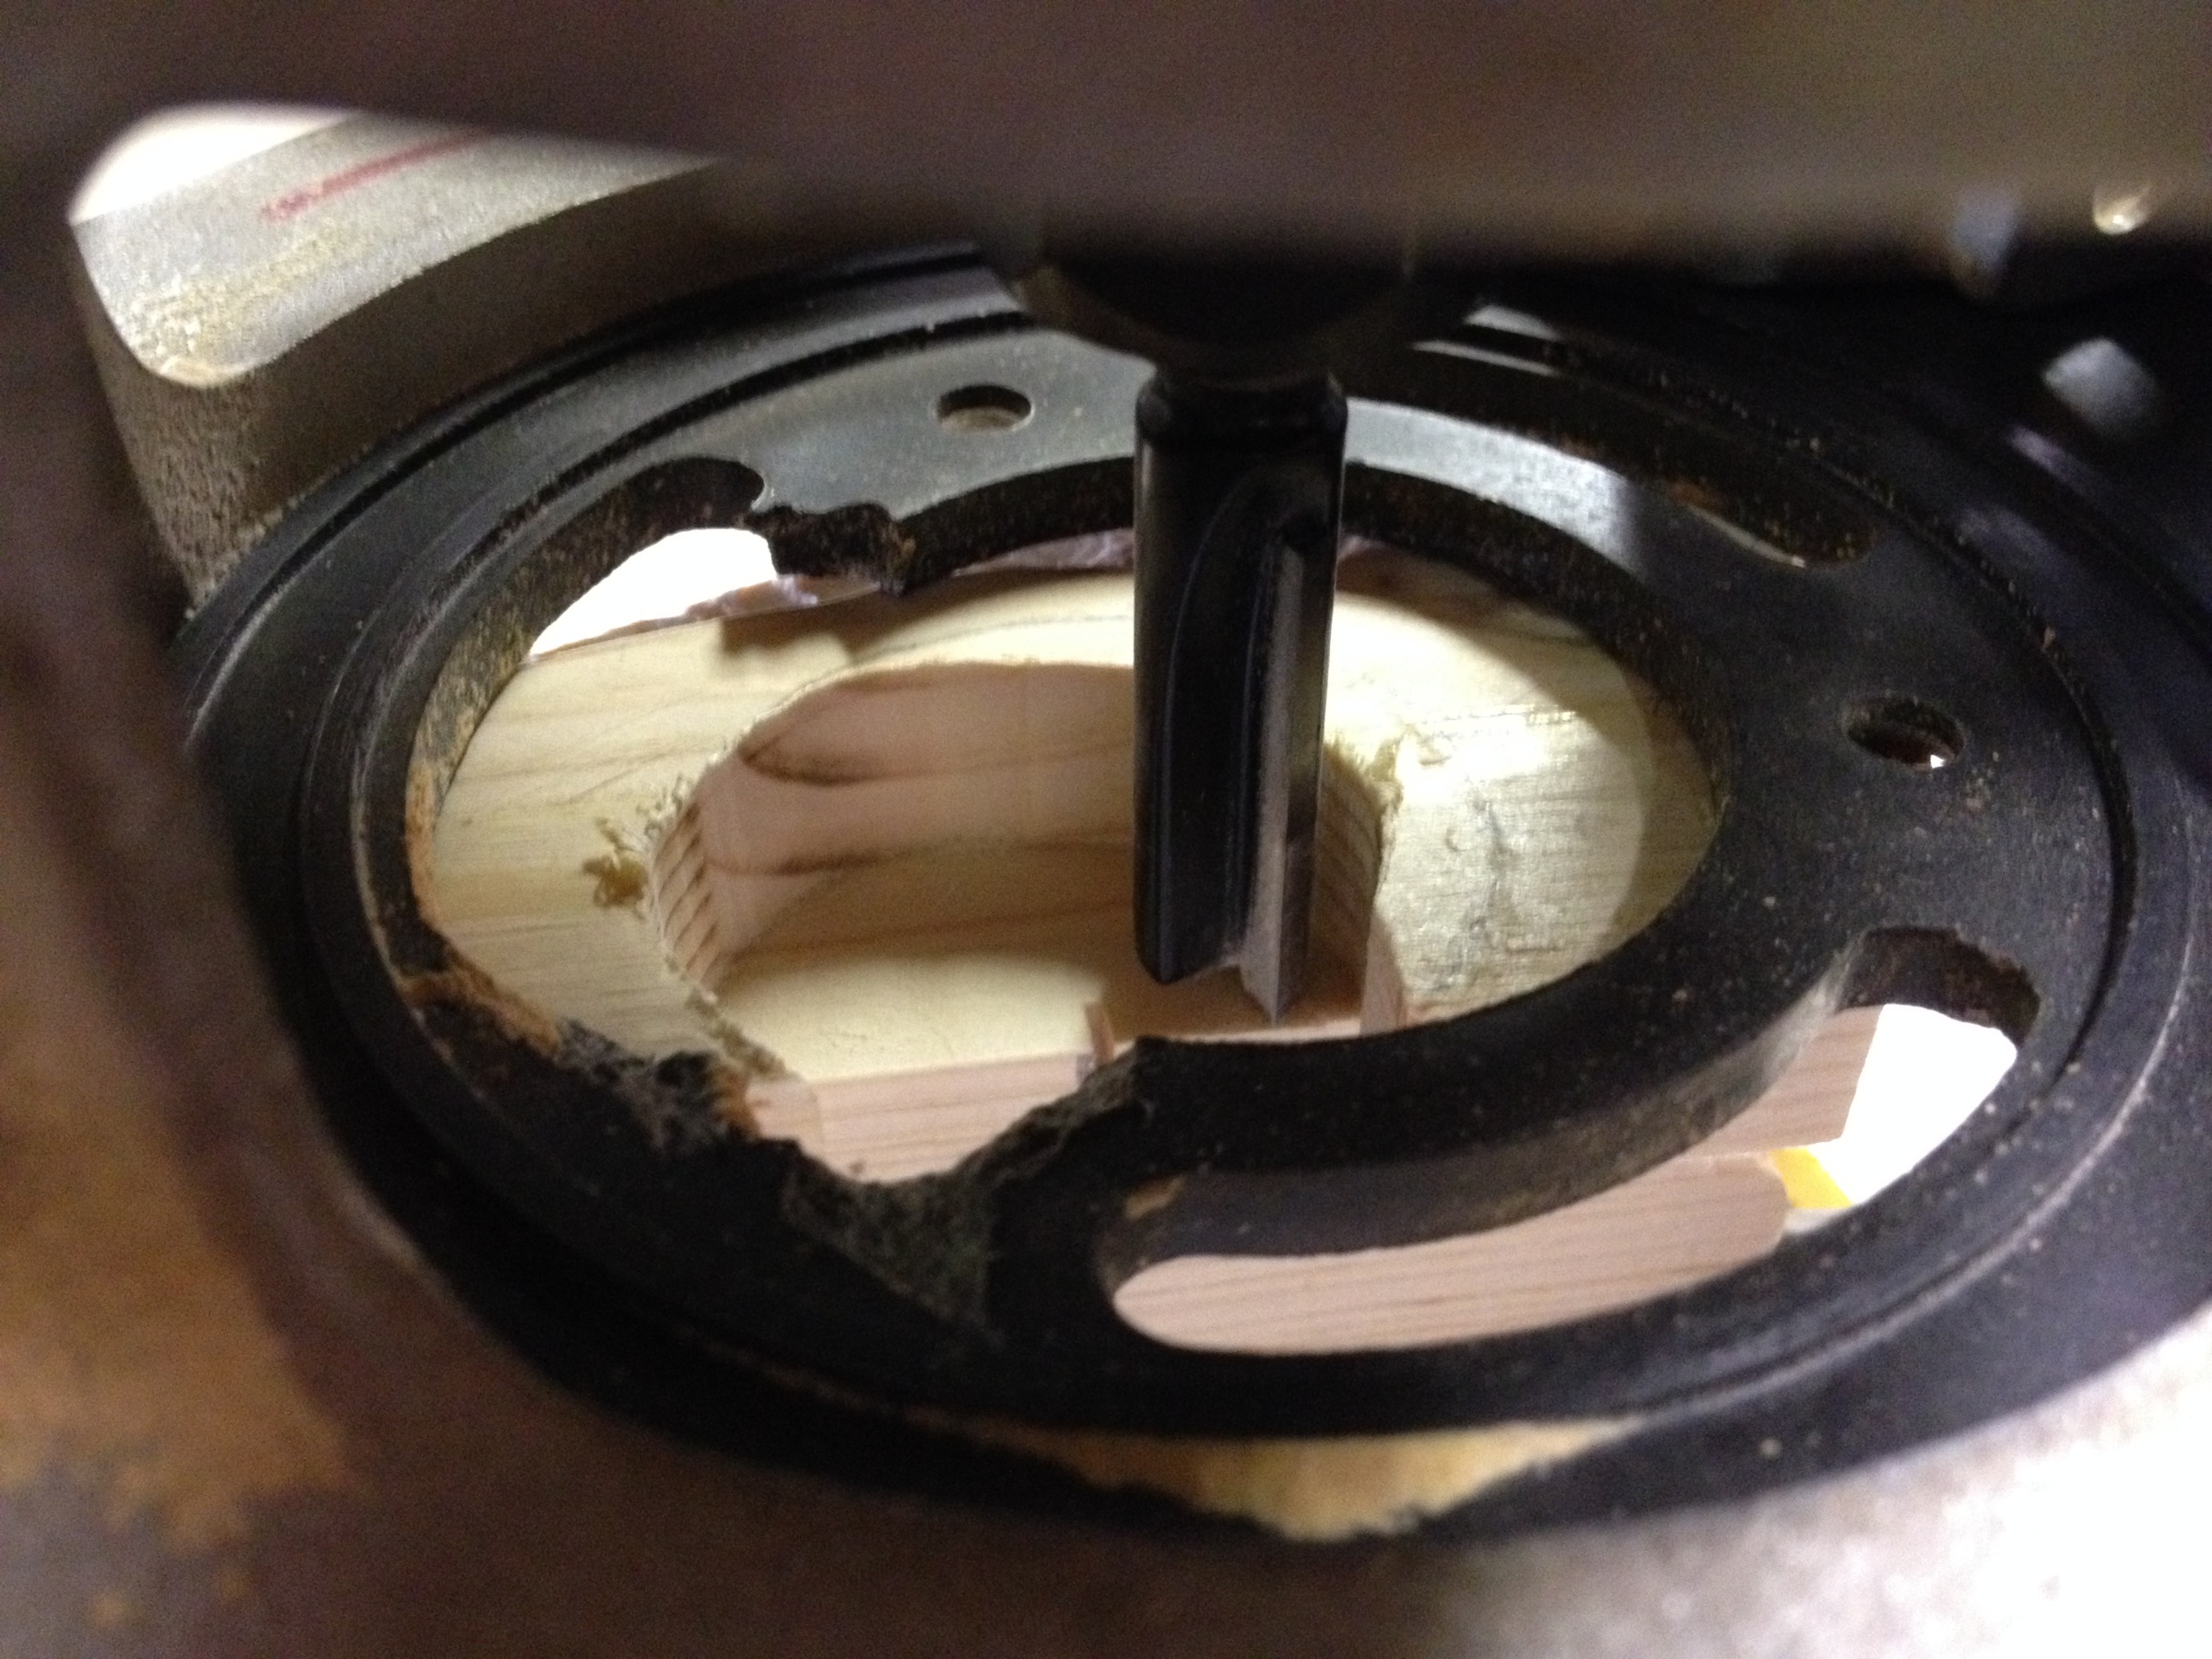
In order to cut out the circular wheel holes, I used a flat bit on my hand router. Be careful to go right up to the circular pencil marks and not any further. It’s hard to make a perfect circle with a hand router and no template, but do it slowly and do the best you can.

I set the bit to the exact depth of the side wood that was hanging down between the slot we cut out earlier using many swipes on the table saw.

Here is what the wheel well holes look like after routing them out. Not perfect circles, but that will be hard to notice from a few feet away. Especially after everything is painted black.

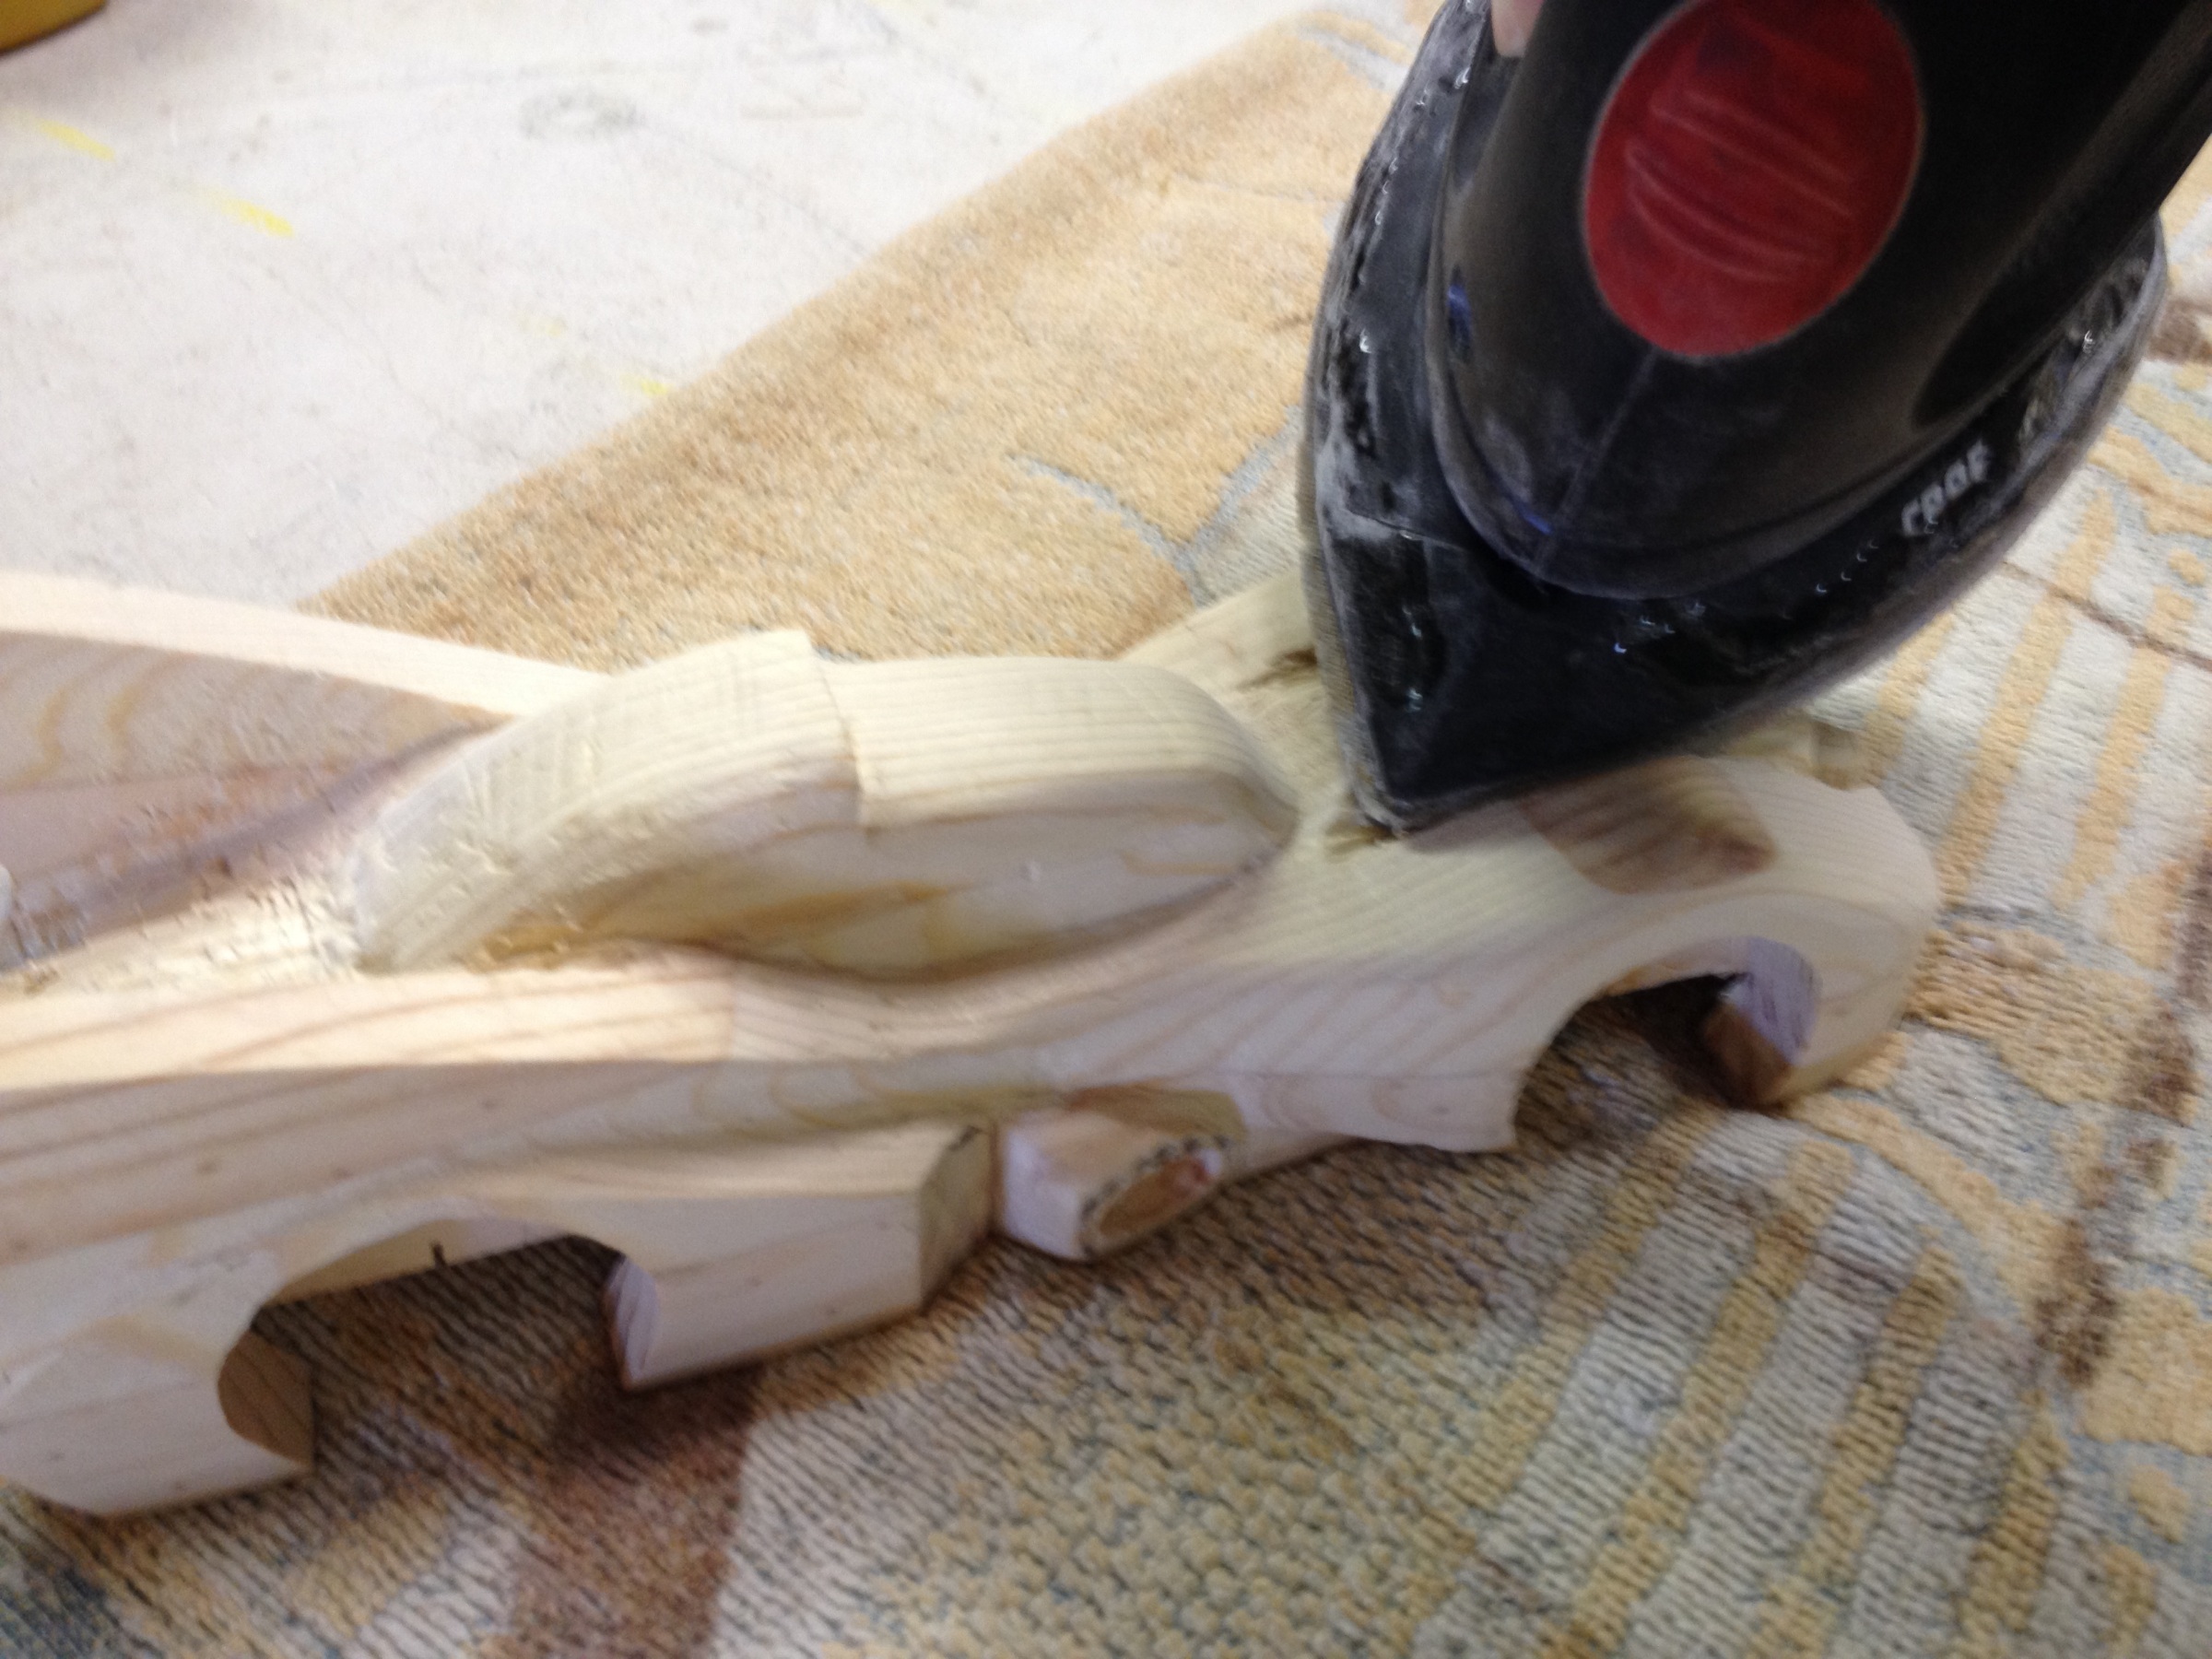
So just keep shaping until you get pretty close to the shape you want. Then do some coarse grit sanding. A detail power sander comes in real handy at this point.

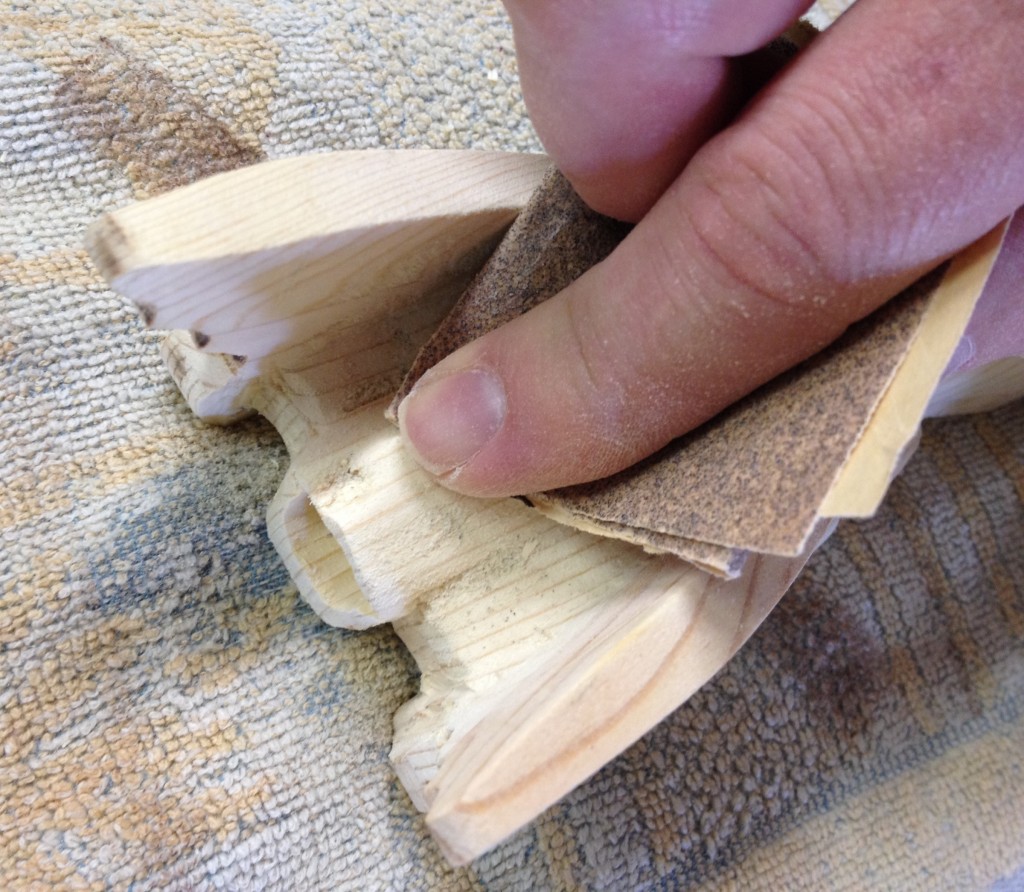
But even a small detail sander with a pointed tip can’t reach every nook and cranny in this design. So I had to resort to good old fashioned finger sanding between the rear fins.
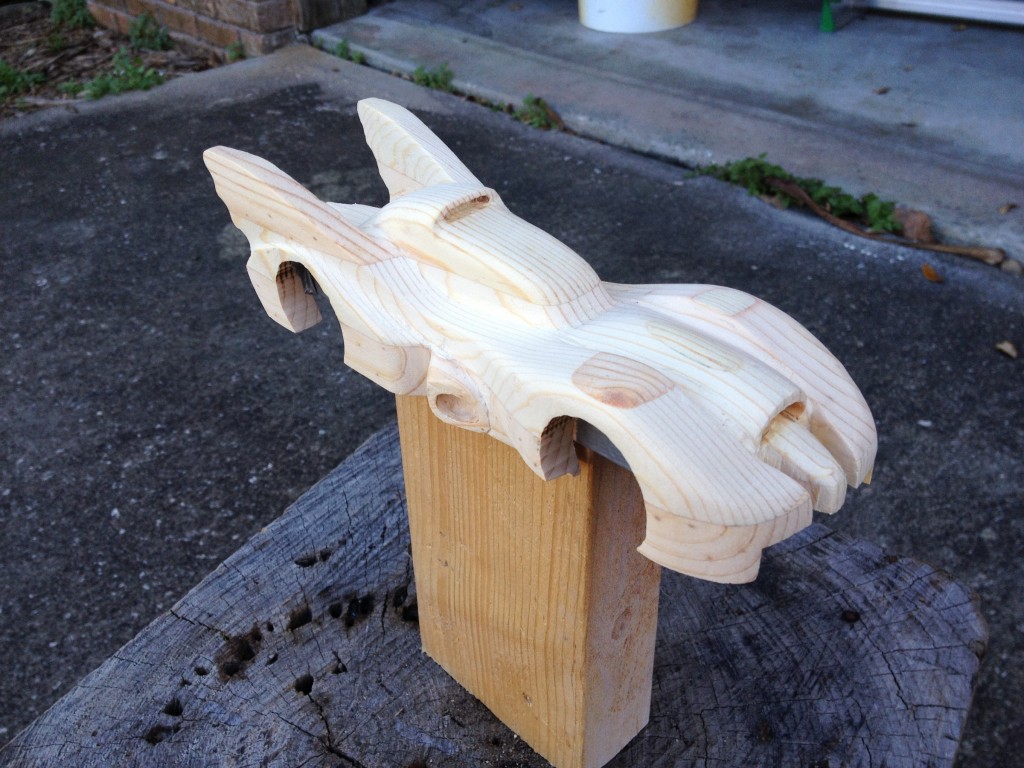
After the coarse sanding gets you nice and smooth fenders and such, you can run over the whole thing with a finer sandpaper to get something that looks like this. Wow. It’s almost too beautiful to paint, isn’t it?
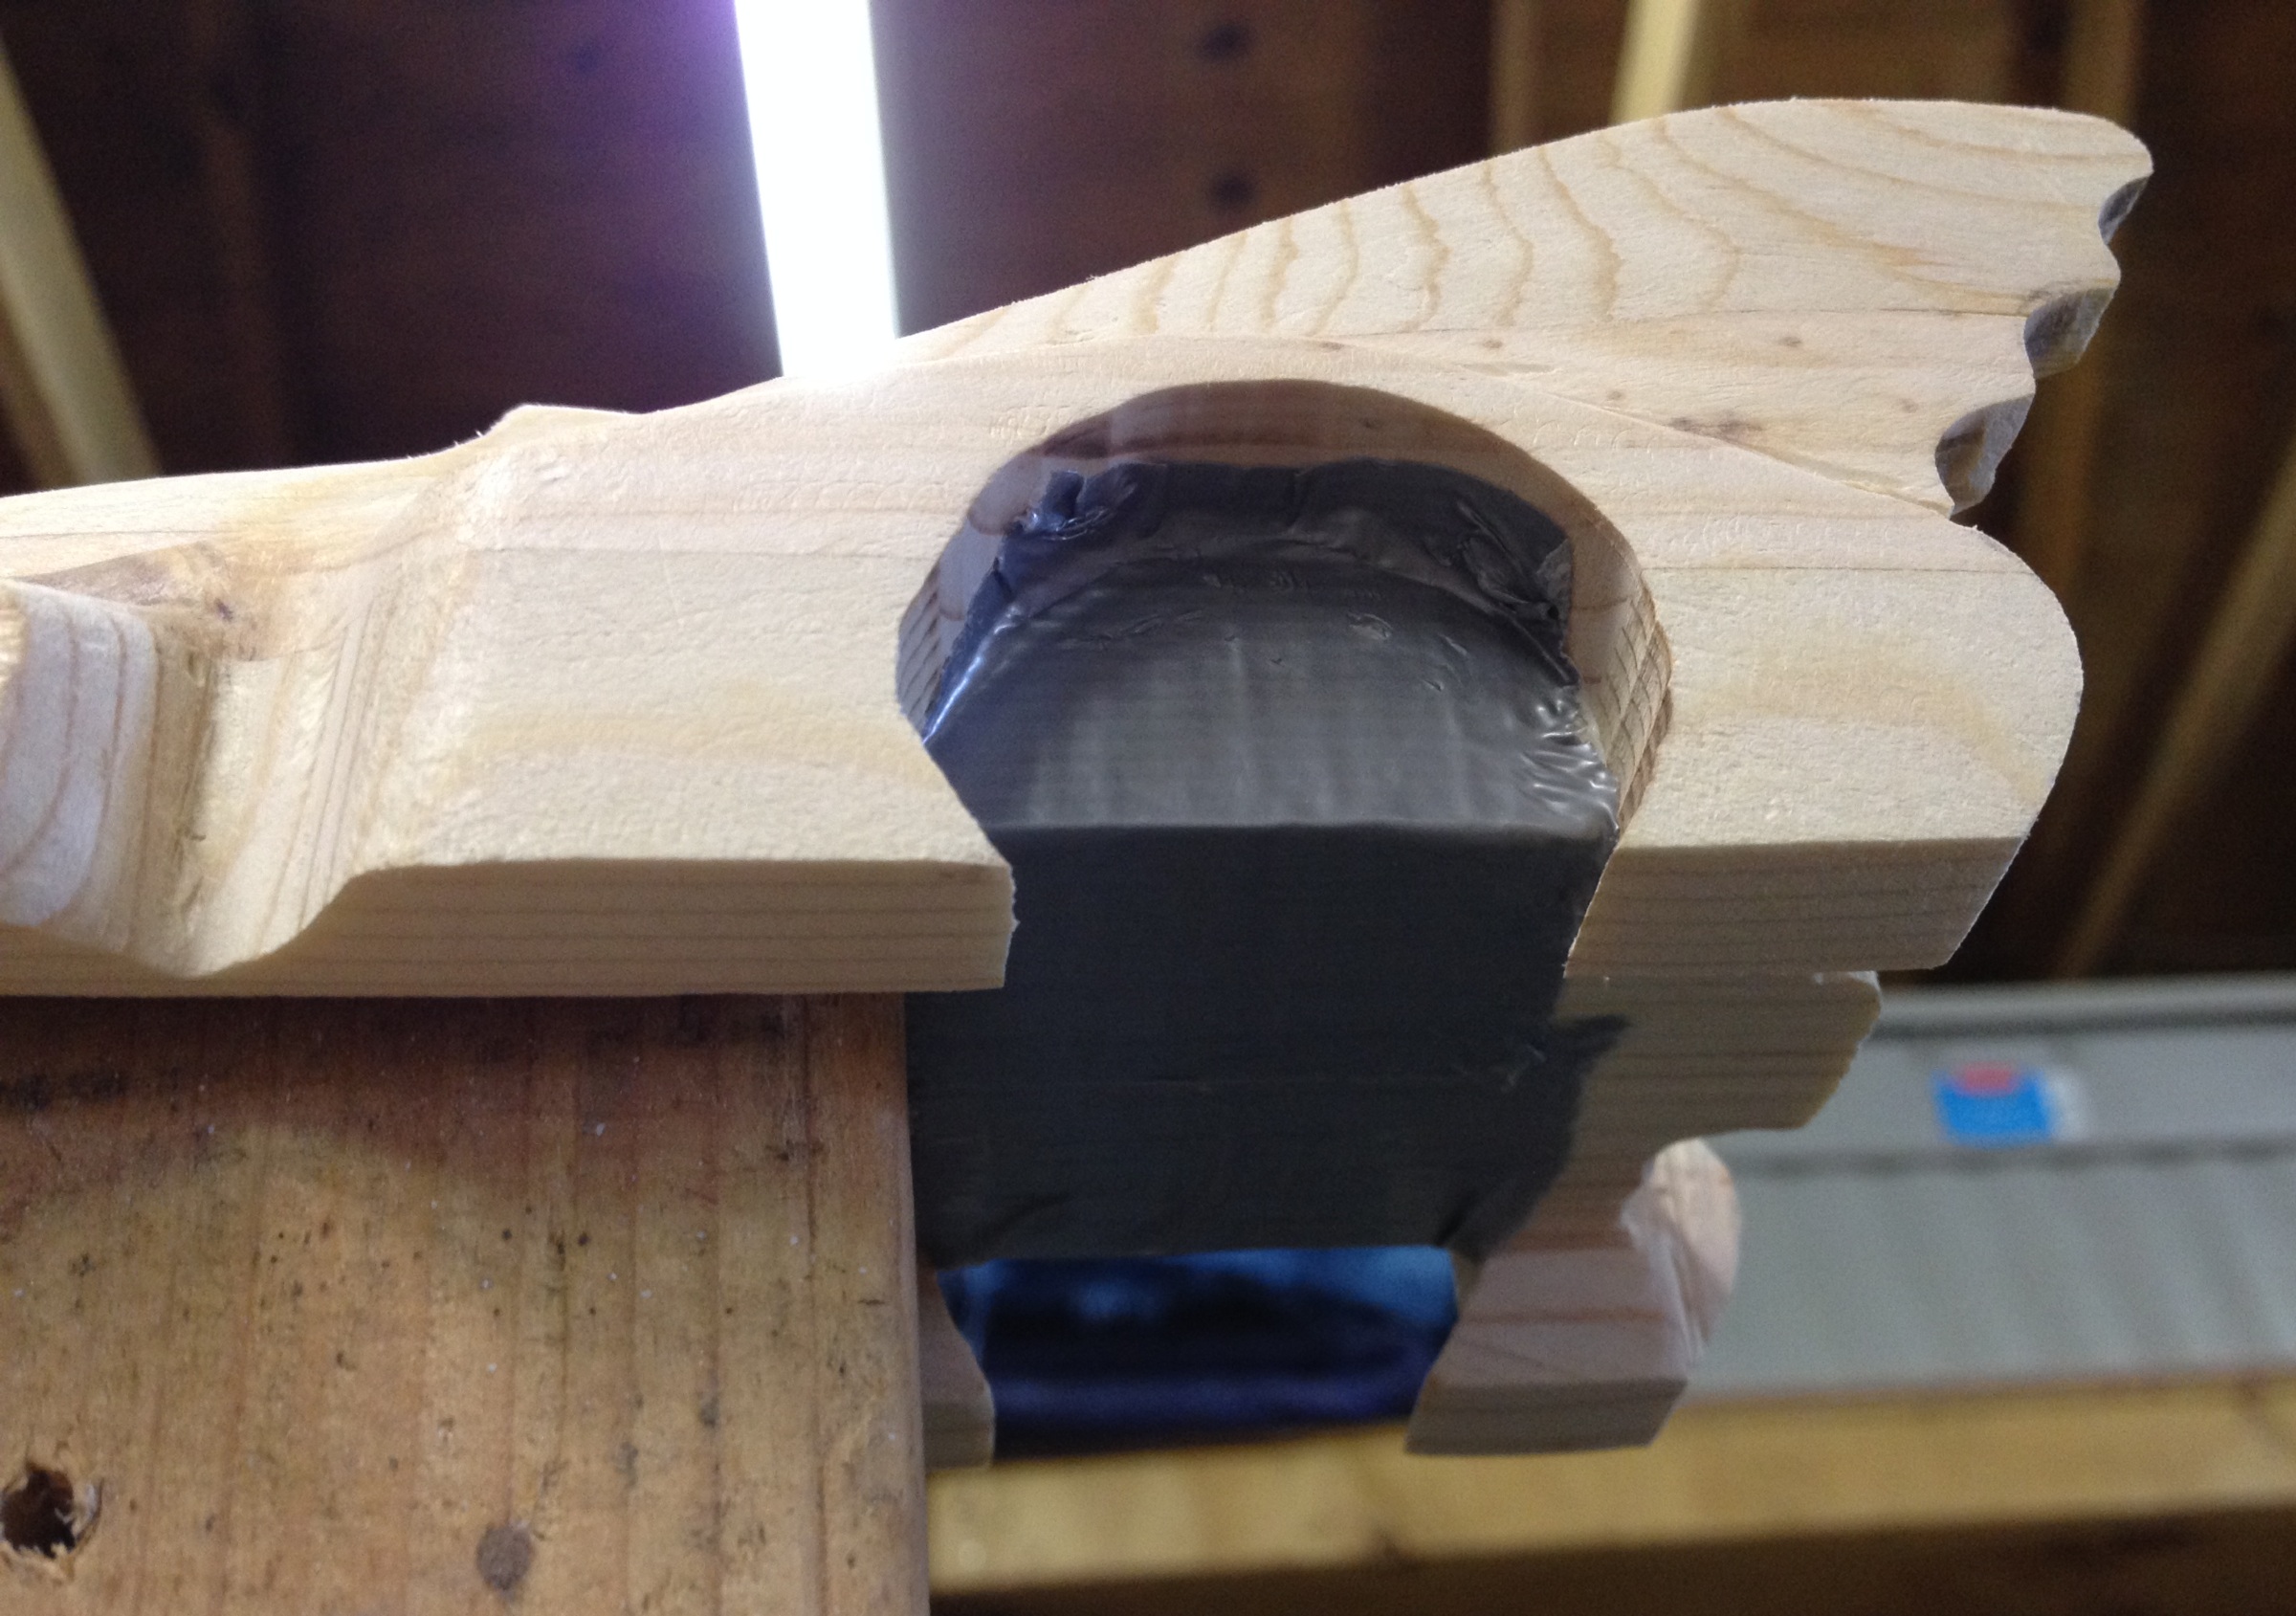
Now it’s time for painting. I’m not sure if this was a good idea or not, but I thought I should have my Pinewood Derby wheels touching raw wood rather than touching possibly sticky paint, so I masked them off with tape. In hindsight, since I used a tough outdoor quality spray paint for my finish, the wheels might have had less resistance on the paint than on the soft pine wood. Does anyone have any opinions or real data on this topic?

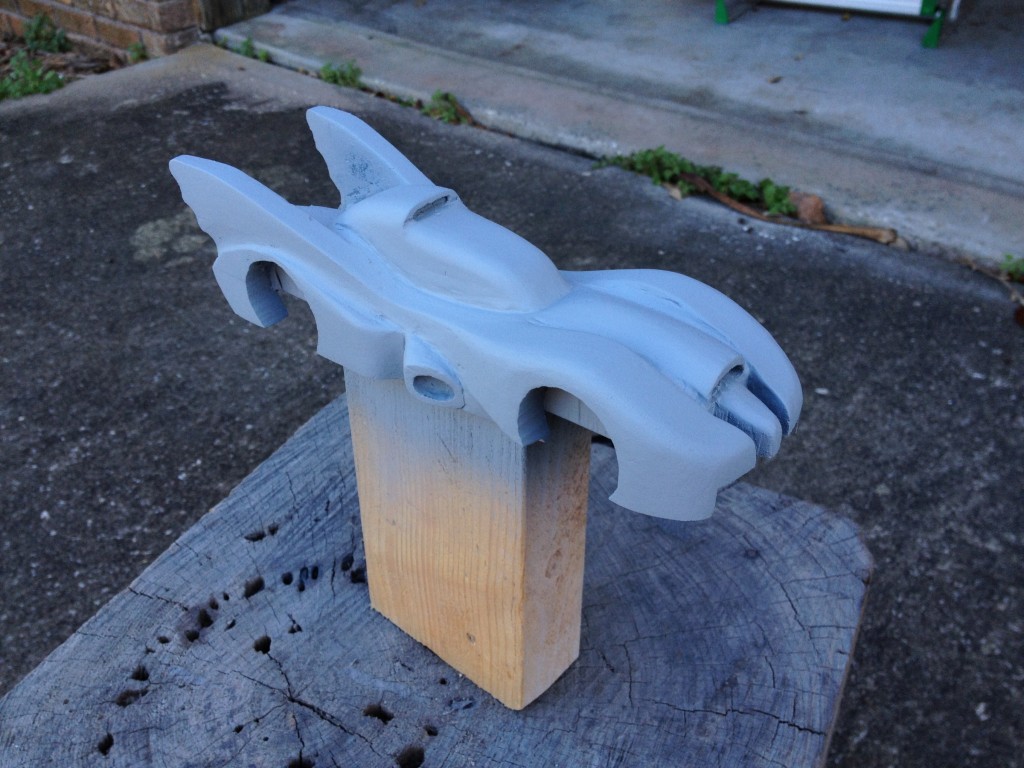
Here it is ready for a coat or two of spray paint primer.
The primer fills in some of the imperfections and gives the glossy outdoor spray paint a nice surface to stick to.
And here is the painted product. Not a perfectly smooth finish, but pretty good considering we started with a big square block of wood. Part of the finish roughness in my case was because I did not follow the spray paint directions exactly and I put my second coat on too soon. My first coat looked almost perfectly smooth and I should have just stopped there. But I got greedy.
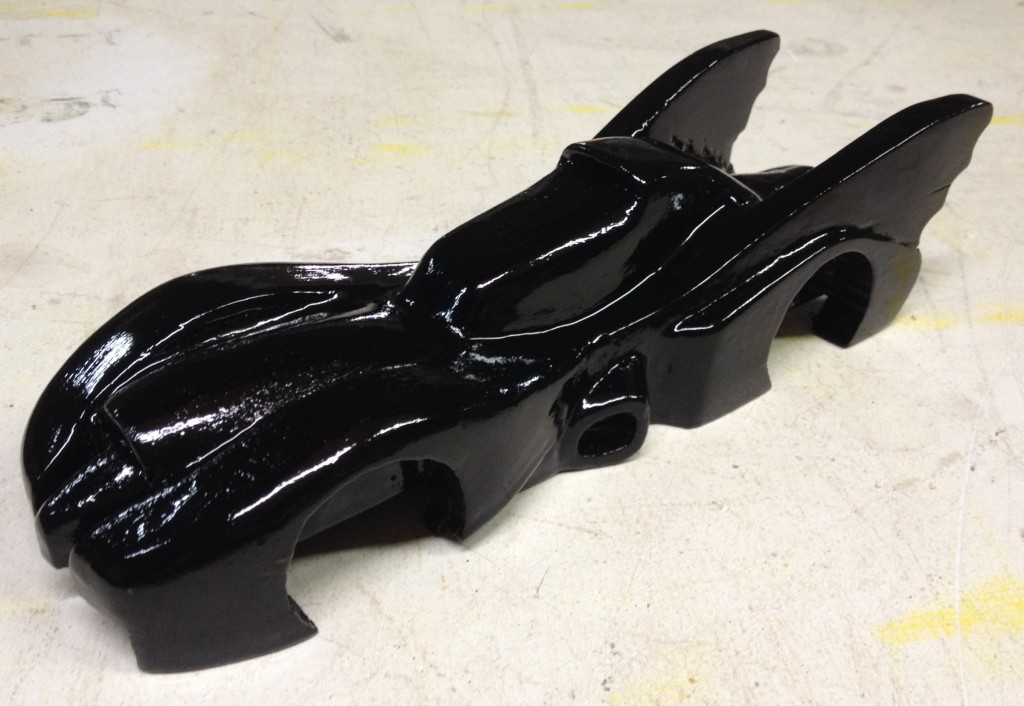
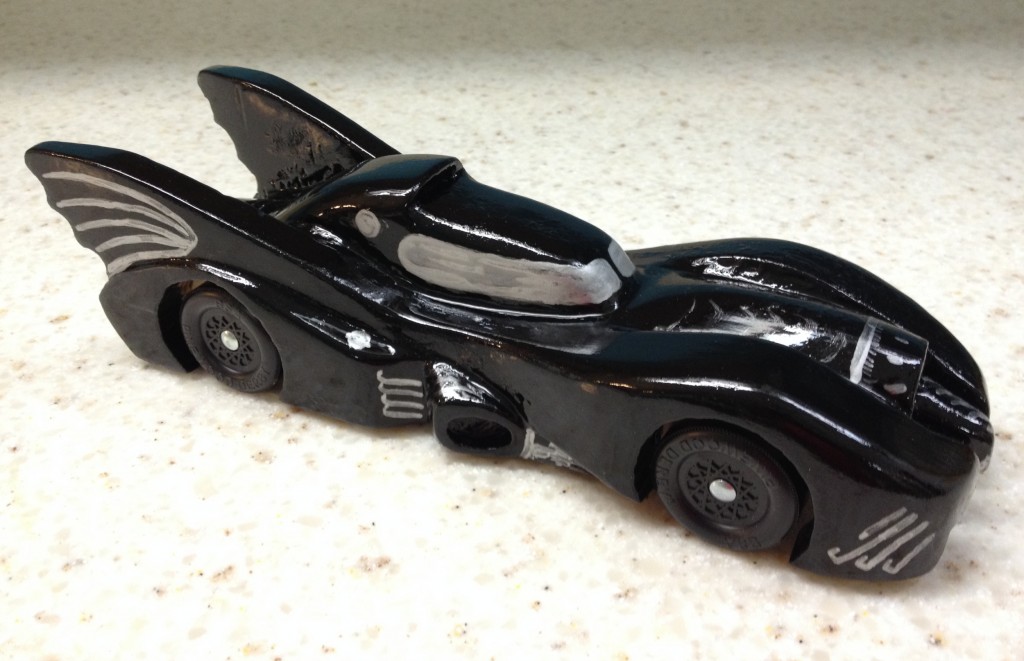
It looks even better with wheels installed. The axle slot I cut using the hacksaw was not wide enough, so I had to drill pilot holes. I probably did not drill them as perfectly straight as they needed to be, though.
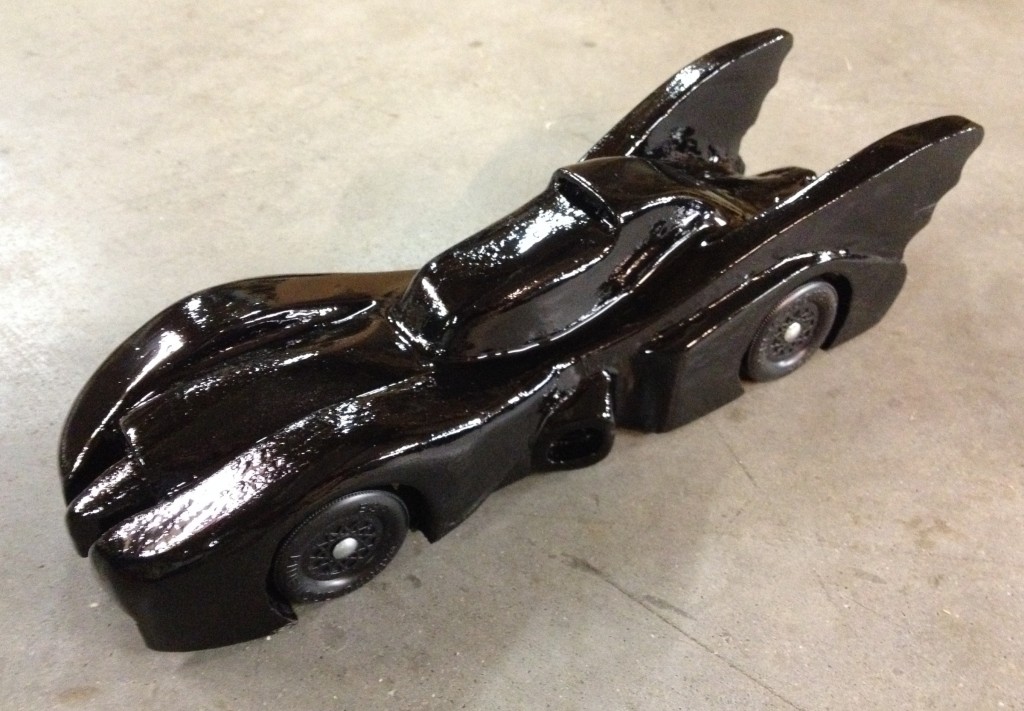
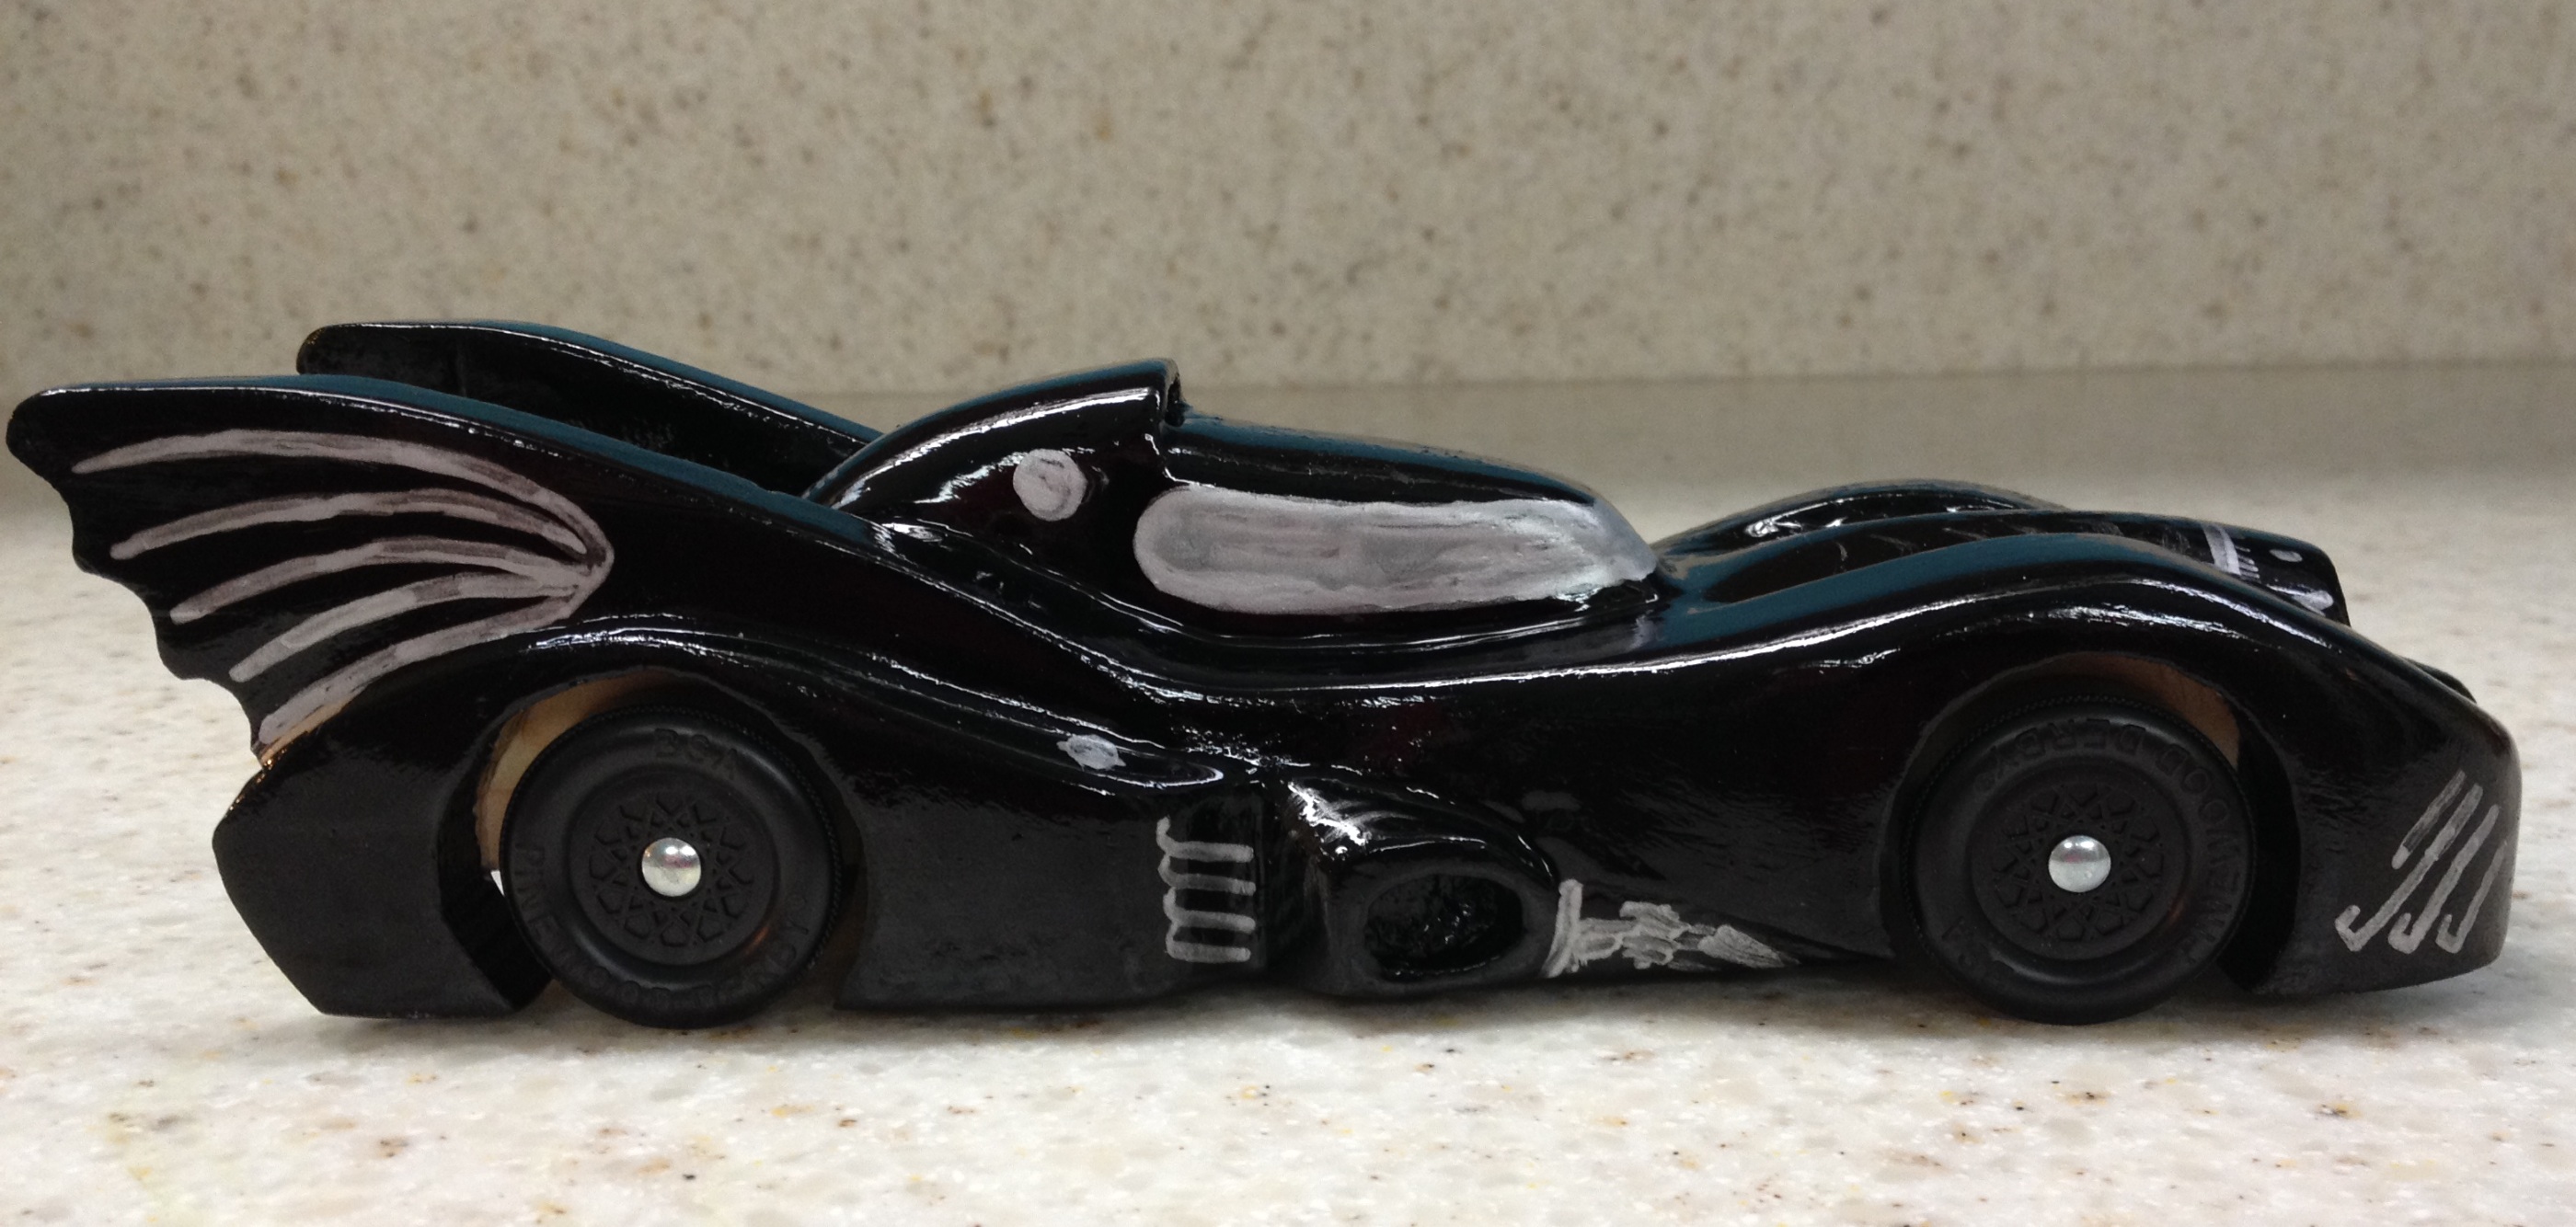
After painting a bit of detail, it really looked like the real Batmobile!

And here is the beauty shot! It took me a couple half days worth of effort over a couple weekends to get it completed. Maybe a bit more than that. Of course your results will vary.
I had a lot of fun and I learned quite a bit by doing this build. I hope that putting these photos and these instructions on the Internet will help some people with their build and I hope it will inspire some people to try it or to do something in a similar vein.
This project allowed me to exercise my creative and artistic muscles combined with woodworking which was a great experience. And even though my car didn’t win many races (funny story … it actually won several races when tried backwards, but it won none forwards), I’m happy with the experience.
If you have any comments or suggestions, please feel free to leave comments below or you can click on the “email us” link at the bottom of the website to send me a private email.
Thanks for your interest,
Kurt