Tag Archives: do it yourself

Toybox and shelf/desk for kids

After not finding any kid furniture that we were completely happy with, I decided to design and create my own large rolling toybox and plastic-bin holding shelf that can turn into a desk as the kids grow up. If I can find some time, I might add some detailed plans for this project. But for now I’ll just post a couple of photos of the finished products.

.Kid bin shelf and kid desk in one Rolling toybox.

Leave a comment below or send me an email from the link at the very bottom of the website if you are interested in seeing some plans.

Kurt

Replacement of window sill on block exterior wall

A few years ago on my 15 year old concrete block house, one of my exterior window sills started cracking severely and eventually started falling off in large chunks. We had new windows installed, and that work basically did the old broken window sill in for good. I decided to try to form a new concrete window sill on my own. You can see in the photo below that the missing window sill and the broken pieces on the ground after I had ripped off all the loose pieces.

01-oldsillremoved.jpg

In the photo below, you can clearly see the rebar showing throughout the length of the fractured concrete surface. I guess that rebar didn’t help the sill stay in one piece. It actually helped break it apart once the crack had formed in the area of the rebar.


I got the surface really clean and free of dust and concrete pieces. Then I painted on concrete adhesive that I bought at my local home improvement store. I’ve never used this stuff before, so I don’t know how well it works. As you can see from the photo below, I then mounted some wood strips that were about a half an inch thick to the wall with tapcon screws. These wood strips would become the bottom and side surfaces for my concrete sill mold.

02-boardsattached.jpg

Then I screwed a 1×6 plank that I had laying around to the wood strips. I mounted the top of the plank at the same height that I wanted the top of the new window sill to end up being. I then mixed up some concrete and poured it into the mold. I made sure that the top surface of the new sill slanted down and away from the house. Otherwise, water would pool instead of running off. The photo below shows the mold filled with concrete and curing with plastic around it.

03-concretesetting.jpg

The new sill is perfect. Eventually I got the house painted and the photo below shows the final painted product.

04-finishedproduct.jpg

Kurt


Mission style wall hanging mail holder

This was another case of seeing a product in a mail-order catalog and saying to myself, “I could make that, and it would cost me way less than 40 bucks!”

.01-mailholder.JPG .02-mailholder.JPG

I don’t really have a lot of details to talk about here. I saw this product, probably in an expensive Pottery Barn catalog or something. It was not a big deal to make. I just cut some boards to size, made rabbit joints and finish nailed them together. I put lots of coats of dark stain on it to get it as dark as I wanted it. I wish I would have made it about an inch wider, though. When we put magazines in it, they get rolled up at the bottom corner because the slot width gets skinnier at the bottom.

My magical disappearing workbench!

I designed, built, and installed this amazing disappearing workbench many many years ago when I first moved in to this house. I figure there might be someone out there who might be able to use this design for their own workbenches. First, lets look at the photos, then I’ll try to describe the design.

.01-disappearingworkbench.jpg .02-disappearingworkbench.jpg

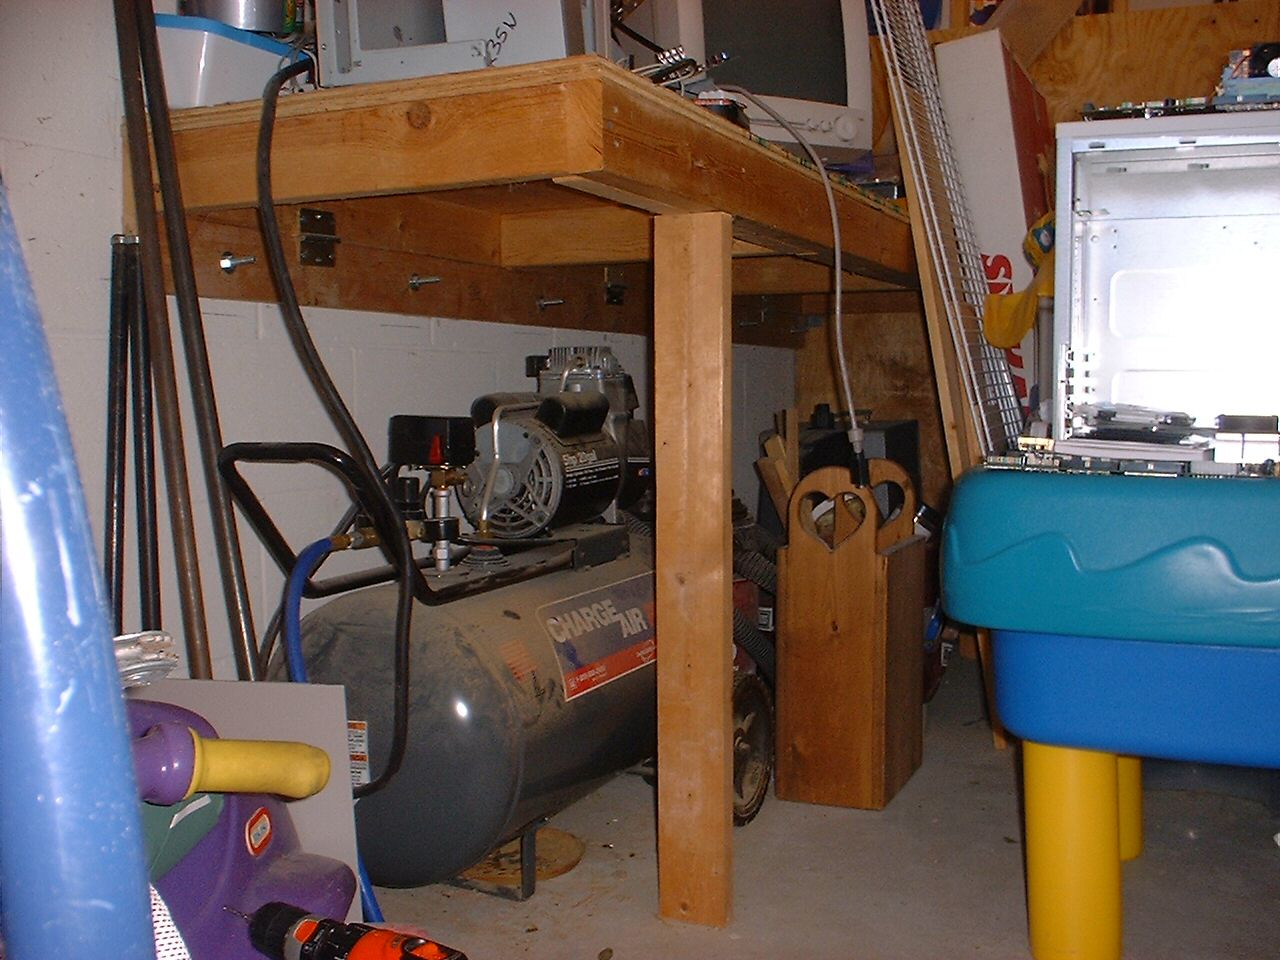
You can see in the photos that there is a hinge on each leg of the workbench and also there are hinges along the back wall. So you just lift up the legs and the whole workbench swings down and against the wall and out of your way! Pretty cool, huh? I don’t have photos of the bench folded down because I rarely, if ever, actually fold mine down. I usually have too much stuff stored on top of it and also underneath it, so it’s not too convenient for me to fold mine down.

Basically, I created a box the size of the workbench top out of 2×4’s. Then I nailed some plywood to the box, then nailed a second piece of plywood just to make the top of the workbench extra tough. Then I mounted a 2×4 to the concrete block wall using some large heavy duty cement anchors and then connected the workbench top to the wall mounted 2×4 using heavy duty door hinges.

You can see in the second photo that I had to double up the box frame 2×4’s in the area where the legs are mounted to the box frame. The legs are mounted to this doubled up area using the same hinges. That’s about it. If I left out any important details, just email me using the link at the bottom of the page or reply to this blog entry and I will answer either way.

Kurt

Update: September 2012

Here are finally some more photos of the workbench design, including what it looks like when it is folded down.  I hope these photos show you how simple and awesome this workbench design is.

Kurt