
I had every intention of building a full-blown tree house on our new property, so I started with the base platform and then I was going to add other platforms and railings and ladders and such. But when the first base platform was done, I kind of liked the openness and simplicity of it. Rather than a tree house, it was sort of like a tree deck.

Some readers might be wondering about the lack of railings and the potential for safety issues. That’s obviously a concern with any play structure … especially elevated ones. I find that the lack of railings makes the kids nervous enough that they don’t run around or play rough up there.
Also, I made the access from the ground difficult enough that it becomes a sort of physical test that the kids have to pass before they are allowed up there. If a kid can’t climb up to the platform, which is a bit of a difficult climb, then they aren’t big enough or agile enough to be playing up there.
I started out with a rough sketch. This sketch helped me figure out how much lumber to buy. Always use treated lumber for outdoor structures. Or be prepared to paint it at least once every year.
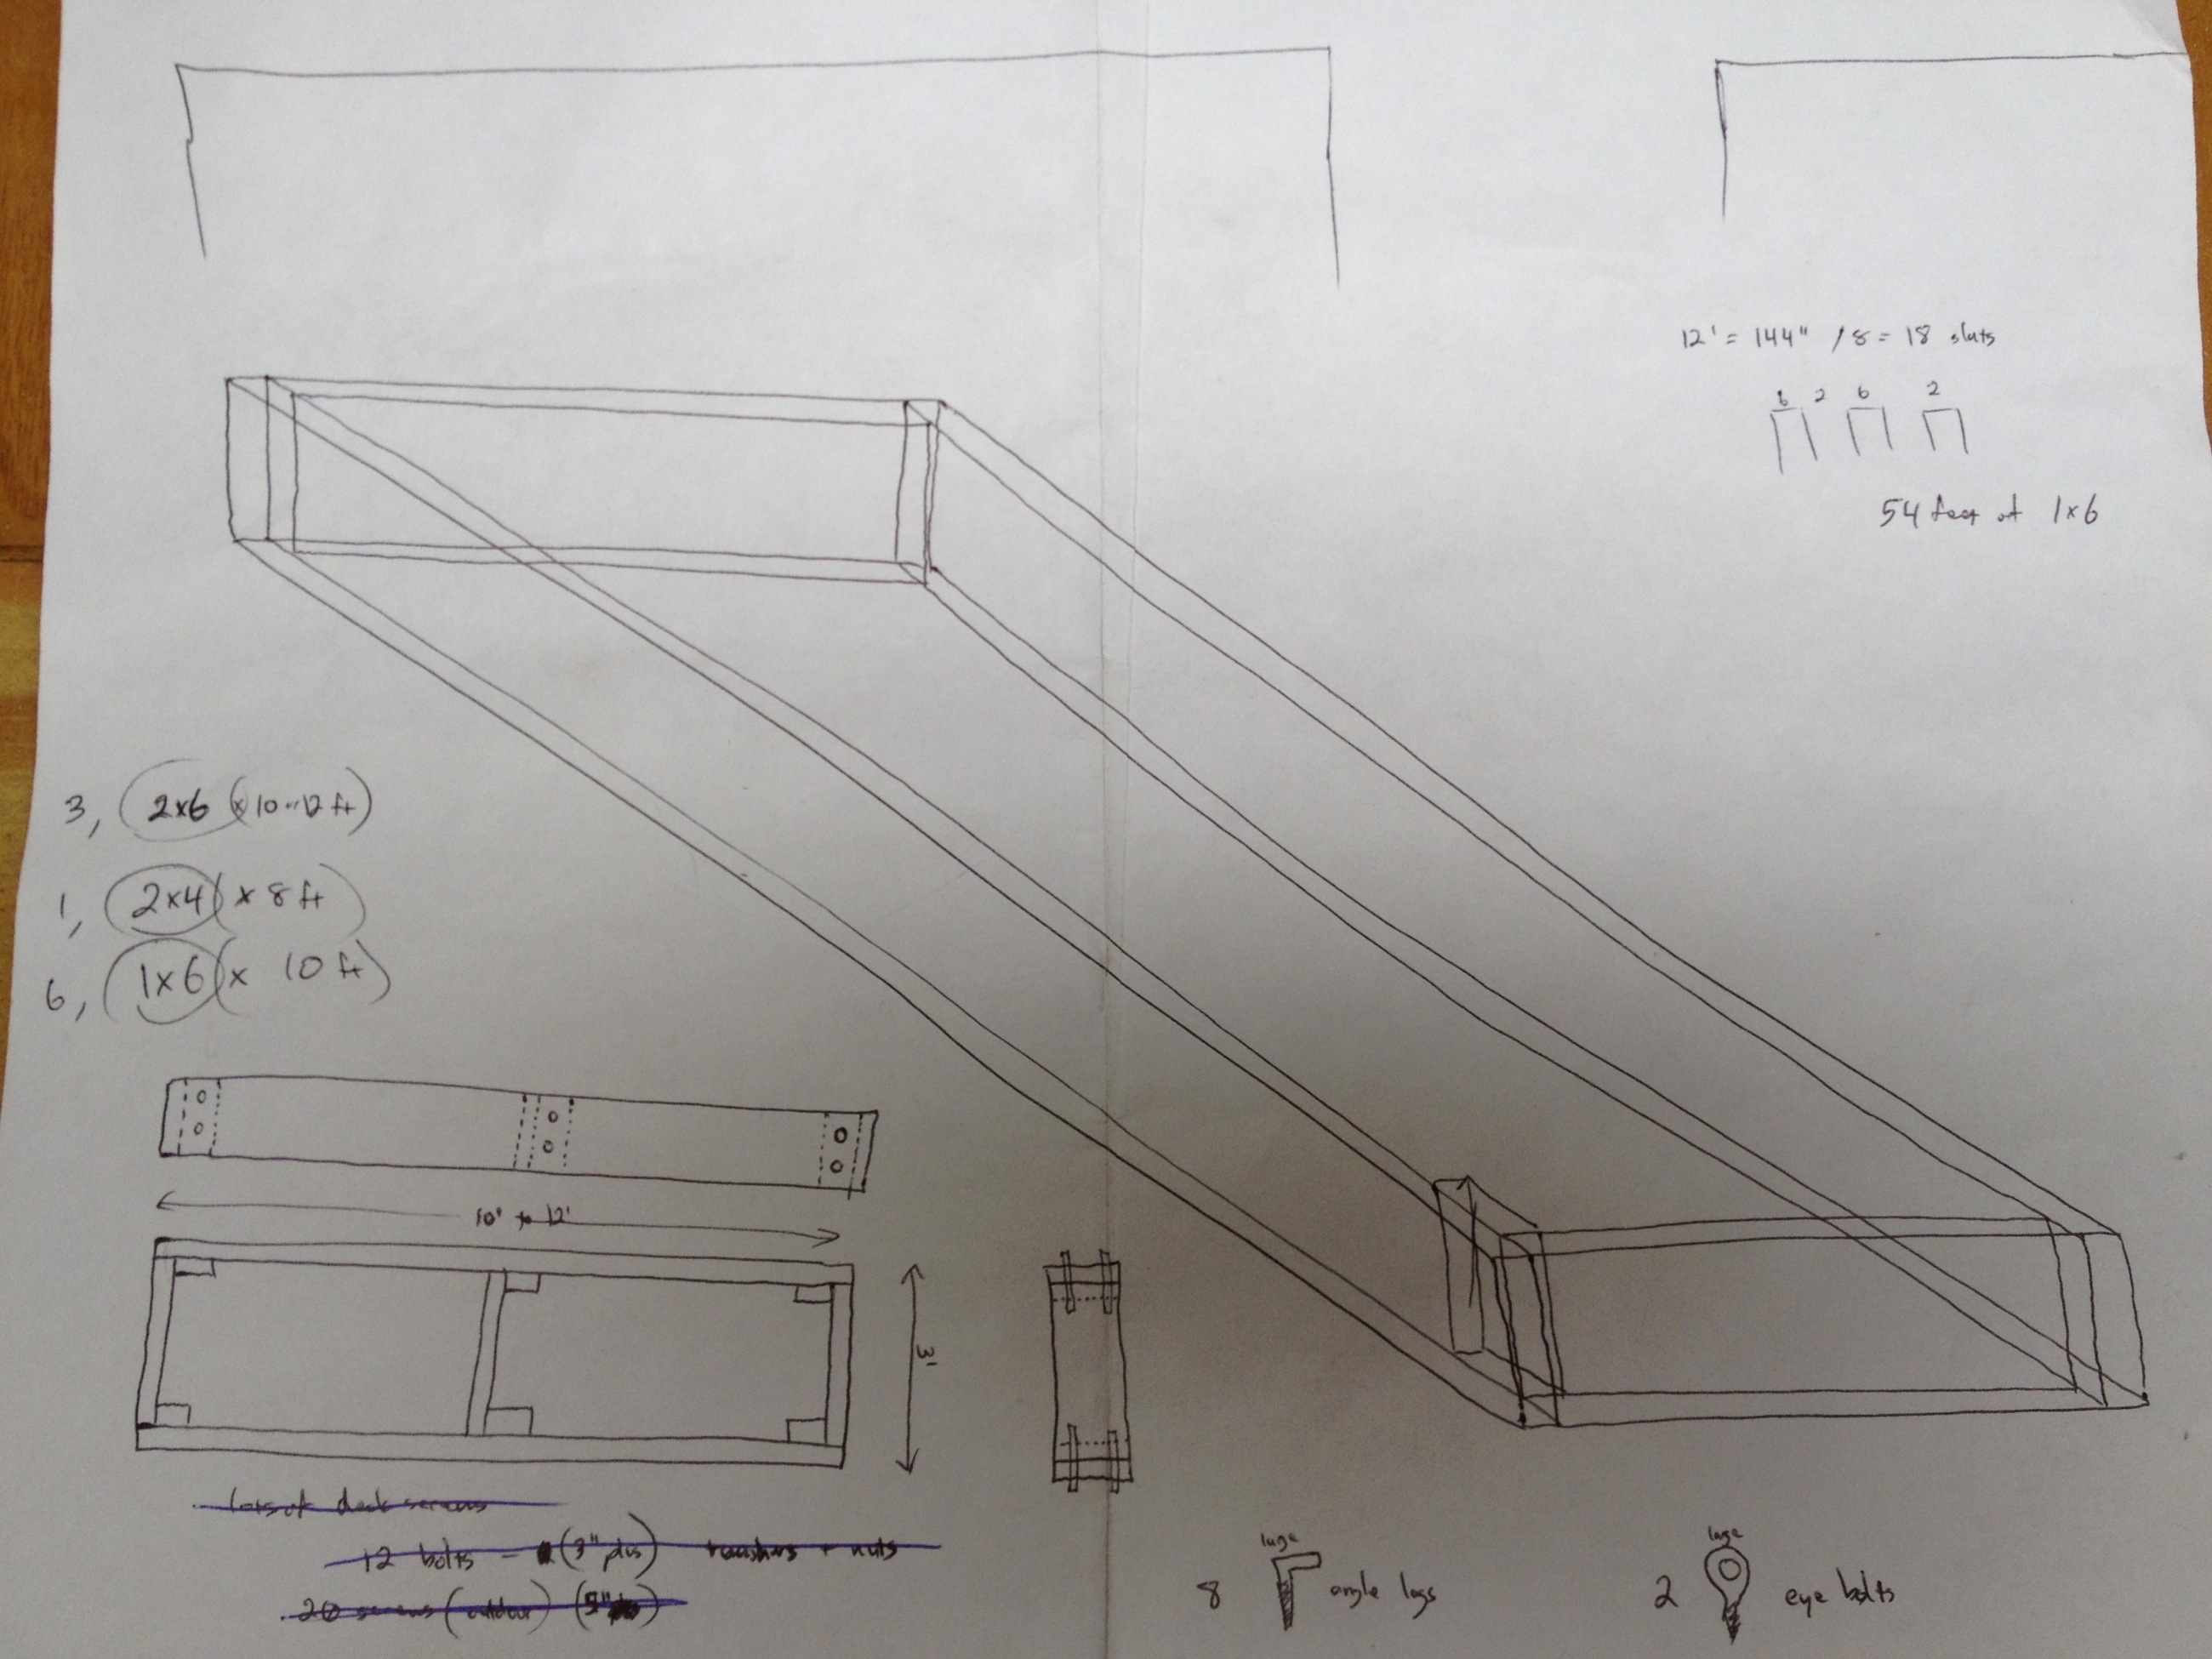
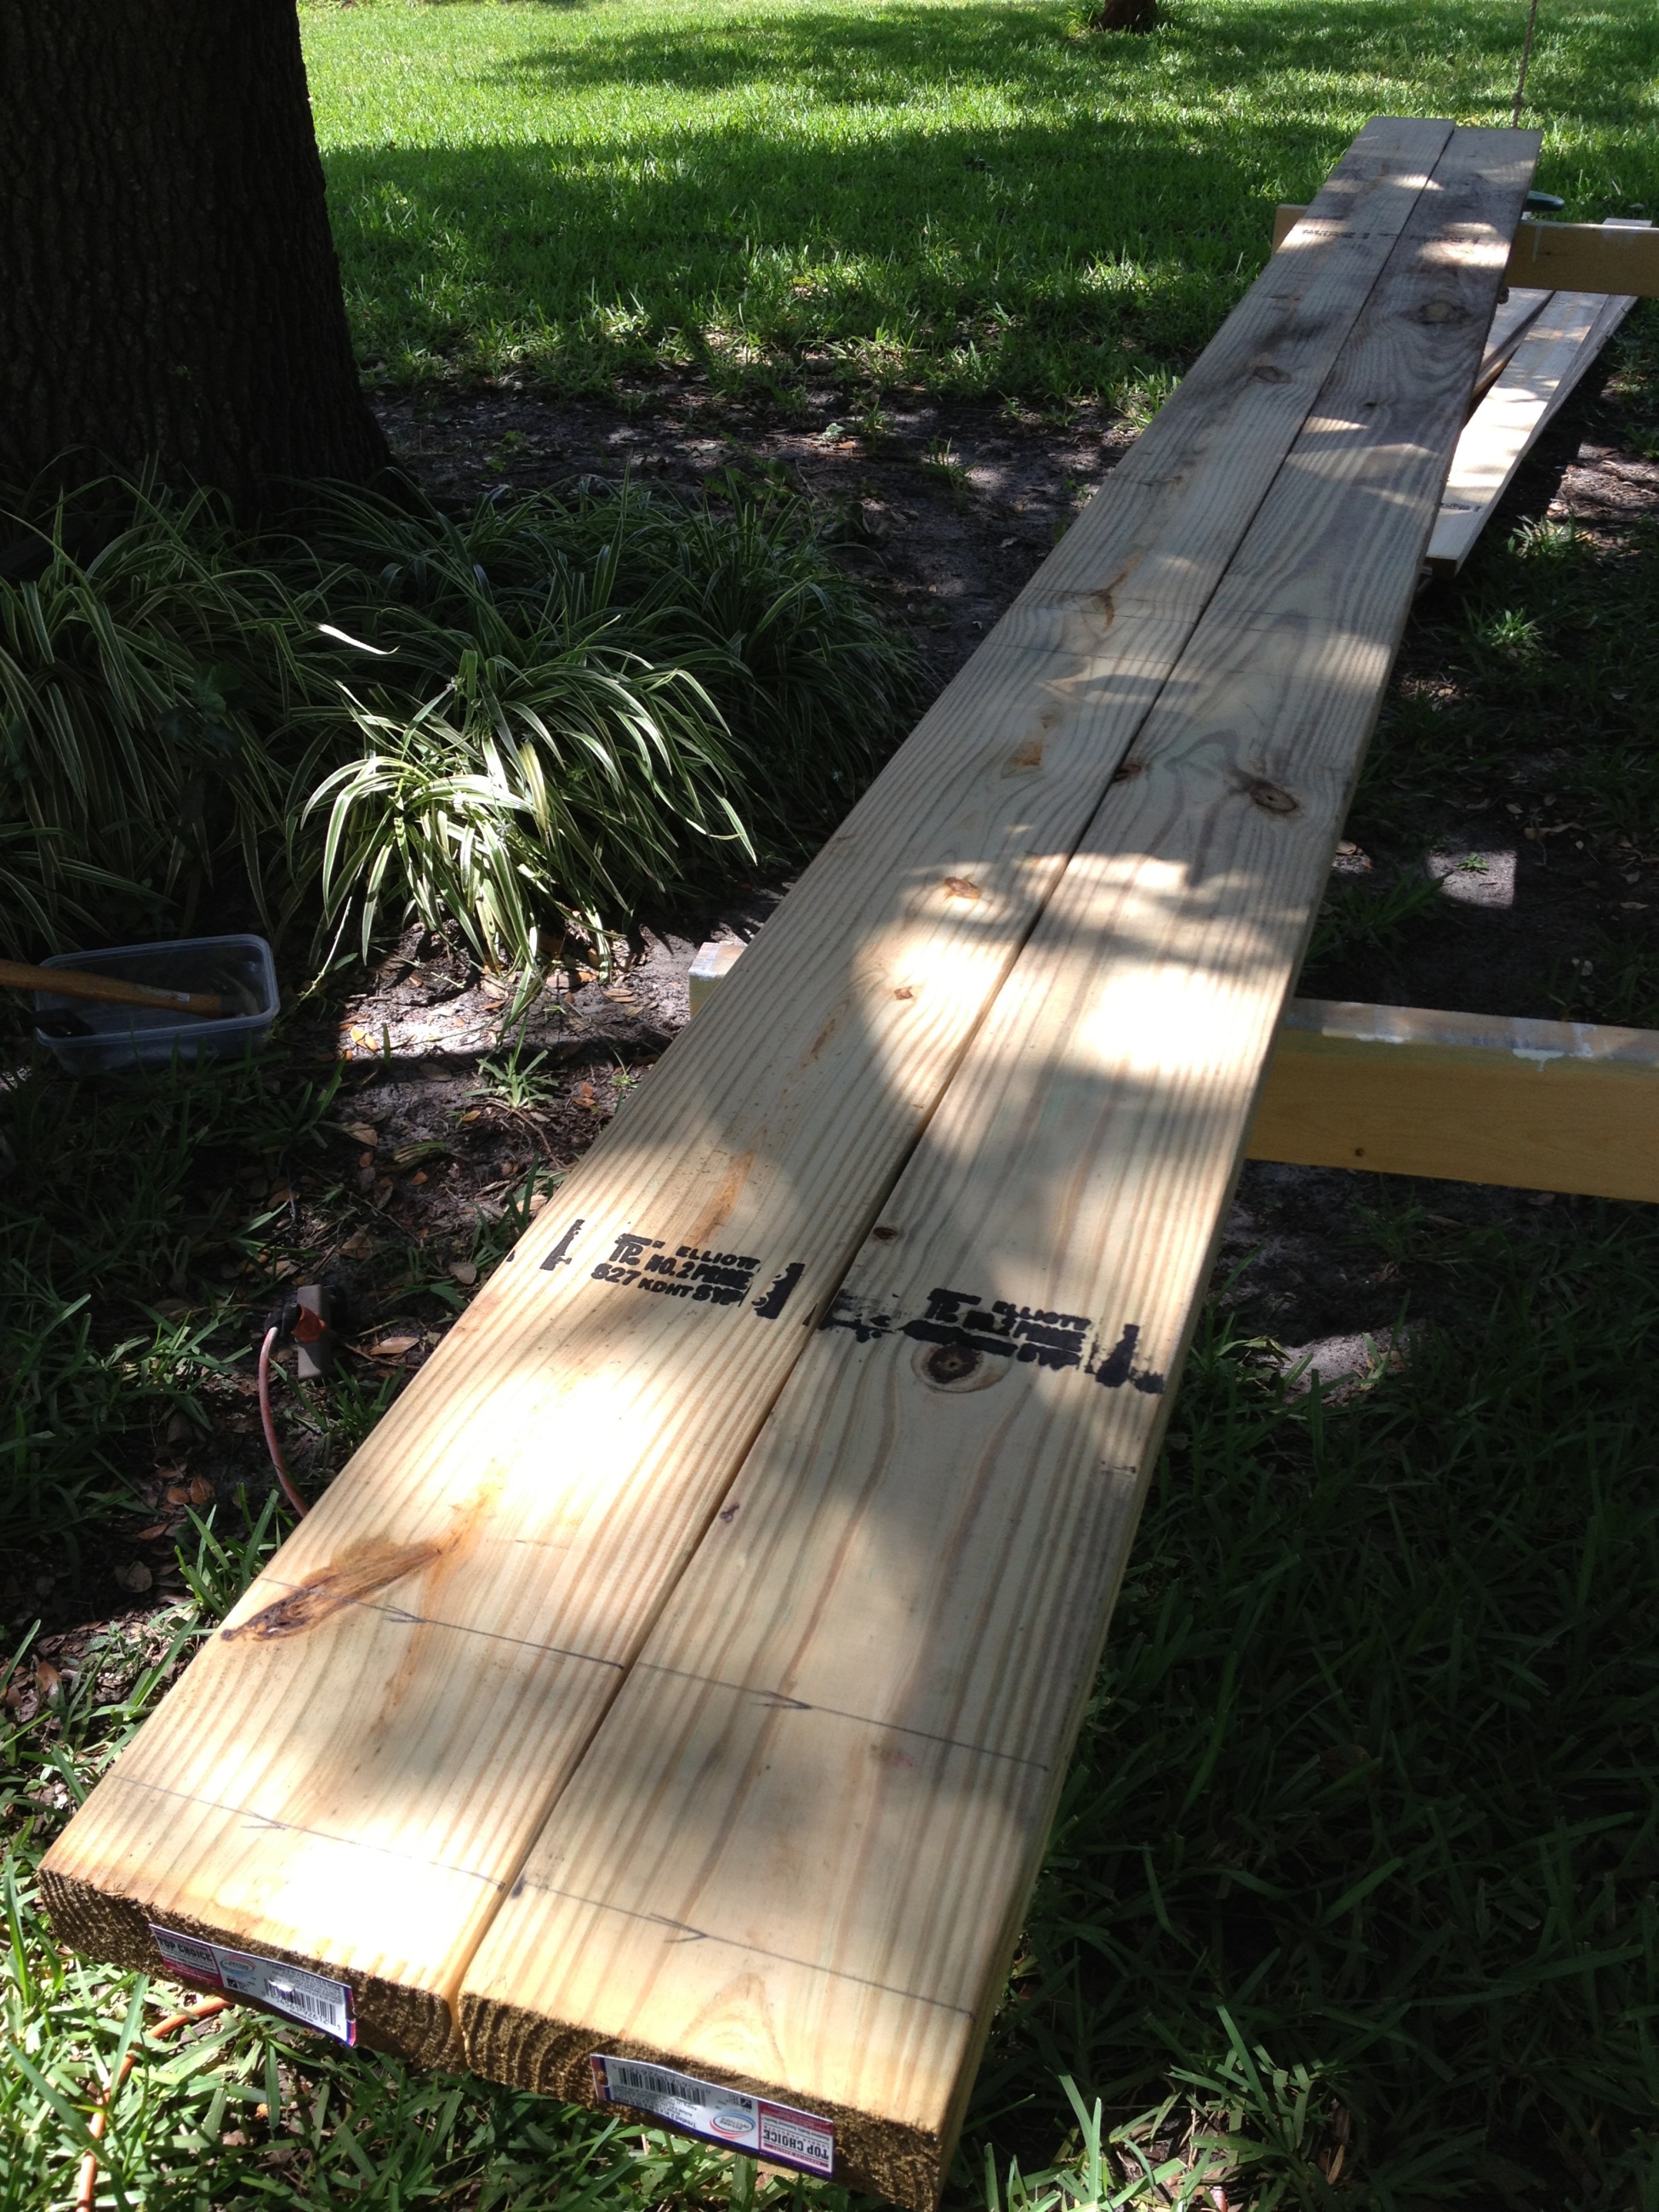
I decided to go with a 12 foot length, so these are my 12 foot long 2×6 main beams. I’ve marked on both beams where the 2×4 support blocks will be attached.
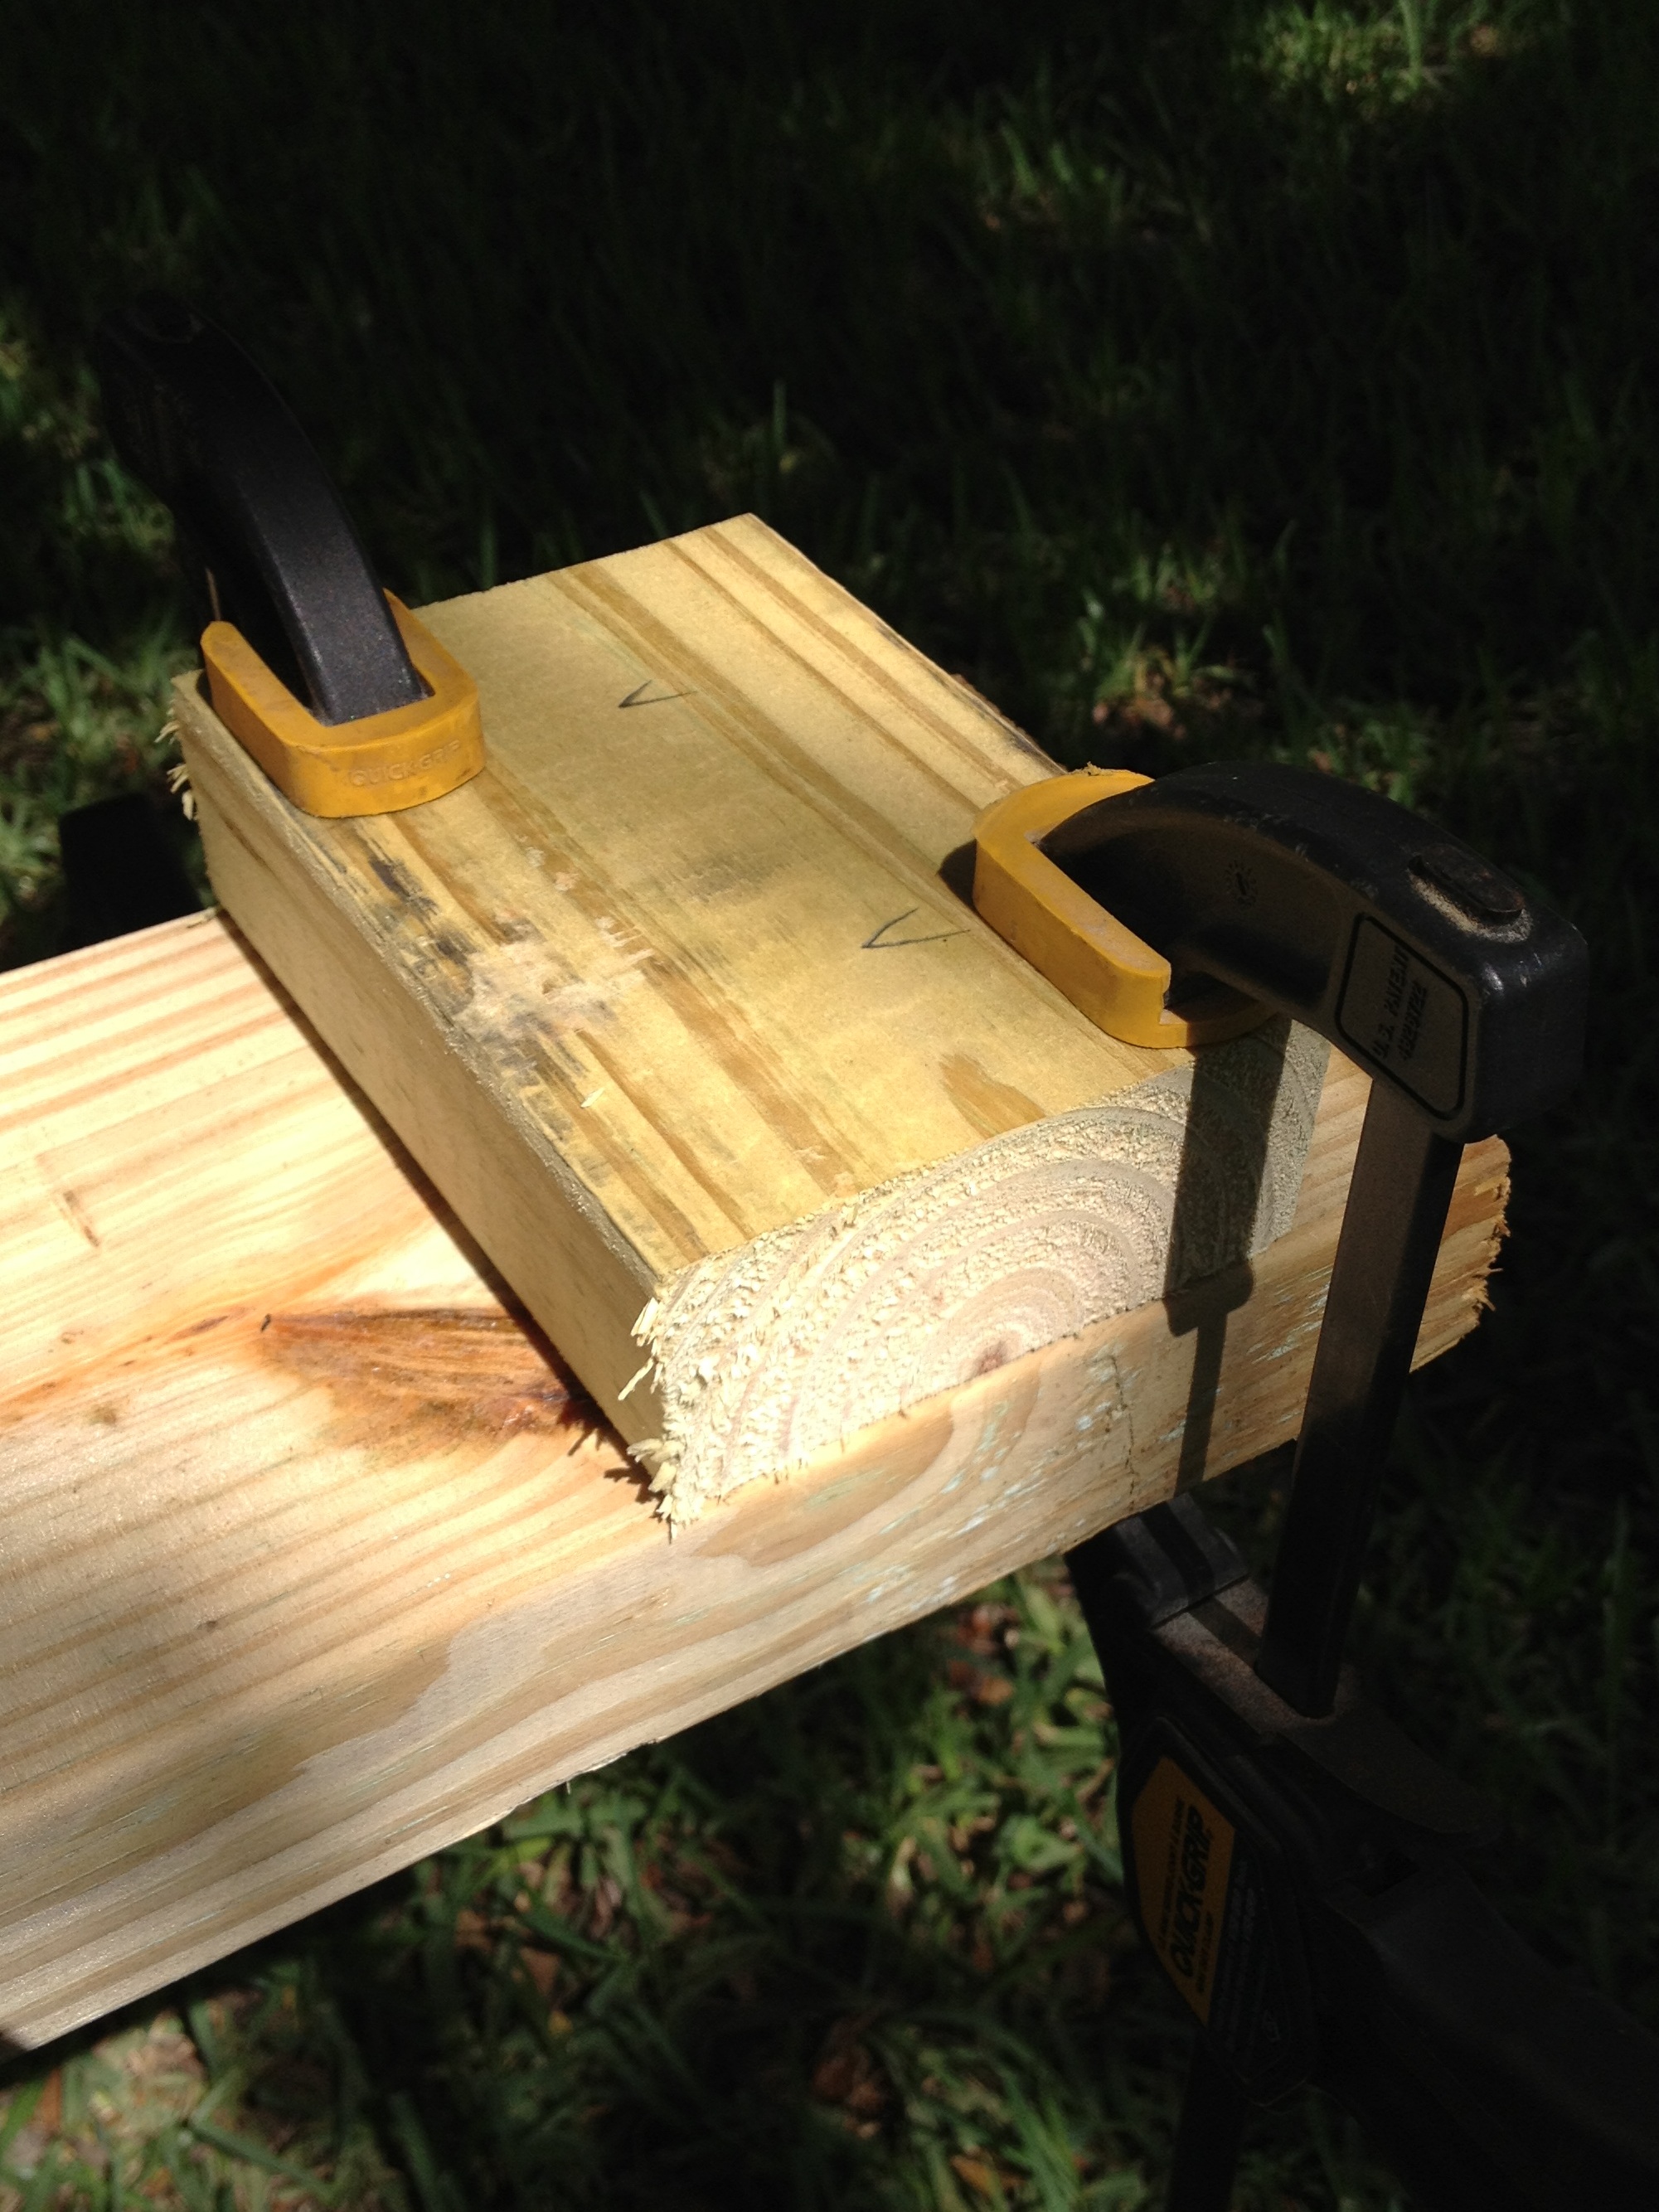
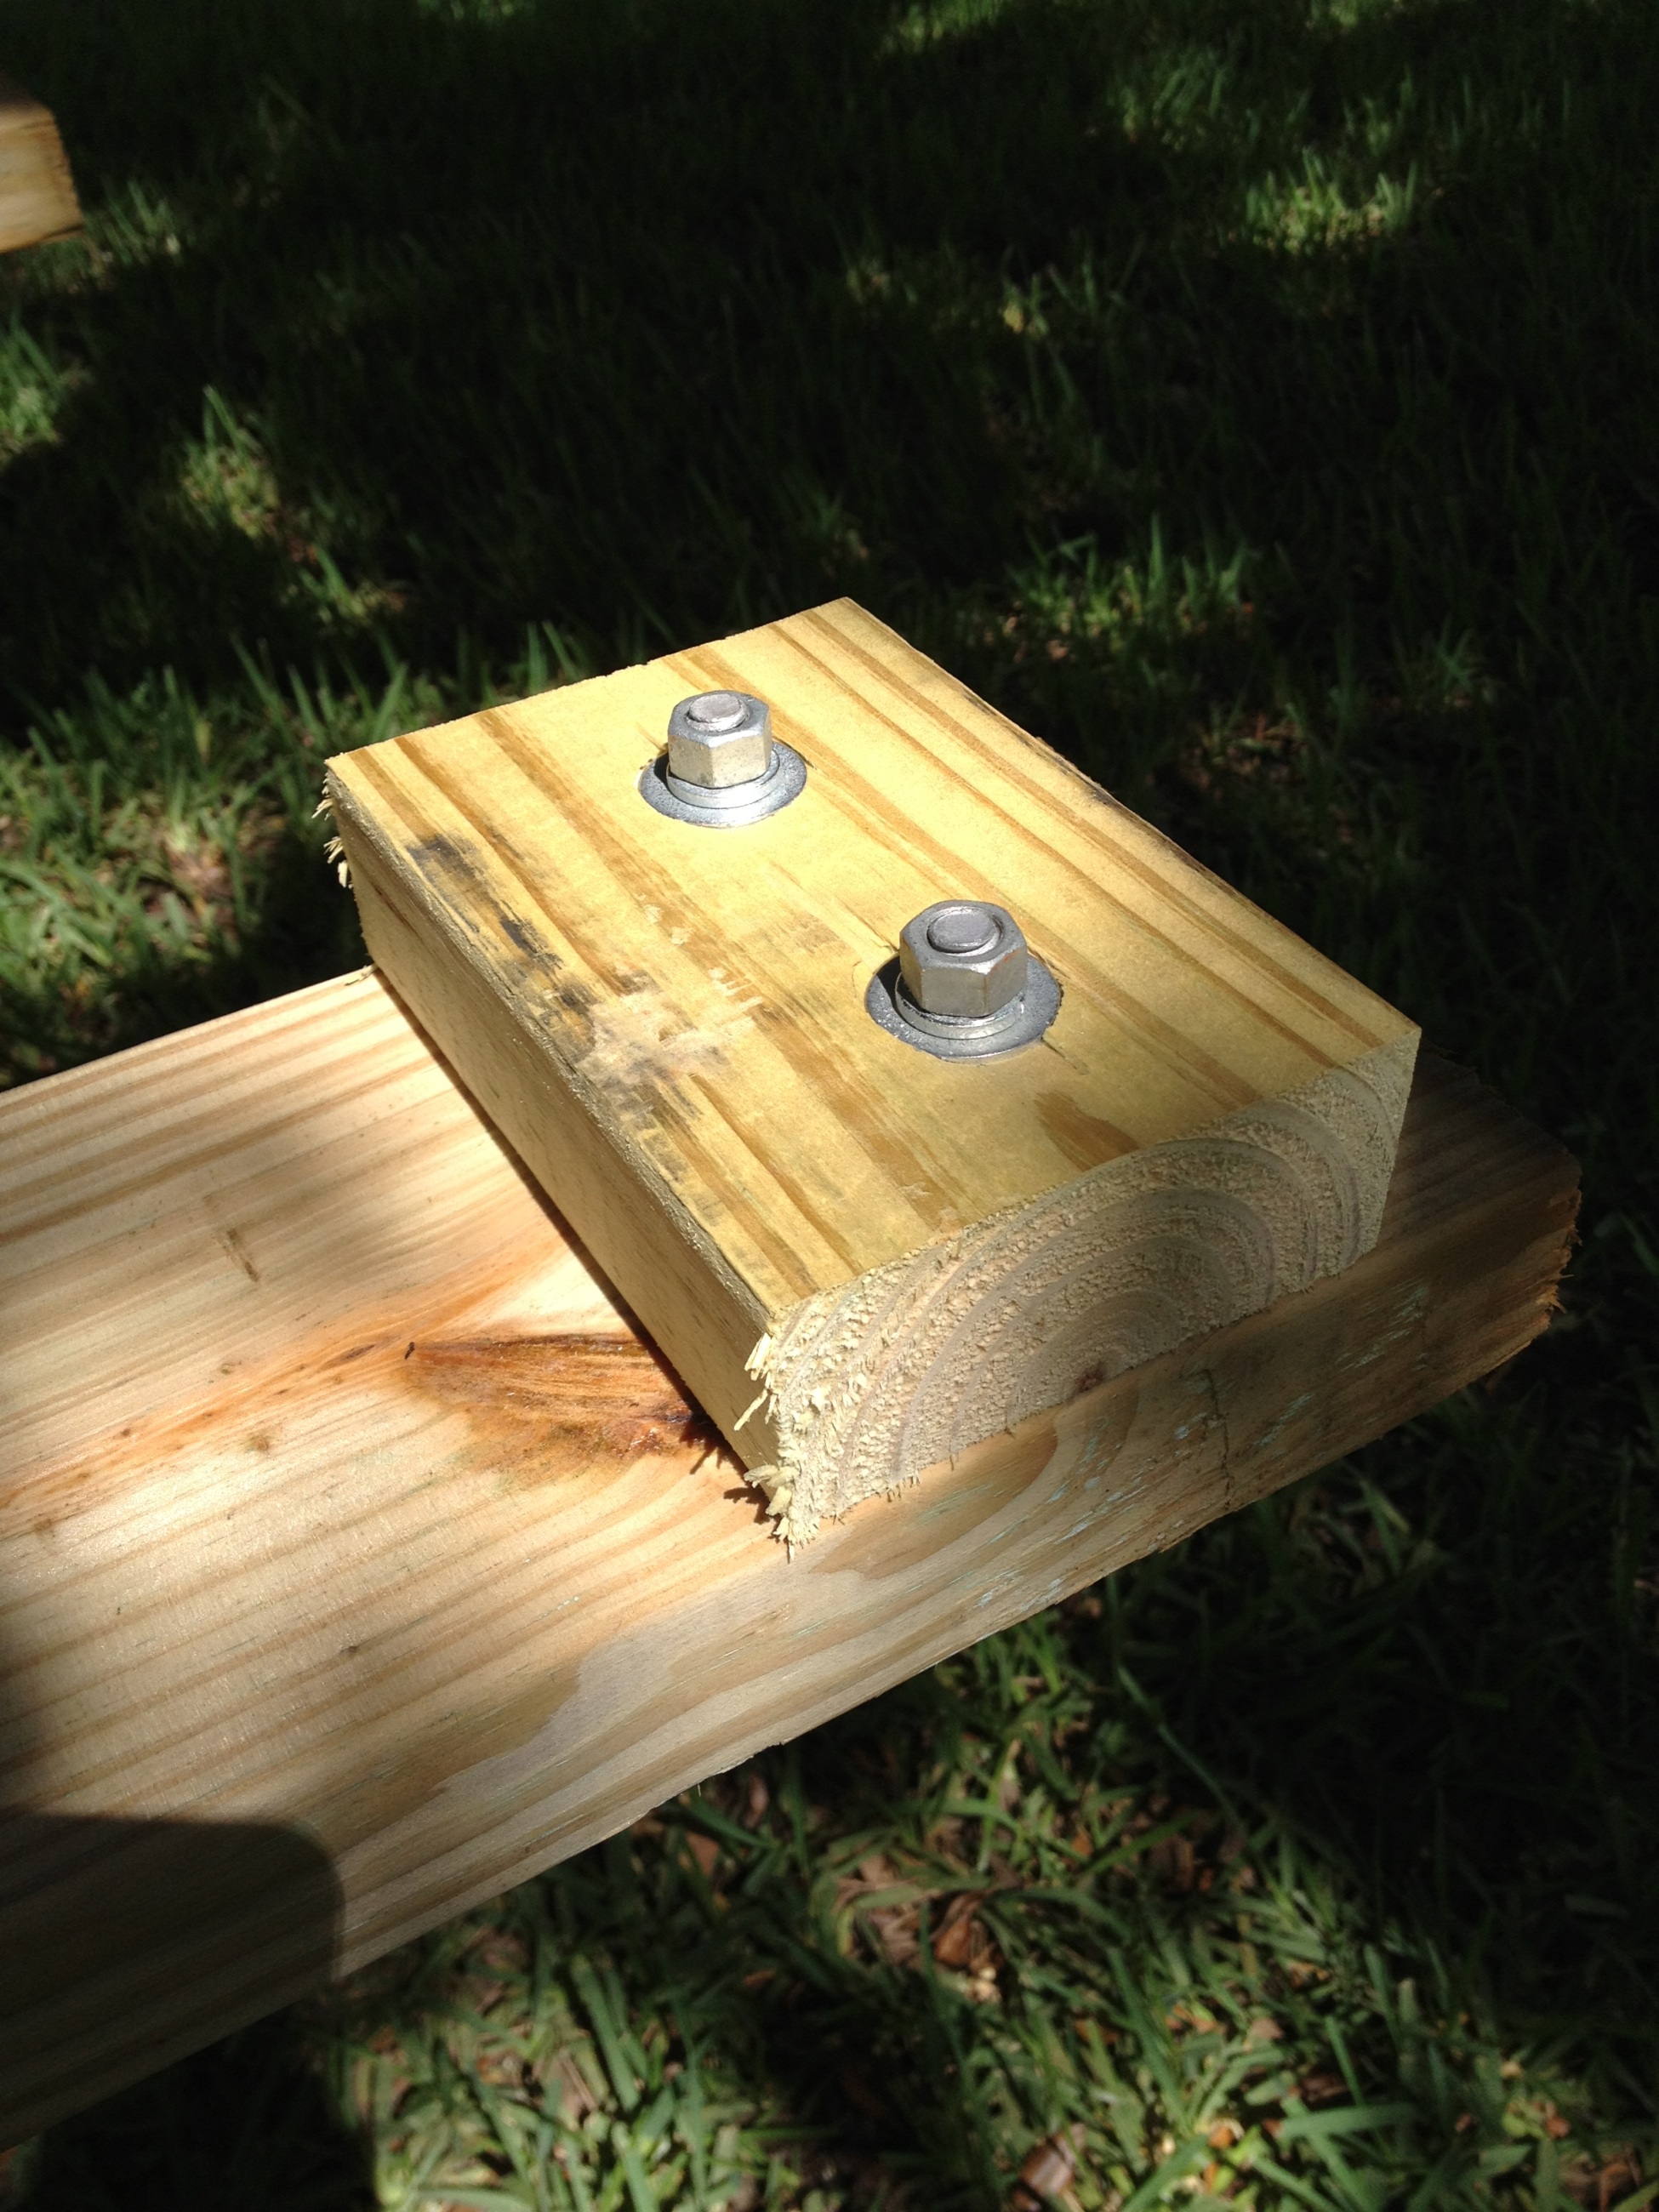
This just shows the 2×4 support blocks sitting in position. These blocks are used to screw the shorter cross beams solidly to these main beams.

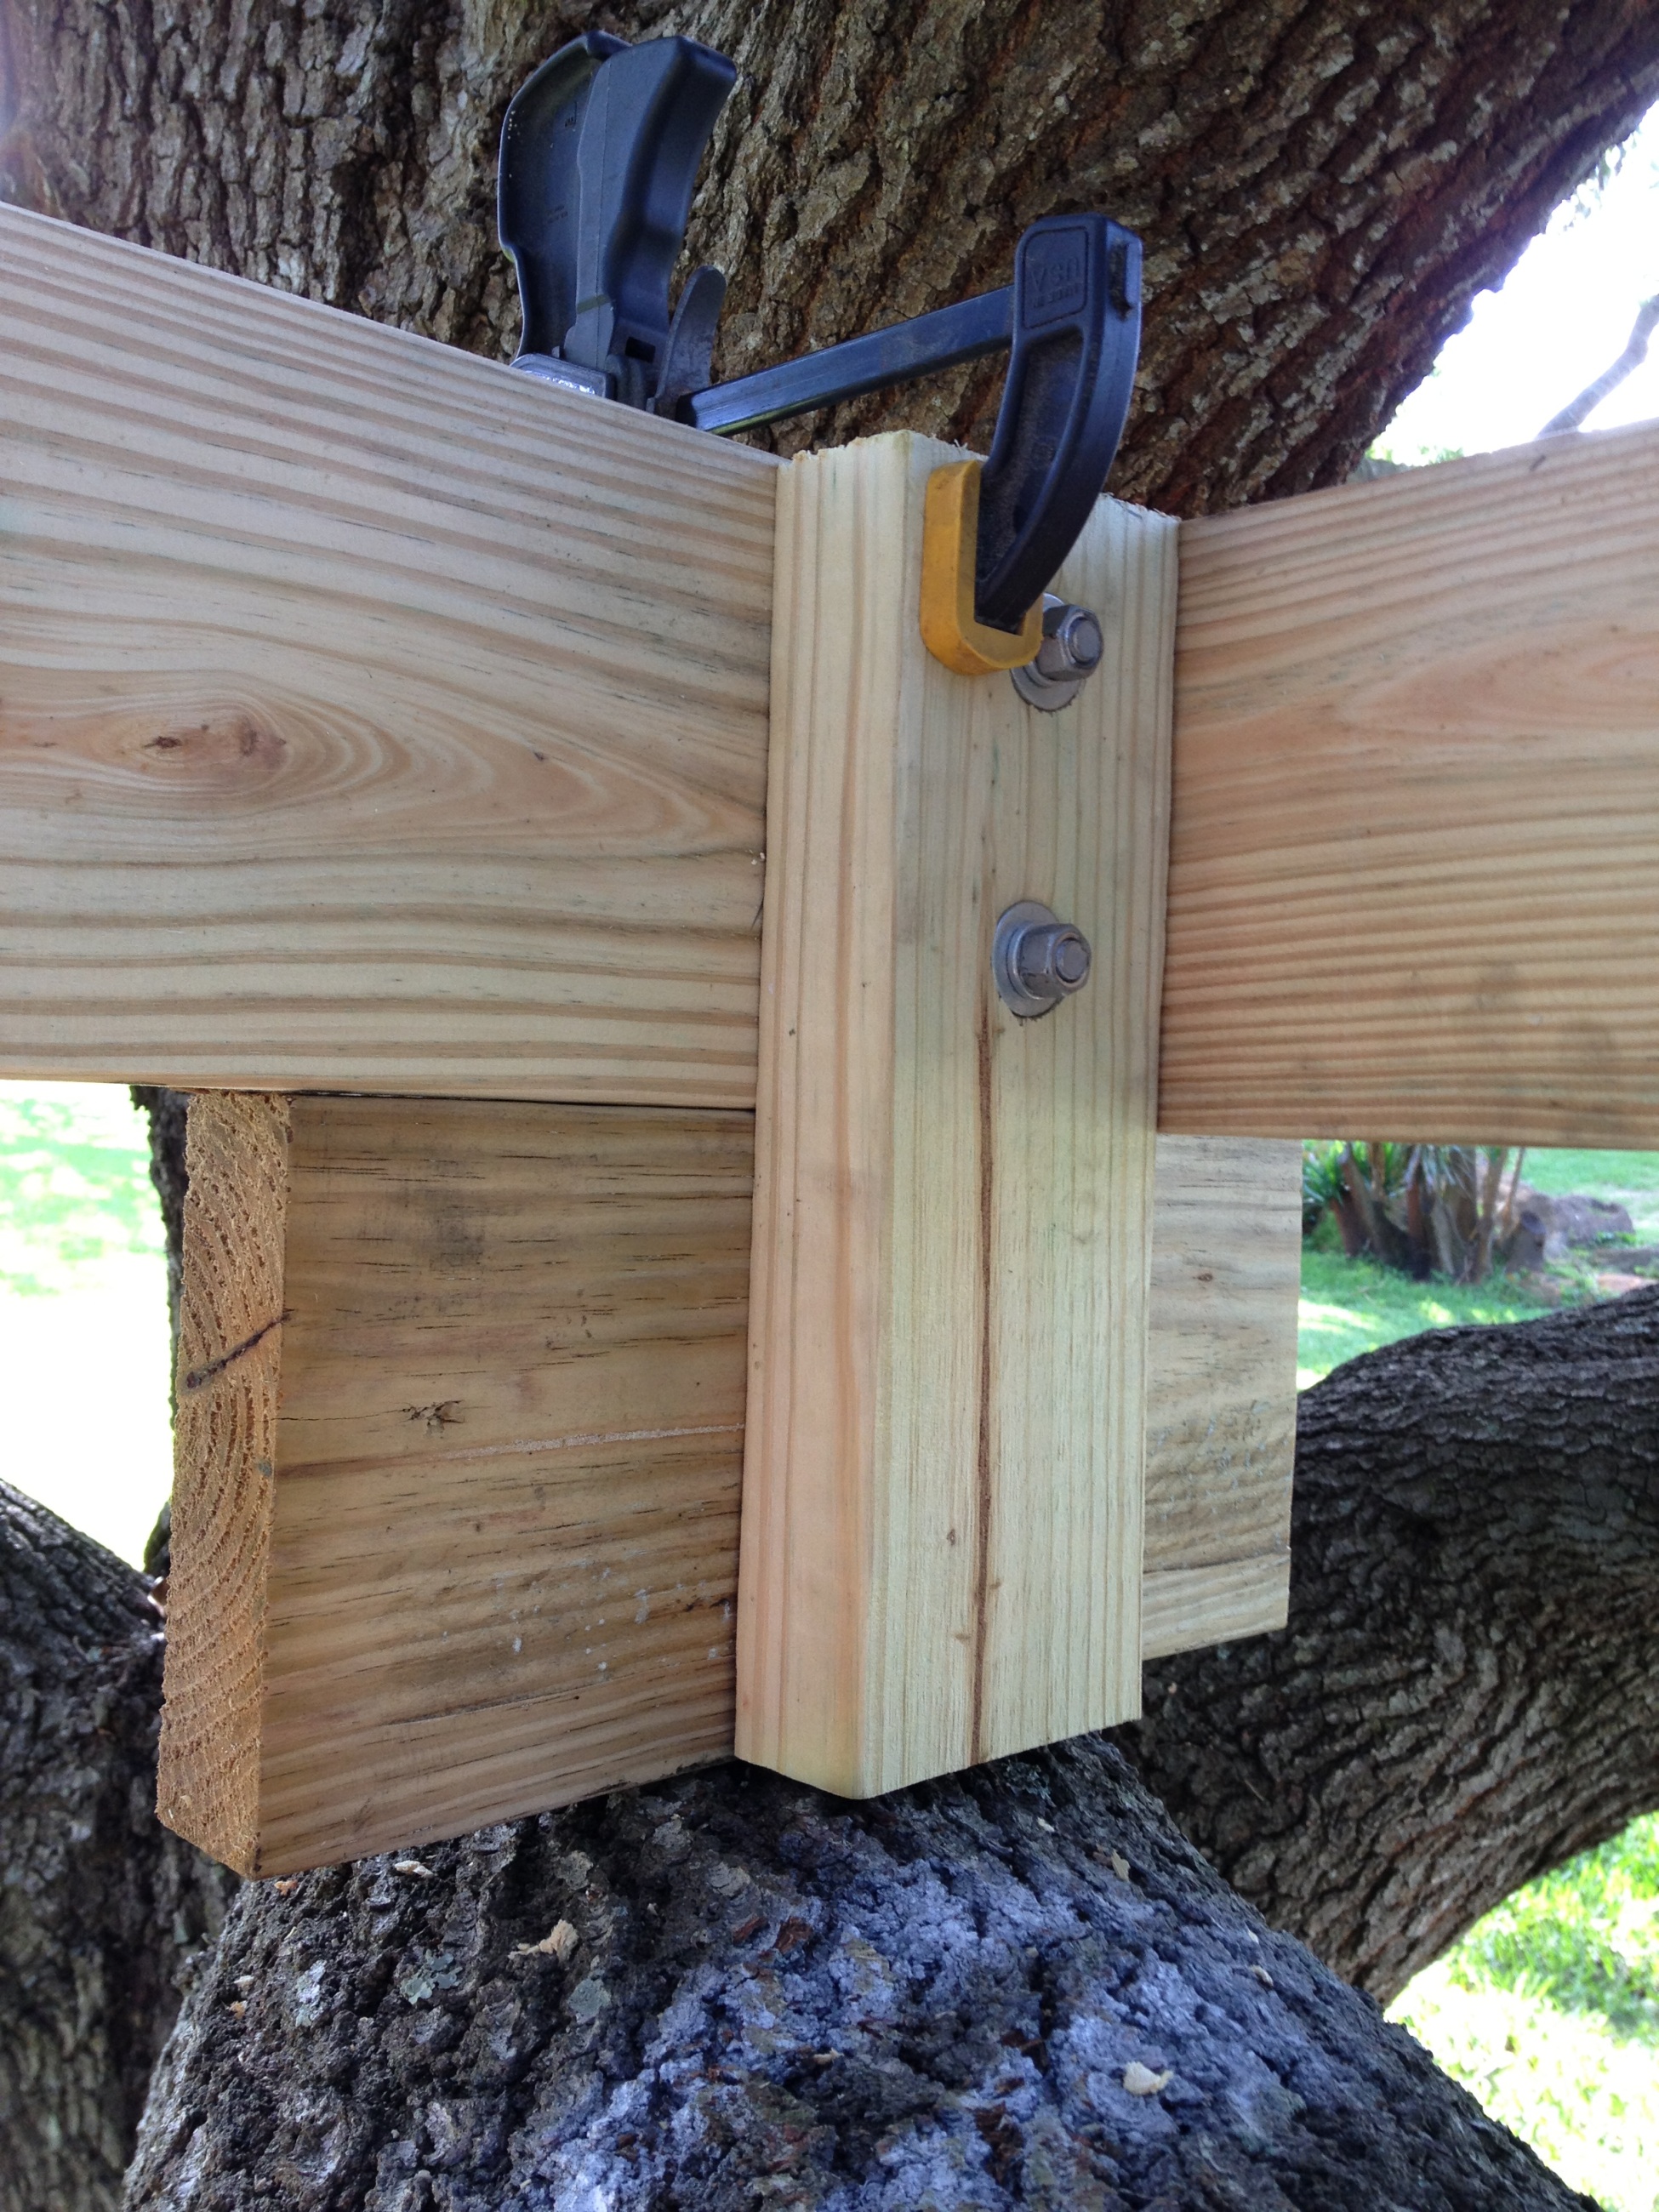
Use clamps to hold the 2×4 support blocks temporarily in place.
Then mark and drill two holes for the bolts that will hold them permanently in place.
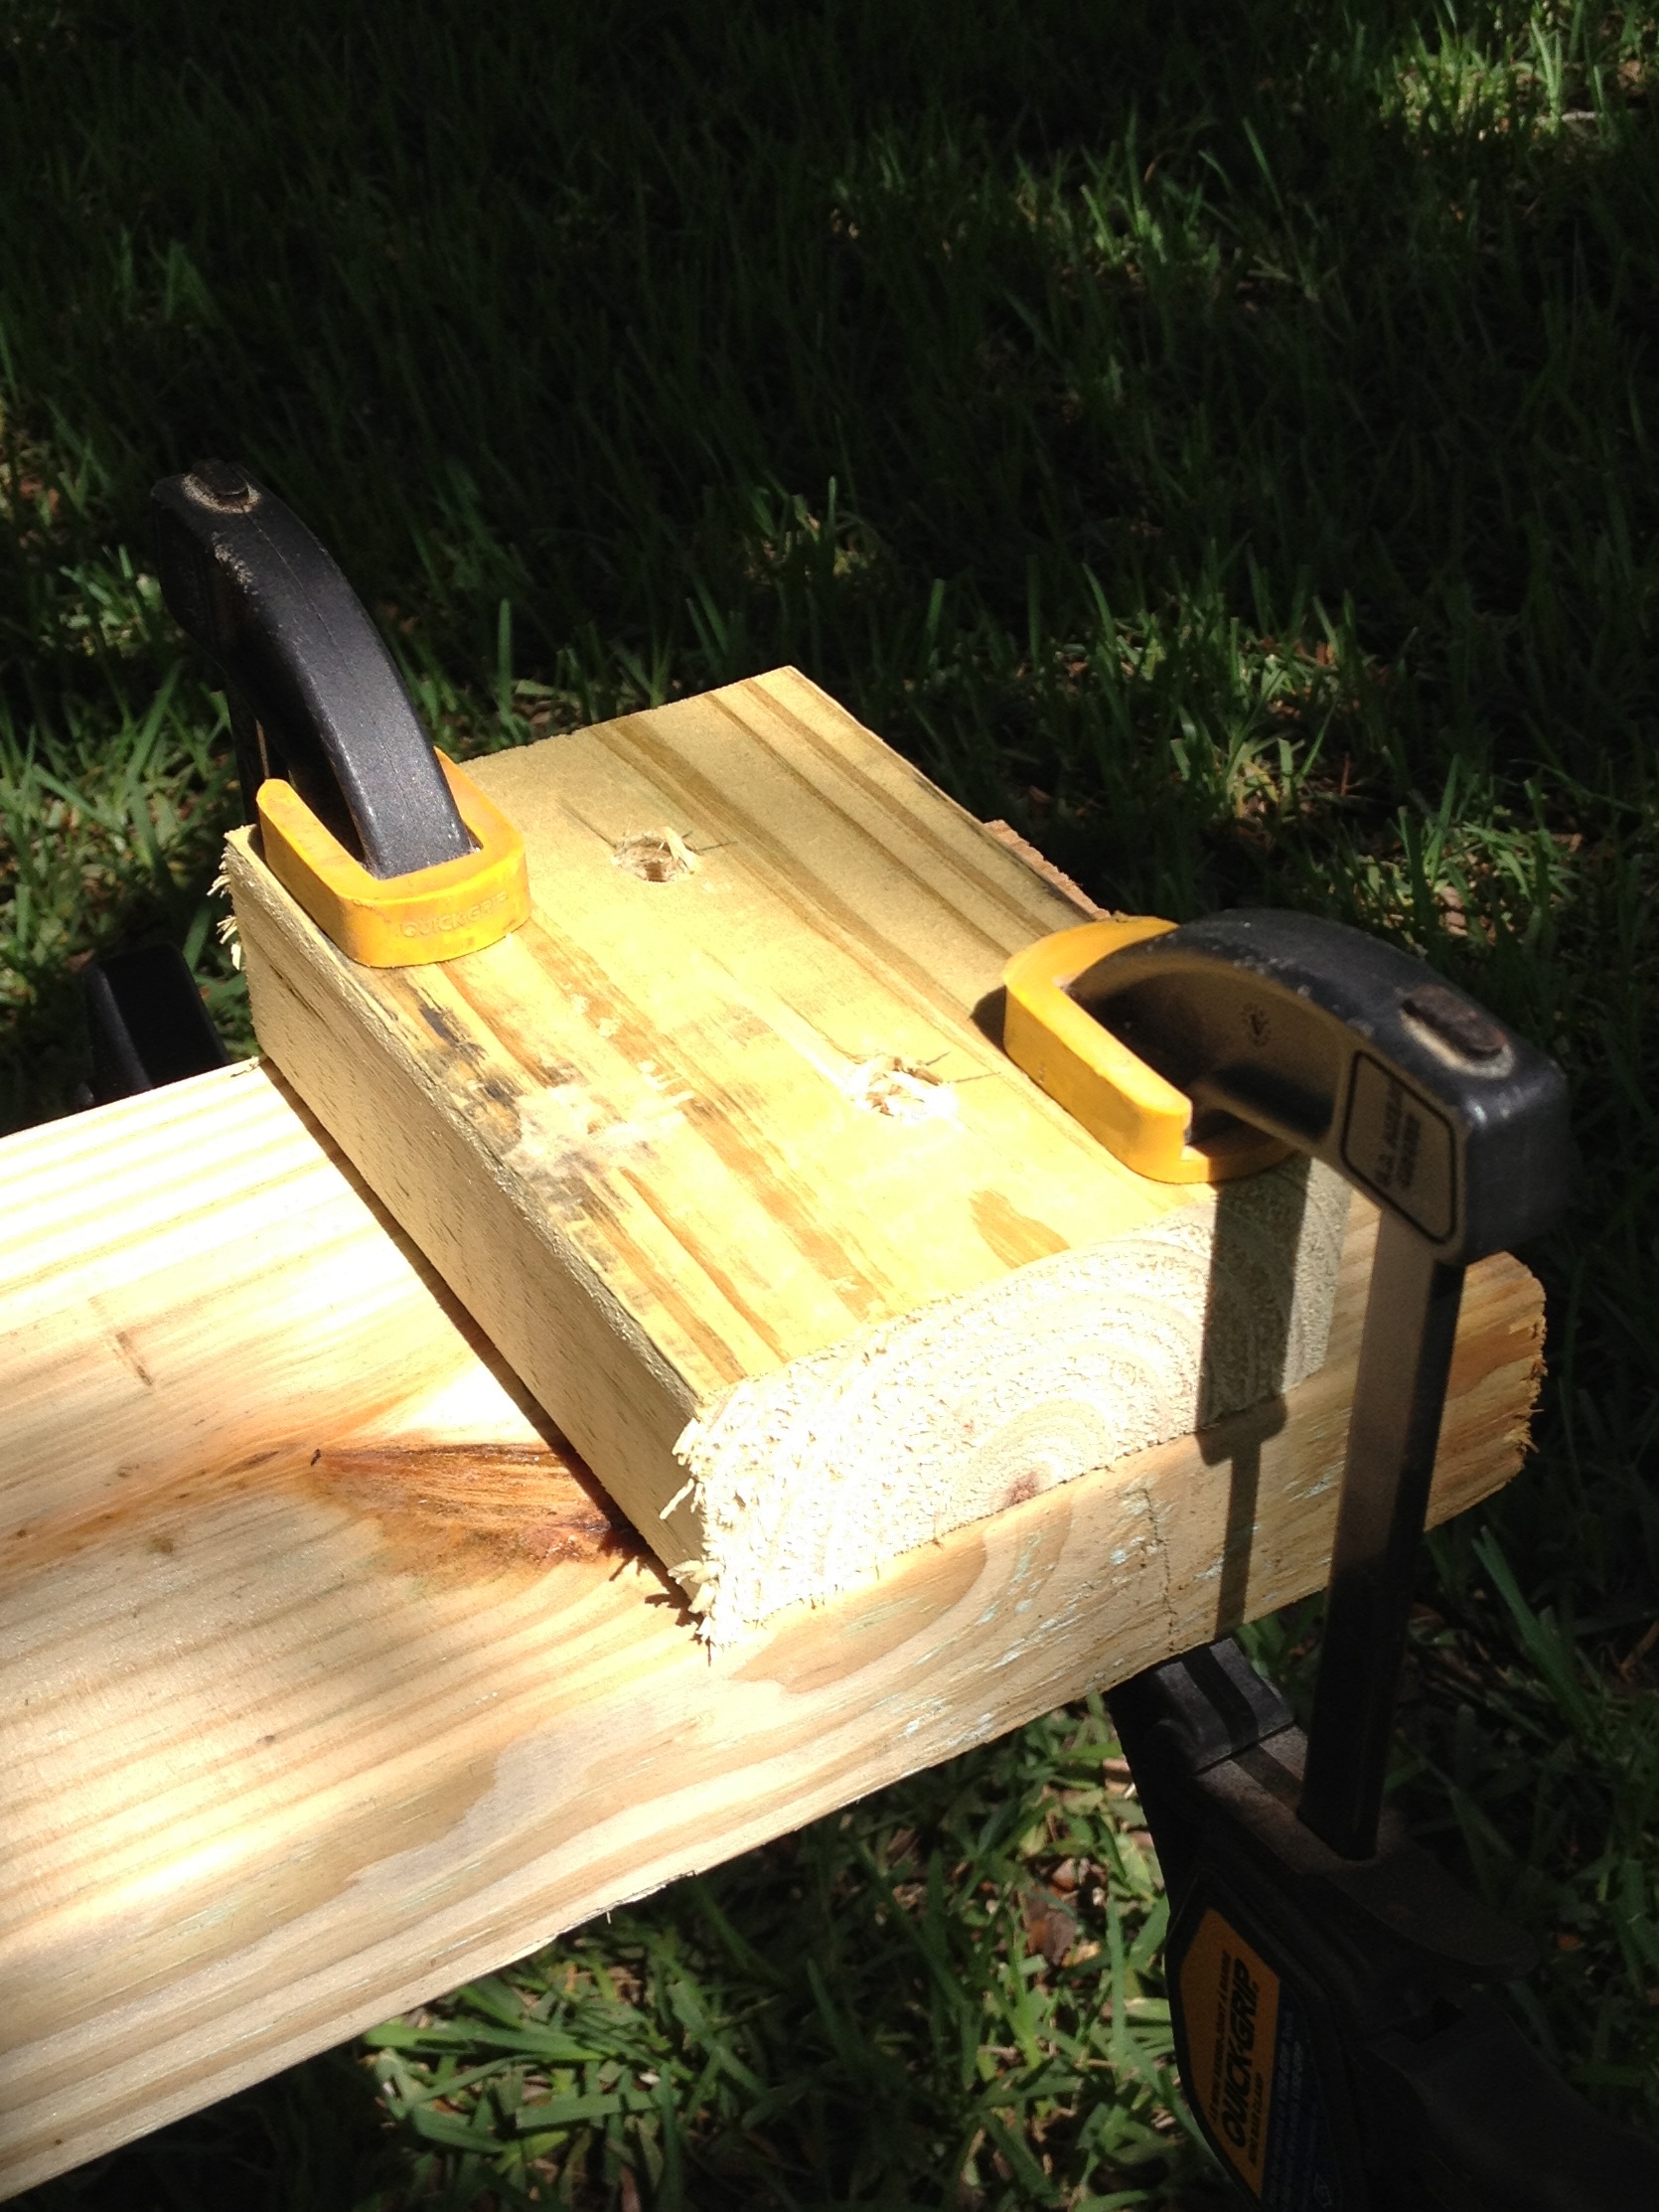
The bolts, washers, nuts are all galvanized which cost more but will last a long time in the elements. I used lock washers, although I’m not sure if that’s necessary or not.
So now we have the 2 main beams ready to be turned into a platform by adding the shorter cross beams. This can be done on the ground and then the entire platform can be lifted up into the tree. I chose to lift these 2 main beams up into their positions in the tree and then build the platform up there.

The shorter cross beams are also 2×6 material. I made my platform 3 feet wide, so these cross beams are 3 inches shorter than 3 feet to account for the 1.5 inch plus 1.5 inch thickness of the main beams on either side.
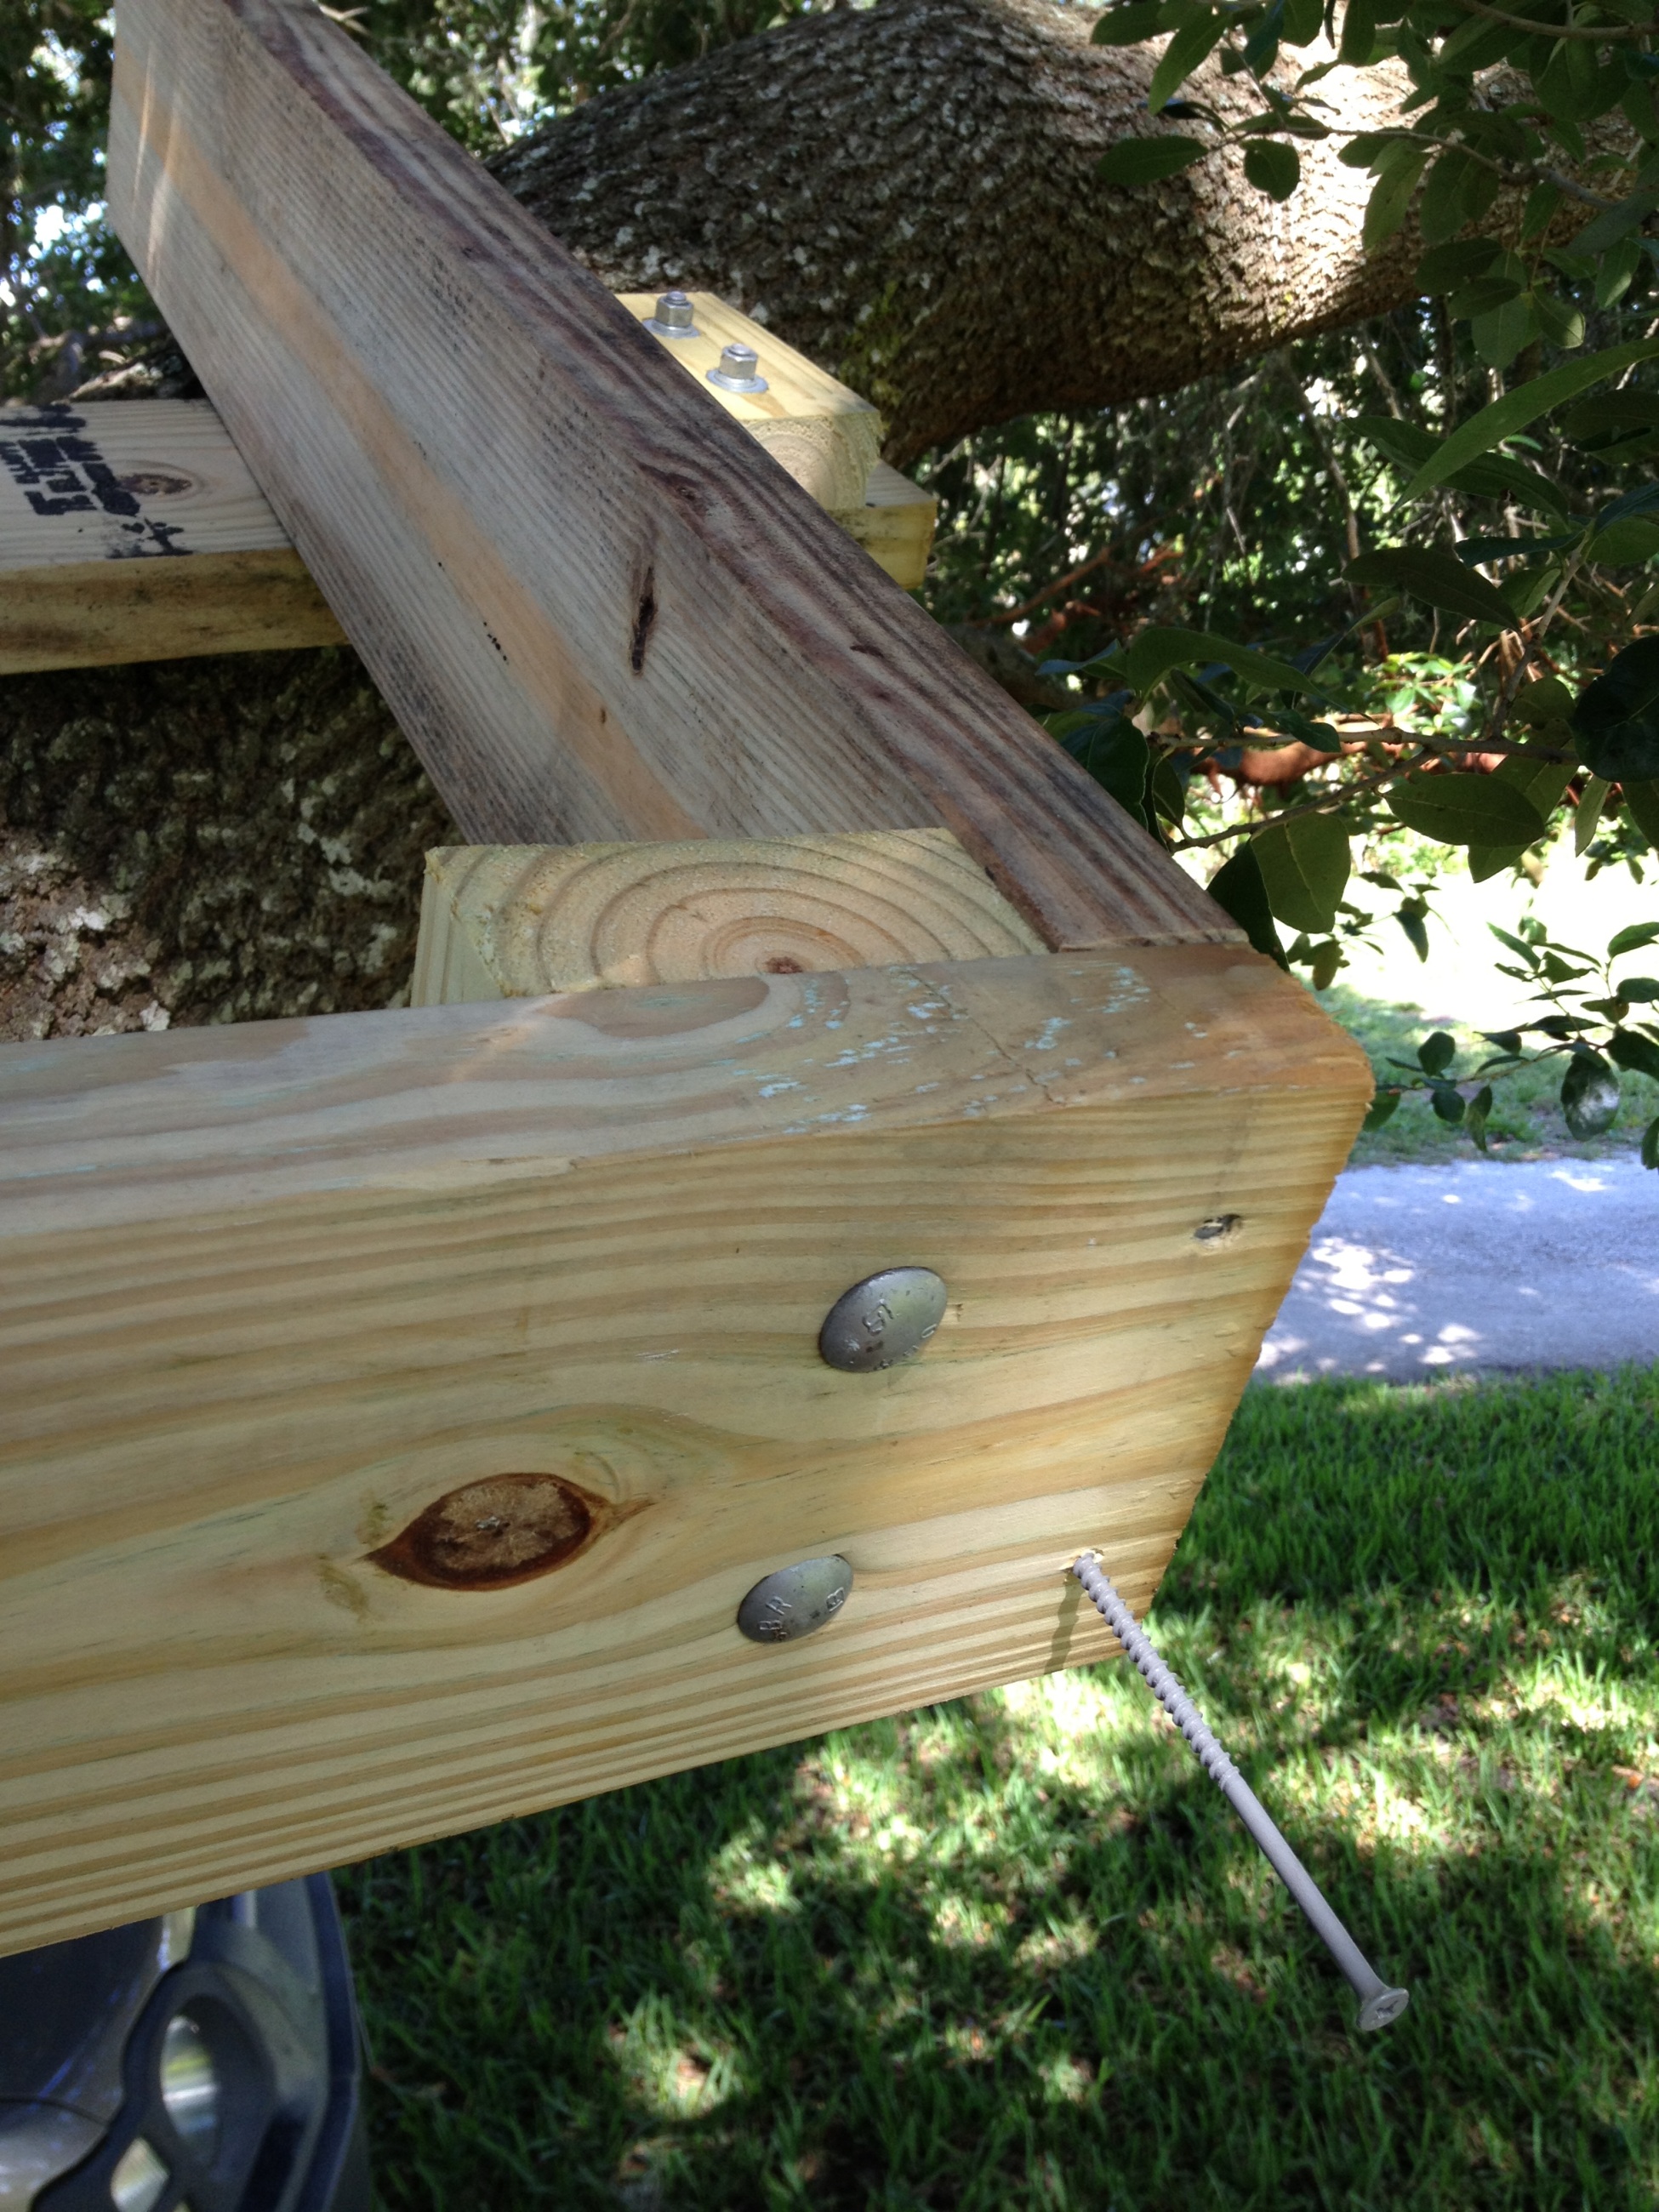
Attaching is easier on the ground, but if you clamp the cross beam to the 2×4 block (clamp not shown in picture), then you can drive some long screws to hold it permanently. I used the expensive outdoor coated screws which should last a long time in the elements. You can’t see from this photo, but I screwed the main beam to the cross beam and I also screwed the cross beam to the 2×4 block. That should hold it. It’s a good idea to pre-drill the screw holes with a bit that is smaller diameter then the screw.
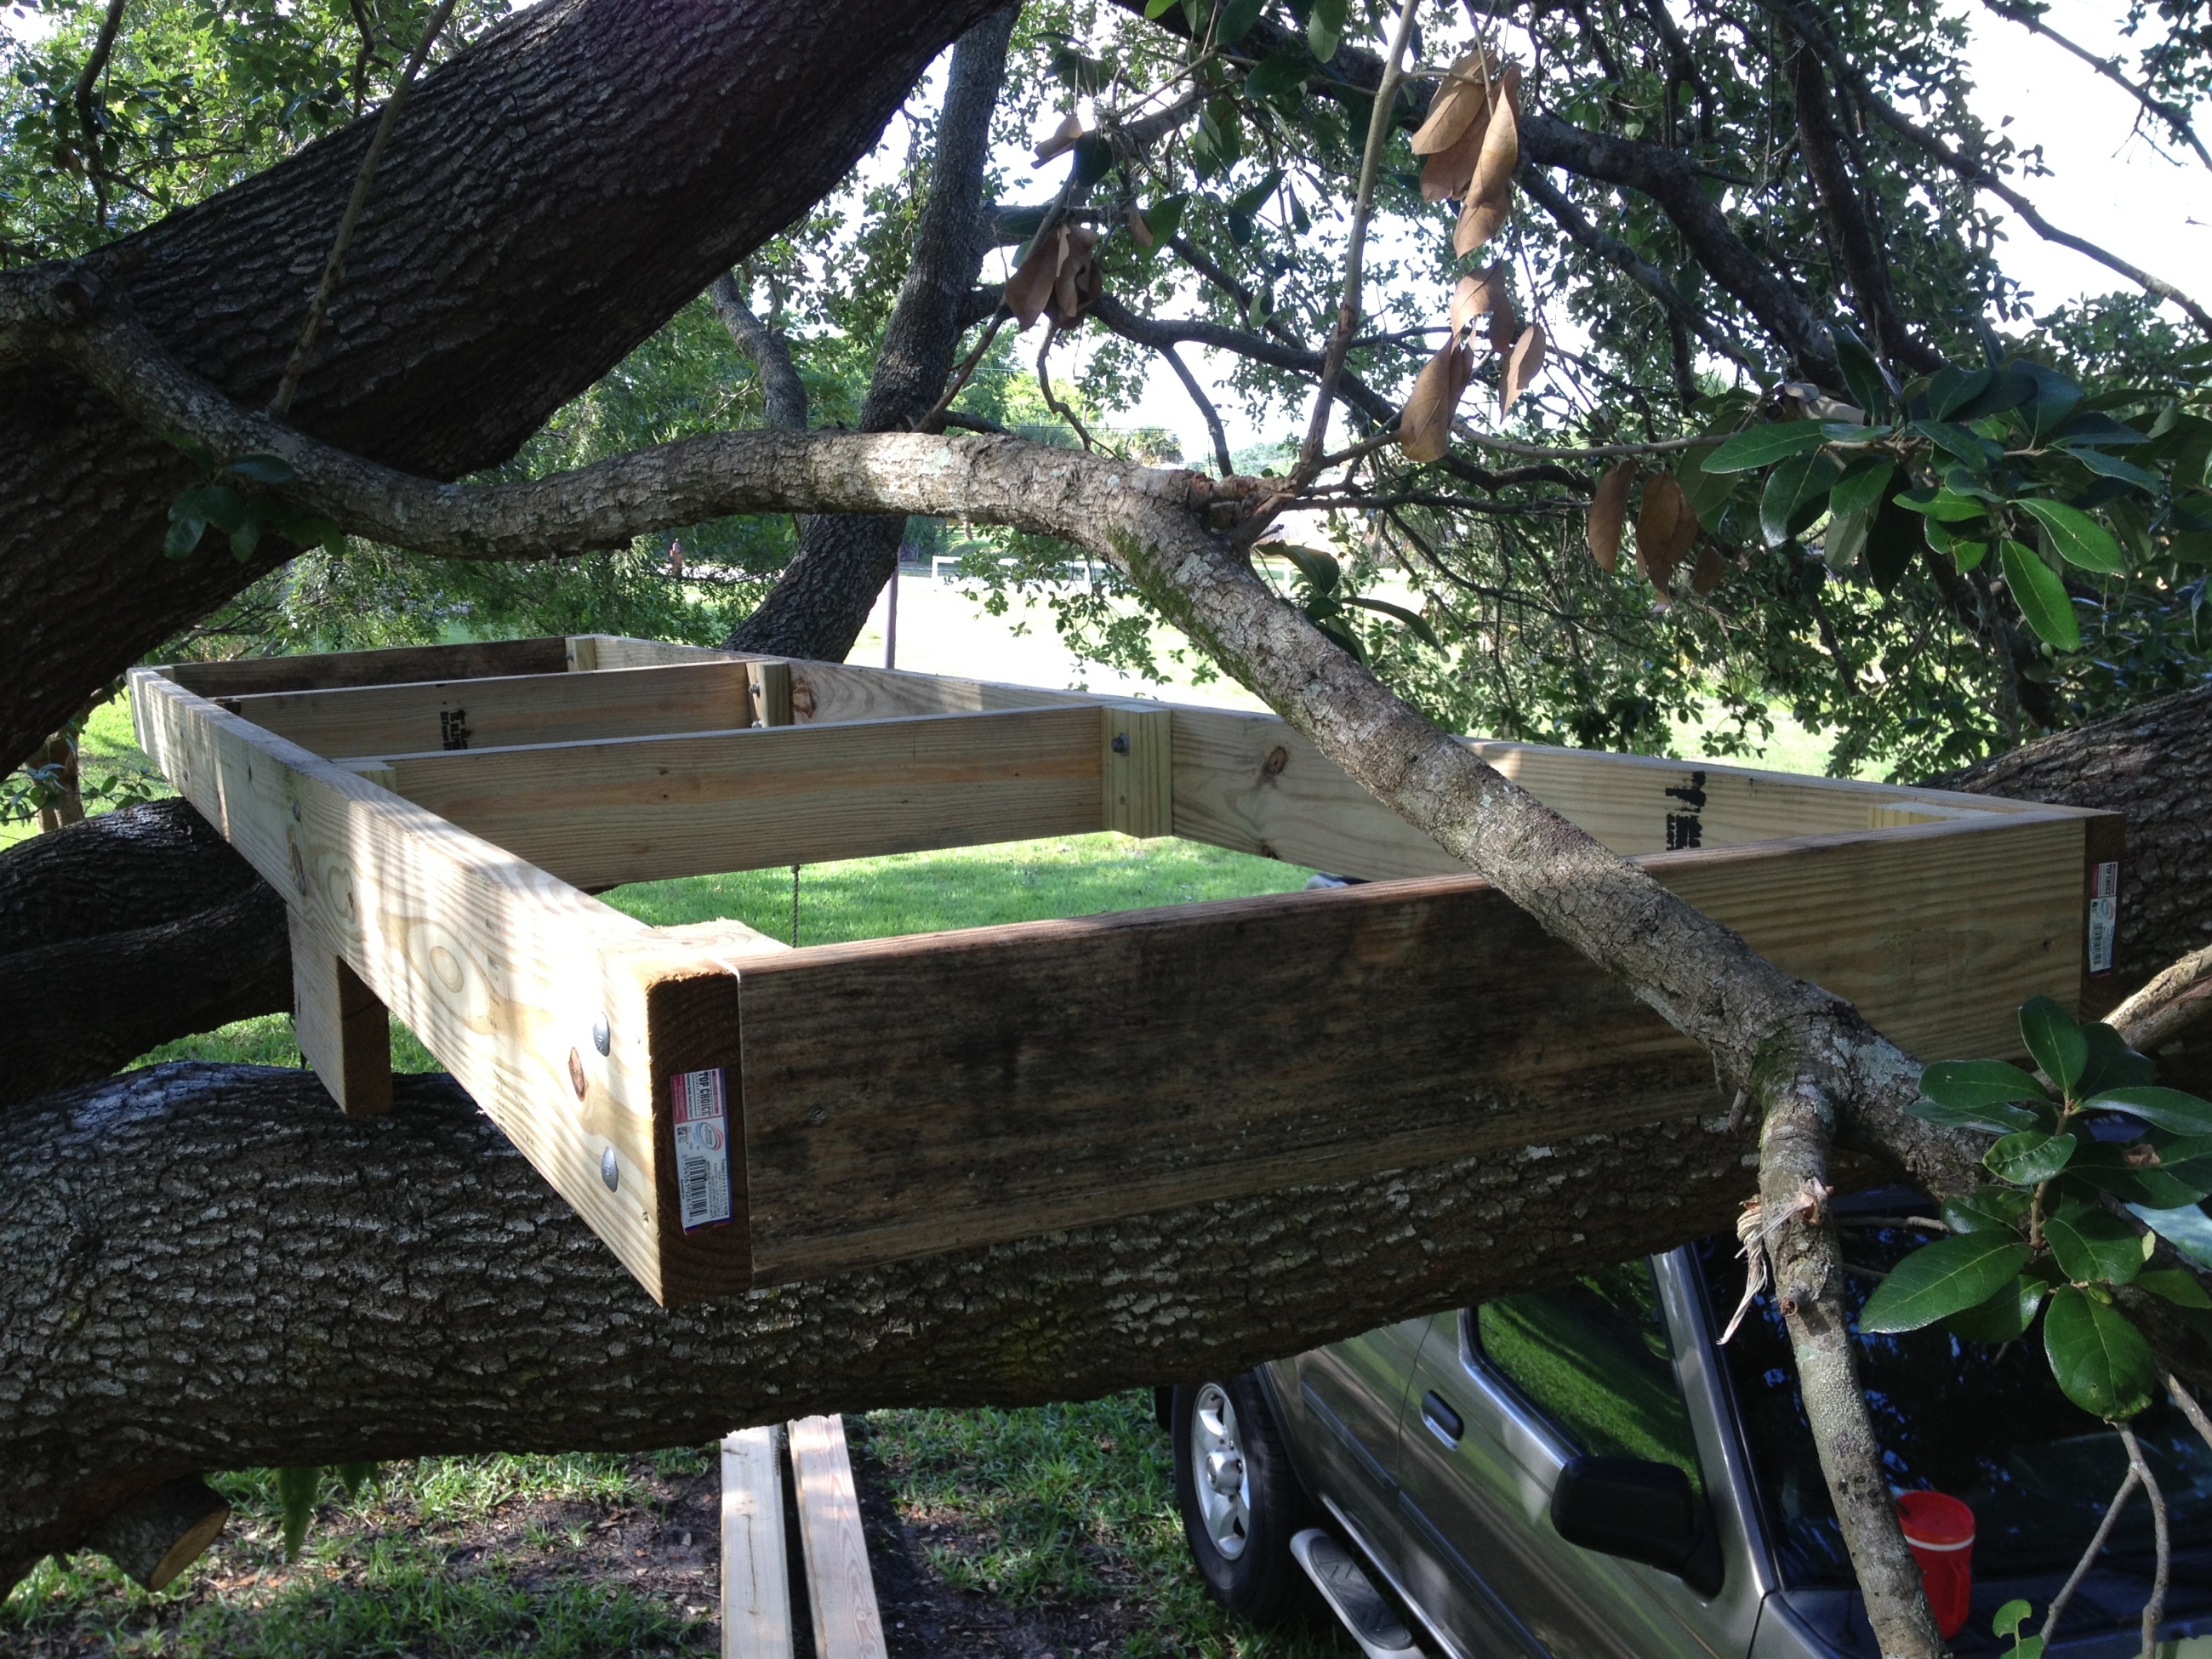
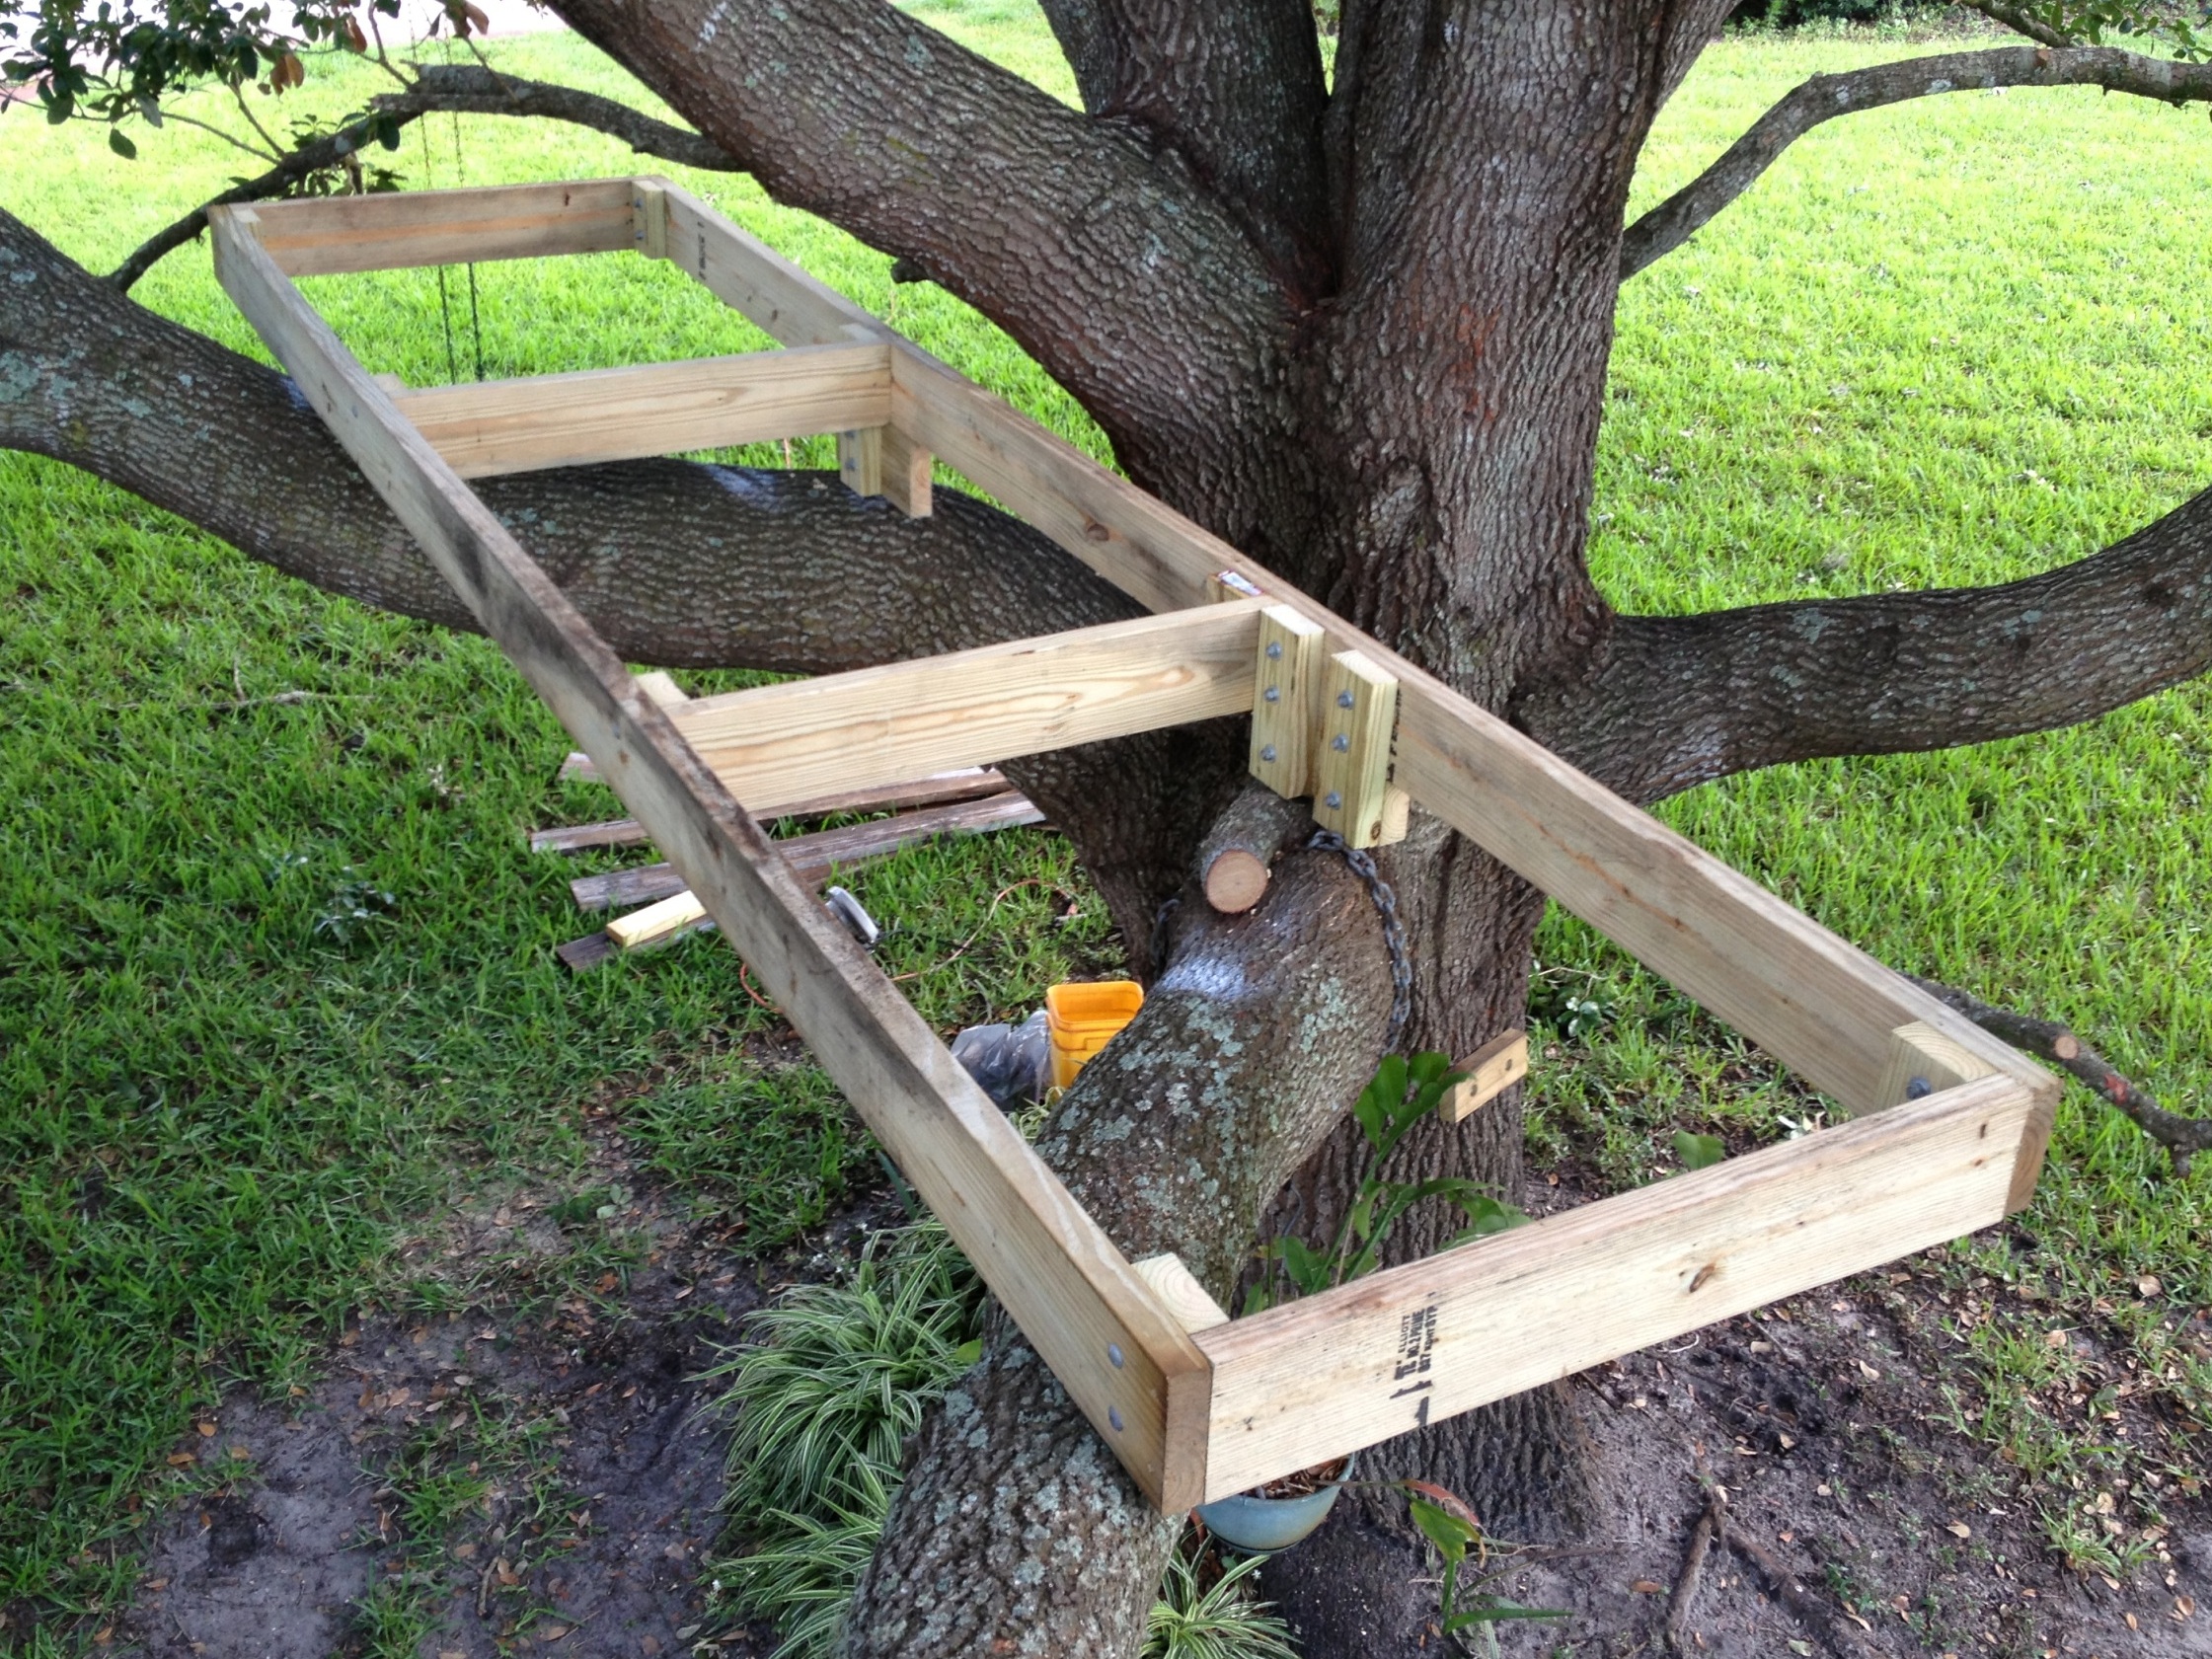
Once all the smaller cross beams are attached to the main beams, you will have a nice solid frame. Notice that I have a spacer block under the left side in the picture. Good luck finding a perfectly flat and level tree limb! I used spacers to level the platform.
Here is a close up of one of the spacers before it was permanently mounted. A block of 2×6 was pretty much the height I needed.
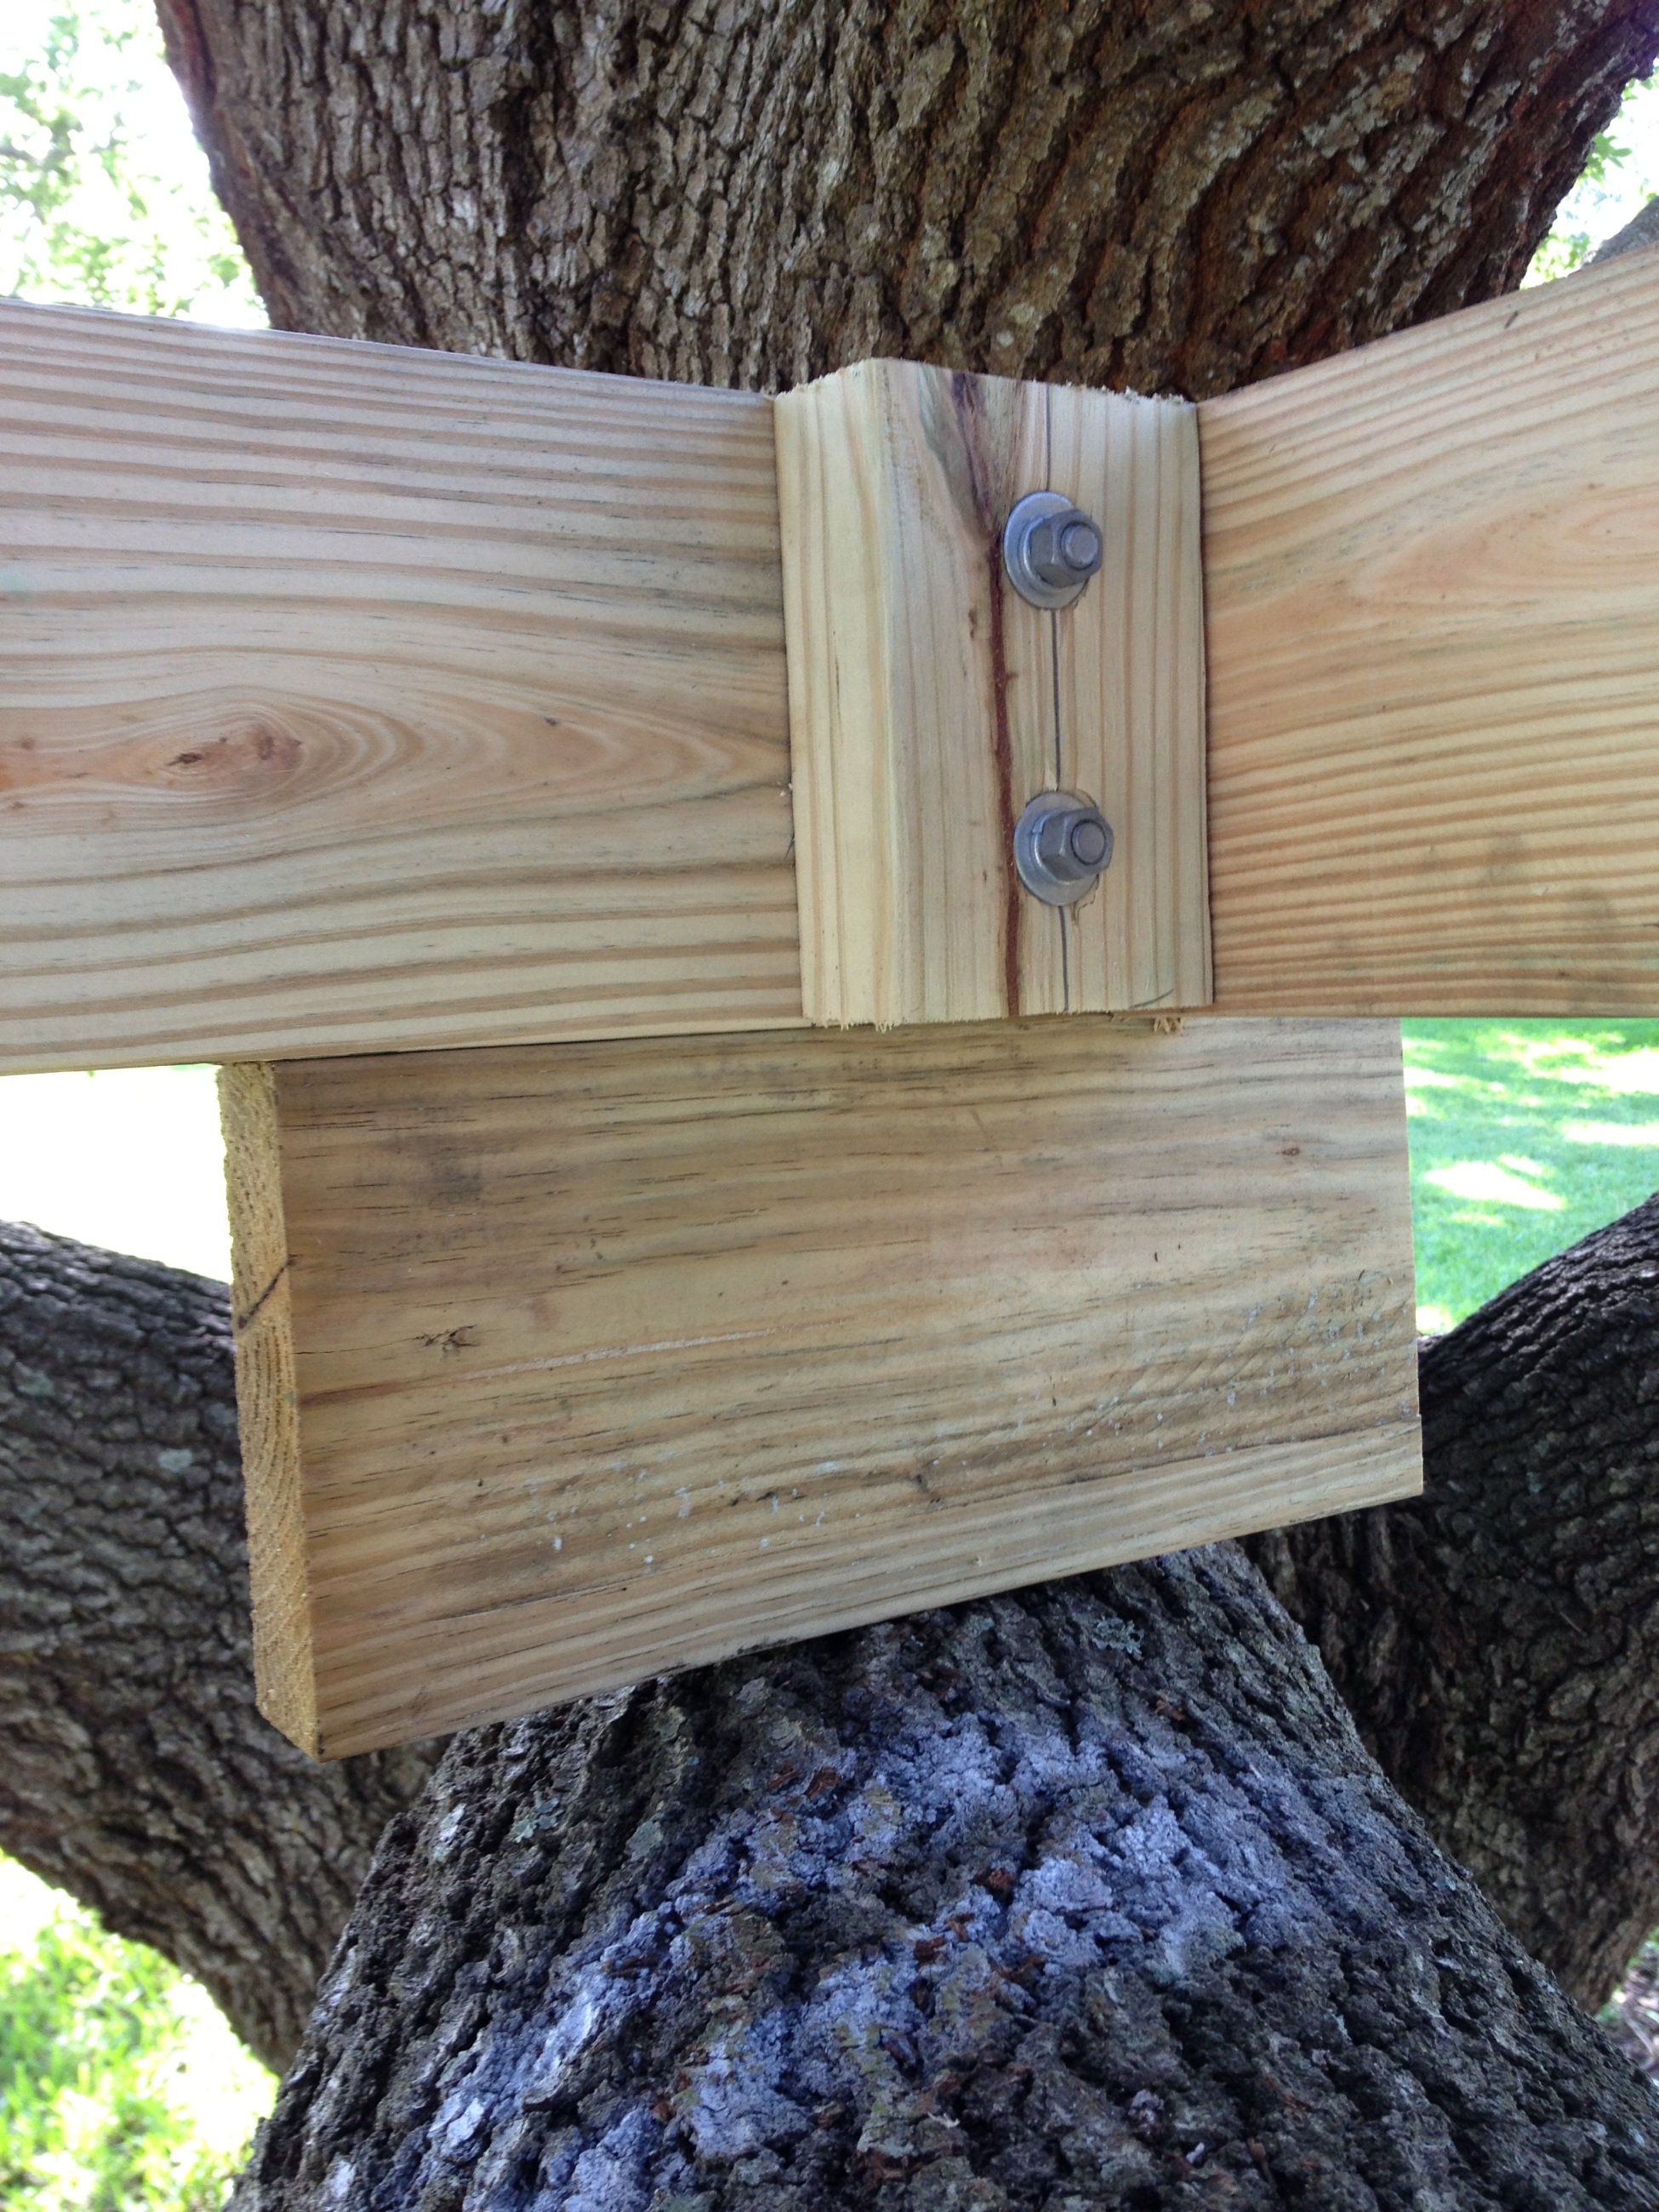
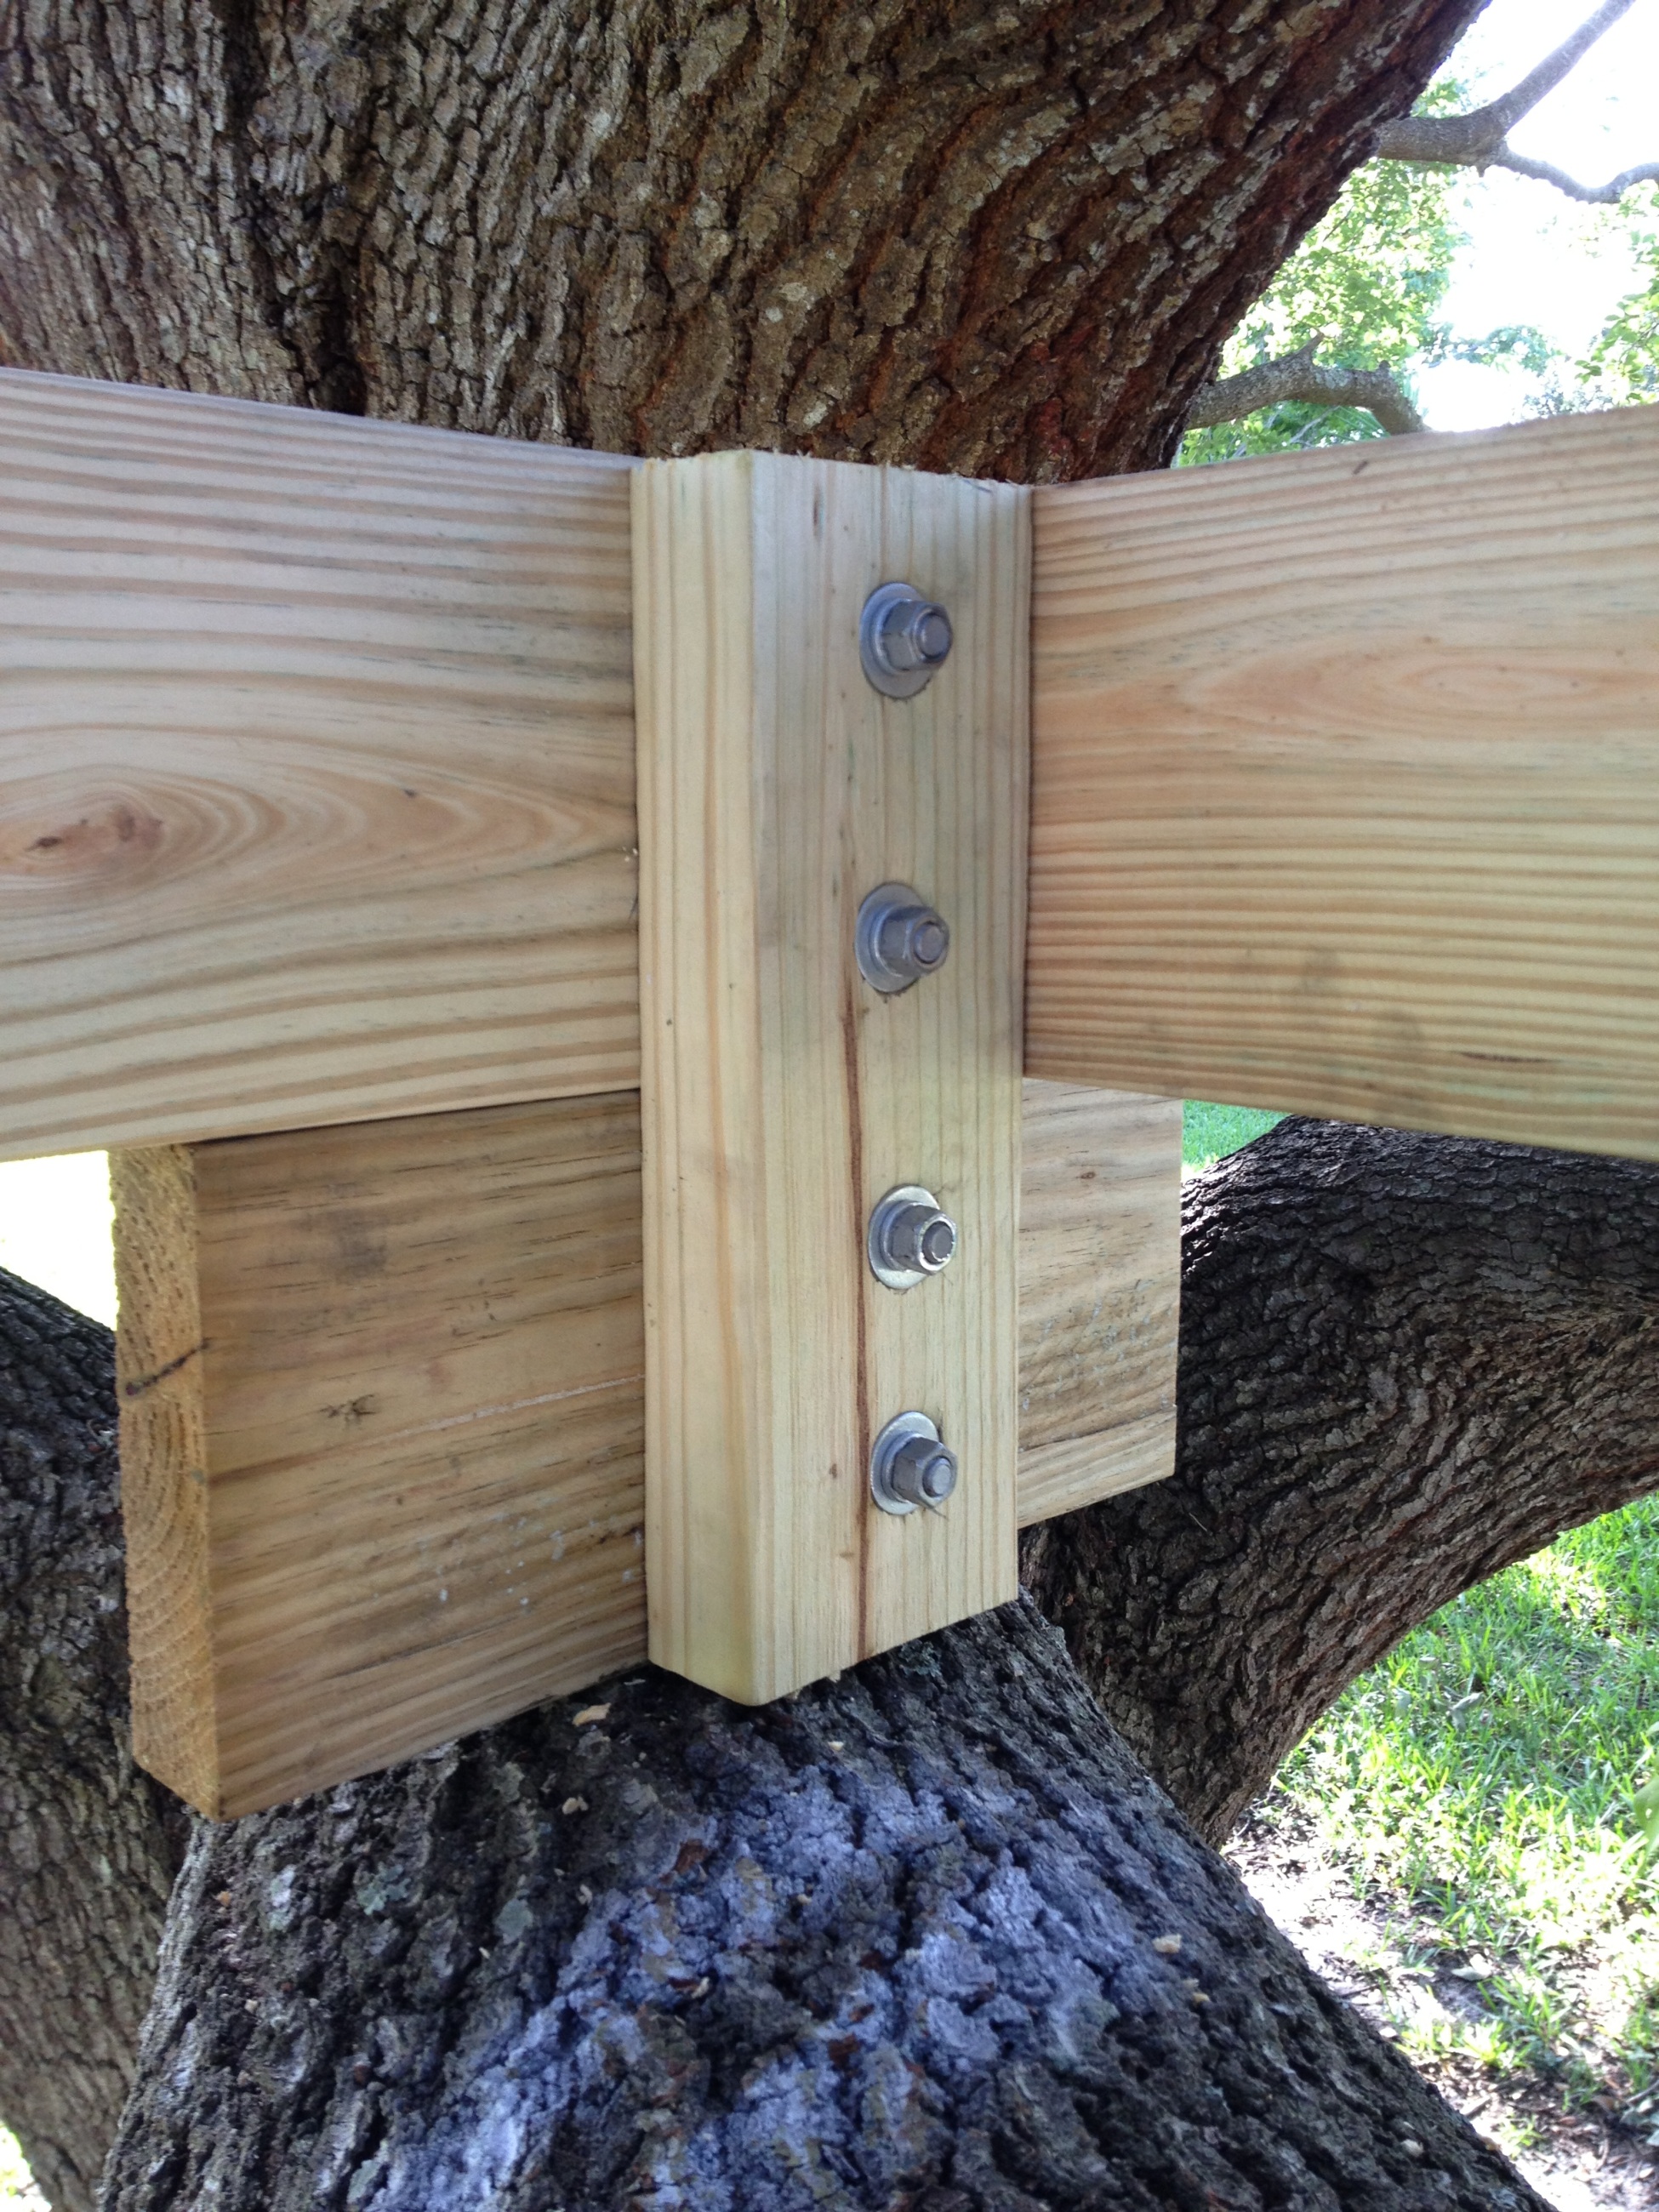
I realized at this point that I needed to replace the short 2×4 block in this area with a longer one that would span the height of both the main 2×6 beam plus the new small 2×6 block.
A couple more bolts and this height extension was complete.
Here is a different angle of the platform at this point. You can see that I had to create a second height extension at the other limb that was the width of a 2×4, rather than the 2×6 I used at the other limb. This second height extension is attached using two separate 2×4 blocks.
Before attaching the flooring to this frame, the platform needs to be attached to the tree so it doesn’t move or get blown away in a wind storm.
Attaching non-moving, non-growing structures to moving, growing structures can be tricky and confusing. You want to avoid your lumber contacting the tree if at all possible. That point of contact can capture leaves and water and rotting of both your structure and of your tree can occur there.
Another potential issue is binding or pinning the tree’s movement and growth. If you permanently attach or pin a structure to 2 separate tree limbs, that structure might inhibit the tree’s growth in a certain direction. Or alternatively, the tree might move or grow to a point where it stretches or warps or even breaks your structure. Not good for the tree and not good for your structure.
So the trick is to mount the structure in the tree in a way that allows the tree to grow and sort of slide past the structure without it warping or breaking the structure. There are specialty fasteners and brackets that allow your support beam to float on top of the moving tree limb or trunk. The common phrase used in the industry is “perch, don’t pin”.
I got lucky because I found a location for my platform where it was just simply sitting on top of two large horizontal limbs that could easily hold the weight of the platform. So all I really needed was to find a strong spacer of some sort to mount between the tree limb and my platform. I used lag bolt gate hinges (also called pintle screws), similar to this photo and this website.

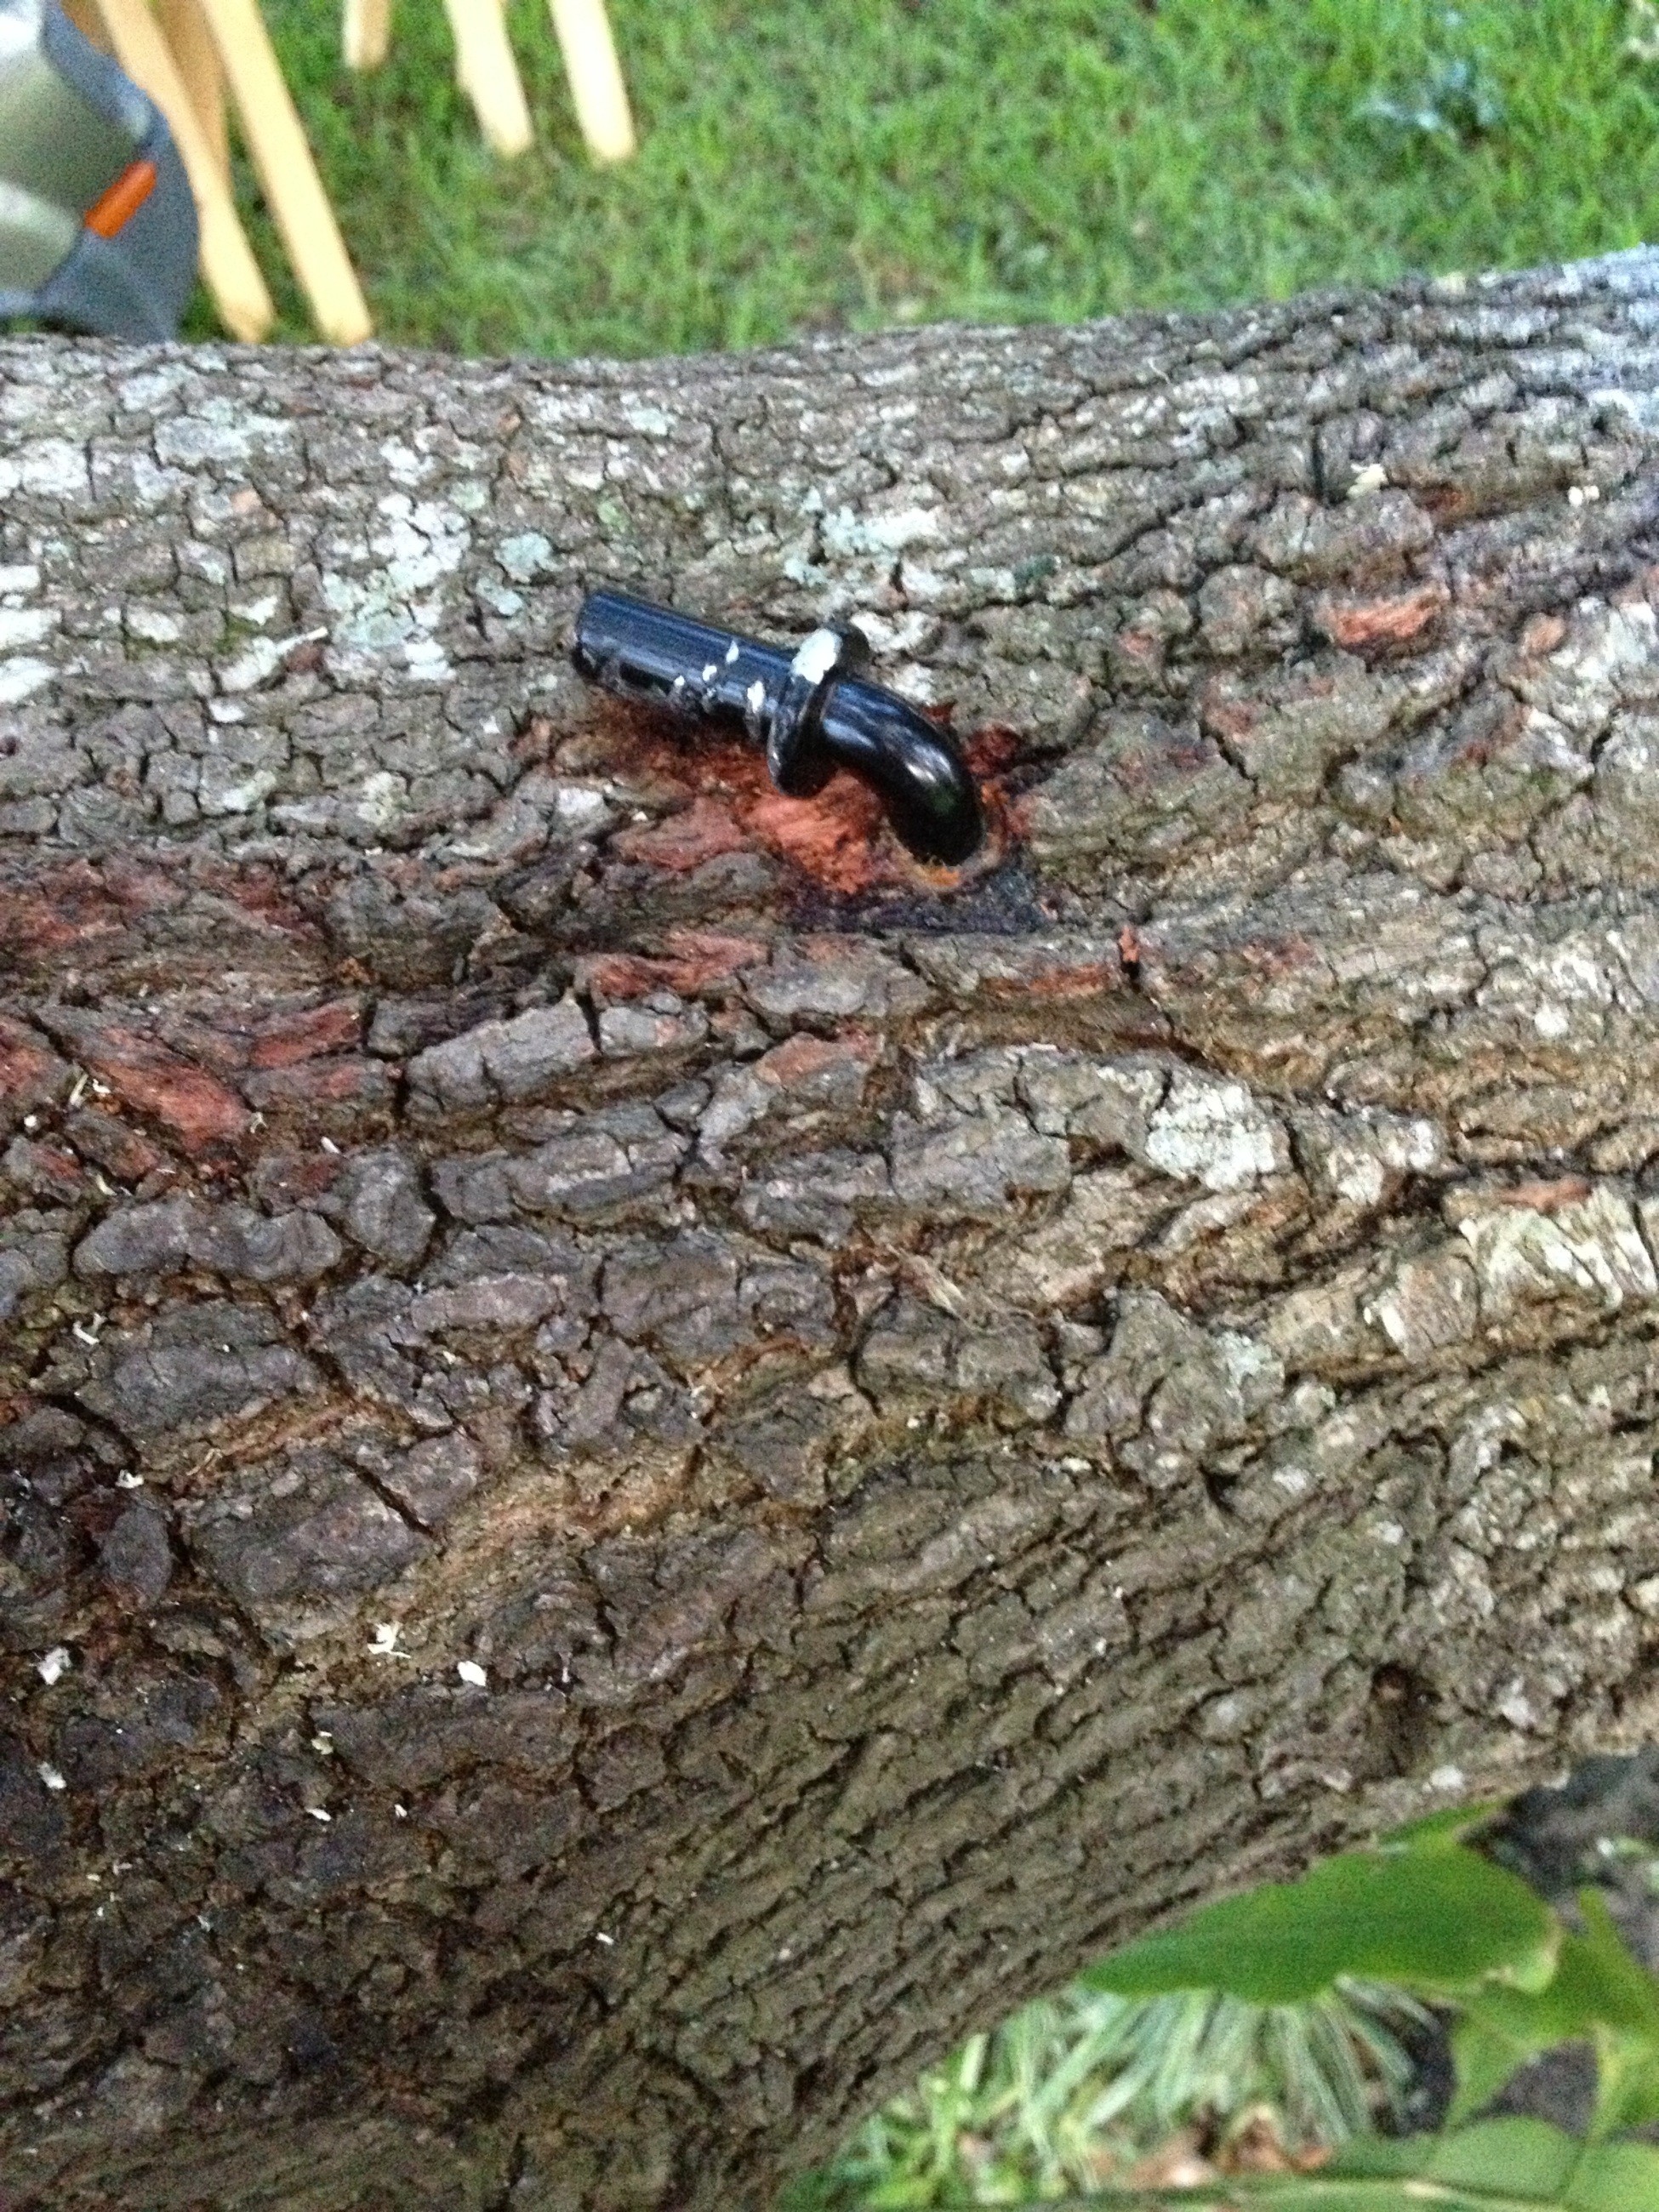
By screwing them all the way down to the limb surface, the lag bolt doesn’t actually hold up the weight of the platform … the tree limb does. The lag bolt head just acts as a surface to separate the structure lumber and the tree while also providing a sliding surface that allows the platform to slide as the tree limb grows and moves beneath the platform.
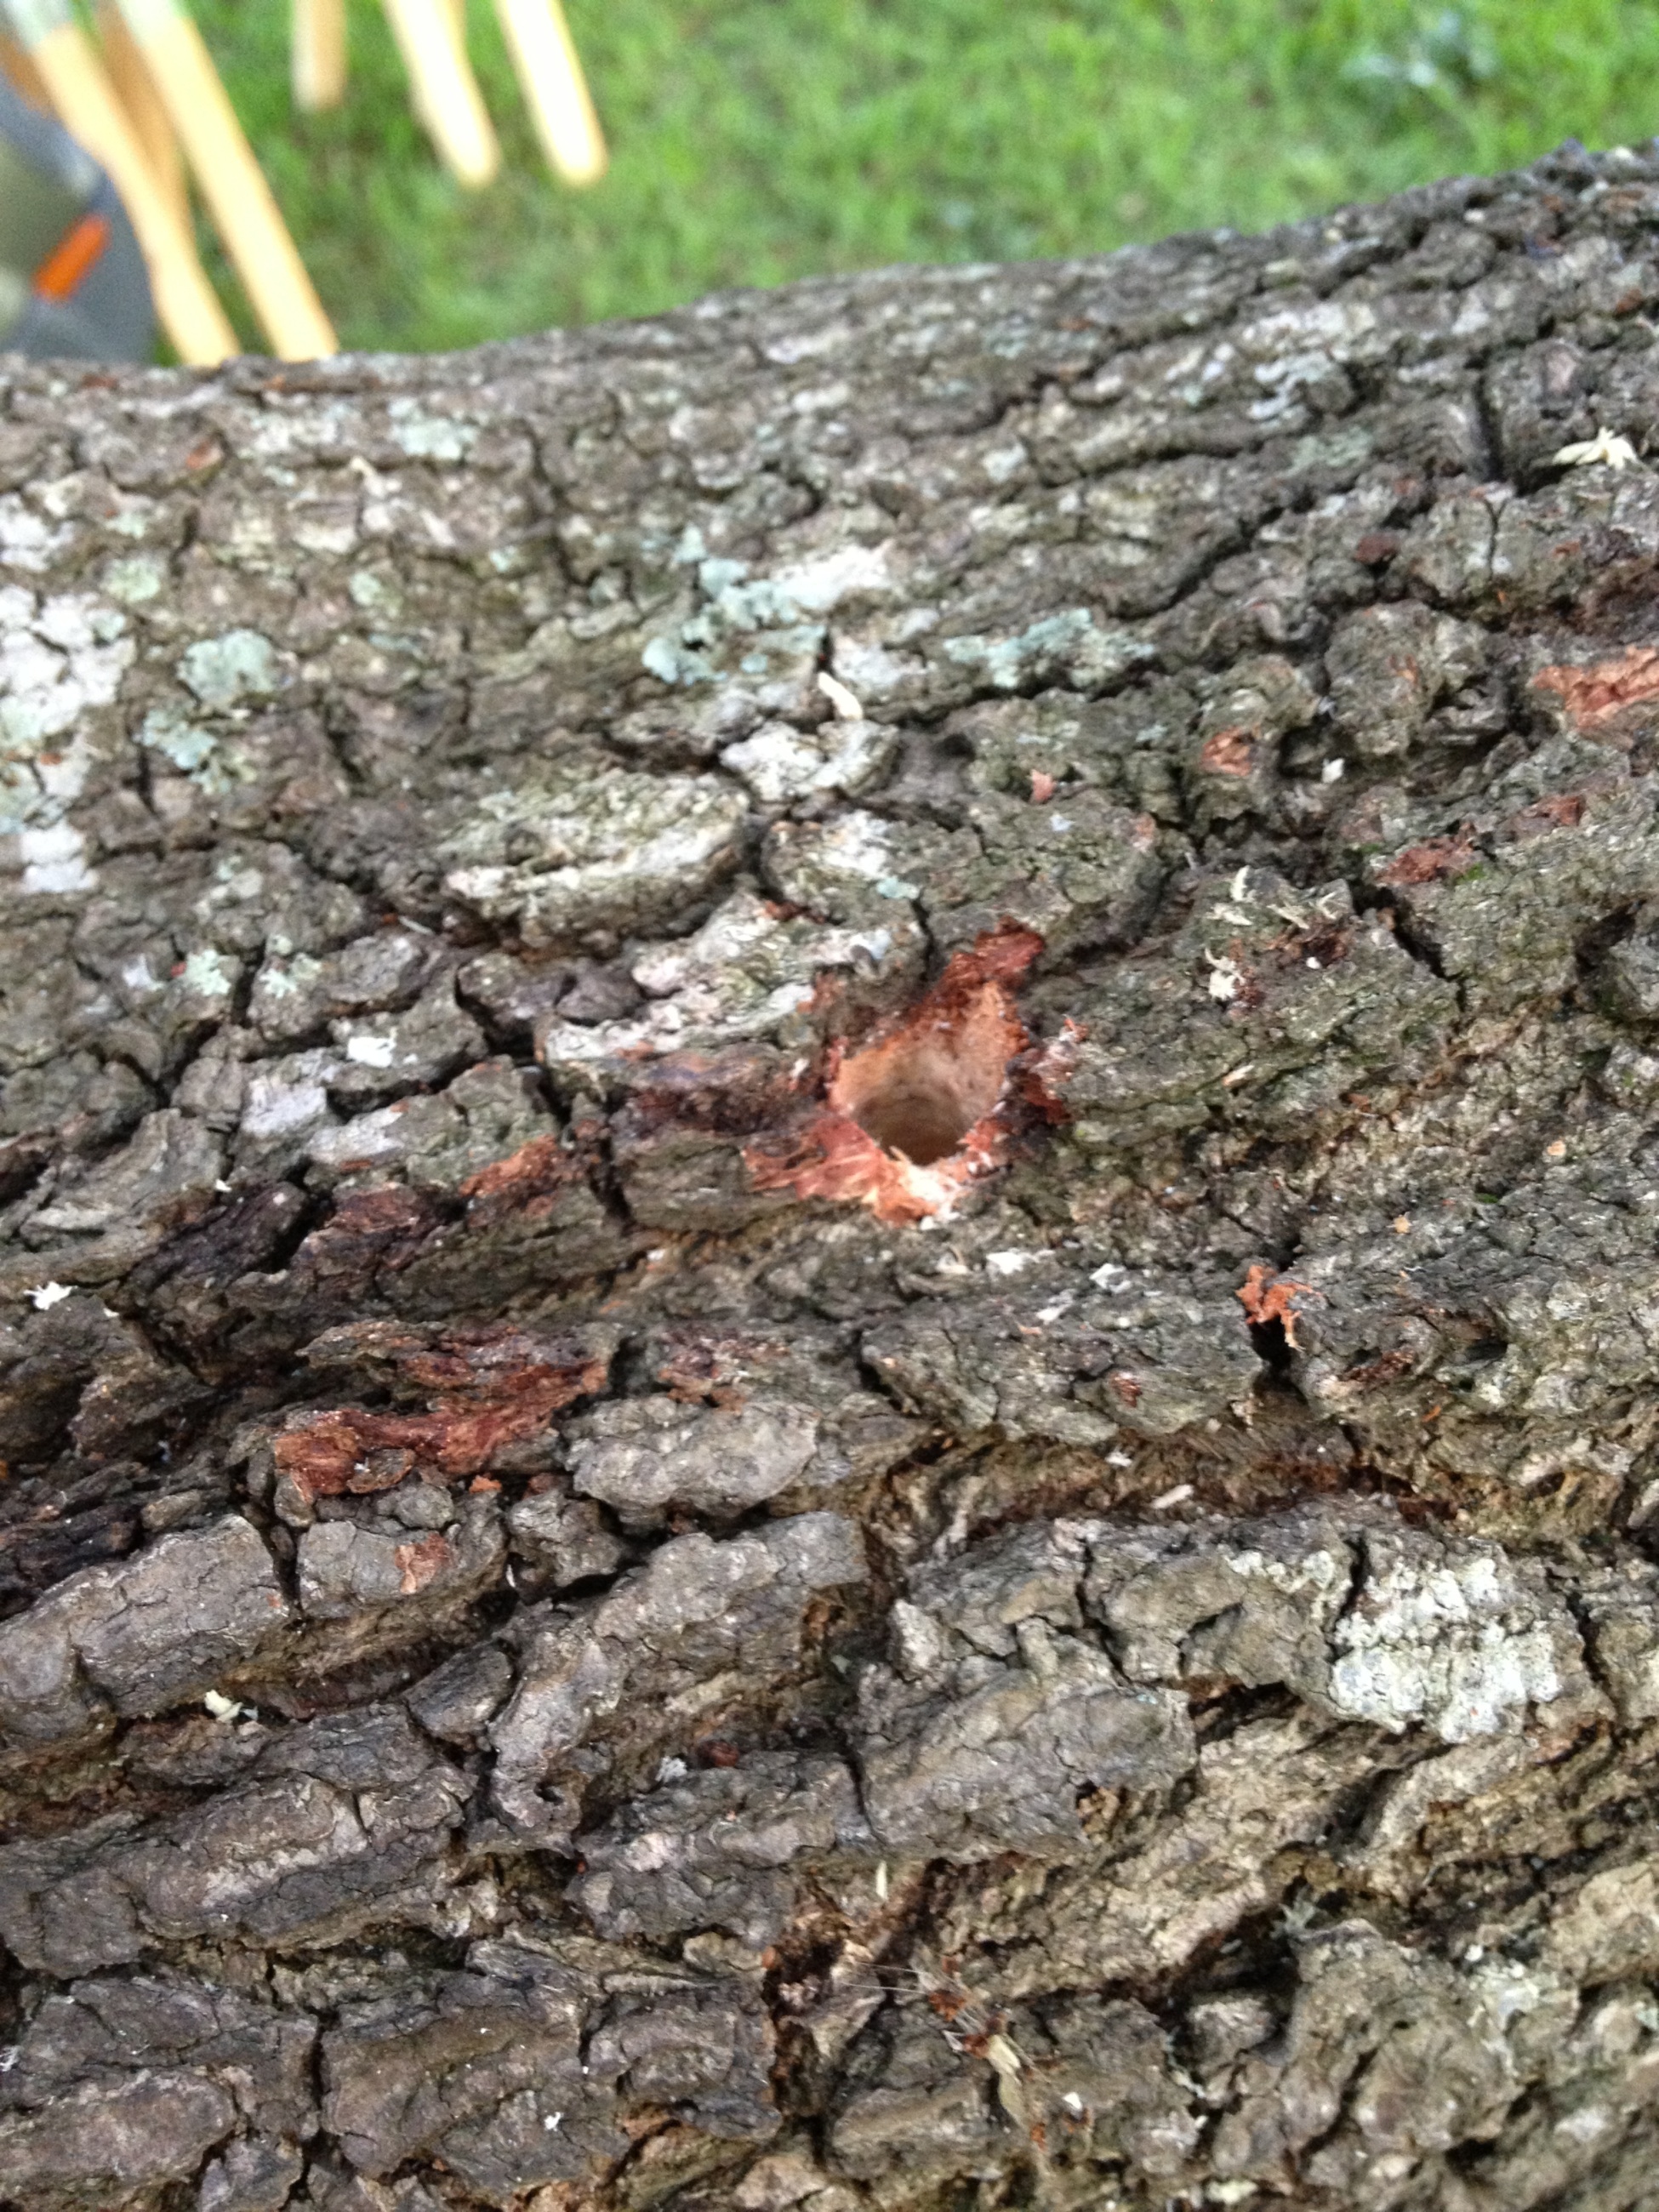
So here is the pilot hole in the limb.
And here is the lag bolt installed.
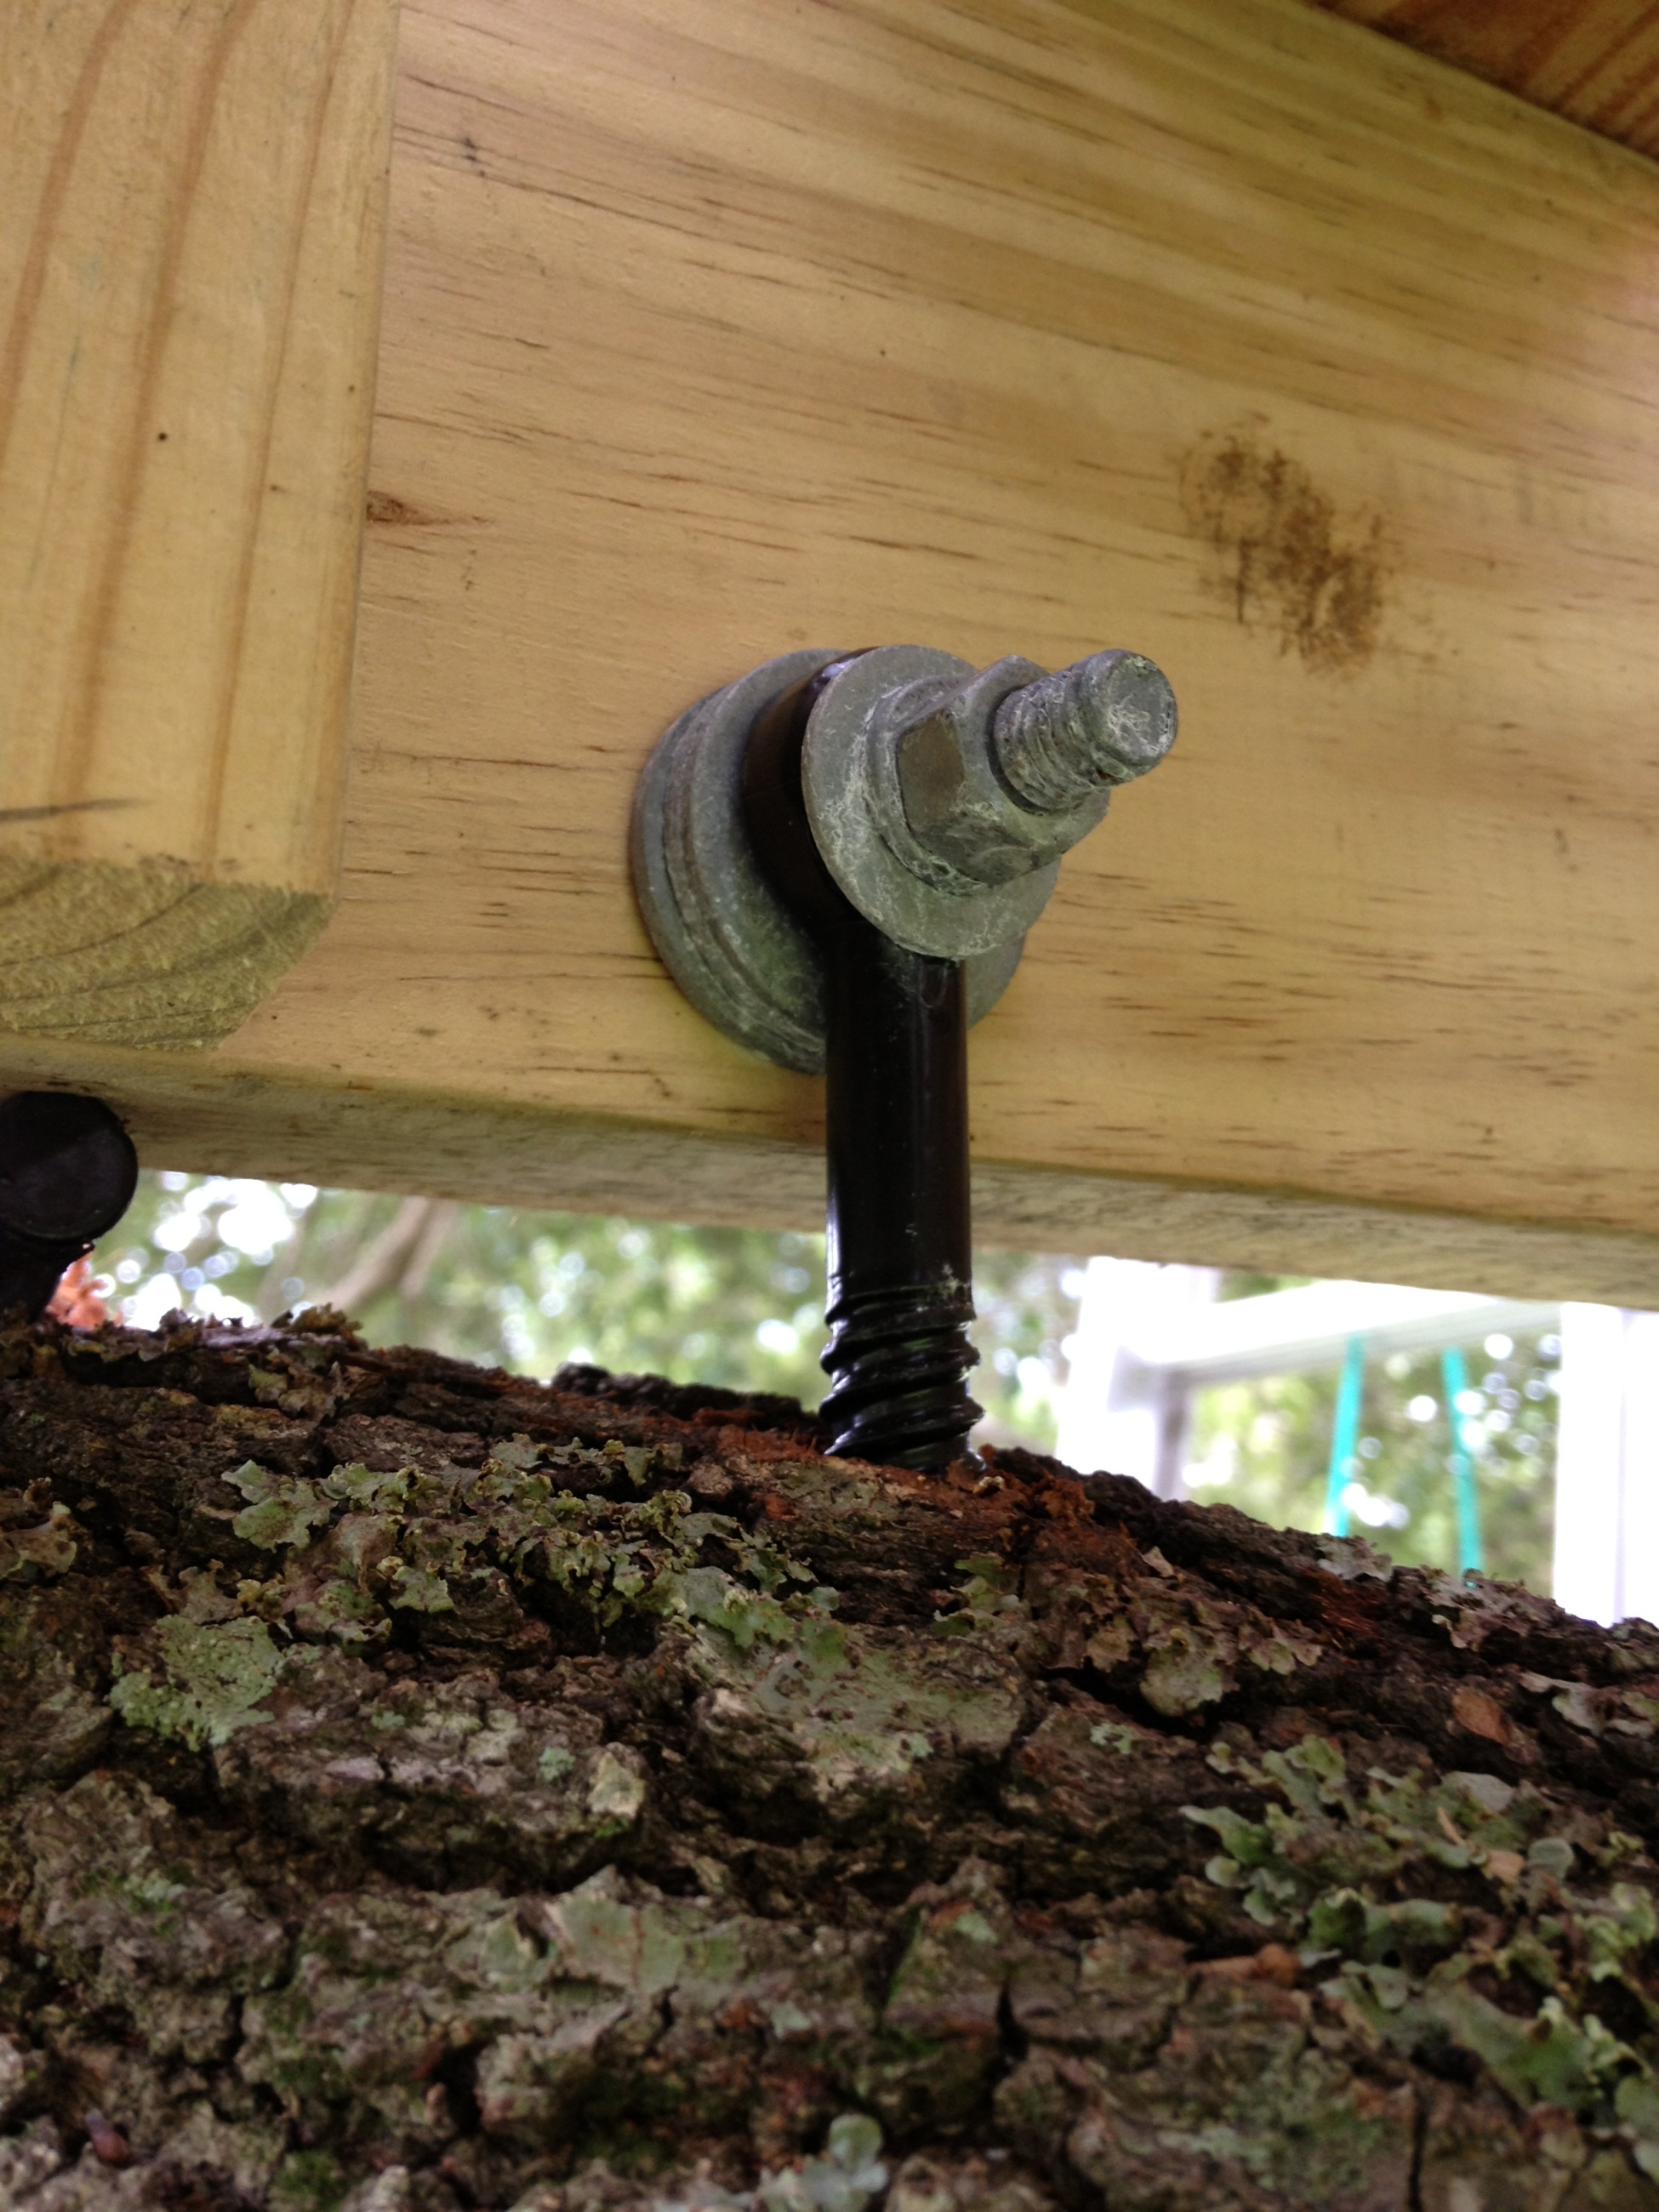
Here is what it looks like from underneath with the platform on top of the lag bolt gate hinge. You can see how the platform is just sitting on top and can slide past as the tree moves. Of course, I need to keep my eye on this over the years because if the tree moves too much I may need to move the lag bolt or add another one in a different location.

Now the next part is trickier. The platform is pretty darn heavy so I’m not terribly worried that it will blow away in a wind storm. But since it is mounted on top of a sliding surface, I don’t really want it moving over time and sliding off or becoming way off center. So I picked one single attachment point and allowed it to pivot at this point by using a lag bolt with an eye. Technically this is pinning the platform to the limb, but only one out of the four touching points is pinned, so it won’t bind. This pin will pull one corner of the platform along with the growing tree limb and the rest of the platform will slide along the lag bolt gate hinges. And the fact that this pinned joint is hinged will allow the platform to rotate a little bit in case one limb grows up or down relative to the other limb.
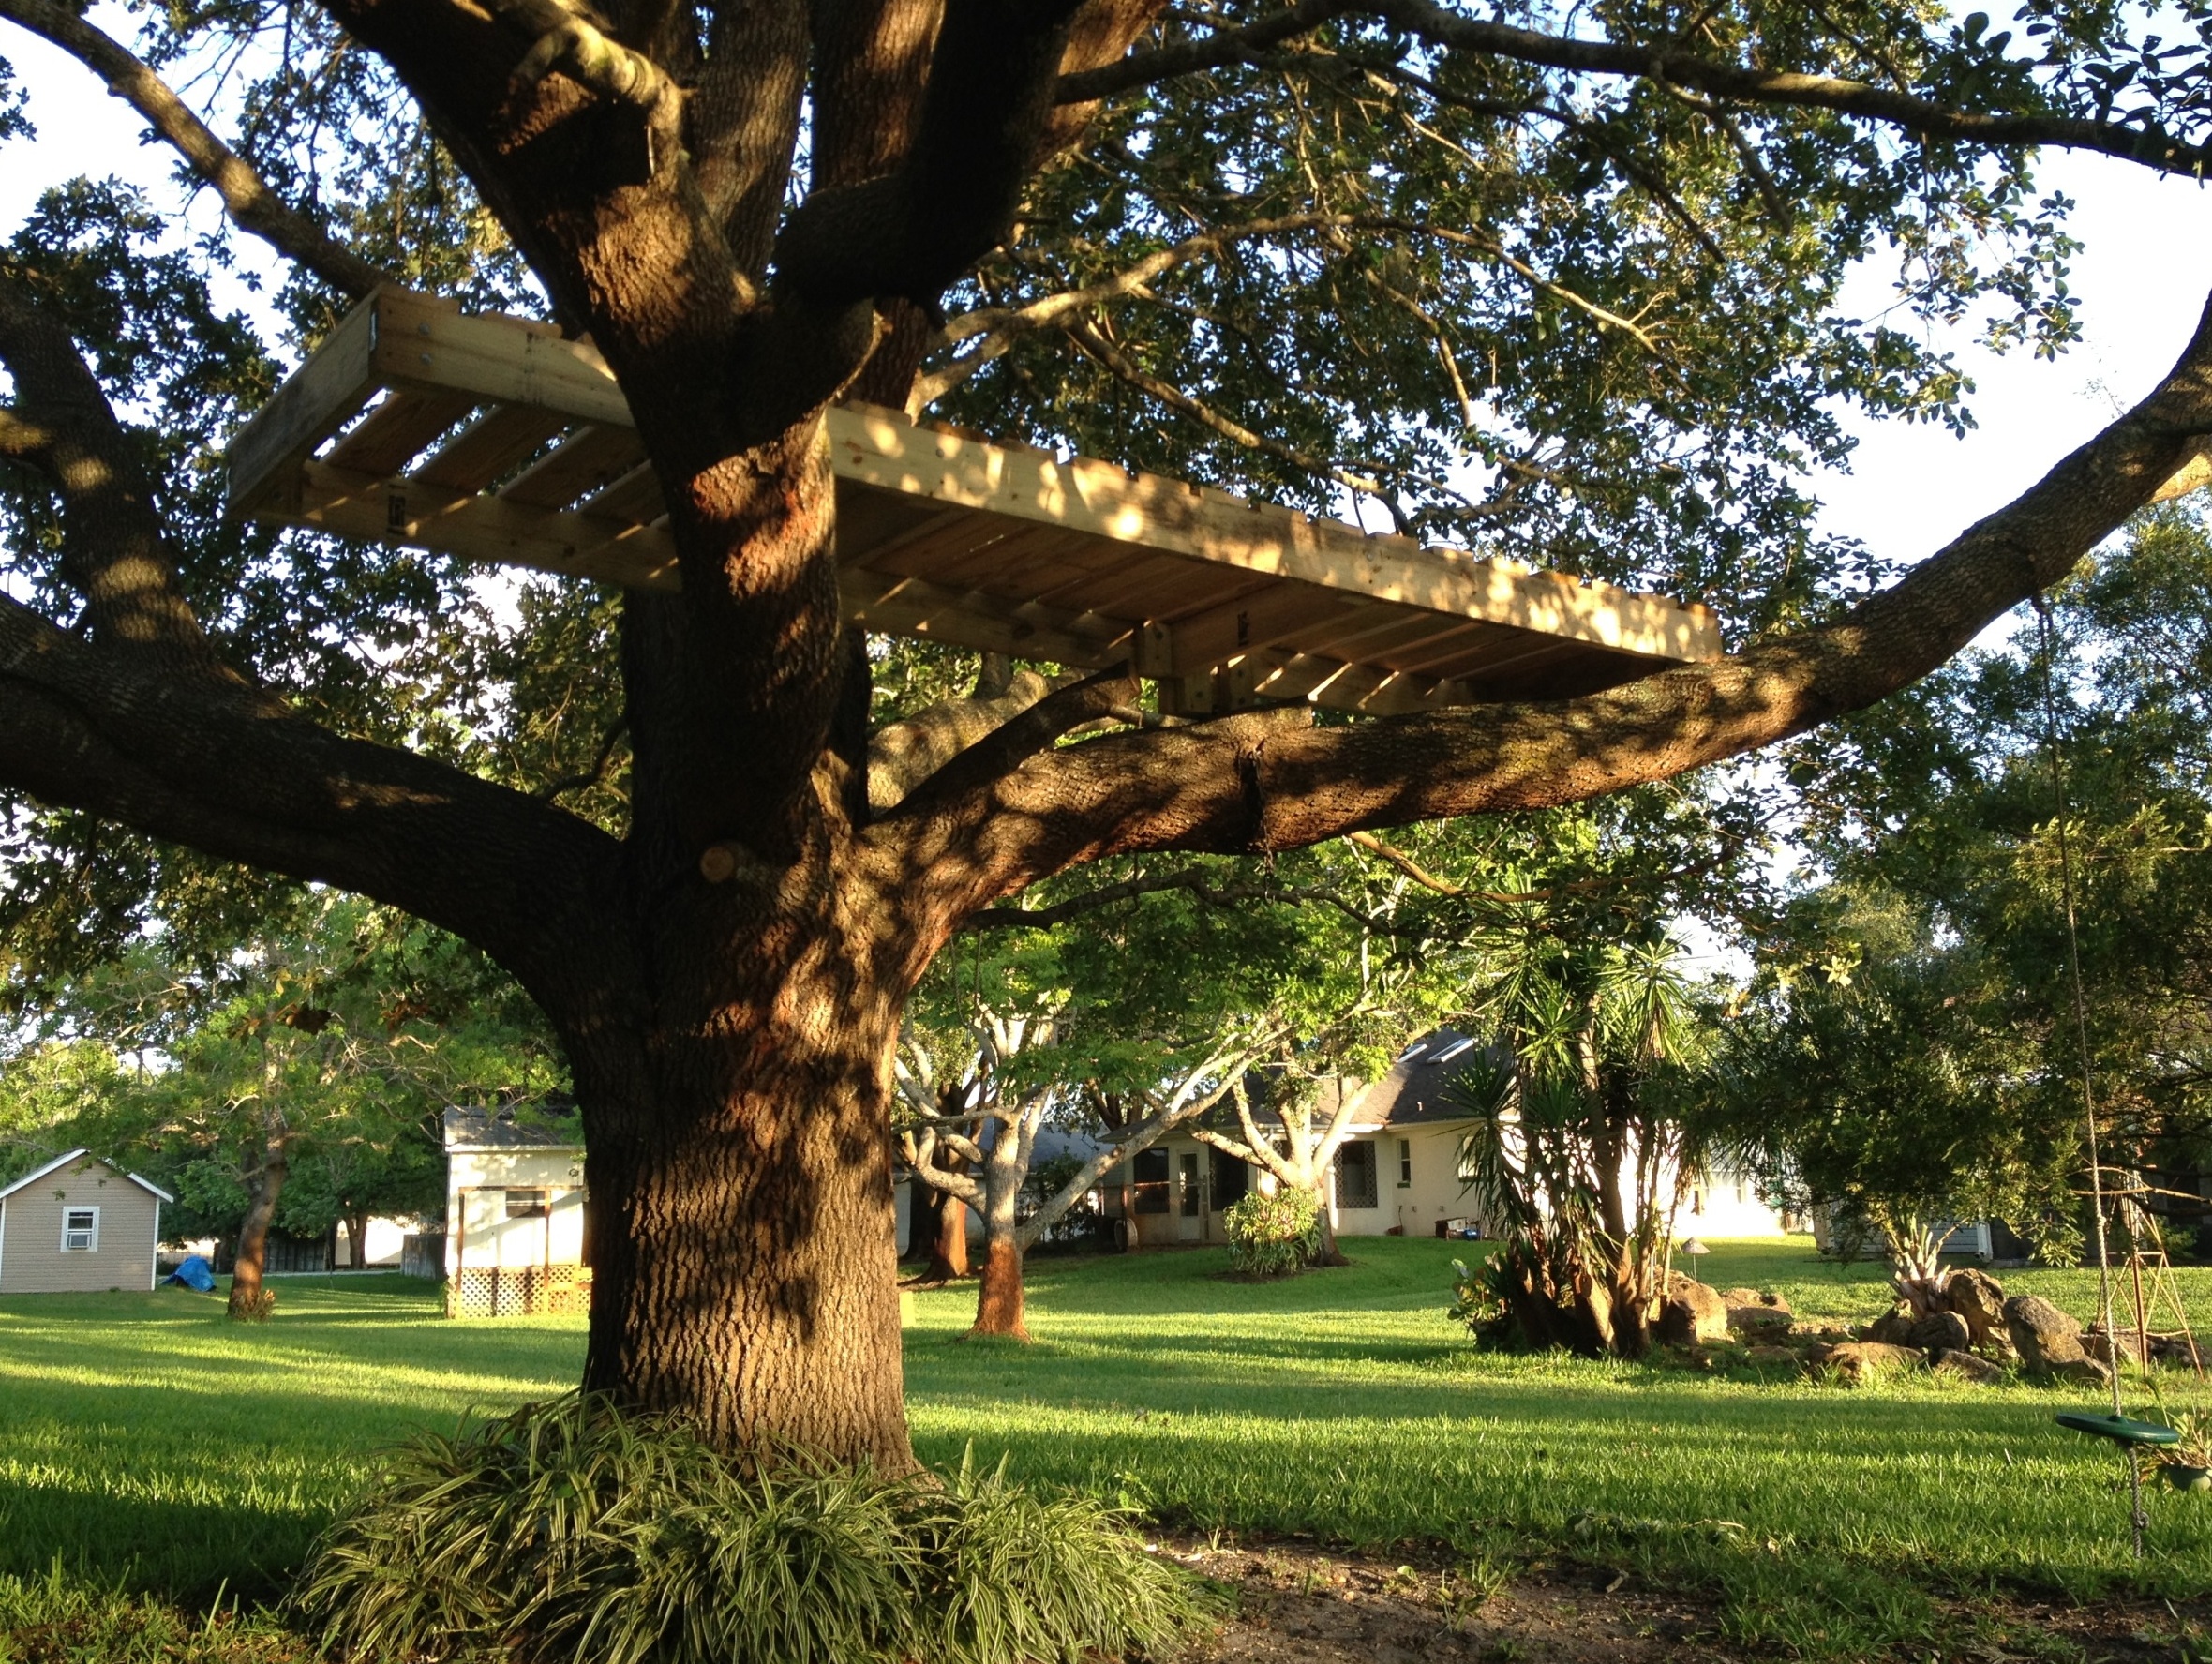
After cutting and installing the 1×6 deck boards, the project is complete. I purposely left a pretty good sized gap between the deck boards. The large gap helps keep leaves from piling up. Also, psychologically I think it helps remind the kids that they are not standing on safe ground and that they need to be extra cautious up there. I also think the lack of railing up there makes them extra cautious.
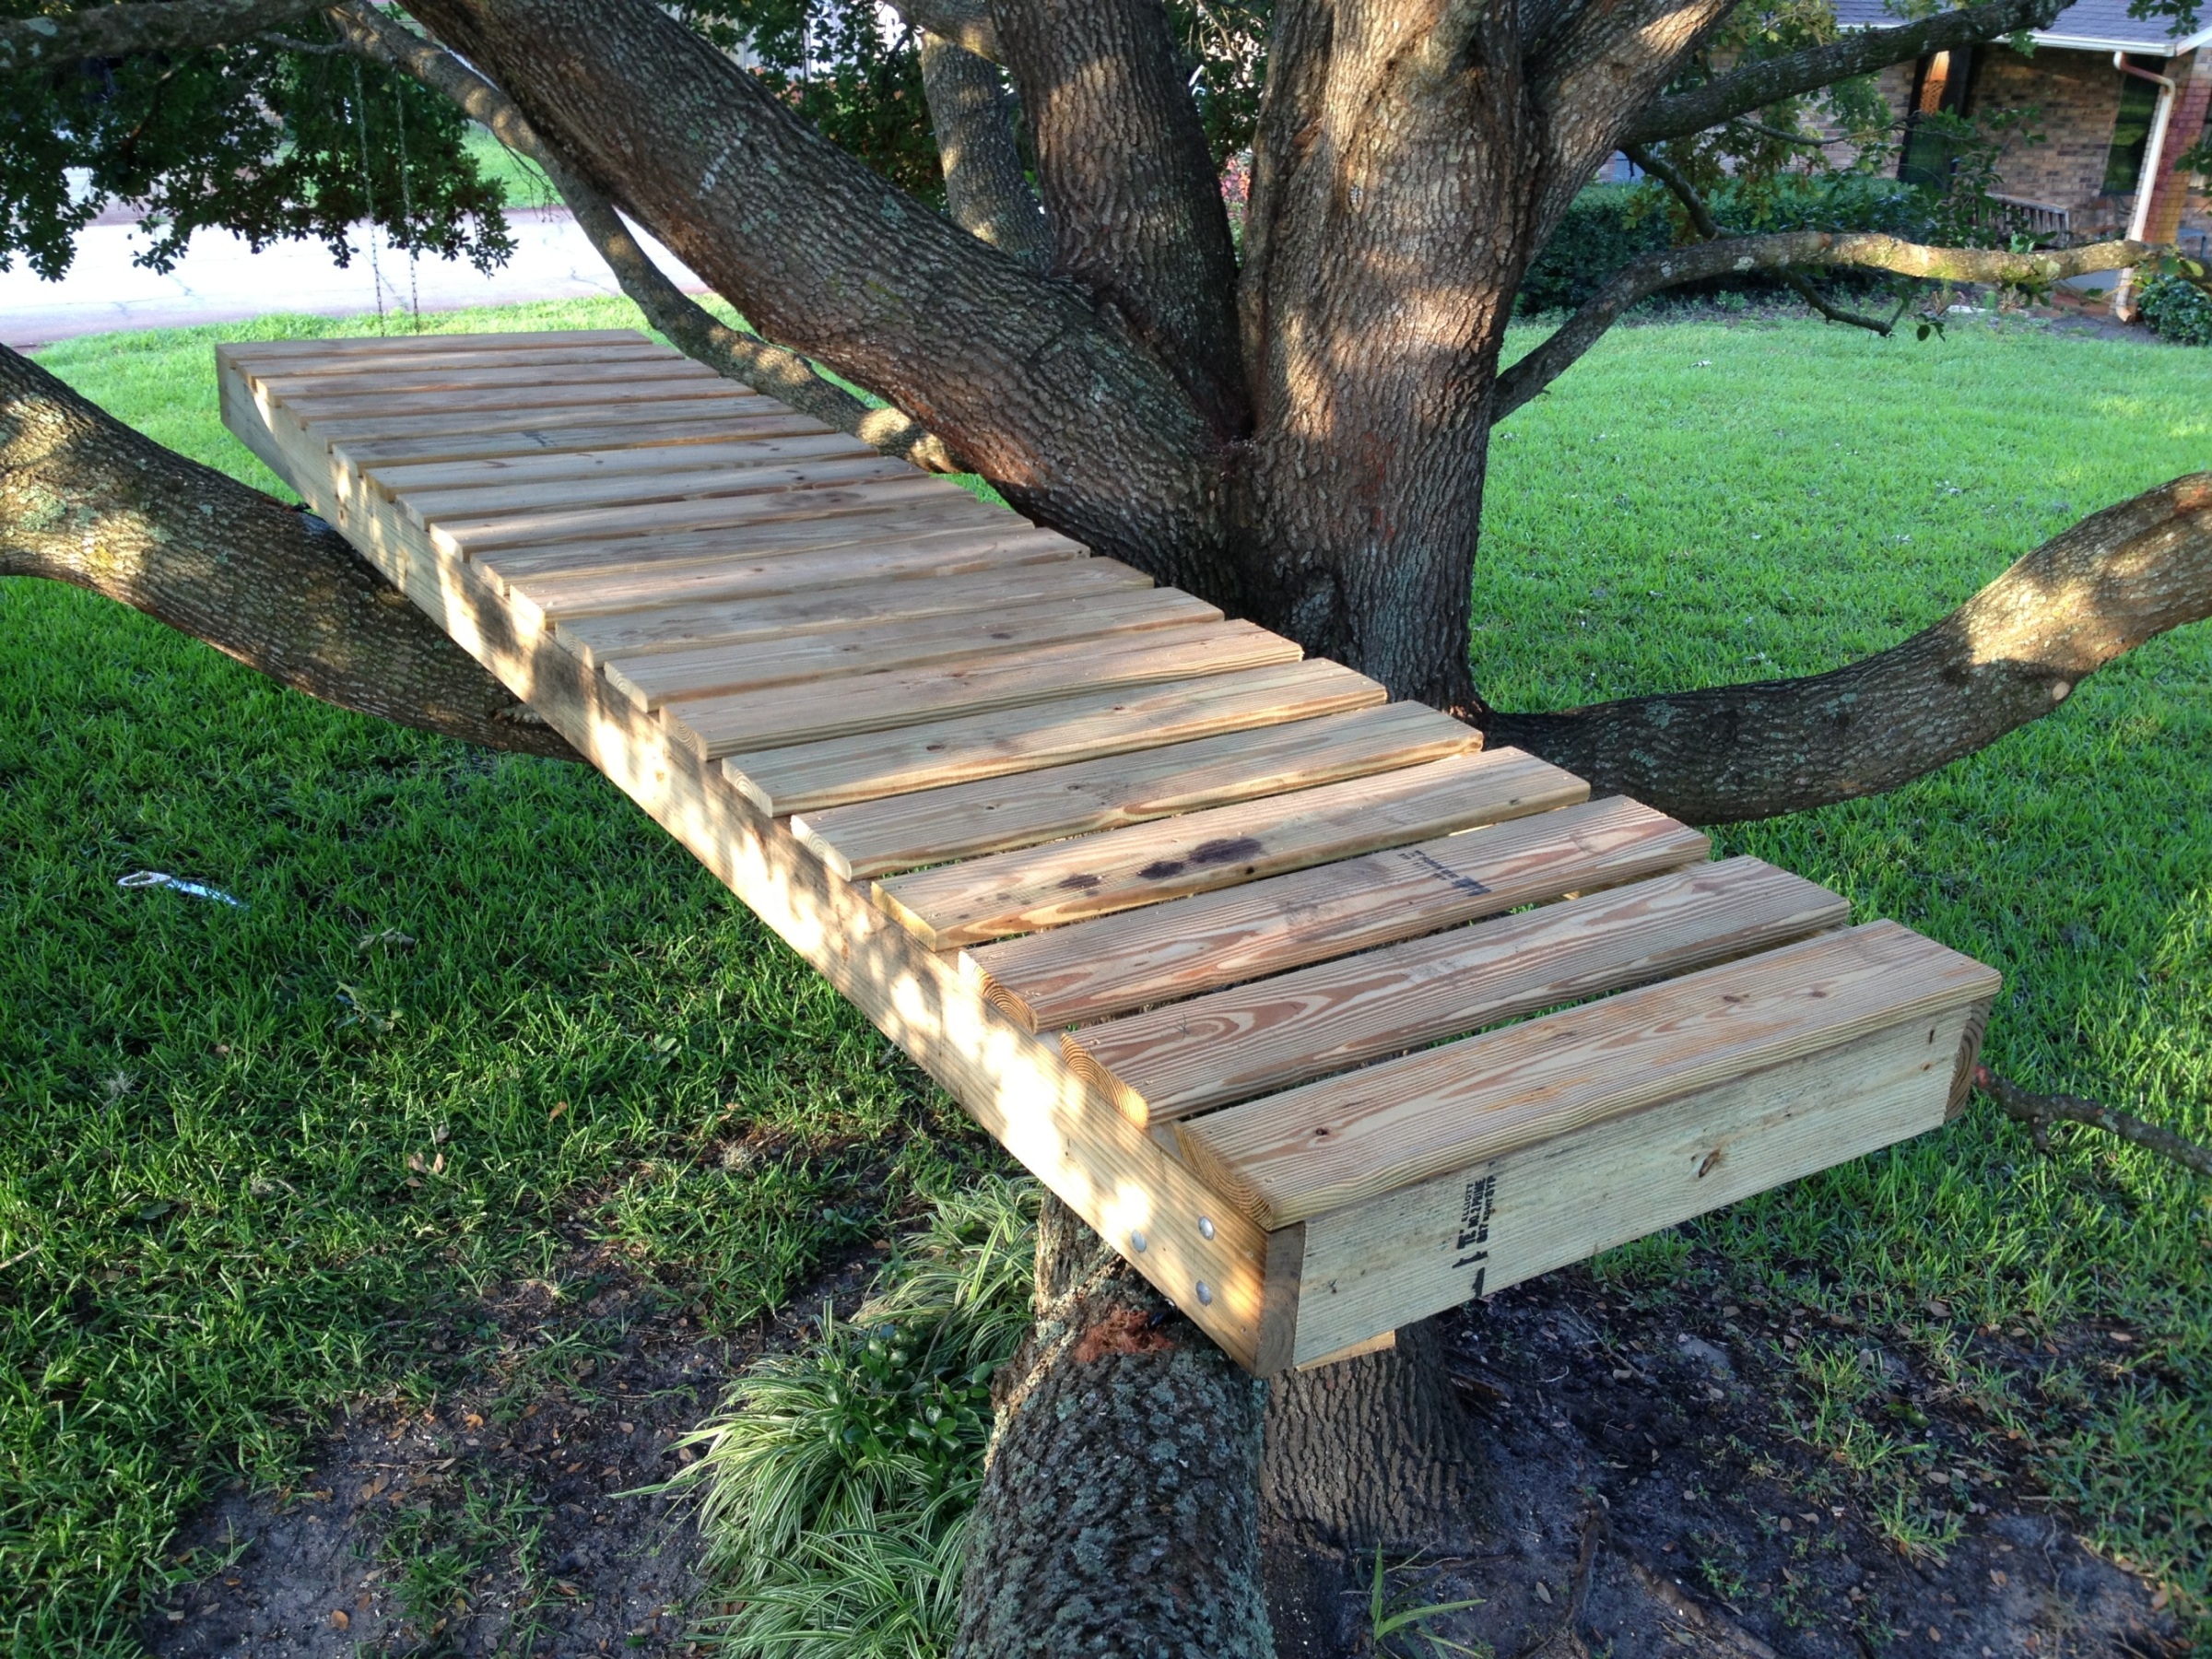
Here is the reverse angle photo. The platform is 12 feet long and 3 feet wide. I considered making it 4 feet wide, but the limbs at that point start to turn upwards pretty sharply, so 3 feet was a good compromise to keep the platform relatively level and a decent size.
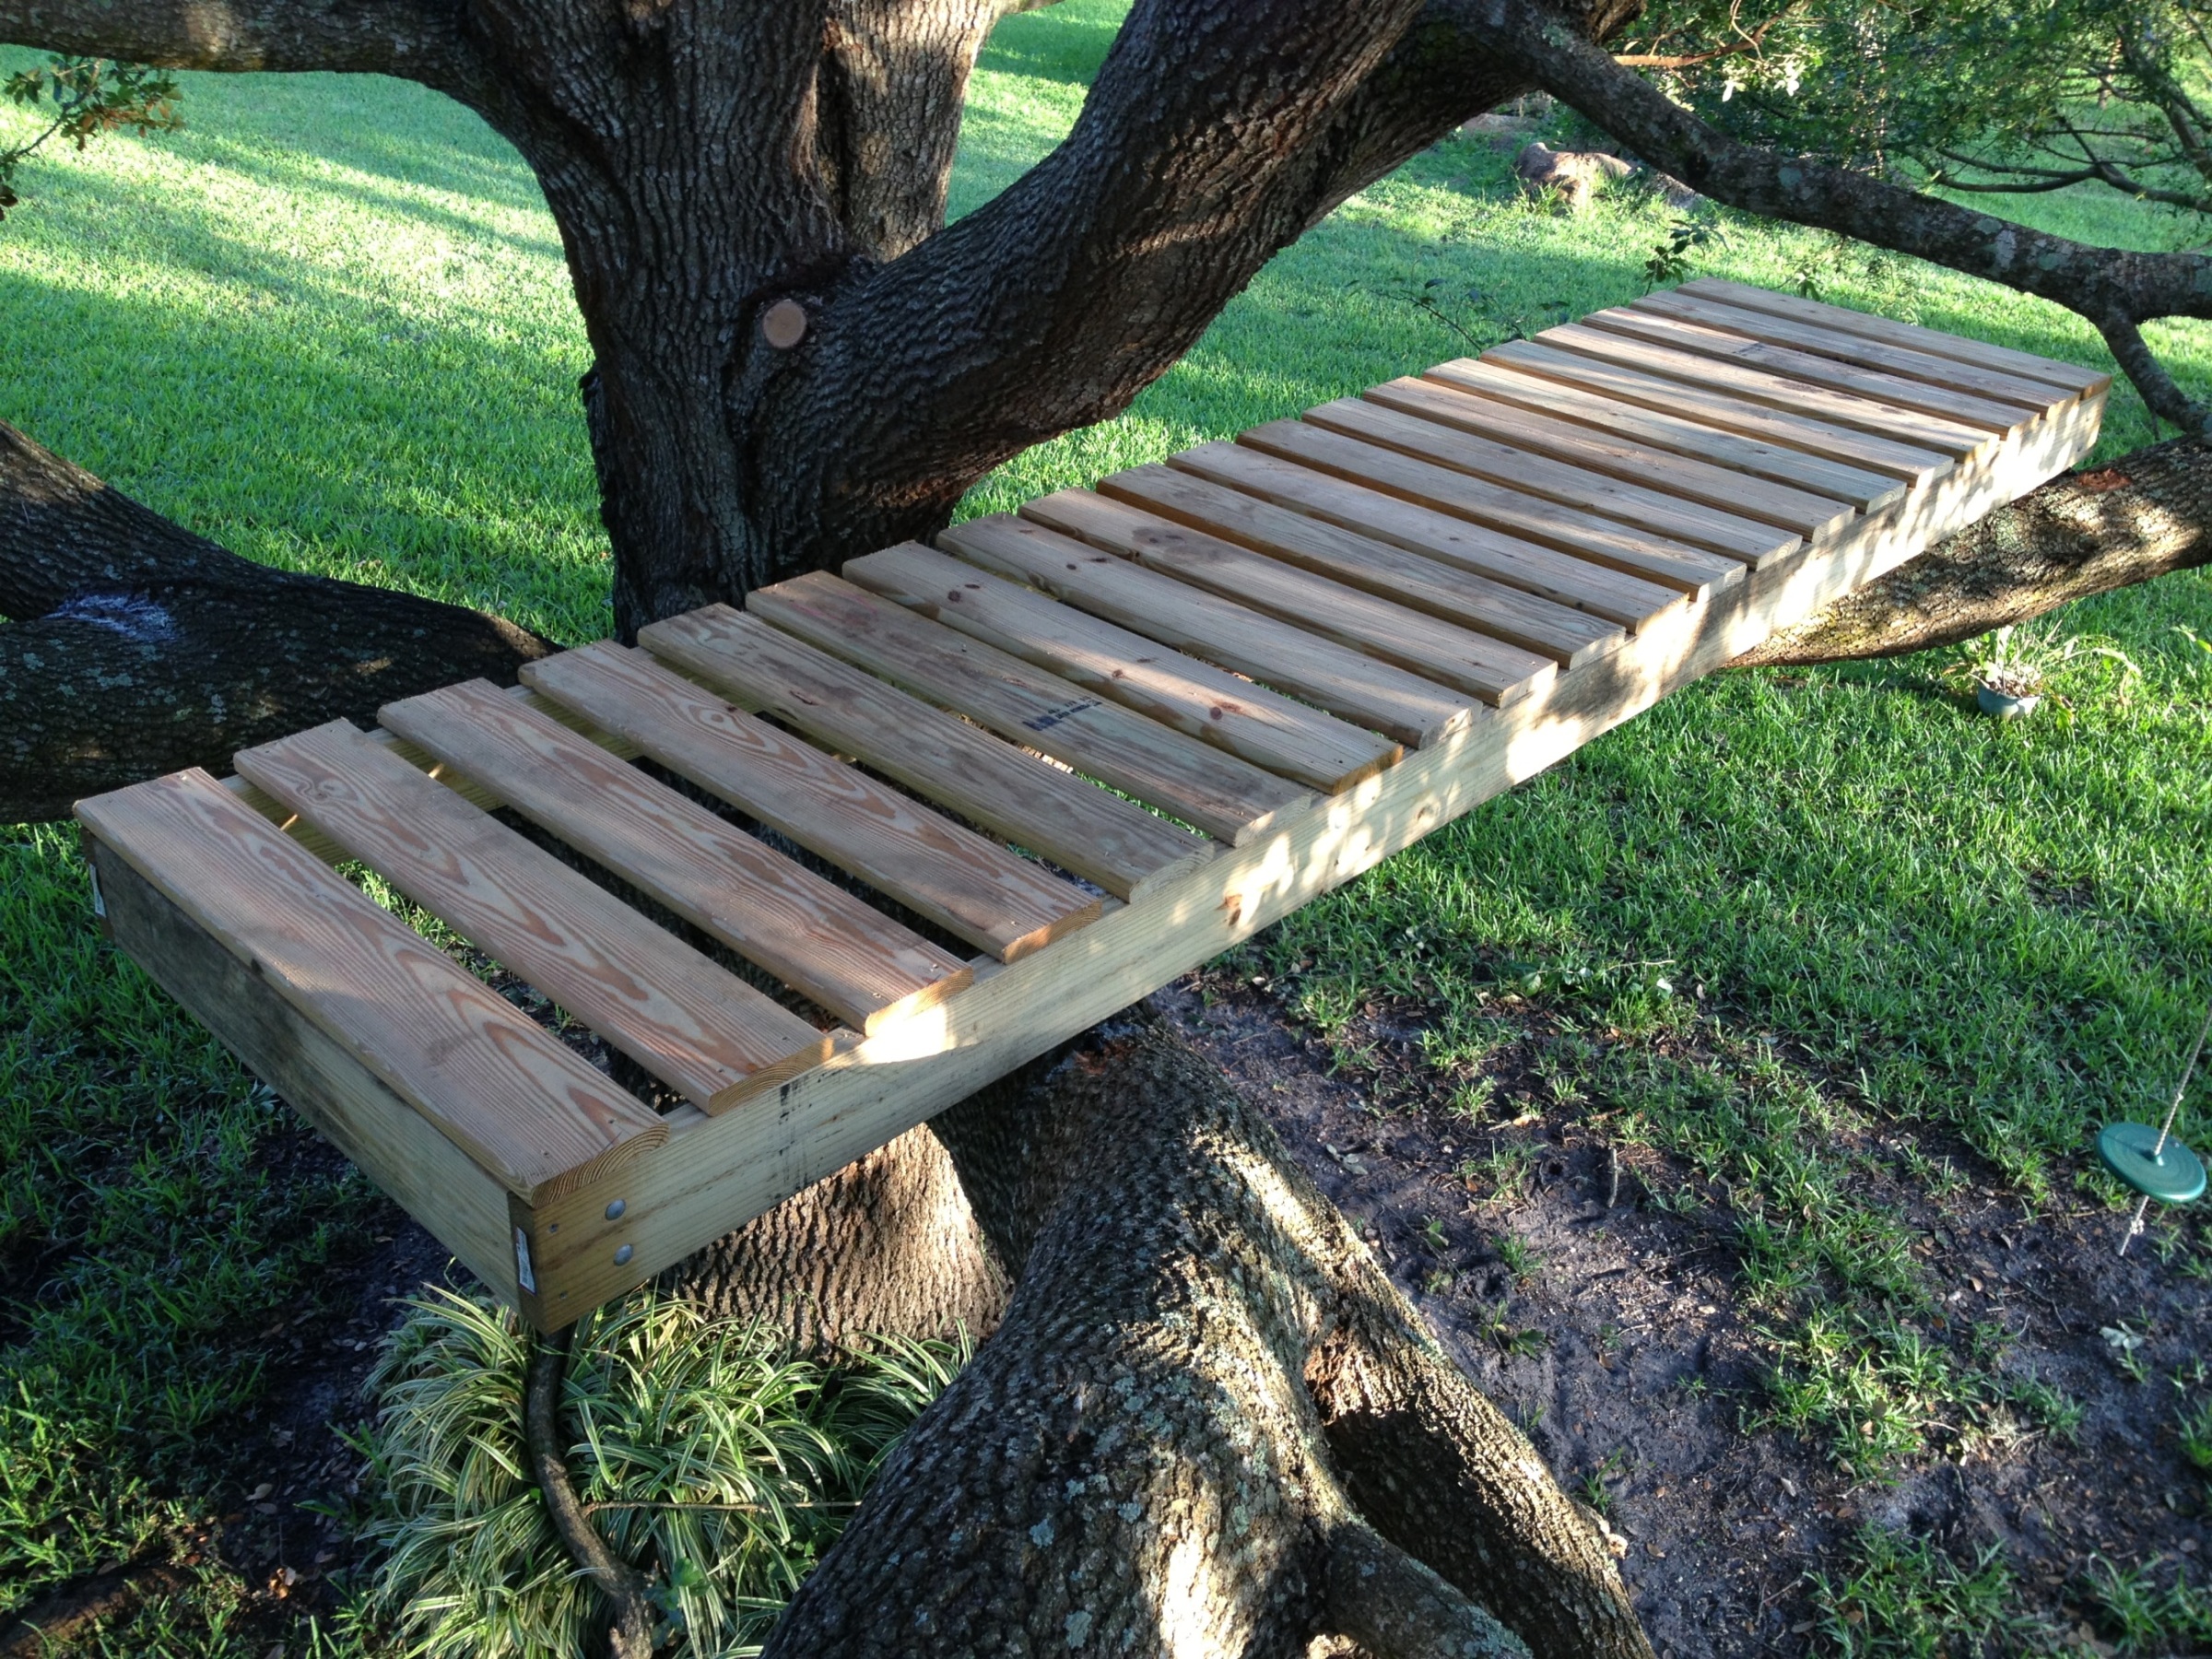
And finally, here is what it looks like from the ground. I wanted it to stick out past the tree limbs so the kids could sit up there with their legs dangling over, like sitting on a dock in a lake or something.
Thanks for your interest! Please use the “email us” link or leave a comment below if you have any comments or feedback or any other ideas!
Kurt