Exactly 100 years ago today, my 18 year old grandfather, Kurt William Leucht, wrote the following entry into his journal:
I got up at 8:00am in order to go to the luggage drop-off place. I went to the Hamburg harbor and, just then, a Z3[zeppelin] was passing by in silence. I continued to view the harbor and later the area of St. Pauli-Landungsbrücke. After a three hour walk, I got to the receiving location and took care of the things I had to do. Next, I went to the train station in order to pick up my dad.
I still had an hour and a half wait, so I went to the café Klosterecke. Traveling on the same train with my dad, were Mrs Traeger, her female sleeping partner and Mr Steinbruder, [who also had passage to America]. We all went to “HAPAG” and then we started to search for a hotel. [HAPAG stands for Hamburg Amerikanische Paketfahrt Aktien-Gesellschaft (Hamburg American Packet-shipping Joint-stock company) and was commonly called the Hamburg America Line. It was the largest German, shipping company, serving the market created by the German immigration to the United States and later immigration from Eastern Europe.] We spent a considerable time together. We took a streetcar to St. Pauli, where my father stayed behind, and I took them on to the luggage reception area. At 1:20 in the afternoon, we returned. The three of them toured the city, while I stayed to be with my father. Dad and I took a walking tour of the city and arrived at the hotel around 9:00pm. We went to sleep right away.
You can read my grandfather’s entire journal by clicking below. It’s quite interesting! Of course, I’m biased! 🙂
Exactly 100 years ago today, my 18 year old grandfather, Kurt William Leucht, wrote the following entry into his journal:
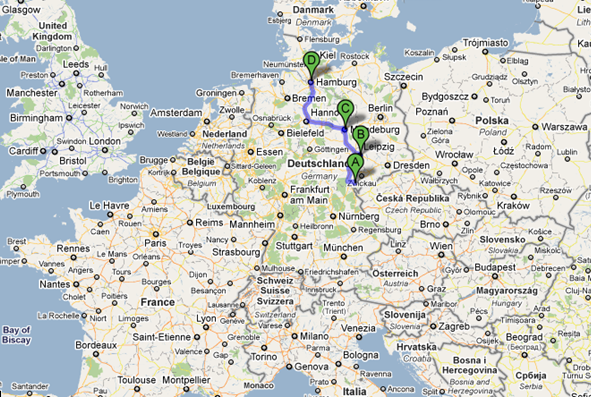
After obtaining my passport and papers, I was on a train headed for Hamburg. I went per express train from Plauen[A on map] at 6:02 in the morning to Leipzig[B]. There was a layover of two hours, so I visited the “Battle of the Nations” monument. At 10:25am, I left per train thru Magdeburg[C] to Hamburg[D] arriving at 4:25pm. I bought a ticket for the ship and after a lengthy search, I found the Hotel Minerva at the corner of Lolienstreet and the Repperbahn. The price for overnight was 2,16 Mark per day. [That’s about $35 today.] I wandered around the city for awhile. That evening at 8:30, I went to see a musical at the Varsity St. Pauli Singspielhalle until 10:45 and then I let myself be photographed. At midnight, I was in my hotel room and fell asleep.
You can read my grandfather’s entire journal by clicking below. It’s quite interesting! Of course, I’m biased! 🙂
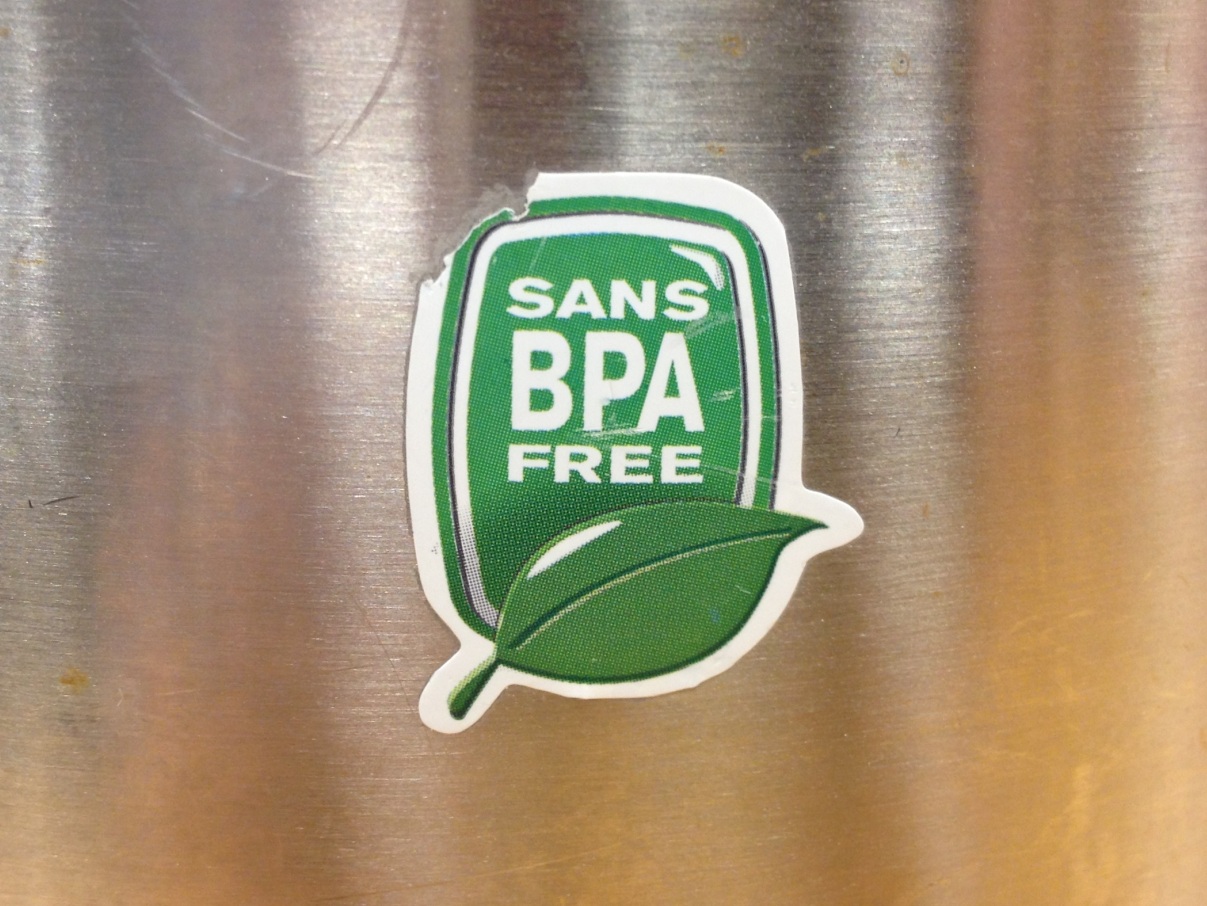
I know what the word “sans” means. I also know what the word “free” means. So what does this label mean that I saw recently on the side of this coffee mug? This coffee mug is very proudly not free of BPA?
Typically when a label repeats a word in a different language, it it a smaller or italic font or is underneath the English version. This is an odd choice, to me. Plus, I think it’s safe to say that most Americans hear the word “sans” enough to know what it means and many people who see this label will not realize that the word “sans” in there for Spanish speaking readers.
I just thought this label layout was an odd choice. Feel free to discuss below in the comments.
NASA has always been pretty bad about marketing itself to the general population … who happen to pay for the entire agency, by the way. They’re getting better, though. NASA has been latching on to new marketing technologies recently, like social media and video streaming on the Internet. And I’ve noticed them outsourcing some of their marketing to external companies and external talent which probably means that they realize that they don’t have all the right skills and experience in house. (No offense to all my friends in NASA Public Affairs.)
So if NASA is open to new marketing ideas and out-of-the-box thinking, then why couldn’t NASA have a reality TV show?
I’m thinking that a documentary style program in the professional activities genre would work nicely as a marketing tool for NASA. The show could focus on the subculture of NASA geeks, engineers, scientists, and possibly also their managers.
I’m not talking about what is commonly called “reality TV” these days where it is pretty much just scripted and the characters just put on a show to please the producers and directors. I’m talking about a documentary that shows the reality of what NASA engineers and scientists actually do on a daily basis! There’s no need nor desire for any morality experiments … no social experiments … no scripts. Just real life NASA employees doing whatever they normally do.
I honestly think the general public would be interested in and also entertained by this type of show. Geeks are gaining popularity and are generally thought of as cool in this day and age.
NASA probably couldn’t justify spending tax dollars on a project like this, so it would have to be taken up by a major network or a major production company that was willing to take the risk or maybe a small news crew or similar group who already has a good working relationship with NASA. Or maybe an independent film company using a Kickstarter crowdsourcing campaign to raise the funds.
On the other hand, NASA might not be real keen on allowing unrestricted access without editing rights. NASA has an image to maintain and they probably will want to have final say on what gets aired and what doesn’t. So maybe this is a project that NASA Public Affairs does take on? But I honestly think it would be a better product if an independent professional crew worked it. Maybe there is a way to make everyone happy … for an independent crew to film it and edit it and for a NASA public affairs representative to approve the edits before airing or something like that.
Characters!
There could be different NASA employees (characters) starring in each episode. The show doesn’t necessarily have to follow the same 8 or 10 characters throughout the entire series, although it would be good to repeat characters occasionally during the series. And it would be even better if characters overlapped each other and the show used some characters’ experiences to introduce us to some other characters and then the show follows these new characters on tangential storylines. NASA isn’t as big as most people think it is, by the way. Employees cross paths and are inter-related more than you might think.
Here are several examples of some plots and subplots that could be explored and highlighted by the producers of such a show:
Funding the Ideas: NASA employees and managers have a lot more ideas than they can get funded to actually work on. Follow two separate employee’s fights to get their own project funded and witness what they are up against. It’s a tough battle to get your project idea funded. There are so many great technical ideas being presented to various funding boards and there is so little money that only a small percentage can actually get funded each year.
Cool Projects: Show off some of the really cool and high tech projects that are actively being developed and demonstrated around the agency. This can also lead to some really cool and interesting filming locations. Explain why they are necessary and why they are important for NASA’s mission. Show the viewer behind the scenes stuff that they never get to see otherwise. Show the excitement and the passion of the engineers and scientists who work on these cool projects.
Never Stopped: The reports of NASA’s death have been highly exaggerated. Just because the Shuttle program is gone, doesn’t mean that NASA is idle. They’re developing new rockets and spacecraft to go beyond low earth orbit. They’re developing new ground systems to support these new rockets and spacecraft. They’re helping private companies develop systems to launch astronauts into low earth orbit. Tell the story about why NASA had to make the tough decision to retire the Shuttle before they had a program to replace it. Talk nuts and bolts about budgets and why two large vehicle programs cannot run simultaneously in this day and age.
Art of Engineering: Engineering is basically the art of solving ordinary everyday problems. Introduce the viewer to some problem that the viewer may or may not realize exists in their daily life and then demonstrate how an engineer or a group of engineers has recognized that problem and are working on a solution. This subplot will help the general public make a better connection with NASA and it will show how NASA is improving lives for people here on earth through its projects that may or may not actually execute here on earth. Introduce the viewer to the concept of NASA spinoffs. Also, explore problems the employees experience while doing their jobs and show how they get past those problems.
Character Evolution: Show how a character has a bad experience and learns from that experience and does a better job next time he is faced with the same type of situation. For example, an engineer might get upset if a meeting decision doesn’t go their way, but then a coworker tells them that their attitude toward the decision makers was bad, so the engineer takes some leadership type training classes and practices what he learned and has a great experience the next time a similar situation occurs.
Communication Issues: Engineers are often known for their poor communication skills and their poor social skills. This could lead to some humorous and/or uncomfortable moments in the show. But the viewer will learn to love the characters and embrace their weaknesses. The show should also reveal their strengths and help the viewers feel for and connect to the characters.
Slow Going: NASA is doing research and development in areas that could have big impacts on the general public down the road. But unlike a big product producing company, like Procter & Gamble or similar, NASA technologies and inventions are complex enough that it takes a long time from concept to actual use in industry or out in the general public. By then, NASA rarely gets the credit for the technology that they deserve. Give a historic example for the audience to get a feel for this concept.
Stress and Pressure: Schedules and deadlines are common at NASA. Some are just pulled out of thin air and some are critical and necessary. But both can and often do cause employees lots of stress and headache. Explore the pressures that NASA engineers and scientists encounter and show how different personalities deal with that stress and pressure differently.
Personalities and Management Styles: Just like any job, NASA is filled with employees and managers of various personality types and various management styles and leadership styles. Explore how these different types and styles collide and how they deal with each other.
Tax Dollars: Demonstrate to the viewers how much of their tax dollars actually goes to NASA as compared to other government programs. Show how much money NASA helps pump back into the economy. Prove using simple concepts that their tax dollars are well spent at NASA.
What happens when you send a camera crew behind the scenes of America’s space program? Find out on Engineers At Work!
Watch as engineers and scientists struggle to solve many of the world’s problems. Do they have the right stuff?
Wouldn’t you like to know how your tax dollars are being spent? An American Space Program is an eye opening look behind the scenes of NASA, showing the viewer how their tax dollars are ultimately being spent.
The point!
The entire point of this show is to demonstrate to the general public that their tax dollars are very well spent at NASA and that NASA has not been idle since the Shuttle program ended. Much of the general public stopped hearing about NASA after the Shuttle program ended and many think that NASA as a whole has ended. A show like this could open the eyes of the public and help spur the popularity of NASA and could even end up boosting NASA’s budget in the process. But in order to be popular and to create a buzz with the general public, this show needs to be different than all those “boring” educational shows that NASA has been producing for the last 20 or so years. The reality TV angle of being filmed as a real life unscripted documentary, I believe, is what is needed to get their attention and interest.
Most of the general public is disconnected with NASA and the work that NASA does for them. This show idea can bring the two closer together using inspiration, humor, conflict, and then wrapping it all up with a happy ending. In the end, the viewer will cheer for the engineer, cheer for the project, and cheer for our space agency!
Kurt Leucht
(concerned citizen)
full disclosure: I work for NASA, but I do not speak for them.
Cast your vote!
Thanks for reading the whole article! Now that you’ve heard my idea, please let me (and Hollywood) know your opinion! Please vote below and make your voice heard! Please vote whether you like this reality show idea or not! I would like to get a realistic cross section of voters! Thanks!
If you are a guest at one of the Disney World Resorts, you can visit several of their other resorts during the day and enjoy quite a bit of entertainment by resort hopping. Not to mention all the awesome and interesting dining options. Disney has an “open resort” policy which means that you are allowed to visit their other resorts and enjoy their amenities. But Disney is very careful to point out that using a pool at another resort is strictly forbidden.
[Disney’s Caribbean Beach Resort, image from Tripadvisor.com]
But aside from the pool issue, there are lots of reasons to resort hop while you’re staying at Disney. I will attempt to run down the major reasons below. Please let me know if I got anything wrong or if I missed something important!
[Disney’s Caribbean Beach Resort pool, image from Tripadvisor.com]
dining: 1 fine dining, 1 character dining, 1 casual themed, 3 fast food, 4 bars
activities: monorail runs through, water sports rentals, volleyball, tennis, jogging trail, campfire, movies under the stars, arcade, nighttime fireworks cruise
transportation: boats to Magic Kingdom and Fort Wilderness and Wilderness Lodge
dining: 3 fine dining, 1 character dining, 1 casual, 3 fast food, 2 bars
activities: spa services, boat rentals, adventure cruise, movies under the stars, jogging trail, arcade
transportation: monorail and boats to Magic Kingdom and Polynesian
Getting from place to place
Epcot is a major bus hub, so you can get to pretty much anywhere from Epcot via bus. Epcot is also a boat hub for the Boardwalk, the Beach/Yacht Clubs and the Dolphin/Swan resorts.
The Magic Kingdom is a boat hub for the Grand Floridian, the Polynesian, the Wilderness Lodge,Fort Wilderness, and the Contemporary. The Magic Kingdom is a monorail hub for the Contemporary, the Polynesian, and the Grand Floridian. A second monorail line runs between the Magic Kingdom and Epcot.
Animal Kingdom is also a major bus hub.
Yuo can get to Downtown Disney from pretty much any resort. Also, Downtown Disney is a boat hub for the Old Key West, Saratoga Springs and the Port Orleans French Quarter/Riverside resorts.
Have fun!
Thanks for reading my blog! Let me know if I got anything wrong or if you have any information to add! And also let me know if this blog post helped you in any way shape or form! Thanks!
Kurt
Thanks for visiting, Kurt & Sam Leucht Titusville, FL