Fix Your Loose Shifter With Booger Bushings

I have a 2005 PT Cruiser that I bought used about 4 years ago.  (http://www.leucht.com/blog/2009/06/kurts-new-car-pt-cruiser/)  The manual 5-speed shifter was fairly loose compared to any of my previous vehicles, but it seemed to work fine so I didn’t worry about it.  Over the past couple years I feel like the shifter has been getting looser over time, so I knew that something was going to give someday.  Then suddenly I could not get it to go into reverse.

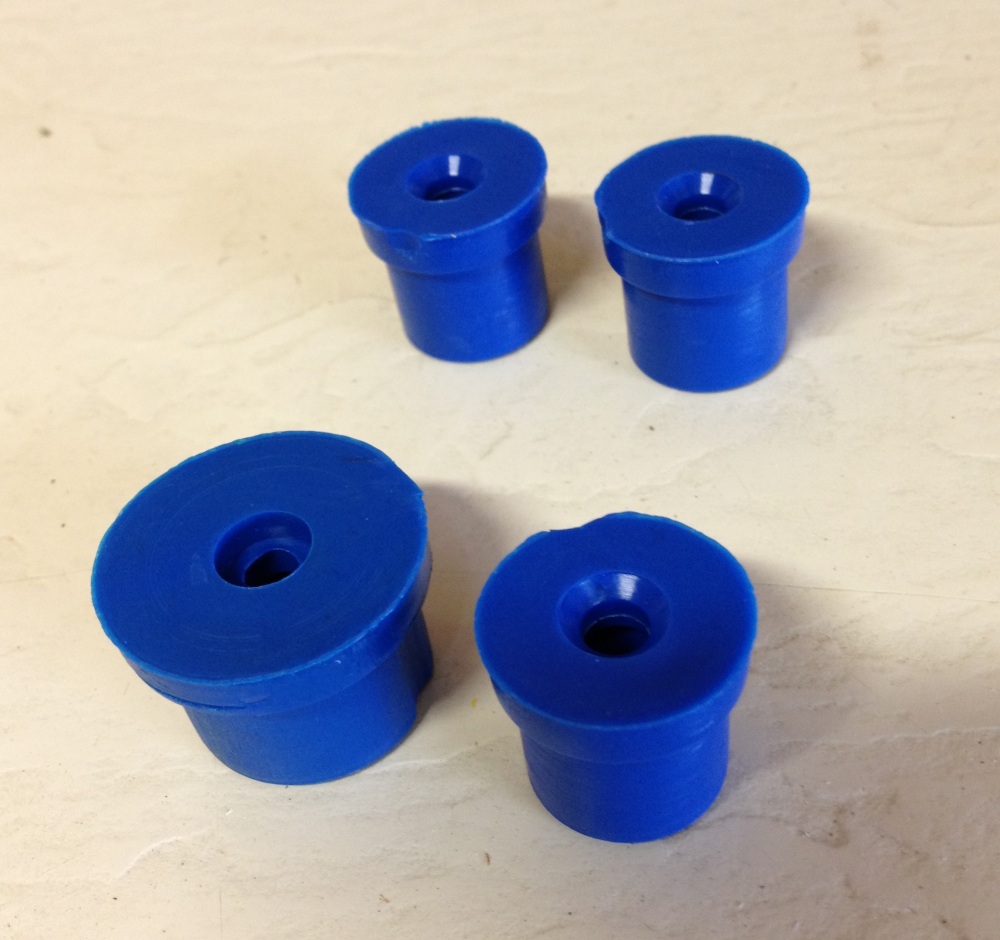
My brother in law pointed me to a website, http://www.boogerracing.com/ where they sell transmission bushings called Booger Bushings that were advertised to fix me right up.  A set of replacement bushings cost only $22, including shipping.  According to the website, these bushings are “injection molded polyurethane with a proprietary molded-in lubricant”.  They claim to be significantly stiffer than the stock bushings but are not a “solid” bushing.  Before I bought these on the Internet, I checked with my local auto parts store and they did not sell the bushings separately from the shifter cables, which ran a couple hundred bucks.

0

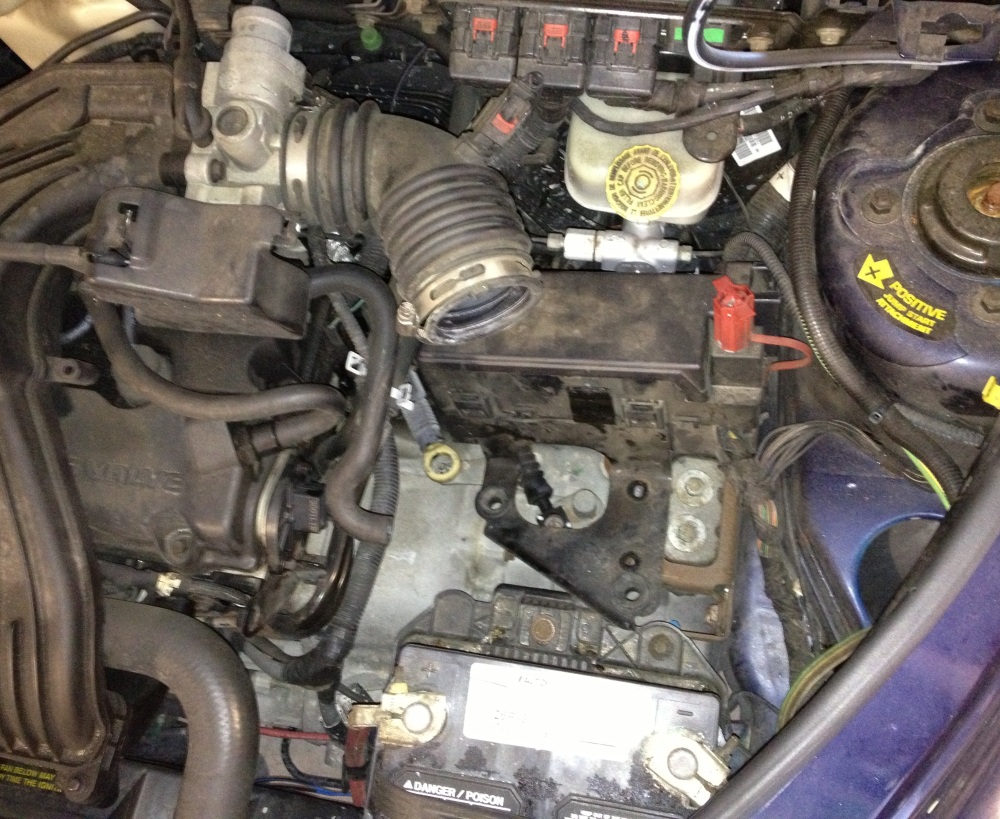
The shifter cables attach to the transmission underneath the air filter housing in the PT Cruiser.  Luckily, they are very easy to get to.  Just remove the air filter lid and disconnect the big hose exiting the air filter housing.  There is also a small hose that needs to be removed from the air filter housing.  Then just lift the whole air filter housing up, rocking it as you tug.  It’s held down only by the friction of some feet sticking through some rubber grommets.  Very simple.

1

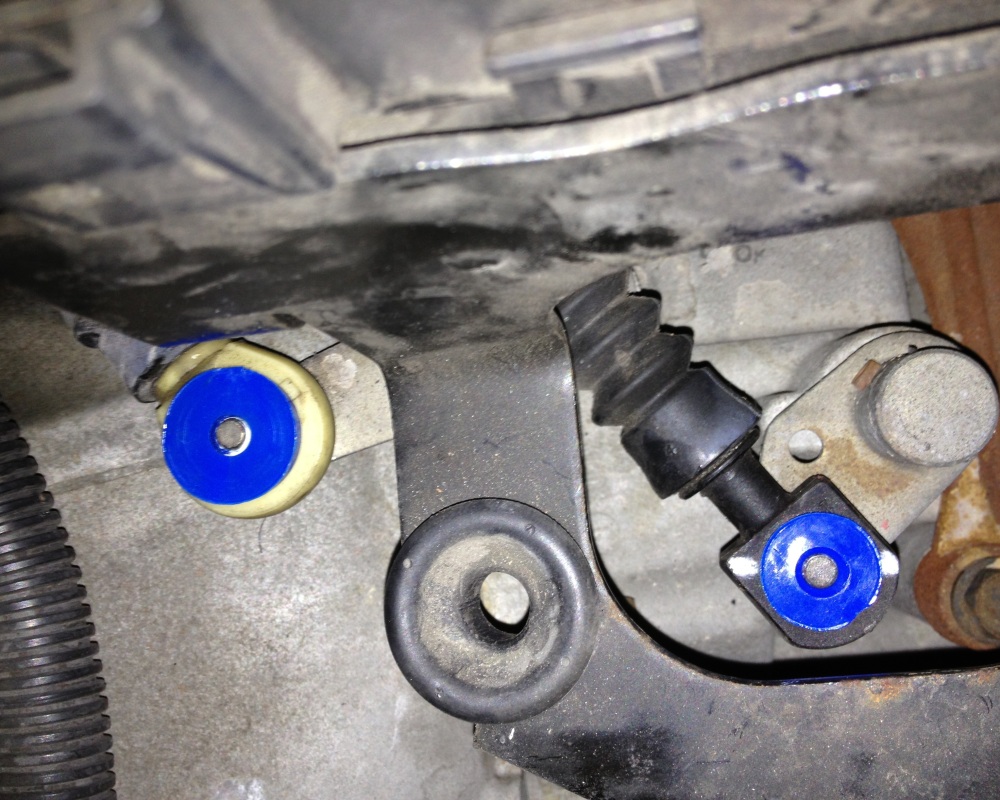
Now, to get the metal bracket out of the way a bit, just remove the two bolts holding it down.  It’s easiest to use a ratchet with a long extension for this.  This allows you to slide the bracket to the left a few inches to reveal the shifter cable underneath.  Now you should be able to clearly see both shifter cable ends along with the bad or missing bushings.  In my case, both of the old bushings were completely gone.  That explains how I suddenly lost the ability to shift into reverse.  Remove the old bushings if they are still there.

2

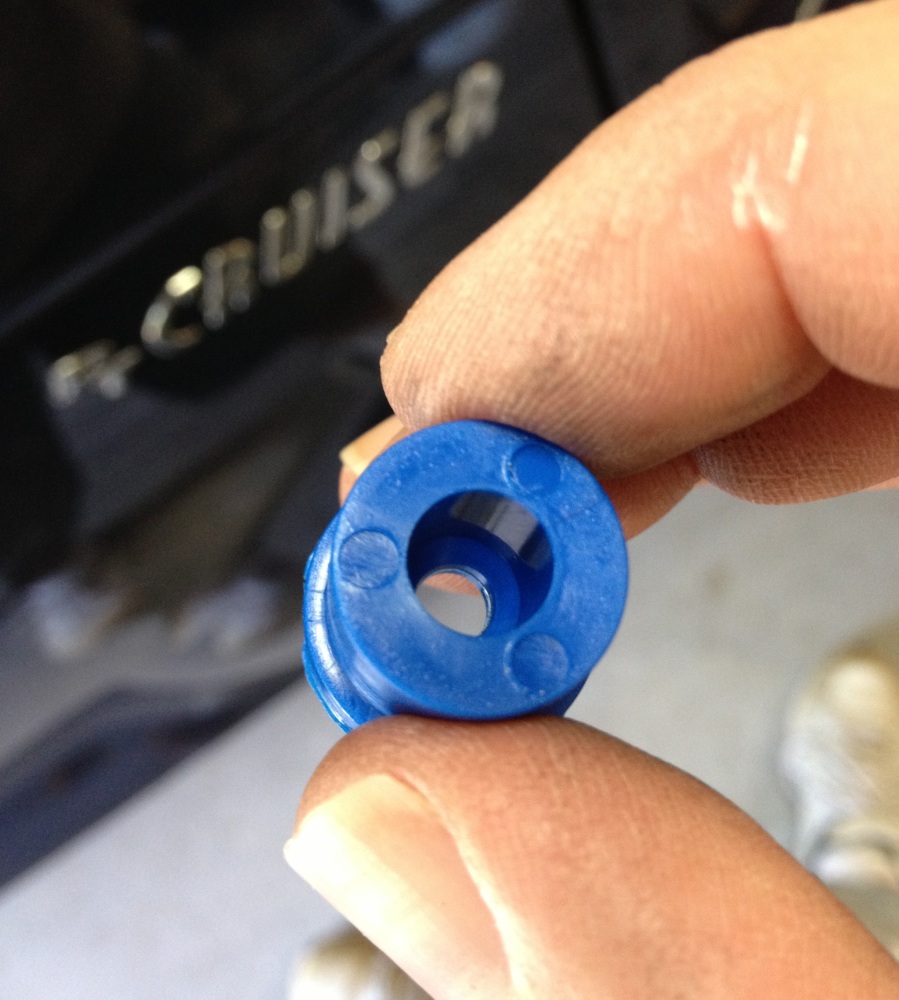
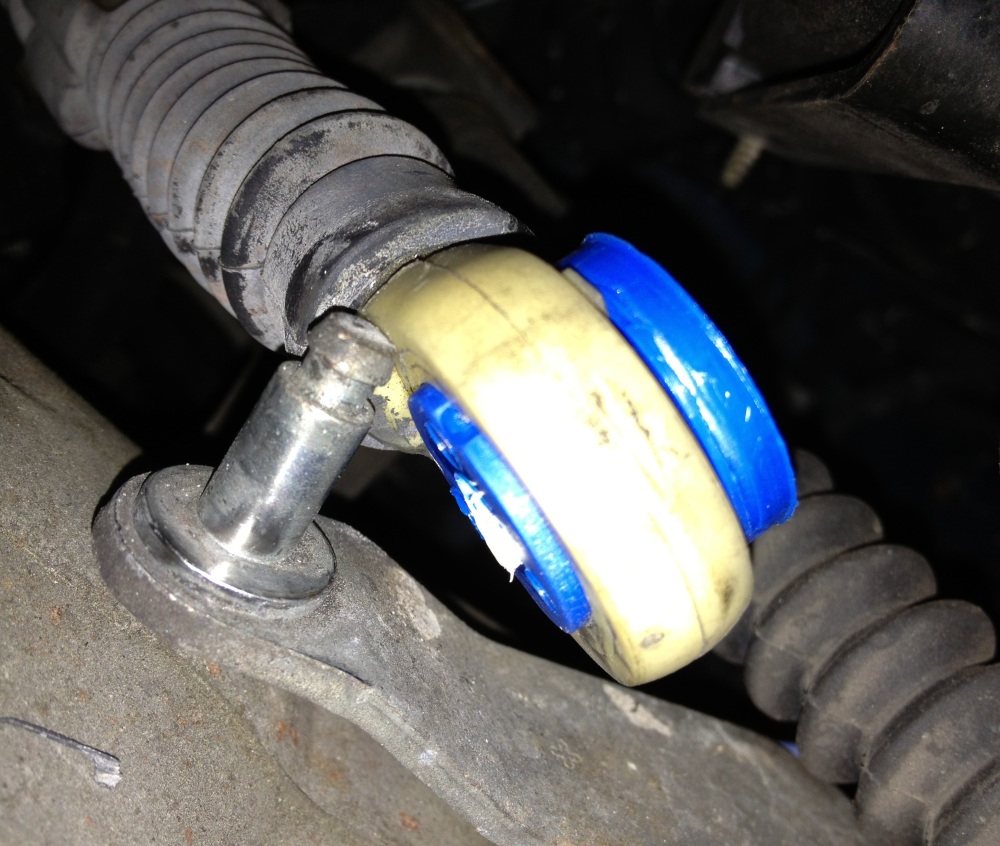
The Booger Bushings are designed with a lip at the top that snaps very solidly onto the slot of the transmission shaft.  As a matter of fact, they are so tight to snap on, that the manufacturer suggests that you put a dab of grease inside to assist in the installation.  This photo is looking at the lip from the bottom of the bushing.

3

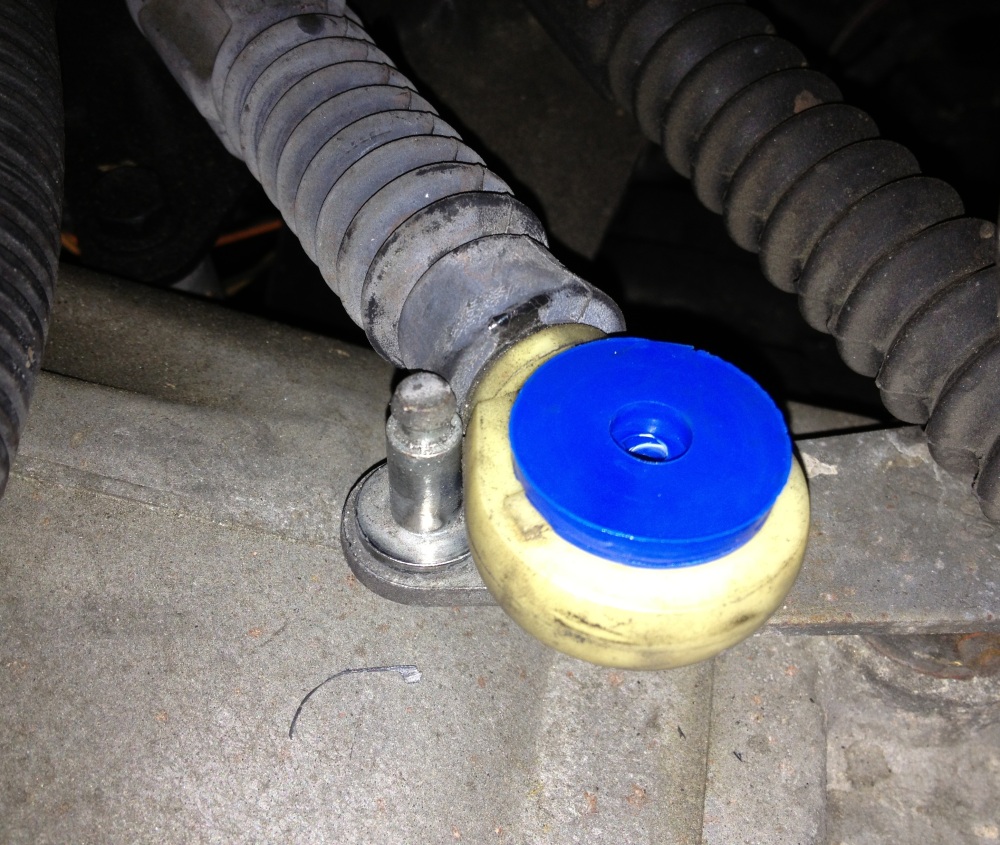
Simply slide the bushing onto the cable end.  The white in the next few photos is a bit of white lithium grease that I added to help with the installation of the bushing onto the slot of the transmission shaft.

4

5

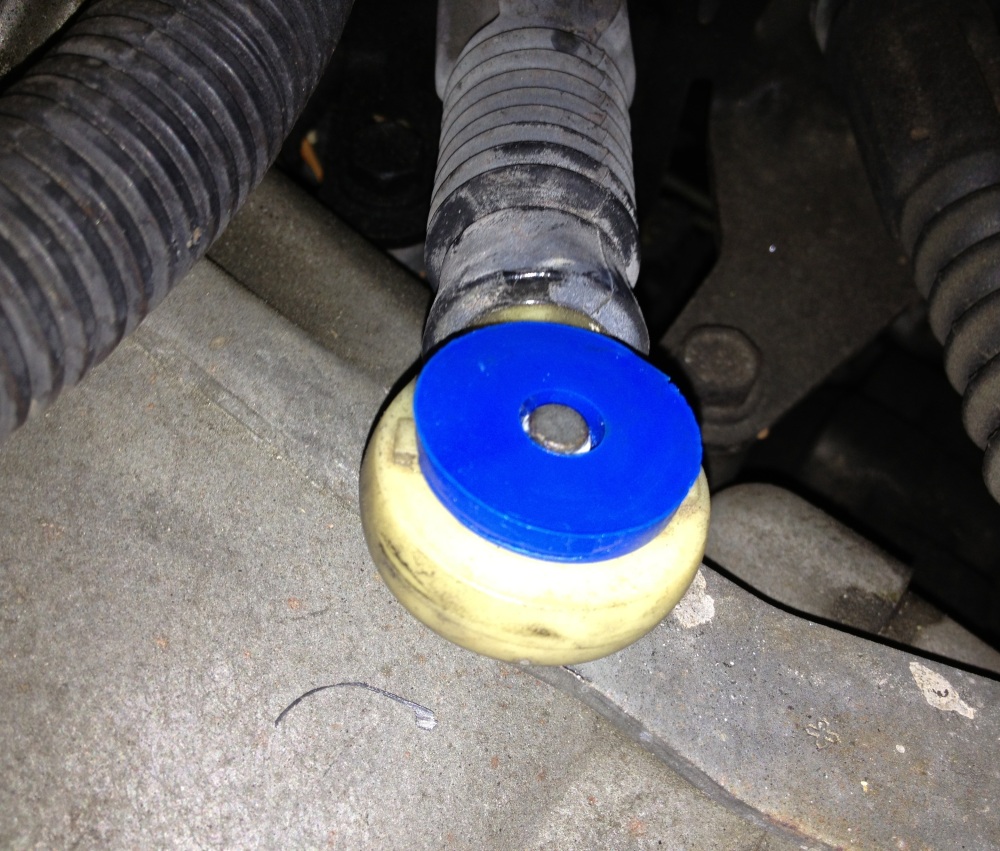
And pop it onto the transmission shaft.  Use both thumbs and push down hard until it snaps into place.

6

7

It’s as easy as that.  There are also two bushings under the shifter in the cabin.  But I did not change those out yet, since these two bushings seems to have tightened it right up and it is a bit more work to get to those bushings under the center console.  I will definitely tear into it and change those out if I feel the stick getting loose, though.

After installing Booger Bushings, it will feel like you have a brand new car if you’ve been driving around with a loose shifter for a while, like I had been doing.  Now my transmission feels tight like I’m driving a race car.  And it only cost me about 20 bucks and less than an hour’s worth of work!  Thanks Booger Racing!

Kurt


RSVP and pay for reunion electronically using PayPal

Yes, we’re that cool!  The Dee Mack High School Class of 1988 25 Year Reunion planning committee has set it up so that you can RSVP and pay for the reunion (the dinner event, on June 21st) electronically using PayPal. Fill in the form fields below and click BUY NOW:


How many will attend the reunion on June 21st?
Please give us your phone #:
Names of attendee(s):


Thanks,
Kurt & Frank

JCS wrap up

Sunday, March 31st, 2013

Today we closed Jesus Christ Superstar at the Historic Cocoa Village Playhouse.  It was a great run and it was pulled it off amazingly by a wonderful cast and crew.  It was a lot of work, but I’m glad I did it.

Here are some statistics on the run.

  •  Opened March 15th, closed March 31st (17 calendar days)
  • 15 total performances
  • 594 seats in theatre (8910 seats for the entire run)
  • 8763 seats sold during entire run
  • 149 seats unsold during entire run (an average of 9.93 unsold seats per performance)


Poll: What is your opinion of Jesus Christ Superstar (soundtrack, musical, movie)?

I grew up thinking that everyone loved Jesus Christ Superstar, just like my parents did. I never knew there was such a big controversy surrounding the musical. It seems like there is still quite a difference of opinion about the show, even 40 years later. People either love it or hate it, it seems.

To help satisfy my curiosity, and to help me understand how divided people really are about it, please take 5 seconds out of your busy day and answer this simple anonymous poll question:

https://polldaddy.com/poll/6913188/


image courtesy https://rodgersandhammersteincom.s3.amazonaws.com/modules/image/5859/338997/file_url.jpg

Now, whatever your answer to the poll question, you may want to come see the “best community theater in Florida” put on this musical during the final three weekends in March 2013. You can buy your tickets online at http://www.cocoavillageplayhouse.com/ or you can phone the box office at 321-636-5050.

Thank you for your time!
Kurt

Custom built wood washer and dryer shelves

Ever since we got our front loading washer and dryer a few years ago, we’ve been wanting to get some of those laundry pedestals to lift them up higher.  But the pedestal units are pretty pricey.  Those things are like $250 bucks … each.  Ridiculous. So I decided I would make my own laundry pedestals out of wood that I had laying around in my shop.  And I decided that I would design a pedestal that would include both a step stool and a storage drawer in one single unit. The step stool will help us reach the wall mounted cabinets that are mounted above our washer and dryer.

Click on any photo to view larger versions of it in my photo gallery.

Here is a photo of the basic frame for my pedestal design.  You can see that the front (facing down and to the left) is basically open to receive a drawer.  The sides and back are solid enough to support a few hundred pounds (as long as the weight is directed down into the floor and focused at the four corners).  All the cross beams are just there for stability.  The four feet of the washer or dryer sit on the top-most two 2x4s.

Here is the same basic frame after the decorative plywood and trim was applied.  The back of the unit was left open and so was the top.  That should allow for access to the bottom of the washer or dryer and access behind the unit if that access is ever needed.

I forgot to take photos of the drawer unit during construction, but this photo gives you a pretty good idea of it’s design.  It’s fairly straightforward.  The front of the drawer is on the upper left in this photo and contains the step stool portion which is made from 2x4s for strength.  The horizontal 2×4 in the middle is both for stability and for mounting the pull handle.  The rest of the drawer is made from plywood that I joined together with biscuit joints.  The 4th sidewall is missing from this photo, but it fits right over the exposed 2x4s shown in this photo and creates a completely closed drawer bin used for storage.

Here is the same drawer from another angle.  The front of the drawer has the decorative plywood.

And here is what the unit looks like with the drawer installed.  I chose not to install a drawer slide.  I just installed some felt pads underneath the drawer unit and it slides in and out just fine.  The next step is to prime and paint to match the washer and dryer.

And here is what the finished laundry pedestal looks like in use in our laundry room.  The drawer holds quite a bit of stuff and pulls out much farther than is shown in the photo below.

And the step-stool feature allows us to reach the wall mounted cabinets above our washer and dryer.

That’s about all the detail that I can think of.  Add a comment below if you like this design or if you have any questions about details that I have left out.  If you end up using my design for a laundry pedestal or if you have an ideas for improvements, please feel free to post in the comments below.

Kurt


Thanks for visiting,
Kurt & Sam Leucht
Titusville, FL
http://www.leucht.com/
Email Us or Give Feedback!
(Report a Problem, Request a Feature)